In this article, we will explore the date type option in Titan Framework: how it works and what parameters it offers. Find out how you can create a date picker inside a custom WordPress admin panel, a metabox or a customizer section.
The Date Type Option in Titan Framework
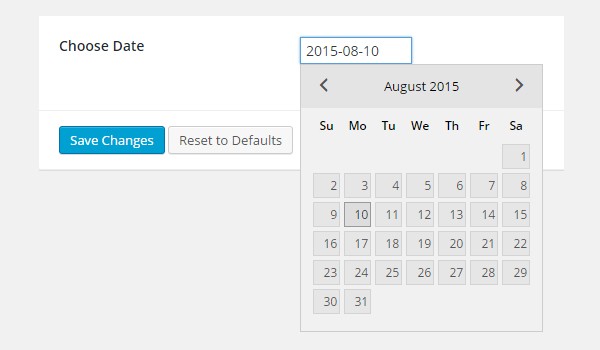
In Titan Framework, there is a date type option which allows end users to input date and time settings dynamically in their themes. This option loads the entire calendar, and you can set any date of your choice. Here is the layout of this option:
Let's take a look at the list of parameters which this option supports:
-
name: It defines the display name of the
datetype option. - id: This parameter specifies a unique name which helps to get the saved values.
- desc: It displays a brief description with the option name.
-
default: (Optional) It sets the default
datesettings. This parameter takes up a specific format of values, i.e.Y-m-dfor the date,H:ifor the time, andY-m-d H:ifor both date and time. -
date: (Optional) If
false, this option is not shown. It is set totrueby default. -
time: (Optional) If
true, this option will appear. It is set tofalseby default.
The parameters date and time are boolean by type, whereas the rest are of type string.
Available Containers for the Date Type Option
The date type option can be created inside:
- Admin Panel
- Admin Tabs
- Metabox
- Theme Customizer Section
This option is created by following a similar code routine irrespective of the container type:
- Get a unique instance via the
getInstance()function. - Add an option via the
createOption()function. - Get the saved values via the
getOption()function.
However, if you want to learn how these containers are created with Titan Framework, then you can find the details in my previous articles in this series.
Creating a Date Type Option Inside an Admin Panel
Example Declaration
First I'll create this option type inside an admin panel.
<?php
    /**
     *
     * Create date type options in an admin panel
     *
     */
    $aa_panel->createOption( array(

        'id'      => 'aa_date', // The ID which will be used to get the value of this option
        'type'    => 'date', // Type of option we are creating
        'name'    => 'My Date Option', // Name of the option which will be displayed in the admin panel
        'desc'    => 'This is our option', // Description of the option which will be displayed in the admin panel
        'default' => '2015-8-15' //Default value
    ) );
A date type option is created inside an admin panel $aa_panel via the createOption() function (line #7). I've defined the parameters id, type, name, desc and default. The ID (i.e. aa_date) should always be unique.
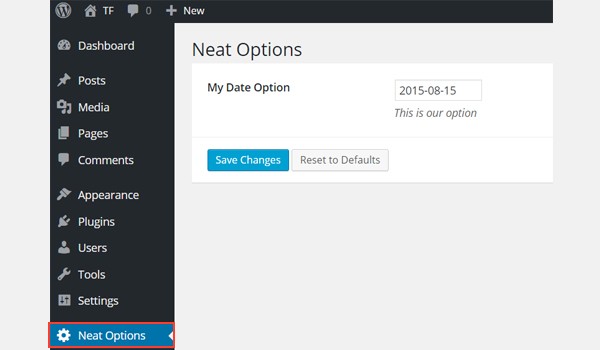
You can see that the option named My Date Option exists inside an admin panel Neat Options. The default date setting also appears in the above screenshot.
Example Usage
Let's get the saved options values.
<?php
// 1. Get the titan framework instance and save it to a variable
$titan = TitanFramework::getInstance( 'neat' ); // we will initialize $titan only once for every file where we use it.

// 2. Get the value via ID using getOption function
$aa_date_epoch_val = $titan->getOption( 'aa_date' );

// Convert the date's epoch value
echo date( 'r', $aa_date_epoch_val ); // output as RFC 2822 date - returns local time - For more read http://goo.gl/g9tZLi

?>
In line #3, an instance is acquired via the getInstance() function, which takes a unique parameter, preferably your theme name (I've used neat). The saved values are retrieved via the getOption() function in line #6, which registers the ID aa_date as a parameter and saves its value in a new variable $aa_date_val.
The last part of the code prints values at the front-end. In most cases the server can return us an epoch value, which we'll need to convert by using PHP's date() function. Discussion of epoch values is out of the scope of this tutorial, but you can read more about it here.
Displaying the Result at the Front-End
Now I'll set any demo date value and save it. For example, I choose 2015-08-20.
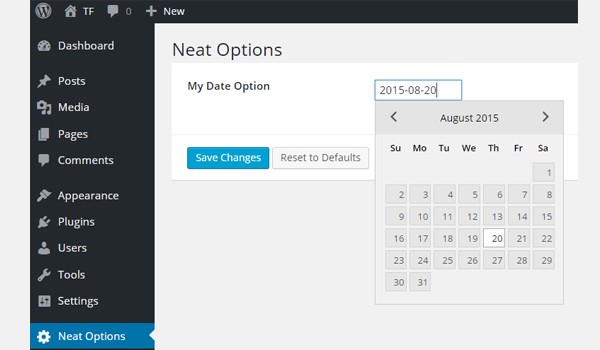
Let's see its output at the front-end.

The saved date setting is correctly printed, with the time. As the parameter for time is disabled for now, no time settings are shown. How do you set the time? I'll come to that in a bit.
Creating a Date Type Option Inside an Admin Tab
Example Declaration
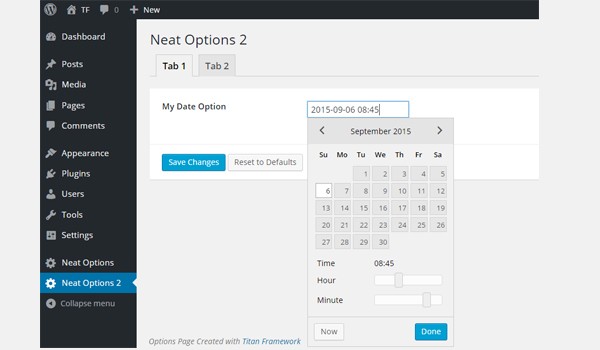
Now I'll add this option in an admin tab, but it will show both date and time settings.
<?php

    /**
     *
     * Create date type option in an admin tab
     *
     */
    $aa_tab1->createOption( array(

        'id'      => 'aa_date_in_tab1_panel2', // IDs should always be unique. The ID which will be used to get the value of this option
        'type'    => 'date', // Type of option we are creating
        'name'    => 'My Date Option', // Name of the option which will be displayed in the admin panel
        'desc'    => 'This is our option', // Description of the option which will be displayed in the admin panel
        'default' => '2015-8-15 00:00', //Default value for date & time
        'time'    => true //Time settings enabled.

    ) );
This time I'm adding a date type option in an admin tab $aa_tab1. Its ID is aa_date_in_tab1_panel2. Look at the parameters list. It shows time is set to true. This means that the time selection is enabled. Note the value format for default, which is set for both date and time.
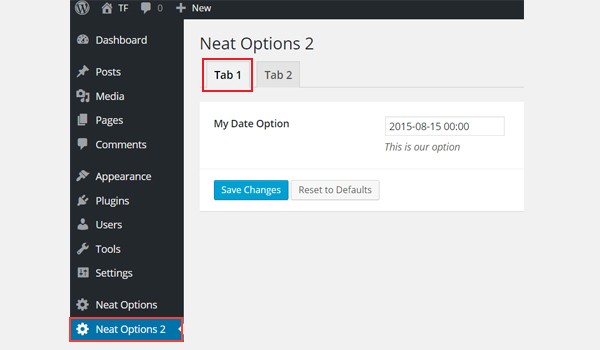
You can find My Date Option in Tab 1 of admin panel Neat Options 2.
Example Usage
Let's retrieve the values.
<?php
// 1. Get the titan framework instance and save it to a variable
$titan = TitanFramework::getInstance( 'neat' ); // we will initialize $titan only once for every file where we use it.

// 2. Get the value via ID using getOption function
$aa_date_in_tab1_panel2_val = $titan->getOption( 'aa_date_in_tab1_panel2' );

echo date( 'r', $aa_date_in_tab1_panel2_val ); // output as RFC 2822 date - returns local time - For more read http://goo.gl/g9tZLi

?>
There's really nothing new in this code.
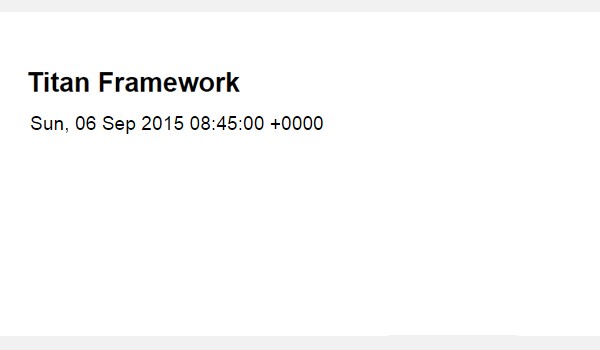
Displaying the Result at the Front-End
Suppose my demo date and time values are 2015-09-06 and 08:45. There is also a Now button which sets the current time value in one click.
The front-end appears like this:
Creating a Date Type Option in a Metabox
Example Declaration
Let's write its code.
<?php

    /**
     *
     * Create date type option in a metabox
     *
     */
    $aa_metbox->createOption( array(

        'id'      => 'aa_mb_date', // IDs should always be unique. The ID which will be used to get the value of this option
        'type'    => 'date', // Type of option we are creating
        'name'    => 'Select Time Settings', // Name of the option which will be displayed
        'desc'    => 'This is our option', // Description of the option which will be displayed
        'default' =>  '00:00', //Default value for time
        'date'    => false, //Date settings disabled.
        'time'    => true //Date settings enabled.

    ) );
The createOption() function adds a date type option in a metabox $aa_metbox (line #5). But this code displays only time settings because the date is set to false. That's why I've changed the name and default values of this option accordingly.
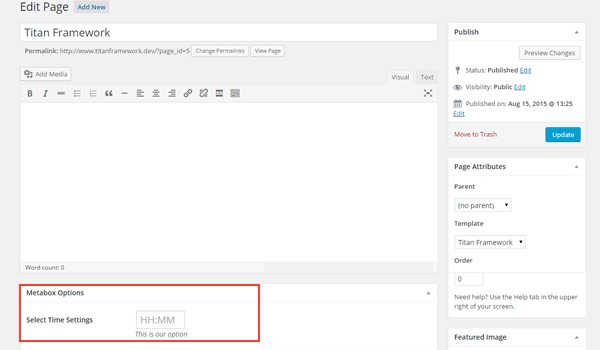
The above screenshot displays a time selector named Select Time Settings inside a metabox. This appears on all page and post editing screens.
Example Usage
Let's get the saved time values.
<?php
// 1. Get the titan framework instance and save it to a variable
$titan = TitanFramework::getInstance( 'neat' ); // we will initialize $titan only once for every file where we use it.

// 2. Get the value via ID using getOption function
$aa_mb_time_epoch_val = $titan->getOption( 'aa_mb_date', get_the_ID() );

echo date( 'r', $aa_mb_time_epoch_val ); // output as RFC 2822 date - returns local time - For more read http://goo.gl/g9tZLi

 ?>
I just retrieved the value of time and then converted it with the date() function.
Displaying the Result at the Front-End
My demo time value is 13:03.
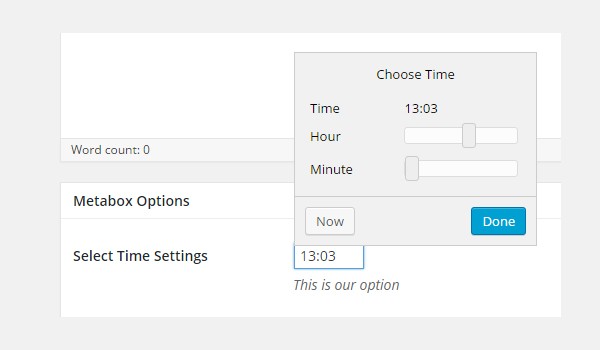
The output prints like this:

Creating a Date Type Option in a Theme Customizer Section
Example Declaration
In the end, I'll add this option in a theme customizer section.
<?php
/**
*
* Create date type option in a customizer section
*
*/
$aa_section1->createOption( array(
'id' => 'aa_sec_date', // IDs should always be unique. The ID which will be used to get the value of this option
'type' => 'date', // Type of option we are creating
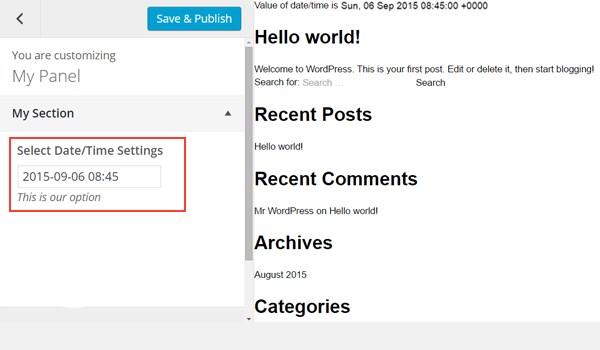
'name' => 'Select Date/Time Settings', // Name of the option which will be displayed
'desc' => 'This is our option', // Description of the option which will be displayed
'default' => '2015-08-01', //Default value for date & time
'date' => true, //Date settings enabled.
'time' => true //Time settings enabled.
) );
Finally, I've added this option following the same procedure in a theme customizer section.

The screenshot shows it clearly.
Example Usage
Let's get its saved options values.
<?php
// 1. Get the titan framework instance and save it to a variable
$titan = TitanFramework::getInstance( 'neat' ); // we will initialize $titan only once for every file where we use it.

// 2. Get the value via ID using getOption function
$aa_sec_date_epoch_val = $titan->getOption( 'aa_sec_date' );

?>


<div>
    Value of date/time is
    <?php echo date( 'r' , $aa_sec_date_epoch_val ); // output as RFC 2822 date - returns local time - For more read http://goo.gl/g9tZLi ?>
</div>
I'll get its saved values in the header.php file. So, first get an instance and register the unique ID inside the getOption() function. Next create a div and print the output of variable $aa_sec_date_val via the date() function (line #13).
Displaying the Result at the Front-End
Here's a screenshot of the changes which take place.
Conclusion
This is how you can add dynamic date and time settings in your WordPress themes and plugins. This option can come in handy whenever you want the end user to input the date and time for whatever reason.
For example, I was building this WordPress theme where I wanted to add an Events custom post type (via a plugin). At that time, I had the option to add any of the most commonly used Event plugins or code a neat little plugin myself.
So, instead of providing my client with an event plugin that might have looked like an airplane's cockpit, I used Titan Framework. I used the date type option twice in two different metaboxes for event dates.
Integrate this option in your project and lessen the burden of writing lengthy code. In my next article, we'll explore the radio type option in Titan Framework.
Do you have any questions? Post them in the comments below, or reach out on Twitter.

Comments