Sometimes while building a plugin or a theme, developers like to provide end users with the ability to add custom code. Today, I'll discuss how to add the code type option with Titan Framework, which lets you create an editor in which you can add any custom code. Let's take a look at it!
The Code Type Option in Titan Framework
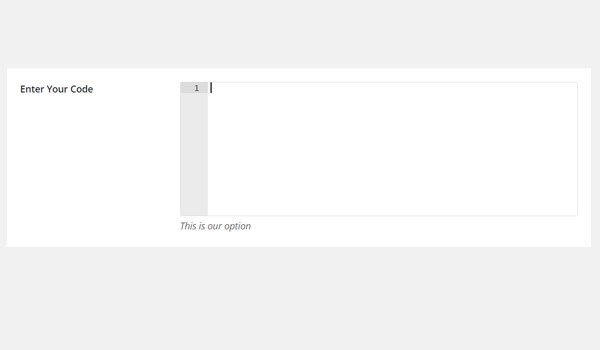
In Titan Framework, it is possible to create a text area for inputting the code via its code type option. The textarea supports syntax highlighting, so in whichever language you code, its corresponding highlighting is adopted. This option has an ability to automatically enqueue CSS and JavaScript—how cool is that? In your dashboard, it appears like this:
Let's look at the parameters of this option:
- name: It specifies the display name of this option.
- id: It assigns a unique name which retrieves saved values.
- desc: It adds a one-line description with the option name.
- default: (Optional) It sets the default value of the option.
-
livepreview: (Optional) Whenever you add a
codetype option in a theme customizer section, you get to see a live preview of changes with this parameter. -
lang: (Optional) This parameter defines the language used for syntax highlighting. The default is set to
css. Here's a list of all supported languages. -
theme: (Optional) You can set the color theme with this parameter. The default is
chrome. Here's a list of all supported themes. -
height: (Optional) It configures the height of the code editor. The default height is
200px.
All the parameters are string by type, except 'height' which is int.
Available Containers for the Code Type Option
You can add this option inside:
- Admin Panel
- Admin Tabs
- Metabox
- Theme Customizer Section
You can add this option inside the containers by following these steps:
- First get an instance via the
getInstance()function. - Next add an option via the
createOption()function. - Finally, get saved options values via the
getOption()function.
To revise your concepts about creating containers with Titan Framework, read the previous articles of this series.
Creating a Code Type Option Inside an Admin Panel
Example Declaration
Let's create this option inside an admin panel first.
<?php
    /**
     *
     * Create code type option in an Admin Panel
     *
     */
    $aa_panel->createOption( array(

        'id'   => 'aa_code_opt', // The ID which will be used to get the value of this option
        'type' => 'code', // Type of option we are creating
        'name' => 'Enter Custom Code', // Name of the option which will be displayed in the admin panel
        'desc' => 'This is our option', // Description of the option which will be displayed in the admin panel
        'lang' => 'css' // Language used for syntax highlighting

    ) );
I created the option with the createOption() function in line #7 to add a code type option in a custom admin panel container $aa_panel. I've defined a list of parameters: name, id, type, lang and desc. The value of ID should always be unique, i.e. aa_code_opt. The value of lang is css, which means the syntax highlighting of CSS will be adopted.
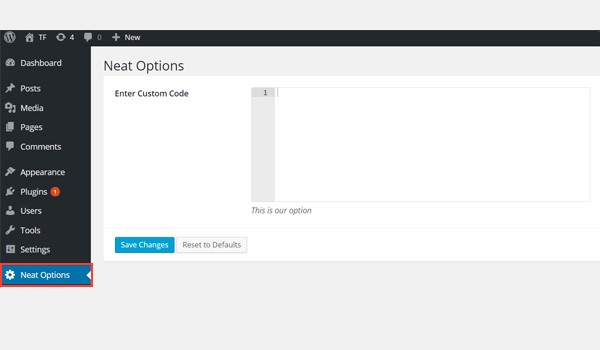
In the above screenshot, there exists an admin panel Neat Options and inside it, you can find a code type option named Enter Custom Code.
Example Usage
Now I'll get the saved values.
<div class="aa_content" >

    <p> Pellentesque habitant morbi tristique senectus et netus et malesuada fames ac turpis egestas. Vestibulum tortor quam, feugiat vitae, ultricies eget, tempor sit amet, ante. Donec eu libero sit amet quam egestas semper. Aenean ultricies mi vitae est. Mauris placerat eleifend leo. Quisque sit amet est et sapien ullamcorper pharetra. Vestibulum erat wisi, condimentum sed, commodo vitae, ornare sit amet, wisi. Aenean fermentum, elit eget tincidunt condimentum, eros ipsum rutrum orci, sagittis tempus lacus enim ac dui. Donec non enim in turpis pulvinar facilisis. Ut felis. Praesent dapibus, neque id cursus faucibus, tortor neque egestas augue, eu vulputate magna eros eu erat. Aliquam erat volutpat. Nam dui mi, tincidunt quis, accumsan porttitor, facilisis luctus, metus </p>

</div>
The code type option can be used to allow end users to add custom CSS/JS code in the theme or plugin. So considering this example, let me show you how it will work.
Titan Framework will automatically enqueue your code in accordance with what you choose as the value of the lang parameter. If it is set to css or javascript, a CSS or a JS file with the user's code will be enqueued.
As the value of the lang parameter is css, it will enqueue a CSS file with my custom code. I don't need to do anything else. Look at the code above—it has a div with class aa_content and dummy text inside it.
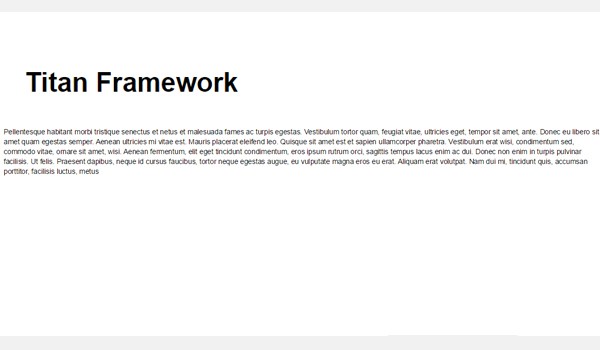
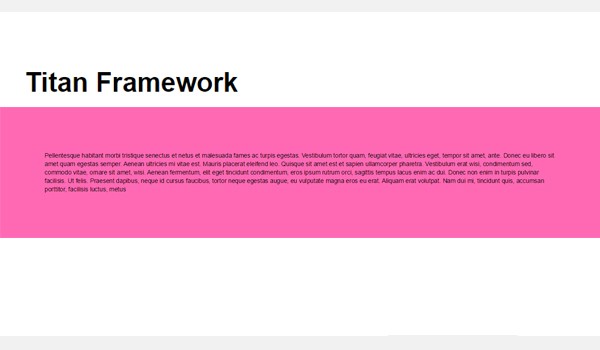
Displaying the Result at the Front-End
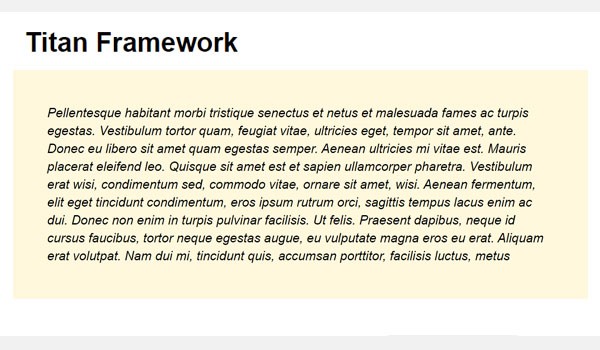
Right at this stage, my front-end looks like this:
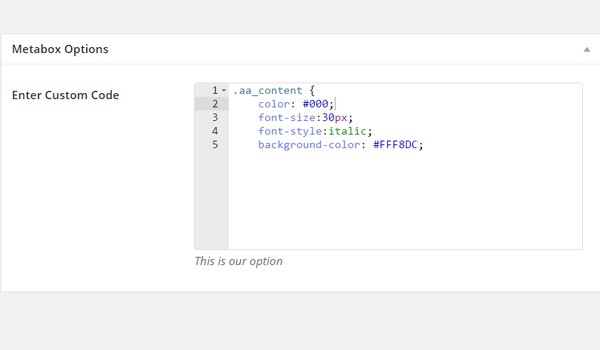
I entered my custom CSS for .aa_content class in the code option inside the dashboard.
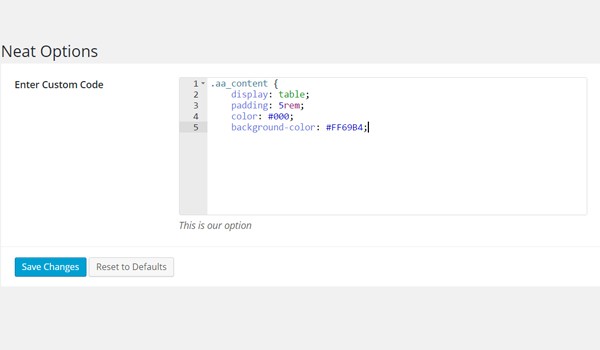
That div with .aa_content class at the front-end got styled as follows:
The changes are quite visible in the above screenshot.
Creating a Code Type Option Inside an Admin Tab
Example Declaration
Next I'll create this option inside an admin tab.
<?php
    /**
     *
     *
     * Create code type option in an Admin Tab
     *
     */
    $aa_tab1->createOption( array(

        'id'   => 'aa_code_opt_in_tab', // The ID which will be used to get the value of this option
        'type' => 'code', // Type of option we are creating
        'name' => 'Enter Custom Code', // Name of the option which will be displayed in the admin panel
        'desc' => 'This is our option', // Description of the option which will be displayed in the admin panel
        'lang' => 'css' // Language used for syntax highlighting

    ) );
Here I add this option in an admin tab $aa_tab1. The value of its ID is aa_code_opt_in_tab and lang is css.
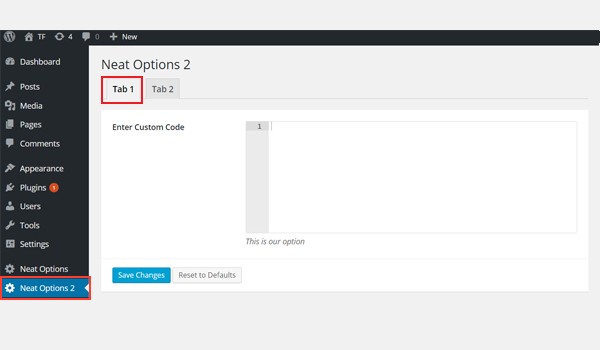
In the image, there is a code type option inside Tab 1 of panel Neat Options 2.
Example Usage
Let's get the saved options values.
<div class="aa_content">

    <p> Pellentesque habitant morbi tristique senectus et netus et malesuada fames ac turpis egestas. Vestibulum tortor quam, feugiat vitae, ultricies eget, tempor sit amet, ante. Donec eu libero sit amet quam egestas semper. Aenean ultricies mi vitae est. Mauris placerat eleifend leo. Quisque sit amet est et sapien ullamcorper pharetra. Vestibulum erat wisi, condimentum sed, commodo vitae, ornare sit amet, wisi. Aenean fermentum, elit eget tincidunt condimentum, eros ipsum rutrum orci, sagittis tempus lacus enim ac dui. Donec non enim in turpis pulvinar facilisis. Ut felis. Praesent dapibus, neque id cursus faucibus, tortor neque egestas augue, eu vulputate magna eros eu erat. Aliquam erat volutpat. Nam dui mi, tincidunt quis, accumsan porttitor, facilisis luctus, metus </p>

</div>
Again a div tag with .aa_content class and a paragraph of dummy text.
Displaying the Result at the Front-End
To display results at the front-end, I added custom CSS code and saved it.
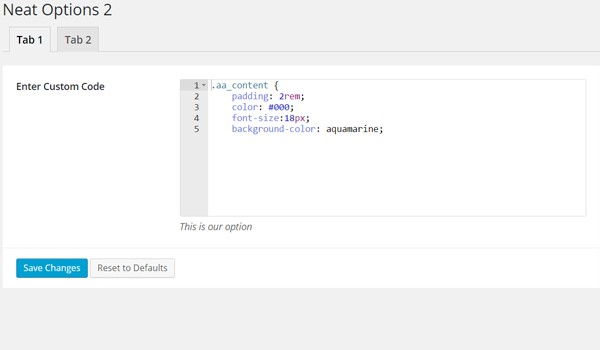
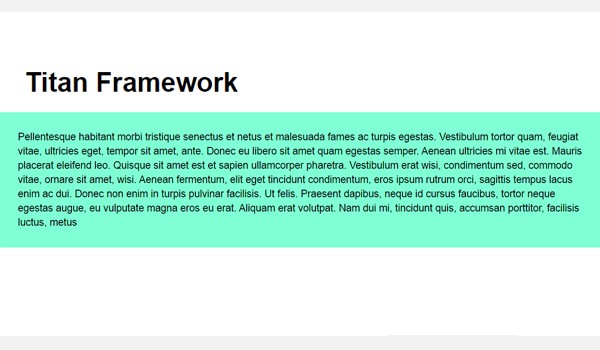
Now the front-end looks like this:
Creating a Code Type Option Inside a Metabox
Example Declaration
Now I'll create this option in a metabox.
<?php
    /**
     *
     * Create code type option in a Metabox
     *
     */
    $aa_metbox->createOption( array(

        'id'   => 'aa_code_opt_in_metabox', // The ID which will be used to get the value of this option
        'type' => 'code', // Type of option we are creating
        'name' => 'Enter Custom Code', // Name of the option which will be displayed
        'desc' => 'This is our option', // Description of the option which will be displayed
        'lang' => 'css' // Language used for syntax highlighting

    ) );
I add another code type option in a metabox $aa_metbox with ID aa_code_opt_in_metabox. The rest of the parameters are the same.
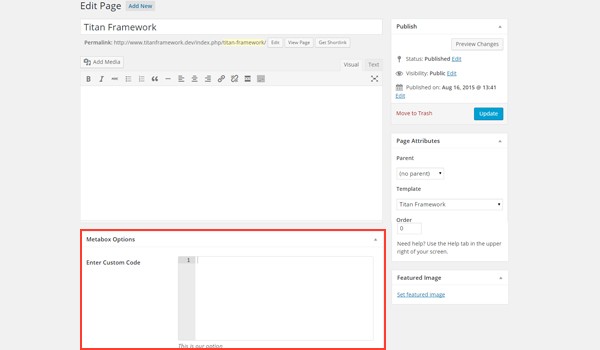
You can find this option in a metabox named Metabox Options. It appears on all page and post editing screens.
Example Usage
Use the following code to get saved values from a metabox.
<div class="aa_content">

    <p> Pellentesque habitant morbi tristique senectus et netus et malesuada fames ac turpis egestas. Vestibulum tortor quam, feugiat vitae, ultricies eget, tempor sit amet, ante. Donec eu libero sit amet quam egestas semper. Aenean ultricies mi vitae est. Mauris placerat eleifend leo. Quisque sit amet est et sapien ullamcorper pharetra. Vestibulum erat wisi, condimentum sed, commodo vitae, ornare sit amet, wisi. Aenean fermentum, elit eget tincidunt condimentum, eros ipsum rutrum orci, sagittis tempus lacus enim ac dui. Donec non enim in turpis pulvinar facilisis. Ut felis. Praesent dapibus, neque id cursus faucibus, tortor neque egestas augue, eu vulputate magna eros eu erat. Aliquam erat volutpat. Nam dui mi, tincidunt quis, accumsan porttitor, facilisis luctus, metus </p>

</div>
The same dummy text with .aa_content class in a div tag.
Displaying the Result at the Front-End
This time I used the following code.
The front-end looks like this:
Creating a Code Type Option Inside a Theme Customizer Section
Example Declaration
Finally, I'll create this option in a theme customizer section.
<?php
    /**
     *
     * Create code type option in a Theme Customizer Section
     *
     */
    $aa_section1->createOption( array(

        'id'   => 'aa_code_opt_in_sec', // The ID which will be used to get the value of this option
        'type' => 'code', // Type of option we are creating
        'name' => 'Enter Custom Code', // Name of the option which will be displayed
        'desc' => 'This is our option', // Description of the option which will be displayed
        'lang' => 'css' // Language used for syntax highlighting

    ) );
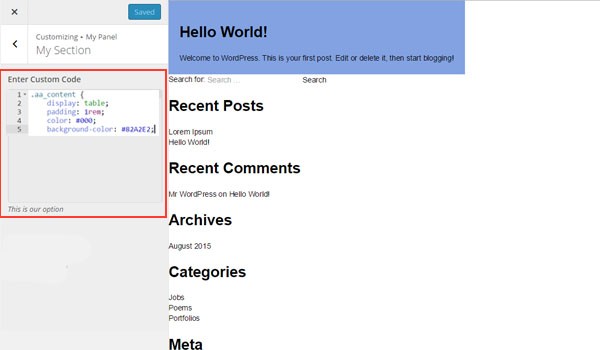
I created this option inside a theme customizer section $aa_section1. Its unique ID is aa_code_opt_in_sec.
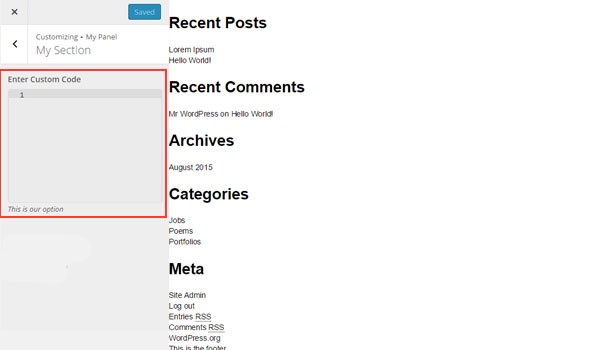
In this image, there is a code type option named Enter Custom Code inside a customizer section My Section.
Example Usage
This time I add the class .aa_content in the div tag of a single post.
Displaying the Result at the Front-End
Here is a screenshot of the live previewed changes.
Conclusion
That's about it. While there is a big debate about whether one should provide a custom code option with the ability to add custom CSS or not, there is one important advantage if you do.
This way the modifications or the custom code by the end users get saved in the options database instead of being written in the theme files, so when they update their themes, the changes would still be there.
If you have any questions, let me know through the comments or reach out on Twitter.

Comments