WooCommerce gives you a sometimes bewildering array of choices when it comes to categorizing your products, and it can be difficult to identify exactly which one is right for which products. I know I've certainly gone through the experience of setting up a product in one way, only to realize I should have used a different option from the beginning.
This guide is designed to help you understand the different options available to you, how they work, and which ones work with which kinds of product. I won't give you a detailed tutorial on setting each one up, but I will show you some of the screens you use to configure them and give you some tips.
The options I'll look at in detail are:
- product attributes
- variable products
- grouped products
I'll also look briefly at product categories and tags, to show the difference between them and product attributes. Finally, I'll provide a flowchart to help you decide which option to use with a product.
Product Categories
Product categories work in a very similar way to categories that you use with Posts in WordPress.
I tend to equate product categories with departments in my stores: they're used for navigation around the site, and each has its own archive page. So if you were running a clothing store, for example, you might have categories for men, women and children. Or you might have categories for different clothing types: knitwear, jeans, coats, etc.
Each category can have as many subcategories as you like: so within your menswear department you could have categories for different clothing types. And those subcategories can have their own subcategories: so you could have a formalwear department in your menswear department that could then have subcategories of suits, ties and shirts.
Each product might be in just one category in your store, in the same way it would be in one department in a real-world store. However you don't have to do this: the advantage of online trading over real-world trading is that you can have crosscutting categories. So formal shirts could be in both the formalwear category and the general shirts category.
It's important to remember that product categories are not the same as post categories: they don't apply to your posts, but just to products. If you wanted to apply product categories to another post type (which might be useful if you wanted to have a blog section relating to each department in your store), you would use the register_taxonomy_for_object_type() function to add the product category taxonomy to posts.
Product Tags
Product tags provide additional information for visitors to your store but aren't generally used in navigation: they're similar to tags for posts. Again, remember that product tags and tags aren't the same thing!
Product tags aren't hierarchical, but they do have their own archive pages. You might use them to identify items in a specific promotion, for example. Or you could tag products related to a holiday or event, and showcase them when that holiday or event comes around.
Product Attributes
Product attributes are similar to custom taxonomies that you'd normally use with posts, pages or your own custom post types. They work in a similar way to taxonomies, and you can access them using WordPress's functions that interact with taxonomies and taxonomy terms.
You would use product attributes to identify aspects of a product that differentiate it but don't mean that you need another product. Examples would be size or color in a clothing store.
You create product attributes via Products > Attributes and then add values for each attribute in the same screen or in the product editing screen, and you add them to products when you're editing them:
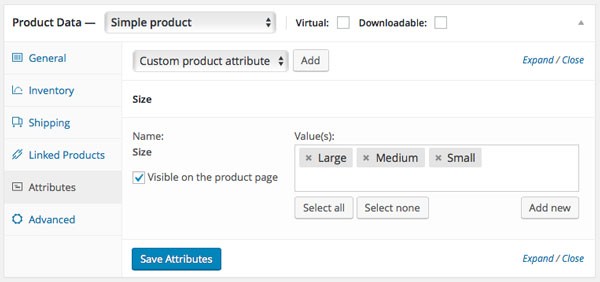
You can choose whether or not to give a product attribute its own archive page: you might want to for color, for example, but not for size.
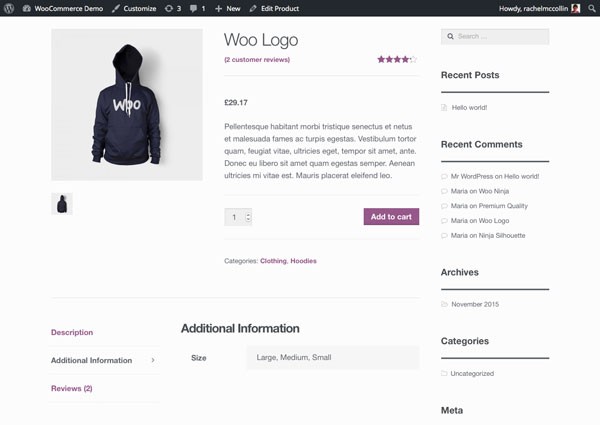
Attributes are displayed towards the bottom of the product screen, in the Additional Information tab:
Variable Products
Variable products take things further than product attributes. Each product is still set up as just one product, but you can define variations of the product with different prices, stock levels and images.
You start off by creating product attributes and adding these to each product, but then you define the product as a variable product (rather than a simple product) and set up variations based on each of your attributes or combinations of them.
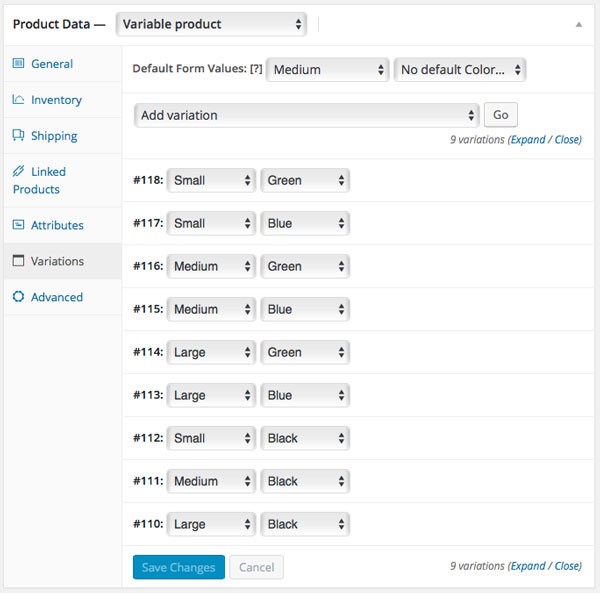
So, for example, you could have different pricing for different sizes, or manage the stock levels of different sized objects. You could use different images for the same item in different colors, and again manage stock for each color. You could also create variations combining color and size, so you can manage stock levels in greater detail.
In the example below, I've added combined variations for color and size, so I can manage stock for both:
You can also use variable products to create versions of the product which are virtual and/or downloadable. So if you were running a bookstore, you could have three product variations: the hardback, paperback and e-book versions. For each of these you could manage stock, set a price, and upload a different product image.
A product with variations will display these in a select box near the top of the product page, allowing users to select combinations and check prices and stock levels:
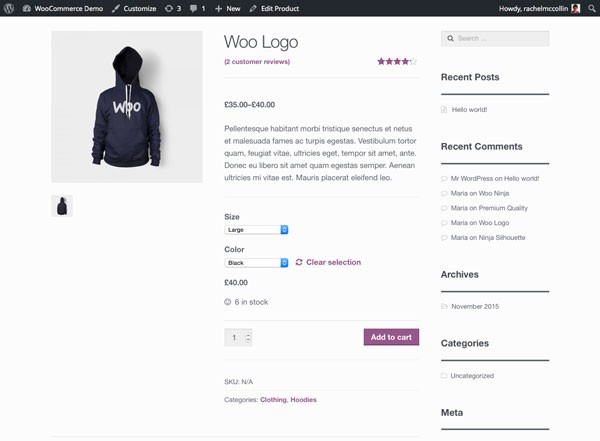
Variable products save you the trouble of creating multiple products when you're selling different versions of the same thing. They let your customers choose exactly what version of the product they need without navigating away from the product page, and they can be very powerful.
You can also use product variations to put different versions of the product on sale, which can help you clear excess stock, and to set different shipping classes for different variations, for example the hardback and paperback versions of books, which would have different weights.
Grouped Products
Grouped products take things another step further. You would use a grouped product when you wanted to sell distinct (but very similar) products that can be viewed together on one main product page.
Setting up grouped products takes a little more work, as instead of setting up one product with multiple variations, you set up a number of individual products as well as an overall grouped product.
Use grouped products when you want each version of a product to be available as a separate product listing. So, for example, if you run a bookstore and you sell different editions of books, you might want to create a separate product for each edition with a description for that edition, and then group all of them to make it easier for customers to find all of the editions of an individual book. It also makes it possible for customers to leave reviews of individual products within the group.
You can then specify whether WooCommerce shows the individual products or just the grouped products in your archive pages. Selecting the second option will make navigation easier, but the first gives people more choice—it's up to you!
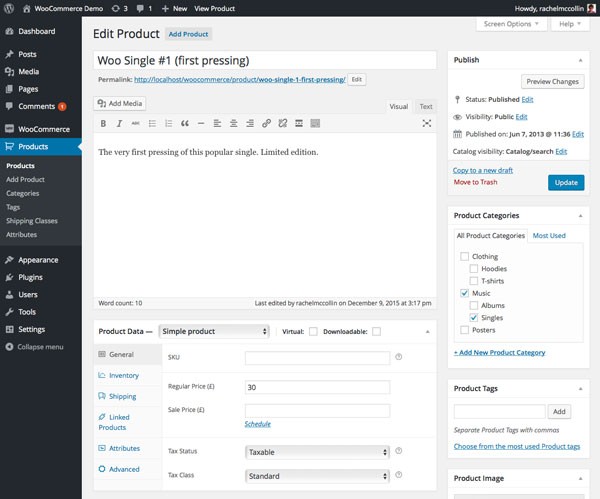
To set up grouped products, first create the individual products as simple products. Here's my rare first pressing of the Woo #1 Single, which I've created by duplicating the normal Woo #1 Single and editing my new product:
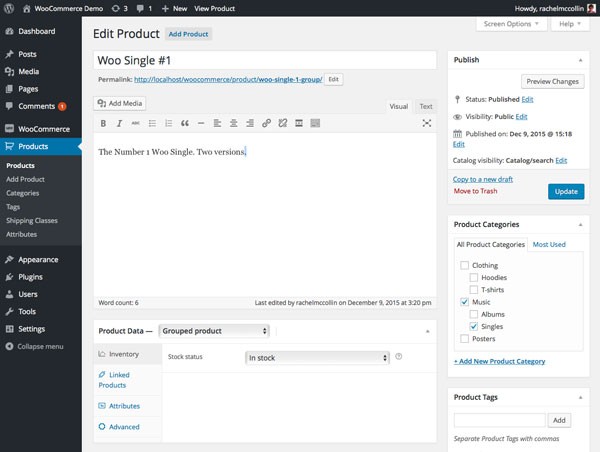
Then I create a top-level grouped product. Again I'll duplicate one of the sub-products, and select Grouped product as the product type:
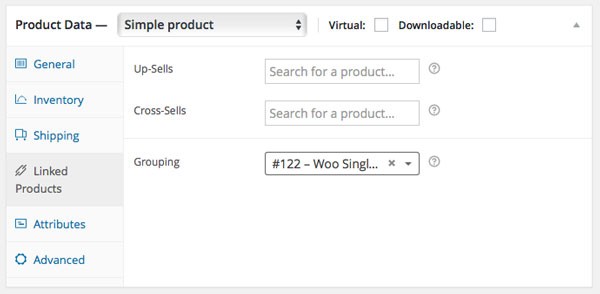
Then I go back to each of my sub-products and, in the Linked Products tab in the product data metabox, I select the top-level product in the Grouping field:
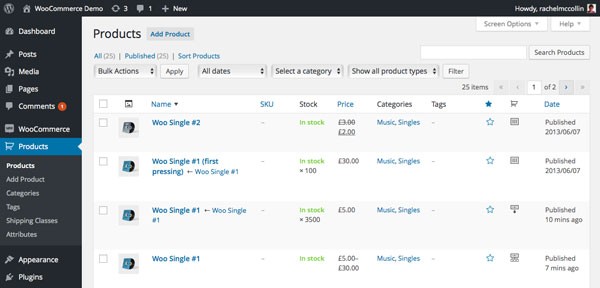
My grouped products are then clearly displayed in the Products listing page in the WordPress admin:
If I view my top level product, the sub-products are listed:
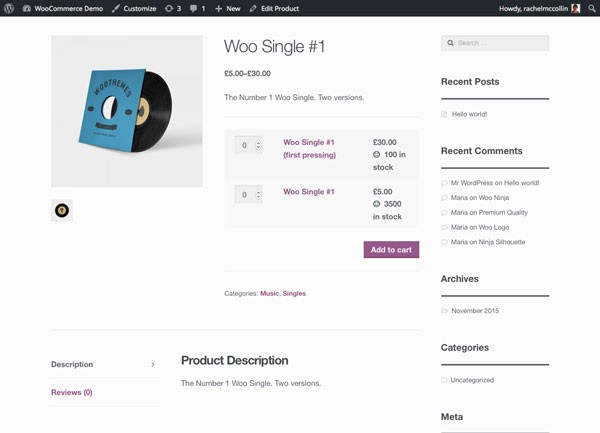
I can then select each of the products to see more information about it.
Choosing the Correct Option for Your Products
So that's how product categories, tags, attributes, variations and grouping work. But how do you go about choosing the right one for your products? Ask yourself the following questions and you should find the correct options for each of the products on your site.

Summary
Product categories, tags, attributes, variations and grouping give you a variety of powerful ways to organise your store and help visitors find exactly what they need. But it can be difficult to identify which option you need, and setting up a product again after realising you've done it wrong will be time-consuming.
If you follow the guide to each option above, and use the flowchart to identify which option is right for you, you should be able to use the right approach every time.


Comments