The latest version of WordPress, given the nickname "Smith" and the version number of 3.9, brings a bunch of great new features to the board.
In this tutorial, you'll learn about what's new and how all the new features work.
If you're an existing WordPress user, you can upgrade your site through the WordPress dashboard. It's always highly recommended that you backup your full site beforehand as mistakes do happen.
There are seven main new features:
- Improved Visual Editing
- Easier Image Editing
- Drag & Drop Image Capabilities
- Gallery Previews
- Media Playlists
- Live Widget and Header Previews
- New Theme Browser
With that said, let's take a look at each of these in detail!
Improved Visual Editing
The visual editor is now better than ever, with improved speed, accessibility, and support for mobile devices. Pasting in content from your word processor will no longer suffer from styling issues, and posts are now even easier to edit and publish.
So, how can you take full advantage of this feature?
Step 1
Open up your favorite word processor, and select the text you want to publish.
Step 2
Paste it into the improved WordPress post editor.
It's as simple as that - pasting from your writing software is now super simple and extremely efficient.
Easier Image Editing
WordPress 3.9 offers a much faster way of editing your images, including rotation, flipping, cropping and resizing tools. This can be done within the post editor, and is yet again, extremely fast and easy to use.
Let's add, flip, crop and resize an image.
Step 1
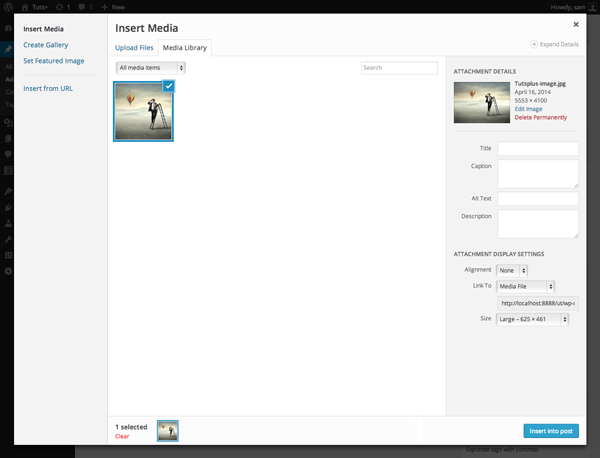
Adding an image into a WordPress post is the same as it always has been: Click the "Add Media" button in the top left corner of the post editor, select the image, and click the "Insert Into Post" button.
Step 2
To resize the image within the post, simply drag the corners. Easy, isn't it?

Step 3
Once the resized image is in the post, hover over it and select the edit icon, which looks like a pencil. This will display the following window:

Now, click the "Edit Original" button.
Step 4
You'll now be presented with the "Edit Image" screen. Here you can rotate, flip, crop, and scale the image.

We're going to flip the image, which can be easily achieved by clicking the corresponding icon from the menu bar above the image.
Step 5
To crop the image, you can simply begin dragging a rectangle on top of the image, and the cropping box will appear. When you've adjusted this to your liking, save your changes.

Step 6
When you've returned back to the "Image Details" screen, click the "Update" button to replace the old image with our newly edited image.

Step 7
That's it - you'll now see your new image within the post editor.

I'm sure you'll agree that the new editing features within WordPress 3.9 are really useful, and are definitely going to be a big hit with both new and legacy users.
Drag & Drop Image Capabilities
As more of a simple productivity feature, the ability to drag and drop images directly into a post will be quite useful, especially for image heavy posts.
Step 1
Importing an image using the drag-and-drop method is really simple. Open up your file manager (for example, this is Finder on Mac OS X or Windows Explorer on Windows) and select - but don't open - the file you want to upload.
Step 2
Drag the selected file onto the post editor until the blue "Drop files to upload" message appears.
Step 3
Once this message appears, drop the file - that is, release the mouse - and wait for the file to upload.
Yet again, another incredibly simple feature that will save a lot of time for both casual and frequent bloggers.
Gallery Previews
In the past, when adding a gallery to a WordPress post, a generic placeholder was used to show where the gallery was. In WordPress 3.9, you can now preview the gallery right within the post editor.
Step 1
To add a new gallery, click the "Add Media" button above the main post content box. The "Insert Media" window will appear.

Step 2
Select the "Create Gallery" tab on the left of the new popup window and select the images you want to include - simply click on each image.

Step 3
When you've done that, click the "Create a new gallery" button, and then amend your gallery's settings.

Step 4
Finally, click the "Insert gallery" button.

Step 5
You should now see a preview of your new gallery within the post editor as illustrated in the following image:

Media Playlists for Audio & Video
WordPress 3.9 allows you to create audio and video playlists in order to show off your work or some of your favorite media. In this quick demo, we'll be creating an audio playlist; however, note that the steps are the same for creating a video playlist.
Step 1
Click the "Add Media" button above the post editor and upload your audio files.

Step 2
Next, click the "Create Audio Playlist" tab on the left of the "Insert Media" window. Make sure all the audio files you want to include are selected, rearrange them, and click the "Create a new playlist" button.

Step 3
Confirm the playlist's settings and amend them if necessary.

Step 4
Finally, click the "Insert audio playlist" and you're good to go!
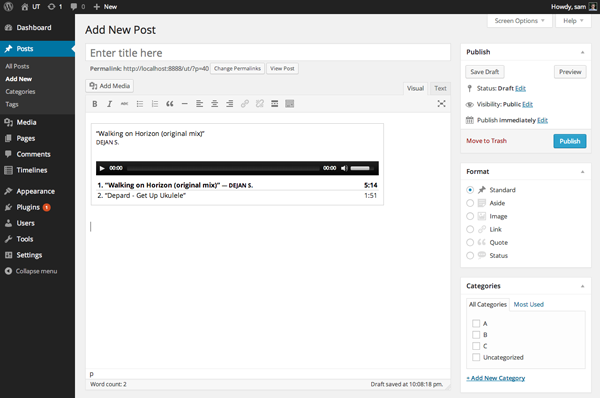
Another really useful feature for WordPress 3.9 - with a little bit of styling and extra customization, these players can be customized even further.
Live Widget and Header Previews
This is quite possibly the most useful feature in WordPress 3.9 as it allows you to manage your widget areas and header images in real time as well as preview them before you push the save button.
Again, it's really simple to get going with this feature. Let's take a look at the Live Widget Previews.
Step 1
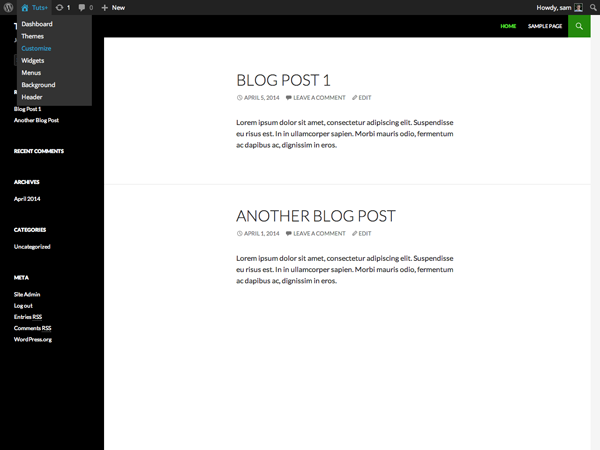
From the frontend of your site, over over your site's name in the admin bar and select "Customize".
Step 2
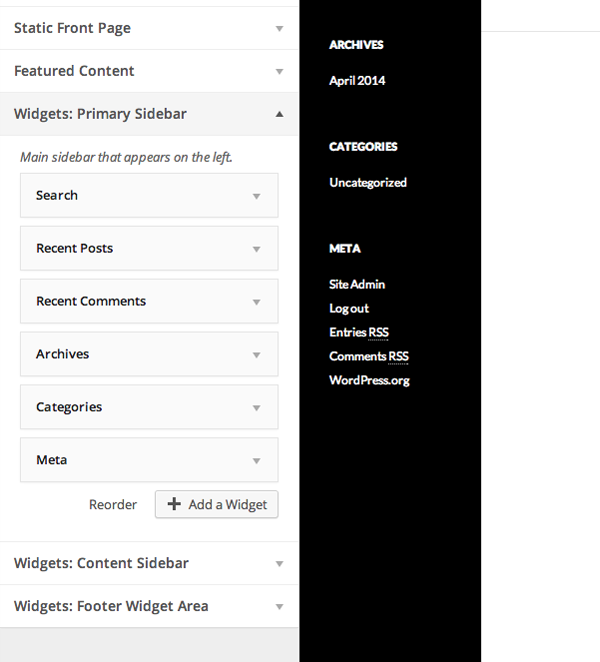
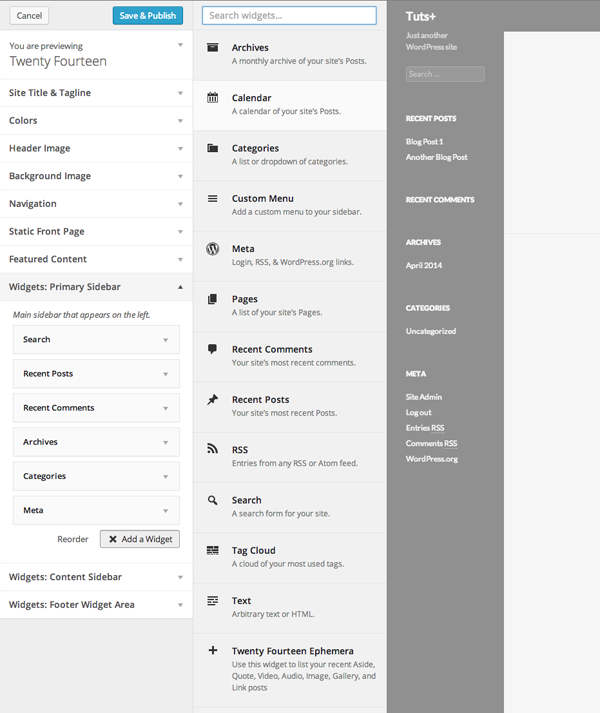
You'll see a bunch of different options, including the new options for the widget areas. Selecting a widget area will allow you to reorder and update the settings straight away.
Step 3
Click the "Add a Widget" button and you'll see a vertical menu appear.
Step 4
Choose the widget you'd like to add, update its settings, and you're done.
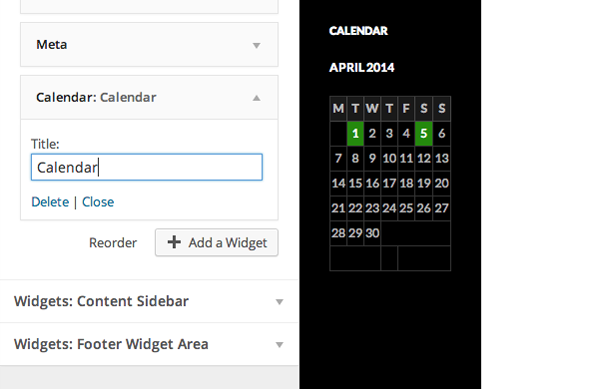
An awesome feature, and another reason for theme developers to begin using the Theme Customizer.
New Theme Browser
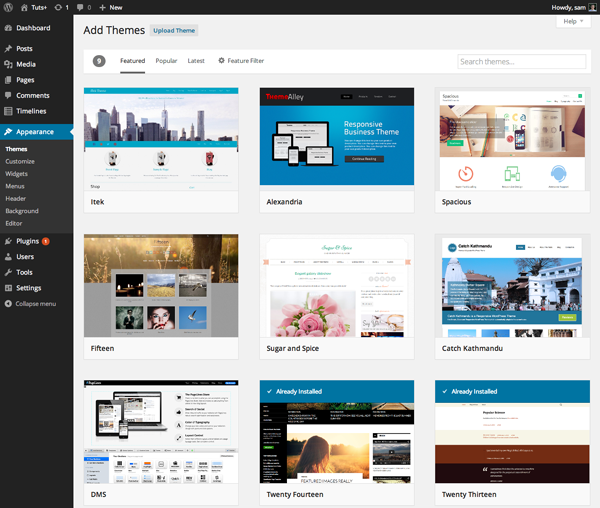
The final new feature in WordPress 3.9 is the new Theme Browser, which offers a totally new experience for choosing, previewing, and activating new WordPress themes.
Step 1
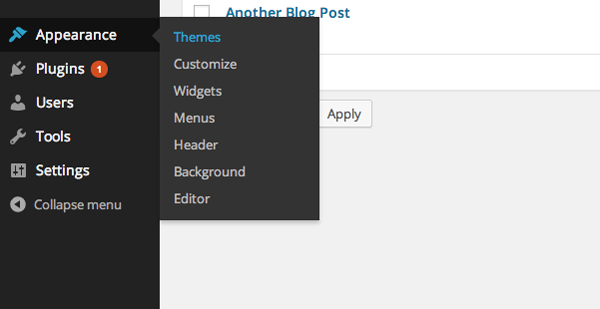
Open the "Manage Themes" page by hovering over the "Appearance" menu and selecting "Themes".
Step 2
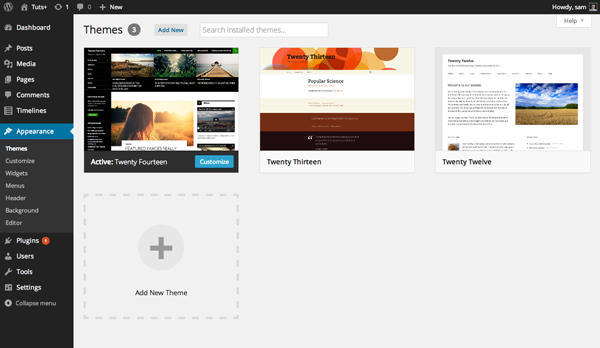
Click the "Add New Theme" button to launch the new Theme Browser.
Step 3
You're now looking at the redesign for the Theme Browser - you can filter and search for themes using the tools available towards the top of the page.
Step 4
Select a theme to learn more and to have the option to install it.
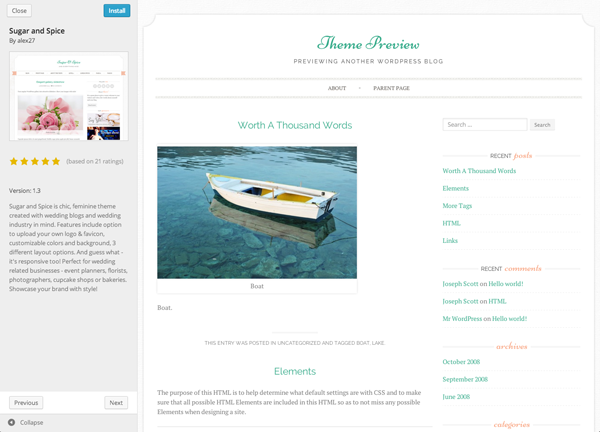
This is a great feature for those who don't want to buy premium themes, and just want to browse the free themes directory for use or for inspiration.
In Summary
You've just learned about all seven of the great new features in WordPress 3.9. Like I mentioned at the beginning, you can upgrade your WordPress installation to the newest version through your WordPress dashboard. This usually takes less than one minute to complete, but may be longer depending on your host.
I hope you've enjoyed this rundown of the new features - if you've got any questions, please leave a comment and I'll be sure to help you out.


Comments