Perhaps one of the most overlooked functionality of Magento is its Newsletter feature. Magento is one of very few CMSs which offers built-in user subscription, management and newsletter sending functionality. Properly using these features can save lot of time and money, which would otherwise be spent on integrating third-party applications for these features.
Store owners can ask store visitors to subscribe to their newsletter and send them latest and special offers, discount coupons which could result in repeating sales and minimizing marketing cost per sale.
Effective placement of the user subscription form in the website is the linchpin of any successful email marketing strategy. Some commonly used places for placing subscription form are sidebar and the footer. Some store owners also place this subscription form on prominent places of home page, some even place it in a lightbox. Mentioning some attractive offer for your newsletter subscribers can substantially increase subscribers’ opt-in rate.
Creating a Newsletter Template
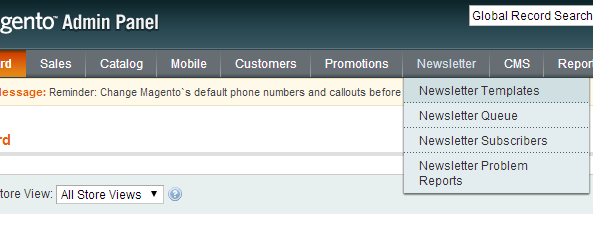
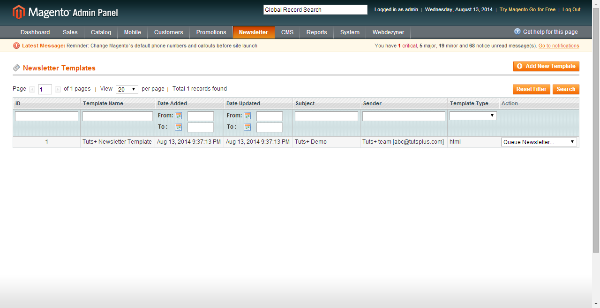
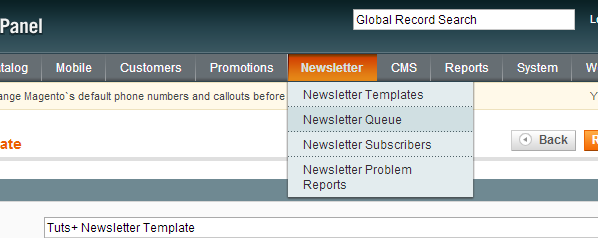
Once you have some subscribers in your list, its time to start exploring Magento newsletter feature by first creating a Newsletter template. To create a new template go to Magento admin panel, and from the upper menu hover over ‘Newsletter’ option, from the dropdown, click on ‘Newsletter Templates.’
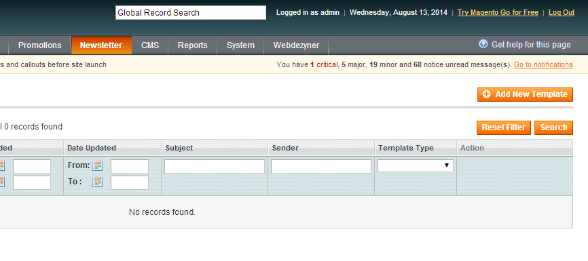
On the next page you’ll see all the available templates created so far, and the link to create a new template. As we haven’t created any templates yet, that’s why it is showing ‘No record found’ in the given screenshot. Click on the ‘Add New Template’ link to start creating a new template.
On the next page you’ll see a detailed form showing various fields to create a new template, as shown in screenshot below.
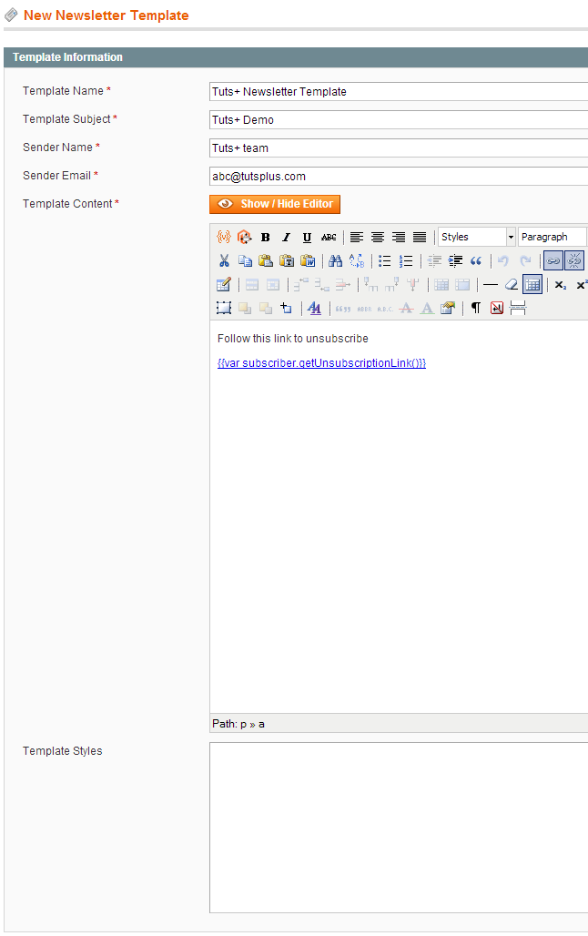
- Template Name: In the template name field, enter the name for this template. This name will not be visible anywhere in the emails; so name it the way you want.
- Template Subject: This will be the default subject of the emails sent using this template. You can edit this subject at the time of sending emails.
- Sender Name: This name will be shown to users as the sender of the email.
- Template Content: This is the most important part of the template. You can insert template content here. You can either insert your own HTML here if you have some proficiency in HTML, otherwise you can use WYSIWYG editor to create a simple template for yourself. If you want to create some fancy looking template, I would recommend using either paid newsletter templates from Themeforest, or free templates from Zurb.
However, if you plan to create your own template, remember to use the best practices of creating email width under 600px, also it should be table-based HTML with inline CSS not because tables are the best elements, but because they transfer best across all clients.
Also, while creating your own template, leave the default code shown in content field at the bottom of the email. It’ll generate dynamic unsubscribe link, which is necessary to abide by spam rules.
- Template Styles: The last field is for inserting template CSS. Though, as mentioned above the best practice is to use inline CSS while creating email templates, however if you want to insert any CSS style separately, this is the place to put it.
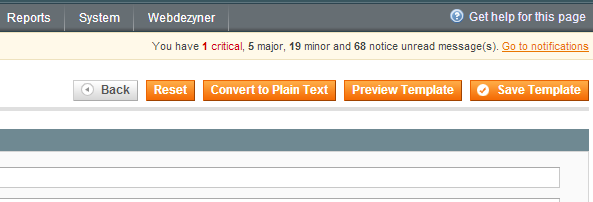
Once you are all done creating this template, make sure to preview your template by using the ‘Preview Template button’ in the upper right corner. Once you are sure you are all set, hit the ‘Save Template’ button.
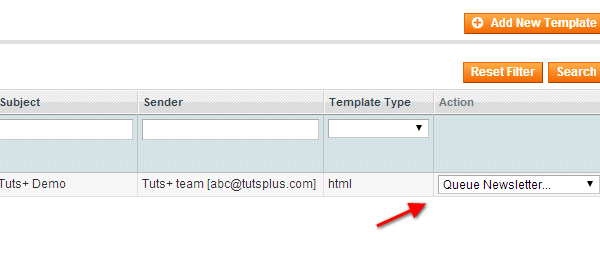
Now go back to Newsletter template page, and here you’ll see the template we have just created.
In the last column of the newsletter template, you’ll see a drop-down to select action for this template. Select ‘Queue Newsletter’ from this drop down.
Upon selecting ‘Queue Newsletter’ option, a new page will load, similar to template creation page, this time it’ll have two new fields there. One is a select form, where you can select the subscribers from different stores.
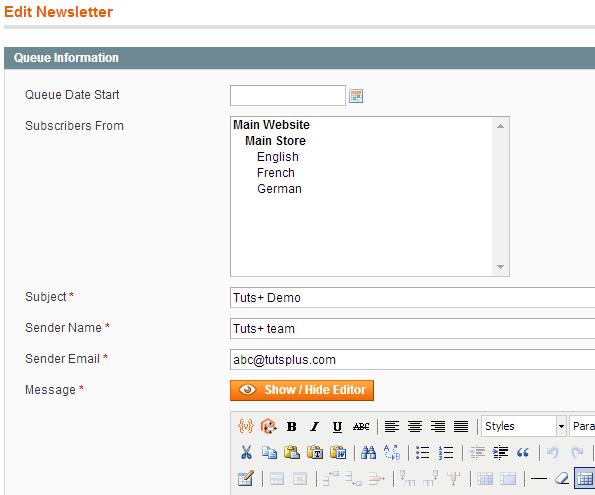
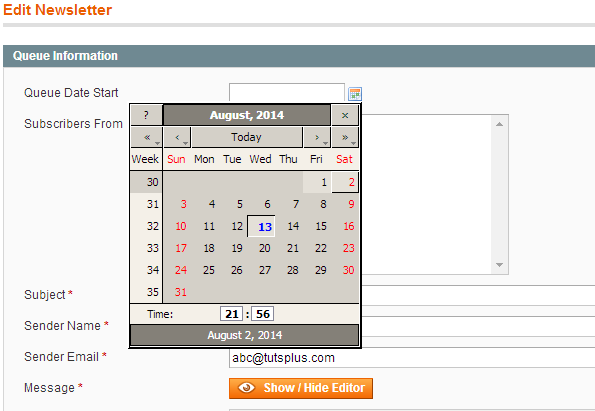
The other option is that of selecting date and time to start the queue.
The Subject, Sender Name, Sender Email, Message and Styles field will be pre-populated with the template content we just created. You can edit the content here, and click on ‘Save Newsletter’ in upper right corner. Do not forget to preview the email, before saving this newsletter. Once you save this newsletter, it'll be scheduled, you can edit/delete it before scheduled sending time, if needed.
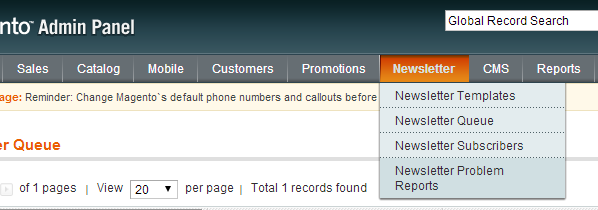
You can view the queued emails by clicking on ‘Newsletter’ ->‘Newsletter Queue’ from the top menu.
Here you’ll see all the queued emails.
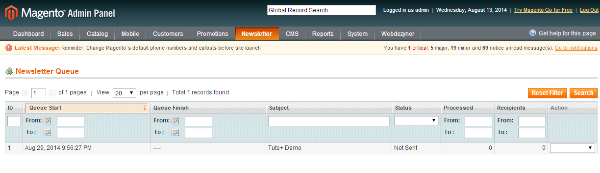
At the queue start time, Magento will start sending emails in batches of 15-20. If anything goes wrong while sending these emails, they’ll be reported in Newsletter->Newsletter Problem Reports.
This was a quick overview of utilizing this built-in feature of Magento. There are plenty of extensions available at Magento connect, which’ll further enhance Newsletter functionality. Some top rated extensions in this regard are Advanced Newsletter by aheadWorks and Advanced Subscribers by apptha.
You can use different extensions to integrate
Magento with other newsletter sending applications like MailChimp, and transactional email services like Sendgrid etc.
Conclusion
On parting thoughts, I would say that coupling this useful feature of Magento with some good extensions can fulfill almost all your Newsletter needs. So, do give Magento Newsletter feature and related extensions a careful look, before you embark on buying some 3rd party Newsletter sending and management application.

Comments