In this tutorial, you'll learn about forms and events in React. We'll start by creating a simple React-based app and then add a form and some elements. Then we'll see how to add events to the form elements.
If you are a beginner with React, I would recommend reading the introductory tutorial on React to get started.
Getting Started
Let's start by setting up our React web application. Create a project folder called ReactFormApp. Inside ReactFormApp, create a file called index.html and add the following HTML code:
<html>

<head>
    <title>TutsPlus - React Forms & Events</title>
</head>

<body>
    <div id="app"></div>
    <script src="bundle.js"></script>
</body>

</html>
Initialize the project using Node Package Manager (npm).
npm init
Fill in the required details and you should have the package.json file inside the ReactFormApp folder.
{
  "name": "reactformapp",
  "version": "1.0.0",
  "description": "",
  "main": "index.js",
  "scripts": {
    "test": "echo \"Error: no test specified\" && exit 1"
  },
  "author": "",
  "license": "ISC"
}
Install the react and react-dom dependencies using npm.
npm install react react-dom --save
Install the required babel package using npm and save it to the package.json file.
npm install --save-dev webpack webpack-dev-server babel-core babel-loader babel-preset-react babel-preset-es2015
babel packages are required to transform the JSX code to JavaScript.
Create a webpack config file to handle the webpack configurations. Create a file called webpack.config.js and add the following configurations:
module.exports = {
  entry: './app.js',

  output: {
    filename: 'bundle.js',
  },

  module: {
    loaders: [
      { exclude: /node_modules/, loader: 'babel-loader?presets[]=es2015&presets[]=react' }
    ]
  }
}
app.js is the file where our React code will reside. Create a file called app.js inside the ReactFormApp folder. Import the required react libraries in app.js. Create a component called App having a div with some text. Render the component using the render method. Here is how the basic app.js file would look:
import React from 'react'
import { render } from 'react-dom'

var App = React.createClass({
  render:function(){
    return(
      <div>
        TutsPlus - Welcome to React Form App
      </div>
    );
  }
});

render((
    <App />
	),document.getElementById('app'))
Save the changes and try reloading the webpack development server.
webpack-dev-server
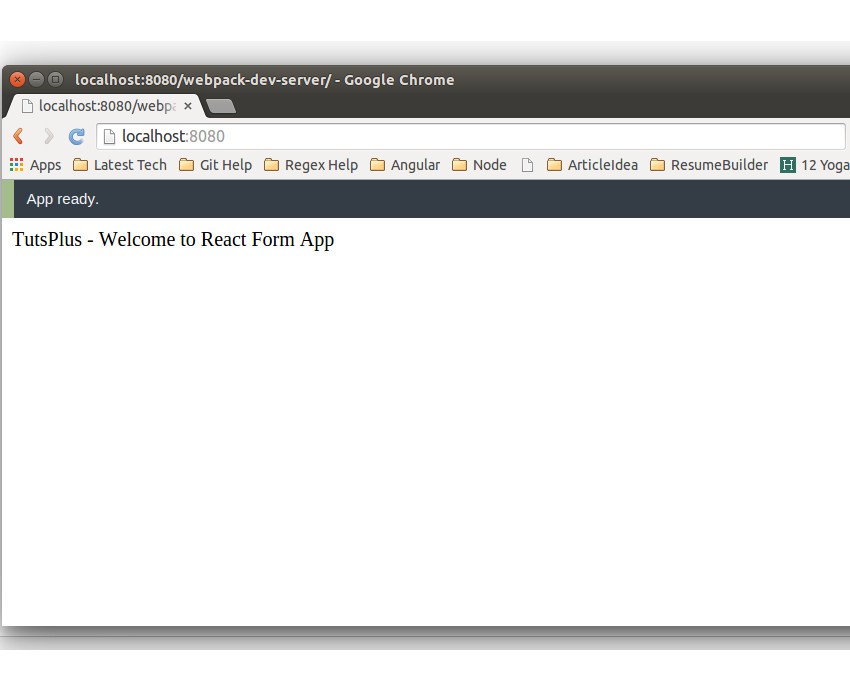
Once the server has been restarted, you should be able to view the React app running on http://localhost:8080/.

Creating a React Form
We have the basic React app up and running, Let's move to the next step and try to create a form component using JSX code in app.js.
Create a component called FormComp inside app.js.
var FormComp = React.createClass({
    render:function(){
		return(
		);
	}
})
Inside the render function for FormComp, we'll define the HTML code for creating a form. We'll put in a couple of labels, input boxes, and a button to click. Here is how it looks:
var FormComp = React.createClass({
    render:function(){
		return(
			<div>

				<h2>TutsPlus - React Form Tutorial</h2>
				<hr />

				<label>First Name: </label>
				<input type="text"  />
				<br />

				<label>Last Name: </label>
				<input type="text"  />
				<br />

				<input type="button" value="Submit" />

				<hr />
			</div>
		);
	}
})
Render the form component FormComp to display the form inside index.html.
render((
    <FormComp />
	),document.getElementById('app'))
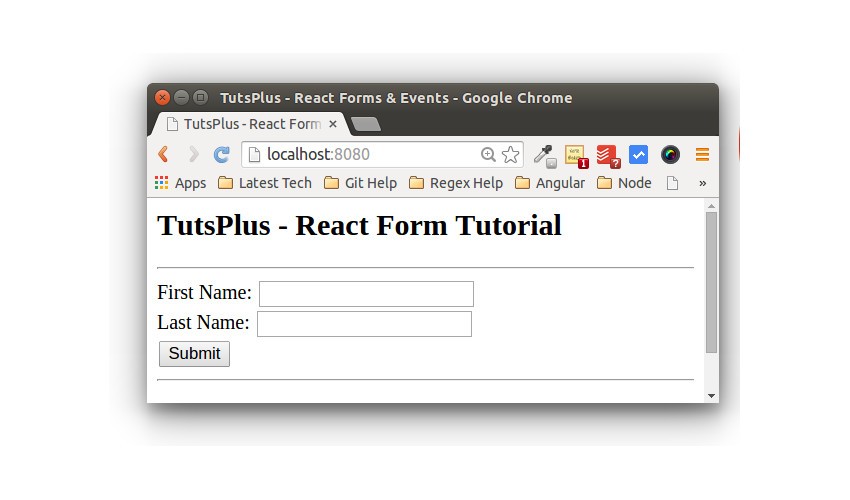
Save the changes and restart the webpack server and you should be able to view the form.

Adding Events to the Form
Our React form is in good shape. To make it interact, we need to add events to the form.
We'll start by adding state variables on each of the input boxes so that we can read the values of the input boxes. Let's set the state variables for the first name and last input text boxes.
<input type="text" value = {this.state.fName} />
<input type="text" value = {this.state.lName} />
Make sure to set the initial state for the above variables. Define the getInitialState function inside the FormComp component and initialize both the variables.
getInitialState: function () {
      return {lName: '',fName:''};
},
We need to handle the on-change event of the input boxes and assign the state variables when the value in the text boxes changes. So define an onChange event on the input boxes.
<input type="text" value = {this.state.fName} onChange={this.handleFNameChange} />
<input type="text" value = {this.state.lName} onChange={this.handleLNameChange} />
Define the onChange functions inside the FormComp and set the state variables.
handleFNameChange:function(event){
        this.setState({fName: event.target.value});
},

handleLNameChange:function(event){
   	 this.setState({lName: event.target.value});
}
Let's try rendering the state variables by using them. Inside the FormComp HTML, add the following element rendering the state variables.
<h3>Your full name is </h3> {this.state.fName} {this.state.lName}
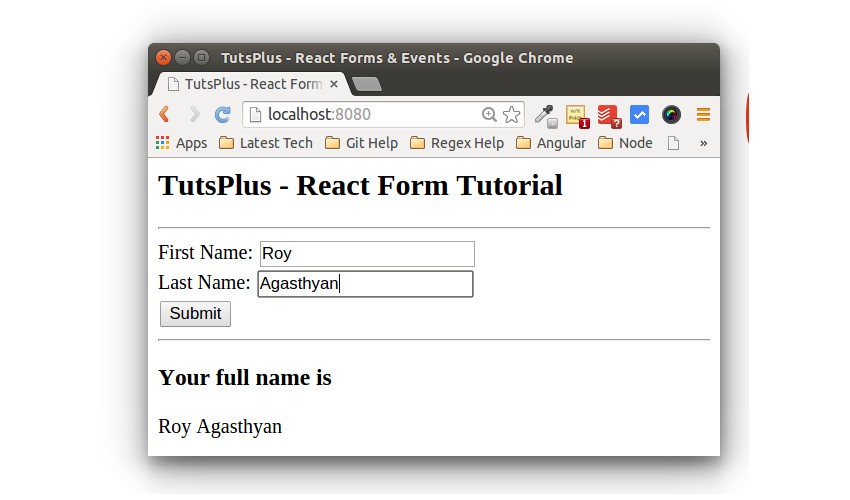
Save the changes and restart the webpack server. Try to enter some text inside the first name and last name text boxes, and you should be able to view the results as soon as you type.

Next, let's add an on-click event to the submit button that we have on our form.
<input type="button" onClick={this.handleClick} value="Submit" />
Define the handleClick function inside the FormComp component. On clicking the submit button, we'll concatenate both first name and last name and display the full name inside the form. Here is the handleClick function:
handleClick:function(){
       var fullName = this.state.fName + ' ' + this.state.lName;
   	this.setState({Name:fullName});
},
Also, initialize the Name variable in the getInitialState function.
getInitialState: function () {
     return {lName: '',fName:'',Name:''};
}
Display the concatenated full name in the form HTML.
<h3>Your full name is </h3> {this.state.Name}
Here is how the final FormComp component looks:
var FormComp = React.createClass({


    getInitialState: function () {
      return {lName: '',fName:'',Name:''};
   	},

   	handleFNameChange:function(event){
   	  this.setState({fName: event.target.value});
   	},

   	handleLNameChange:function(event){
   	  this.setState({lName: event.target.value});
   	},

   	handleClick:function(){
   		var fullName = this.state.fName + ' ' + this.state.lName;
   		this.setState({Name:fullName});
   	},

	render:function(){
		return(
			<div>
				<h2>TutsPlus - React Form Tutorial</h2>
				<hr />

				<label>First Name: </label>
				<input type="text" value = {this.state.fName} onChange={this.handleFNameChange}  />
				<br />

				<label>Last Name: </label>
				<input type="text" value = {this.state.lName} onChange={this.handleLNameChange}  />
				<br />

				<input type="button" onClick={this.handleClick} value="Submit" />

				<hr />

				<h3>Your full name is </h3> {this.state.Name}
			</div>
		);
	}
})
Save the above changes and restart the development server. Enter both the names and press the submit button, and the full name should be displayed.
Wrapping It Up
In this React tutorial, you learnt how to get started with creating React apps and understood the basic concepts about how to deal with forms and events in a React-based web app. I hope this tutorial will be helpful for you in getting started with creating React-based apps.
Source code from this tutorial is available on GitHub.
Do let us know your thoughts, suggestions or any corrections in the comments below. Keep watching this space for more React tutorials.


Comments