You can only produce secure web applications by taking security into account, from the start. This requires thinking of the potential ways someone could attack your site as you create each page, form, and action. It also requires understanding the most common types of security problems and how to address them.
The most common type of security hole in a webpage allows an attacker to execute commands on behalf of a user, but unknown to the user. The cross-site request forgery attack exploits the trust a website has already established with a user's web browser.
In this tutorial, we'll discuss what a cross-site request forgery attack is and how it's executed. Then we'll build a simple ASP.NET MVC application that is vulnerable to this attack and fix the application to prevent it from happening again.
What Is Cross-Site Request Forgery?
The cross-site request forgery attack first assumes that the victim has already authenticated on a target website, such as a banking site, Paypal, or other site to be attacked. This authentication must be stored in a way so that if the user leaves the site and returns, they are still seen as logged in by the target website. The attacker must then get the victim to access a page or link that will execute a request or post to the target website. If the attack works, then the target website will see a request coming from the victim and execute the request as that user. This, in effect, lets the attacker execute any action desired on the targeted website as the victim. The potential result could transfer money, reset a password, or change an email address at the targeted website.
How the Attack Works
The act of getting the victim to use a link does not require them clicking on a link. A simple image link could be enough:
<img src="http://www.examplebank.com/movemoney.aspx?from=myaccount&to=youraccount&amount=1000.00" width="1" height="1" />
Including a link such as this on an otherwise seemingly innocuous forum post, blog comment, or social media site could catch a user unaware. More complex examples use JavaScript to build a complete HTTP post request and submit it to the target website.
Building a Vulnerable Web Application in ASP.NET MVC
Let's create a simple ASP.NET MVC application and leave it vulnerable to this attack. I'll be using Visual Studio 2012 for these examples, but this will also work in Visual Studio 2010 or Visual Web Developer 2010 will work if you've installed support for MVC 4 which can be downloaded and installed from Microsoft.
Begin by creating a new project and choose to use the Internet Project template. Either View Engine will work, but here I'll be using the ASPX view engine.
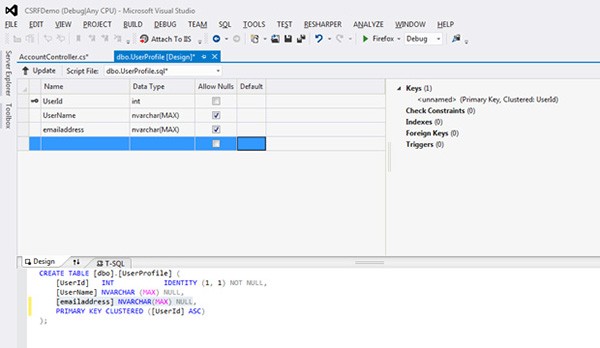
We'll add one field to the UserProfile table to store an email address. Under Server Explorer expand Data Connections. You should see the Default Connection created with the information for the logins and memberships. Right click on the UserProfile table and click Open Table Definition. On the blank line under UserName table, we'll add a new column for the email. Name the column emailaddress, give it the type nvarchar(MAX), and check the Allow Nulls option. Now click Update to save the new version of the table.
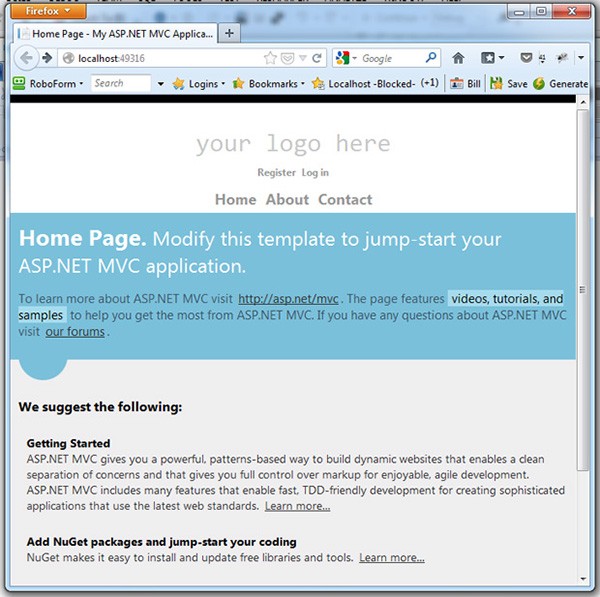
This gives us a basic template of a web application, with login support, very similar to what many writers would start out with trying to create an application. If you run the app now, you will see it displays and is functional. Press F5 or use DEBUG -> Start Debugging from the menu to bring up the website.
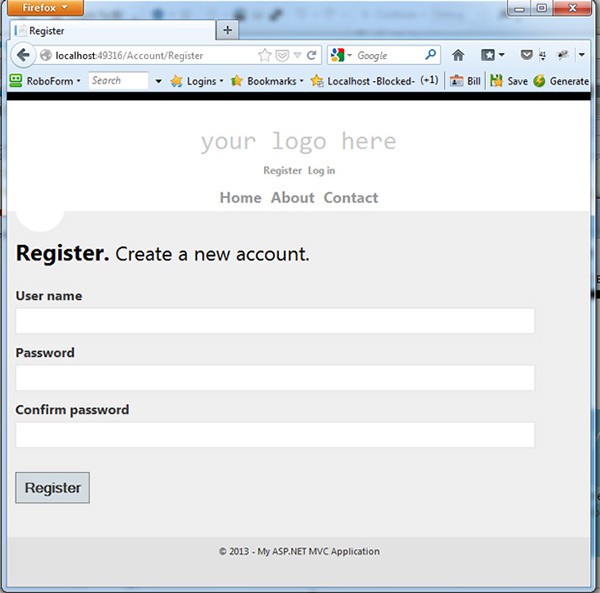
Let's create a test account that we can use for this example. Click on the Register link and create an account with any username and password that you'd like. Here I'm going to use an account called testuser. After creation, you'll see that I'm now logged in as testuser. After you've done this, exit and let's add a page to this application to allow the user to change their email.
Before we create that page to change the email address, we first need to make one change to the application so that the code is aware of the new column that we just added. Open the AccountModels.cs file under the Models folder and update the UserProfile class to match the following. This tells the class about our new column where we'll store the email address for the account.
[Table("UserProfile")]
public class UserProfile
{
    [Key]
    [DatabaseGeneratedAttribute(DatabaseGeneratedOption.Identity)]
    public int UserId { get; set; }
    public string UserName { get; set; }
    public string EmailAddress { get; set; }
}
Open the AccountController.cs file. After the RemoveExternalLogins function add the following code to create a new action. This will get the current email for the logged in user and pass it to the view for the action.
public ActionResult ChangeEmail()
    {
        // Get the logged in user
        string username = WebSecurity.CurrentUserName;
        string currentEmail;

        using (UsersContext db = new UsersContext())
        {
            UserProfile user = db.UserProfiles.FirstOrDefault(u => u.UserName.ToLower() == username);
            currentEmail = user.EmailAddress;
        }

        return View(currentEmail);
    }
We also need to add the corresponding view for this action. This should be a file named ChangeEmail.aspx under the Views\Account folder:
<%@ Page Title="" Language="C#" MasterPageFile="~/Views/Shared/Site.Master" Inherits="System.Web.Mvc.ViewPage<string>" %>

<asp:Content ID="Content1" ContentPlaceHolderID="TitleContent" runat="server">
Change Email Address
</asp:Content>

<asp:Content ID="Content2" ContentPlaceHolderID="MainContent" runat="server">

<hr>
<h2>Change Email Address</h2>

<p>Current Email Address: <%= Model ?? "<i>No Current Email</i>" %></p>

<% using(Html.BeginForm()) { %>
    <input type="text" name="newemail" />
    <input type="submit" value="Change Email" />
<% } %>

</asp:Content>

<asp:Content ID="Content3" ContentPlaceHolderID="FeaturedContent" runat="server">
</asp:Content>

<asp:Content ID="Content4" ContentPlaceHolderID="ScriptsSection" runat="server">
</asp:Content>
This gives us a new page we can use to change the email address for the currently logged in user.
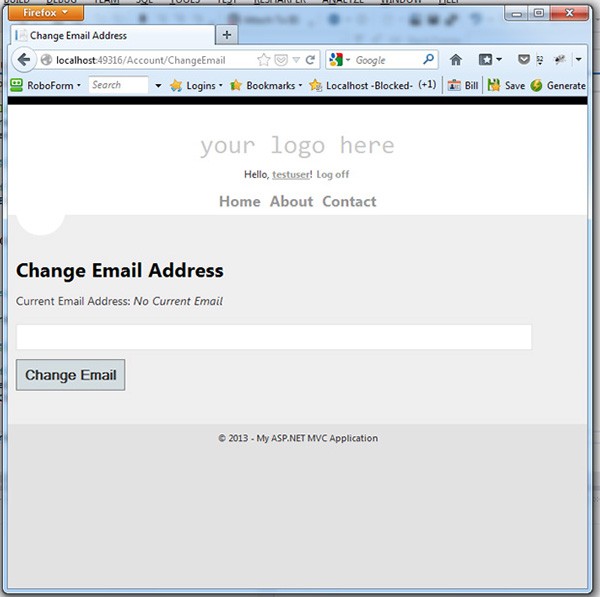
If we run this page and go to the /Account/ChangeEmail action, we now see we currently do not have an email. But we do have a text box and a button that we can use to correct that. First though, we need to create the action which will execute, when the form on this page is submitted.
[HttpPost]
public ActionResult ChangeEmail(ChangeEmailModel model)
{
    string username = WebSecurity.CurrentUserName;

    using (UsersContext db = new UsersContext())
    {
       UserProfile user = db.UserProfiles.FirstOrDefault(u => u.UserName.ToLower() == username);
       user.EmailAddress = model.NewEmail;
       db.SaveChanges();
    }

    // And to verify change, get the email from the profile
    ChangeEmailModel newModel = new ChangeEmailModel();
    using (UsersContext db = new UsersContext())
    {
       UserProfile user = db.UserProfiles.FirstOrDefault(u => u.UserName.ToLower() == username);
       newModel.CurrentEmail = user.EmailAddress;
    }

    return View(newModel);
}
After making this change, run the website and again go to the /Account/ChangeEmail action that we just created. You can now enter a new email address and click the Change Email button and see that the email address will be updated.
Attacking the Site
As written, our application is vulnerable to a cross-site request forgery attack. Let's add a webpage to see this attack in action. We're going to add a page within the website that will change the email to a different value. In the HomeController.cs file we'll add a new action named AttackForm.
public ActionResult AttackForm()
{
   return View();
}
We'll also add a view for this named AttackForm.aspx under the /Views/Home folder. It should look like this:
<%@ Page Title="" Language="C#" MasterPageFile="~/Views/Shared/Site.Master" Inherits="System.Web.Mvc.ViewPage<dynamic>" %>

<asp:Content ID="Content1" ContentPlaceHolderID="TitleContent" runat="server">
Attack Form
</asp:Content>

<asp:Content ID="Content2" ContentPlaceHolderID="MainContent" runat="server">

<hr>
<h2>Attack Form</h2>

<p>This page has a hidden form, to attack you, by changing your email:</p>

<iframe width="1px" height="1px" style="display:none;">
<form name="attackform" method="POST" action="<%: Url.Action("ChangeEmail", "Account") %>">
    <input type="hidden" name="NewEmail" value="[email protected]"/>
</form>
</iframe>
<script type="text/javascript">
    document.attackform.submit();
</script>

</asp:Content>

<asp:Content ID="Content3" ContentPlaceHolderID="FeaturedContent" runat="server">
</asp:Content>

<asp:Content ID="Content4" ContentPlaceHolderID="ScriptsSection" runat="server">
</asp:Content>
Our page helpfully announces its ill intent, which of course a real attack would not do. This page contains a hidden form that will not be visible to the user. It then uses Javascript to automatically submit this form when the page is loaded.
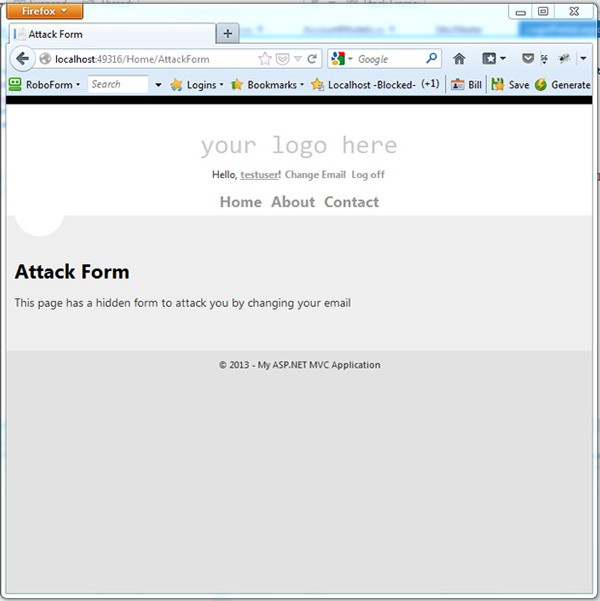
If you run the site again and go to the /Home/AttackForm page, you'll see that it loads up just fine, but with no outward indication that anything has happened. If you now go to the /Account/ChangeEmail page though, you'll see that your email has been changed to [email protected]. Here of course, we're intentionally making this obvious, but in a real attack, you might not notice that your email has been modified.
Mitigating Cross-Site Request Forgery
There are two primary ways to mitigate this type of attack. First, we can check the referral that the web request arrives from. This should tell the application when a form submission does not come from our server. This has two problems though. Many proxy servers remove this referral information, either intentionally to protect privacy or as a side effect, meaning a legitimate request could not contain this information. It's also possible for an attacker to fake the referral, though it does increase the complexity of the attack.
The most effective method is to require that a user specific token exists for each form submission. This token's value should be randomly generated each time the form is created and the form is only accepted if the token is included. If the token is missing or a different value is included, then we do not allow the form submission. This value can be stored either in the user's session state or in a cookie to allow us to verify the value when the form is submitted.
ASP.NET makes this process easy, as CSRF support is built in. To use it, we only need to make two changes to our website.
Fixing the Problem
First, we must add the unique token to the form to change the user's email when we display it. Update the form in the ChangeEmail.aspx view under /Account/ChangeForm:
<% using(Html.BeginForm()) { %>
    <%: Html.AntiForgeryToken() %>
    <%: Html.TextBoxFor(t=>t.NewEmail) %>
    <input type="submit" value="Change Email" />
<% } %>
This new line: <%: Html.AntiForgeryToken() %> tells ASP.NET to generate a token and place it as a hidden field in the form. In addition, the framework handles placing it in another location where the application can access it later to verify it.
If we load up the page now and look at the source, we'll see this new line, in the form, rendered to the browser. This is our token:
<form action="/Account/ChangeEmail" method="post"><input name="__RequestVerificationToken" type="hidden" value="g_ya1gqEbgEa4LDDVo_GWdGB8ko0Y91p98GTdKVKUocEBy-xAoH_Pok4iMXMxzZWX_IDDAXEkVwu3gc6UNzRKt8tjZ88I9t4NE8WT0UTT0o1" />
    <input id="NewEmail" name="NewEmail" type="text" value="" />
    <input type="submit" value="Change Email" />
</form>
We also need to make a change to our action to let it know that we've added this token and that it should verify the token before accepting the posted form.
Again this is simple in ASP.NET MVC. At the top of the action that we created to handle the posted form, the one with the [HttpPost] attribute added, we'll add another attribute named [ValidateAntiForgeryToken]. This makes the start of our action now look like the following:
    [HttpPost]
    [ValidateAntiForgeryToken]
    public ActionResult ChangeEmail(ChangeEmailModel model)
    {
        string username = WebSecurity.CurrentUserName;
        *rest of function omitted*
Let's test this out. First go to the /Account/ChangeEmail page and restore the email for your account to a known value. Then we can return to the /Home/AttackForm page and again the attack code attempts to change our email. If you return to the /Account/ChangeEmail page again, this time you'll see that your previously entered email is still safe and intact. The changes we made to our form and action have protected this page from the attack.
If you were to look at the attack form directly (easily done by removing the <iframe> tags around the form on the attack page, you'll see the error that actually happens when the attack form attempts to post.
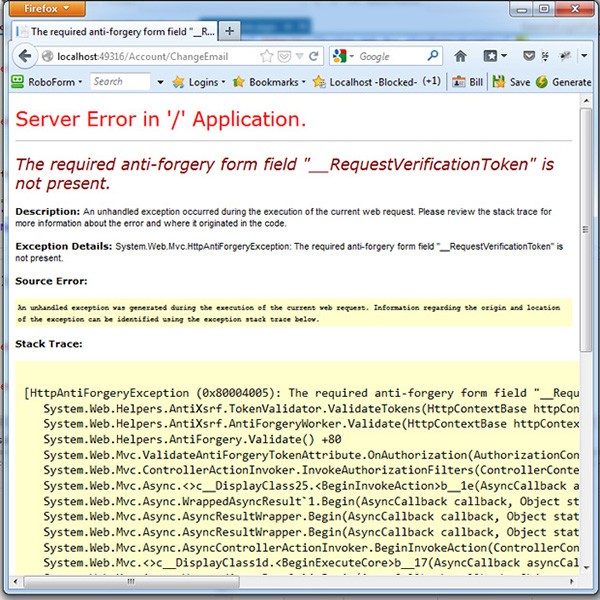
These two additional lines added to the site were enough to protect us from this error.
Conclusion
Cross-site request forgery is one of the most common and dangerous attacks on websites. They are often combined with other techniques which search out weaknesses in the site to make it easier to bring about the attack. Here I've demonstrated a way to secure your .NET site against this type of attack and make your website safer for your users.


Comments