If you're just now joining us, we've covered a lot of topics in this series – we've attempted to give a complete overview of the WordPress Settings API as well as its related functions. We've discussed settings, options, navigation, and menus. We've also been working through practical examples employing each of the topics we've discussed.
We're almost done. In the final two articles in this series, we're going to take a look at sanitization, validation, and the basic input elements that we can use in our WordPress plugins and themes.
Before we get started: This article assumes that you've been following along with the rest of the series, have a working copy of the sample code installed, and are now relatively familiar with the Settings API and theme options. If you're uncertain about any of the above, I highly recommend reading the rest of the articles before diving into this post.
Understanding Validation and Sanitization
Before we begin writing any code, we need to understand exactly what it is that we're going to be accomplishing – namely, validation and sanitization. Simply put, these are the two aspects of safely writing and reading data from a WordPress options page and the underlying database.
We're going to dive much deeper into this as we look at each of the input types and work through the examples, but let's give some context to what we're actually going to be doing:
- Validation is the process by which we examine the data coming in from the options page – or, rather, the user input – and determine whether or not it's acceptable to save.
- Sanitization is the process by which we make sure that data coming out of the database is clean and properly formatted for rendering on the page.
Perhaps the most concise summary is that validation should be done prior to writing the data to the database and sanitization should be done between reading data from the database and sending it to the browser.
Often times, validation is related to saving data and sanitization is related to retrieving data, but it's also completely possible to sanitize data after it has passed validation to make sure that only clean data is being saved into the database. When we're working with our own code, it's easier to do this; however, we can't always depend on other developers to have sanitized their data so the responsibility of sanitizing all data coming out of the database falls on us.
Updating Our Project
In order to make it easy to fully understand validation and sanitization, let's introduce a new tab into our options page. If you've introduced a new top-level menu, this is also going to require that we add add a new submenu item, and update the options display tab. Let's take care of that now.
First, locate the sandbox_example_theme_menu function and add the following submenu item:
add_submenu_page(
	'sandbox_theme_menu',
	'Input Examples',
	'Input Examples',
	'administrator',
	'sandbox_theme_input_examples',
	create_function( null, 'sandbox_theme_display( "input_examples" );' )
);
Next, we need to go ahead and stub out a function that will create the group of options for our new settings tab. Assuming you've been following along with the series, this should be easy to follow:
function sandbox_theme_initialize_input_examples() {

	if( false == get_option( 'sandbox_theme_input_examples' ) ) {
		add_option( 'sandbox_theme_input_examples' );
	} // end if

} // end sandbox_theme_initialize_input_examples
add_action( 'admin_init', 'sandbox_theme_initialize_input_examples' );
Finally, we need to update the sandbox_theme_display function to render the tab and properly select it when being accessed either via the tabs or the submenu item. First, let's update the conditional that examines the query string and the function's arguments. Specifically, it needs to handle the case for the input examples. Update the conditional to look like this:
if( isset( $_GET[ 'tab' ] ) ) {
	$active_tab = $_GET[ 'tab' ];
} else if( $active_tab == 'social_options' ) {
	$active_tab = 'social_options';
} else if( $active_tab == 'input_examples' ) {
	$active_tab = 'input_examples';
} else {
	$active_tab = 'display_options';
} // end if/else
Next, we need to add a new tab to the navigation. Update the nav-tab-wrapper container to include this new anchor:
<a href="?page=sandbox_theme_options&tab=input_examples" class="nav-tab <?php echo $active_tab == 'input_examples' ? 'nav-tab-active' : ''; ?>">Input Examples</a>
Finally, we need to add one more conditional to the form element responsible for displaying the options. Update the conditional to look like this:
if( $active_tab == 'display_options' ) {

	settings_fields( 'sandbox_theme_display_options' );
	do_settings_sections( 'sandbox_theme_display_options' );

} elseif( $active_tab == 'social_options' ) {

	settings_fields( 'sandbox_theme_social_options' );
	do_settings_sections( 'sandbox_theme_social_options' );

} else {

	settings_fields( 'sandbox_theme_input_examples' );
	do_settings_sections( 'sandbox_theme_input_examples' );

} // end if/else
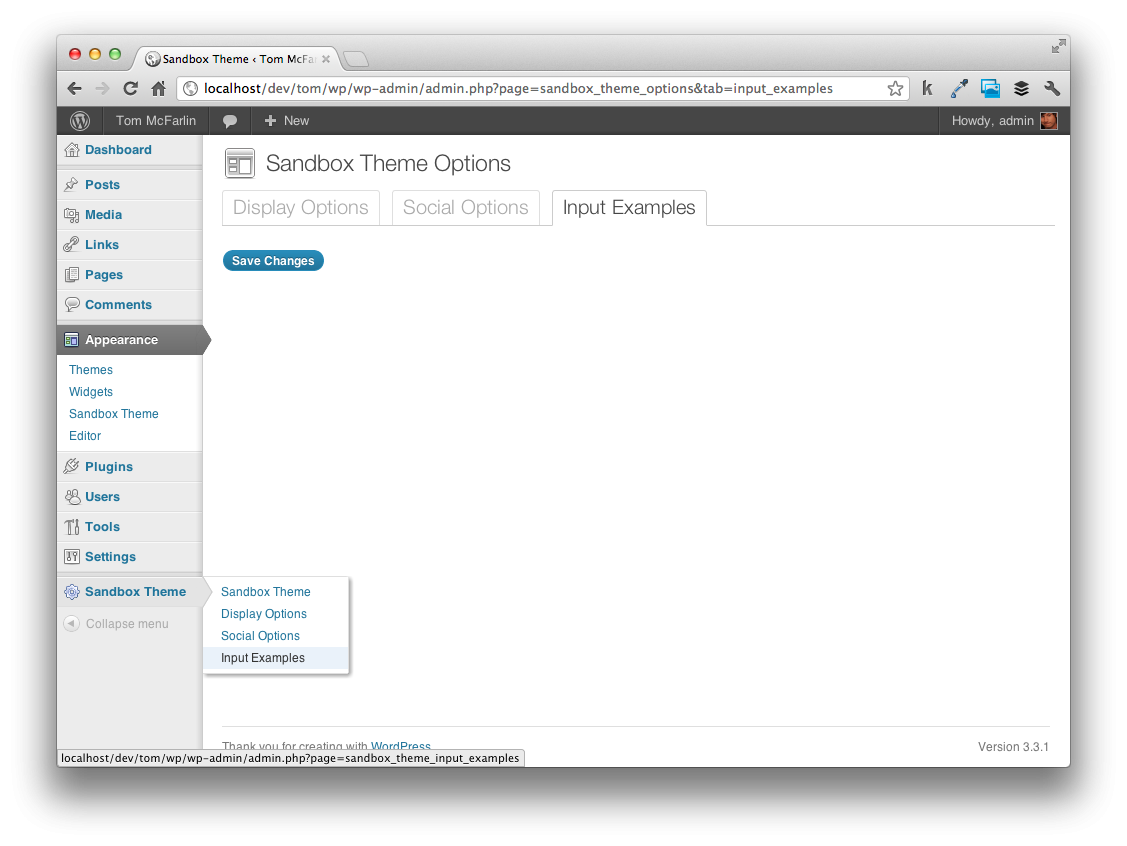
Assuming that you've included all of the code correctly, your admin panel should now look like this:
We're now ready to begin introducing new option elements and the validation and sanitization functionality. If the above code seems unclear, be sure to check out articles earlier in the series as settings, menu pages, and tabs have all been covered.
The Element Types
There are five basic element types that we can use for input in our WordPress options pages. These are inputs, textareas, checkboxes, radio buttons, and select boxes. In the remainder of this article, we're going to take a look at input elements and textareas and we'll review the last three in the final article in the series.
Input
Input elements are ideal for situations in which we need to capture a small amount of text from a user. This can be something like their name or phone number or something just slightly more complex like a URL, their email address, or an API key. In fact, we're actually already using input fields on the "Social Options" page when we're asking for the user's social network profile addresses.
Validating text input can be a complex operation especially if you want to enforce certain constraints. For example, phone numbers follow a specific format and if you're asking a user for his/her phone number, then you can setup a function that determines if the phone number adheres to the strict format. Obviously, we can't capture all of those use cases in our examples here as it's simply too wide a field.
Instead, what we're going to do is ensure that no malicious code gets written into the database. This means that when a user inputs text into our text box, we're going to remove all HTML tags and potentially problematic characters. But before doing that, let's introduce a new option, understand the markup, and then see what happens if we don't enforce any type of validation.
Go ahead and introduce the new section and field using the sandbox_theme_initialize_input_examples function:
add_settings_section(
	'input_examples_section',
	'Input Examples',
	'sandbox_input_examples_callback',
	'sandbox_theme_input_examples'
);

add_settings_field(
	'Input Element',
	'Input Element',
	'sandbox_input_element_callback',
	'sandbox_theme_input_examples',
	'input_examples_section'
);

register_setting(
	'sandbox_theme_input_examples',
	'sandbox_theme_input_examples'
);
Next, define the callback for the section:
function sandbox_input_examples_callback() {
	echo '<p>Provides examples of the five basic element types.</p>';
}
Lastly, introduce the actual input element that we're going to use to capture input:
function sandbox_input_element_callback() {

	$options = get_option( 'sandbox_theme_input_examples' );

	// Render the output
	echo '<input type="text" id="input_example" name="sandbox_theme_input_examples[input_example]" value="' . $options[ 'input_example' ] . '" />';

}
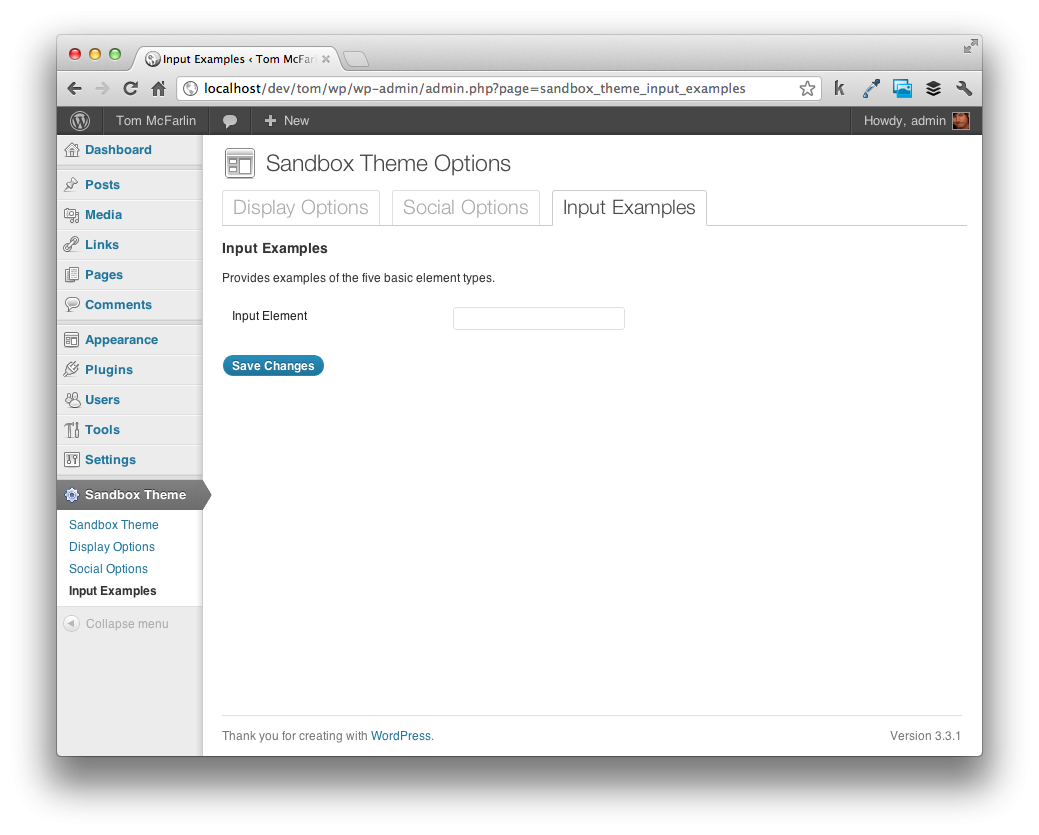
Your options page should now look like the following image:
Understanding the Markup
Up until this point, we've been creating our option elements and I've mentioned that we'd eventually discuss each of the attributes later in the series. This is the article in which we begin looking at the significance of the id and name attributes.
Note that at the start of the function, we read the options for this particular tab using WordPress' get_option function. This function will return the options in an array. The id attribute of the input element identifies this element's value in the array. The name attribute is the name of the array keyed with the ID. Make sense?
To be complete, think of it this way:
- WordPress will create an array based on the name of the section that you've defined. In this case, it's
sandbox_theme_input_examples - Each element will be identified by the
idattribute. In this example, it's "input_example" - You can read the value of this array by using
sandbox_theme_input_examples[input_example]
So, the id of the element represents the key of the value in the options array, the name attribute represents the name of the array with the key of the value in the array.
Adding Validation and Sanitization
At this point, it's completely possible to begin entering values into the input element and saving the option. Go ahead and try it – set a value, click "Save Changes," and you should see the input element display the value that you just created. But here's the problem: try pasting something like this into the input field:
<iframe src='http://wp.tutsplus.com' width='640' height='480'></iframe>
Next, hop over to index.php and add the following block of code:
<?php $input_examples = get_option('sandbox_theme_input_examples'); ?>
<?php echo $input_examples['input_example']; ?>
Refresh the homepage and you should notice an iframe showing up in the middle of your theme's homepage:
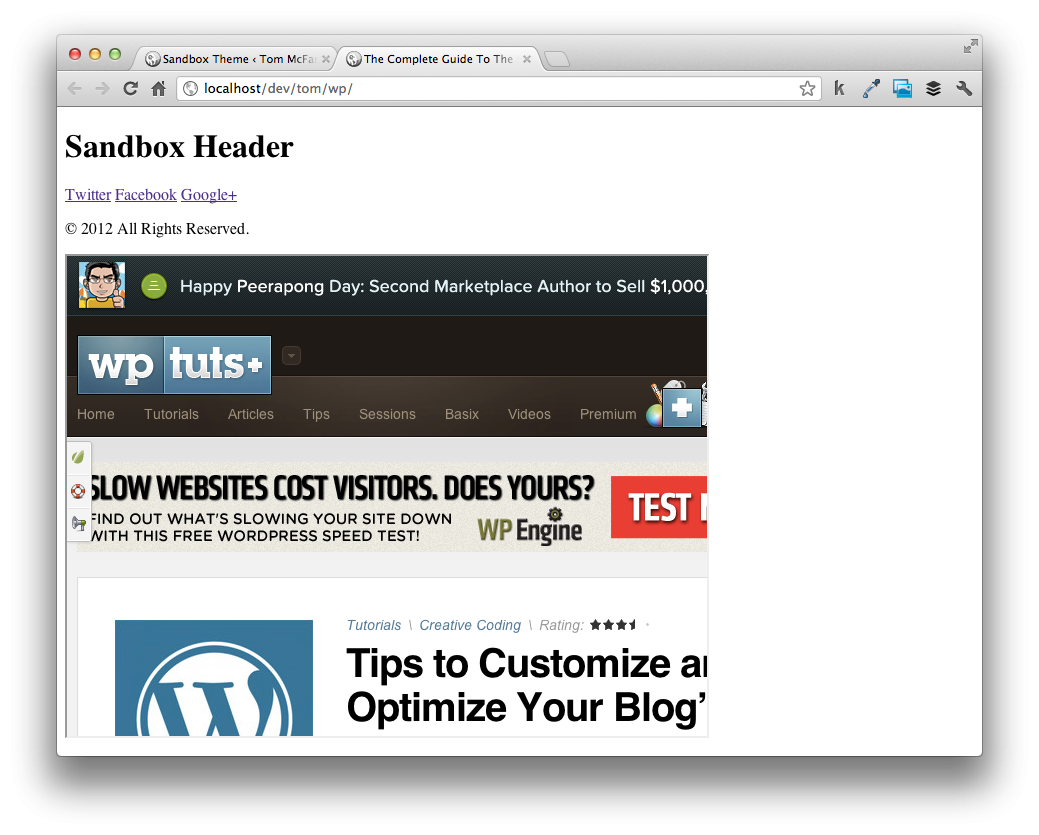
Seems like a relatively minor issue, but this is exactly the type of thing that we need to prevent. We don't want users to have that kind of control over the database, site pages, and so on. Of course, saving a simple iframe is a minor example – if users are able to insert JavaScript, then they can influence certain aspects of your entire site. Even more serious, if users are able to insert malicious SQL, your database could be compromised.
So let's introduce some validation. As mentioned above, we want to remove any markup and problematic characters. To do this, we need to first define a validation callback for our input element section. To do this, let's revisit the register_setting call and update it so that it looks like this:
register_setting(
	'sandbox_theme_input_examples',
	'sandbox_theme_input_examples',
	'sandbox_theme_validate_input_examples'
);
Next, let's define that function:
function sandbox_theme_validate_input_examples( $input ) {
} // end sandbox_theme_validate_input_examples
Notice that this function accepts a single parameter that we've named input. This argument represents the unvalidated set of options that WordPress is sending to this function from the options page that we just saved. Note also that as we add additional option elements, we'll be using this same function.
Creating a validation function typically follows three steps:
- Create an array that will be used to store the validated options
- Validate (and clean, when necessary) all incoming options
- Return the array that we created earlier
Let's do that now. Take a look at the following implementation paying close attention to the comments:
function sandbox_theme_validate_input_examples( $input ) {

	// Create our array for storing the validated options
	$output = array();

	// Loop through each of the incoming options
	foreach( $input as $key => $value ) {

		// Check to see if the current option has a value. If so, process it.
		if( isset( $input[$key] ) ) {

			// Strip all HTML and PHP tags and properly handle quoted strings
			$output[$key] = strip_tags( stripslashes( $input[ $key ] ) );

		} // end if

	} // end foreach

	// Return the array processing any additional functions filtered by this action
	return apply_filters( 'sandbox_theme_validate_input_examples', $output, $input );

}
Most of the code should be relatively straight-forward, but the two most important aspects come at the statement inside of the conditional and the return statement.
- We're using the
strip_tagsfunction, which is native to PHP, for removing all HTML and PHP tags - We're using the
stripslashesfunction, which is another native PHP function, which will properly handle quotation marks around a string.
Finally, we could have simply returned the $output array at the end of the function, but returning the result of the call to apply_filters is a best practice. Though it exceeds the scope of this article, it's worth noting that this statement basically calls any other functions that are filtered by this particular function before returning the value.
Now, try giving some sample input into the input element. Try providing a simple string, a phone number, an email address, a URL, a block of HTML, a line of JavaScript, and so on. Neat, huh?
Lastly, let's revisit index.php and provide one last change to demonstrate how we can perform output sanitization. Remember, it's good practice to sanitize options even if you're working with values that aren't coming from your own work.
Locate the line that reads:
<?php echo $input_examples[ 'input_example' ]; ?>
And update it so that it reads:
<?php echo sanitize_text_field( $input_examples[ 'input_example' ] ); ?>
The sanitize_text_field function is another WordPress native function that is specifically meant to sanitize user input from text fields or from the database.
We'll be looking at more throughout this article and the next, but there's a full listing of these functions available in the WordPress Codex.
Textarea
When looking at input elements, we covered a lot of ground. Luckily, many of the same principles apply for not only textareas, but the rest of the elements as well. As such, we shouldn't have to spend as much time with each element. This will free us up to look at some of the idiosyncrasies that come with each of the element types.
For now, let's introduce a textarea element. In our example, this particular element will allow users to enter a few sentences about themselves – think of it as a short bio. First, add the following call to the sandbox_theme_initialize_input_examples function:
add_settings_field(
	'Textarea Element',
	'Textarea Element',
	'sandbox_textarea_element_callback',
	'sandbox_theme_input_examples',
	'input_examples_section'
);
Next, let's define the callback necessary for rendering the textarea:
function sandbox_textarea_element_callback() {

	$options = get_option( 'sandbox_theme_input_examples' );

	// Render the output
	echo '<textarea id="textarea_example" name="sandbox_theme_input_examples[textarea_example]" rows="5" cols="50">' . $options[ 'textarea_example' ] . '</textarea>';

}
Notice that this call performs very similar to the input element defined above. Specifically, we've supplied an id attribute for giving this value a key in the options array and we've specified the exact name and key in the element's name attribute. We've also given the textarea a particular size, though this is purely arbitrary.
Recall that since this element belongs to the same section as the input element, it's processed using the same validation function. As such, we get the same level of validation for free. Try it out – attempt to save markup, scripts, and other types of code using the textarea.
Lastly, let's update the public-facing page of our theme to retrieve this value and properly sanitize it for display. In index.php, add the following block of code:
<?php if( $input_examples[ 'textarea_example' ] ) { ?>
	<?php echo sanitize_text_field( $input_examples[ 'textarea_example' ] ); ?>
<?php } // end if ?>
Though it's practically the same thing as the input field, we need to make sure that we're complete in our validation and sanitization.
Conclusion
Though we only looked at two types of elements, we covered a lot of ground. In addition to bringing our theme up-to-date, we've also implemented basic validation and having begun exploring the sanitization features of WordPress.
In the final article, we'll take a look at the remaining three element types and how to manage them using validation and sanitization. In the meantime, experiment with some of what we covered here and remember to review the related source articles linked at the bottom of the post.

Comments