
Piwik may be the most polished open source analytics tool you've never heard of. Not only has it had more than two million downloads, it has a rich set of features and excellent documentation. This tutorial will describe how to install and use it to track web traffic to your own sites.
If you prefer to pay to have someone else run it for you, they offer several cloud-based options. Piwik offers a 30 day free trial with $65 monthly pricing afterwards. There's also a community of paid consultants you can hire to assist you.
Benefits to Hosting Your Own Analytics
I've been a long-time user of freemium, cloud-service analytics provider Statcounter. I like being able to see specific user activity and IP address traffic. While Google Analytics doesn't provide this information, Statcounter lacks many of the features that Google Analytics provides for free.
Enter Piwik, a mature, well-documented, full-featured open source analytics product written in PHP; it even offers free mobile applications for iOS and Android.

The team has upcoming plans to offer a tool to migrate Google Analytics data to Piwik in 2015.
Installing Piwik on Your Own Server
Piwik runs on any modern LAMP-based server configuration. If you'd like, you can begin with my generic Ubuntu LAMP installation here.
Then, follow my installation instructions below and/or watch the installation video:
First, let's download the open source Piwik code and create a web directory for your dashboard:
mkdir /var/www/piwik
cd /var/www/piwik
sudo wget http://builds.piwik.org/piwik.zip
sudo unzip piwik.zip
sudo rm piwik.zip
sudo rm How\ to\ install\ Piwik.html
Change the ownership and permissions appropriate to your web server:
chown -R www-data:www-data /var/www/piwik
sudo mkdir /var/www/piwik/tmp
sudo mkdir /var/www/piwik/tmp/assets/
sudo mkdir /var/www/piwik/tmp/cache/
sudo mkdir /var/www/piwik/tmp/logs/
sudo mkdir /var/www/piwik/tmp/tcpdf/
sudo mkdir /var/www/piwik/tmp/templates_c/
sudo chmod  -R 0755 /var/www/piwik/tmp
sudo chmod  -R 0755 /var/www/piwik/tmp/assets/
sudo chmod  -R 0755 /var/www/piwik/tmp/cache/
sudo chmod  -R 0755 /var/www/piwik/tmp/logs/
sudo chmod  -R 0755 /var/www/piwik/tmp/tcpdf/
sudo chmod  -R 0755 /var/www/piwik/tmp/templates_c/
Create an Apache site configuration file and paste the Virtual Host definition below into it. Then, enable the site.
cd /etc/apache2/sites-available/
sudo nano stats.conf
sudo a2ensite stats.conf
Paste in and customize the virtual host definition for your Piwik site as shown below:
<VirtualHost *:80>
   ServerName piwik.yourdomain.com
   DocumentRoot /var/www/piwik
   DirectoryIndex index.php
   <Directory /var/www/piwik/>
      AllowOverride All
      Order Deny,Allow
      Allow from all
   </Directory>
</VirtualHost>
Setting Up Piwik
You can follow the Piwik five minute installation guide if you'd like more details. The installation wizard you should see on your site is quite simple:

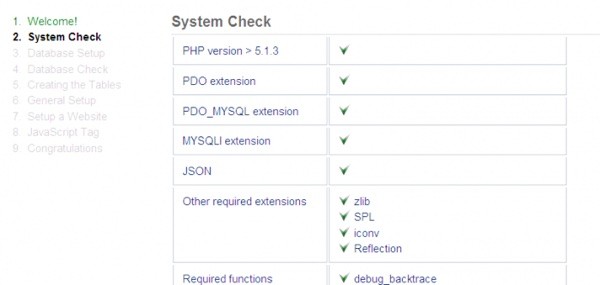
It performs a system check, which should pass if you followed my LAMP configuration guide:
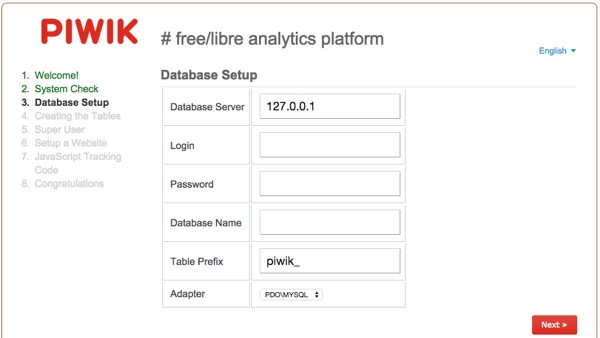
Enter in the database permissions that you created from the configuration guide—when you created your MySQL database:
You should see this:

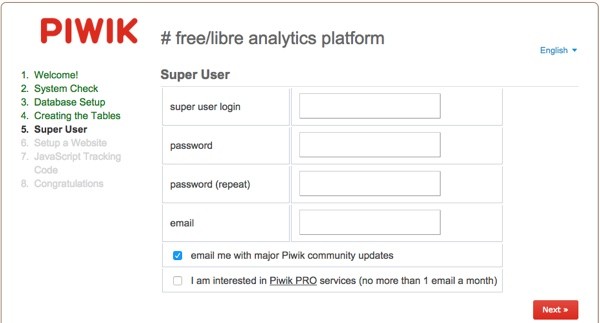
Specify your administrator or superuser login credentials:
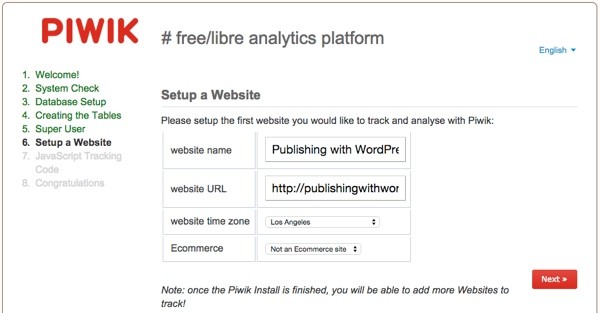
Now, you can add your first website to track:
Keep in mind that the site isn't actively tracking yet. We'll do that below.
If you log out, you'll be greeted with the Piwik sign-in. Enter your administrative credentials chosen above:
Enabling Tracking From Your Sites
There are a couple of ways to enable tracking on your website.
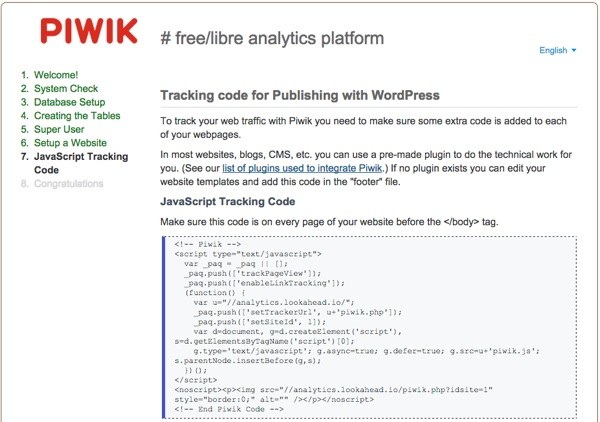
Embedding JavaScript
Just like with Google Analytics, you can paste the Piwik JavaScript into your website code:
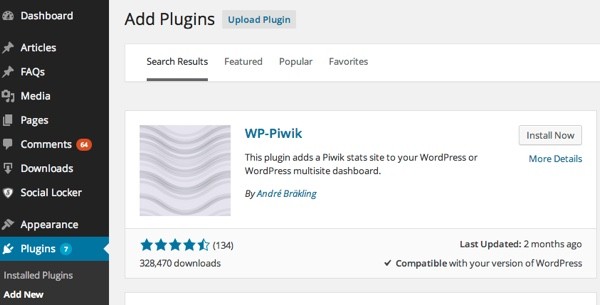
WordPress Plugin
Or, you can install the WP-Piwik plugin:
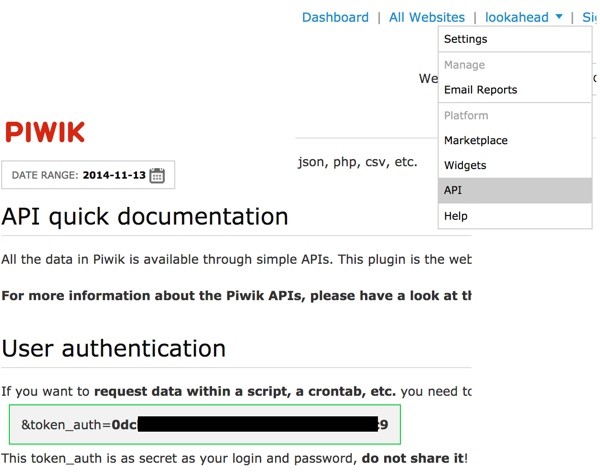
Next, visit your Piwik API settings and copy your authentication token—just the parameter value (mine is blacked out below).
Visit the WordPress WP-Piwik Settings page and provide your Piwik URL, the domain you set up to host Piwik, and the auth token.
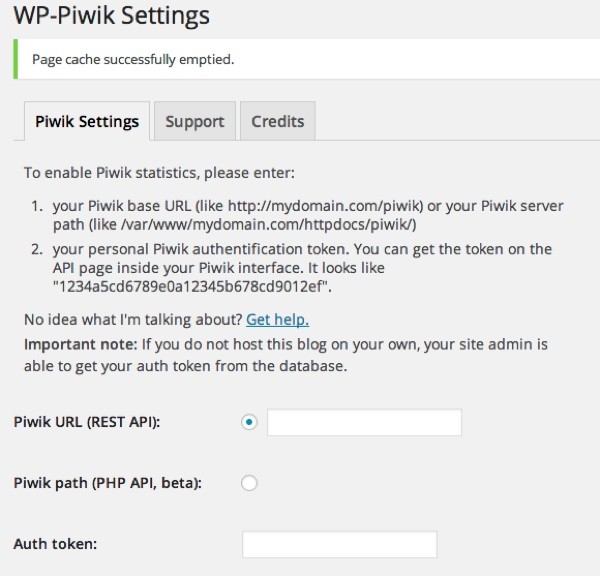
Don't forget to visit the Tracking tab under settings to turn on the tracking code on your WordPress site:
The Piwik Dashboard
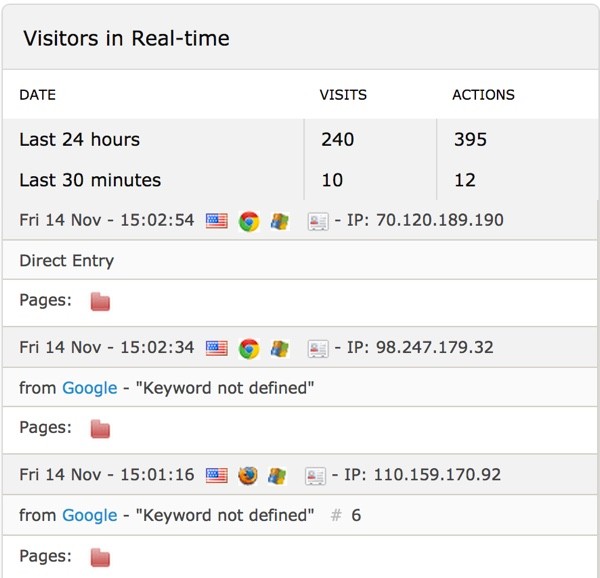
You should be able to see data coming in immediately from the real-time dashboard panel:
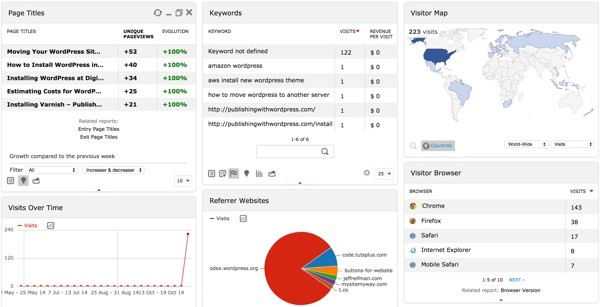
Once Piwik's been collecting data for a few days, you should see something like this in the Piwik Dashboard when you log in:
All the sites you've added can be viewed at a glance:

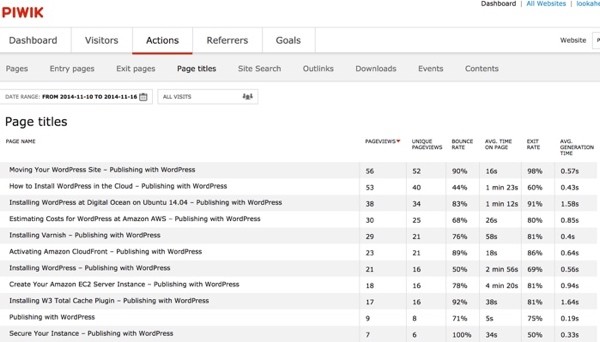
Here's what a summary of traffic by page title looks like:
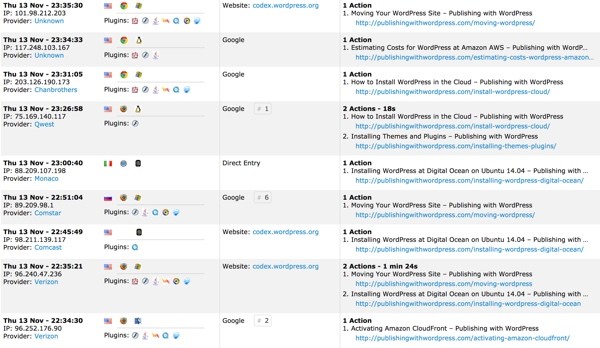
Here's a visitor log for all traffic:
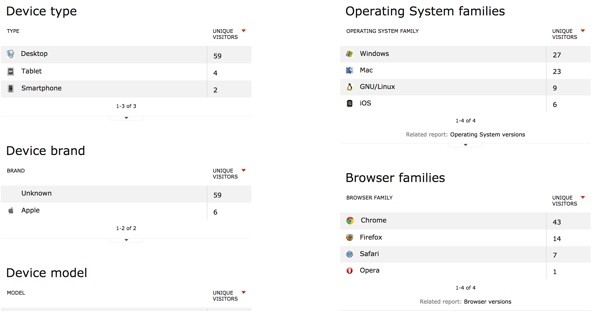
And Piwik has a variety of other features such as device, operating system and browser statistics:
The Piwik administration settings are well designed and very thorough. It's unusually good for an open source project:
Piwik Mobile Applications
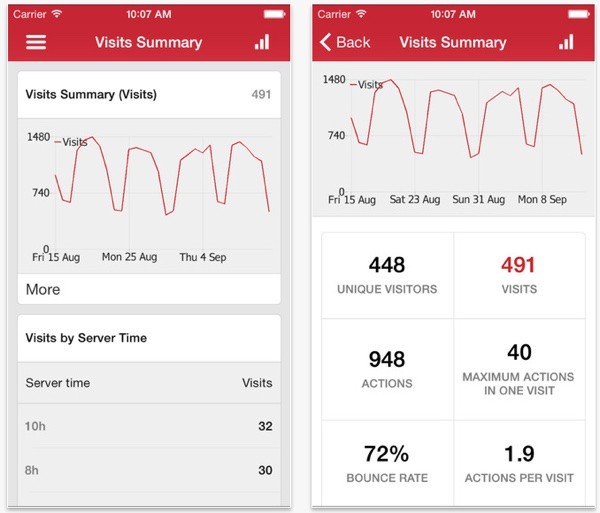
There are also free Piwik mobile apps available at the AppStore and Google Play, so you can keep up with your site traffic on the go more easily:
Special Considerations
Piwik has a wide variety of capabilities. Here are a few things you may wish to update in your own system.
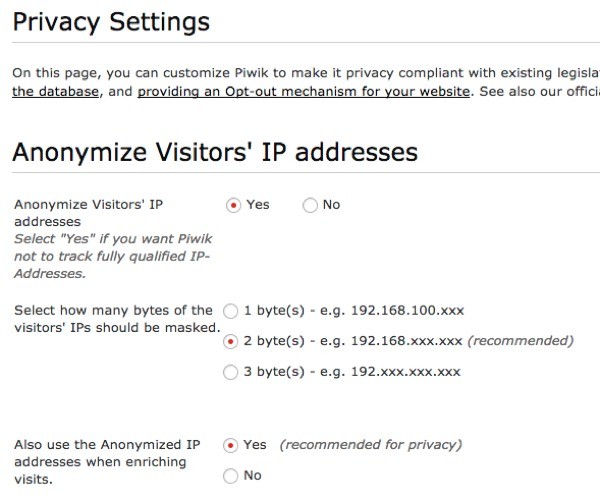
Anonymizing IP Addresses
You can change how much of IP addresses Piwik collects—this affects the relative privacy of your users:
Excluding Your Visits
You can set a cookie on your browser to prevent Piwik from adding traffic of your own editing and browsing from being counted:

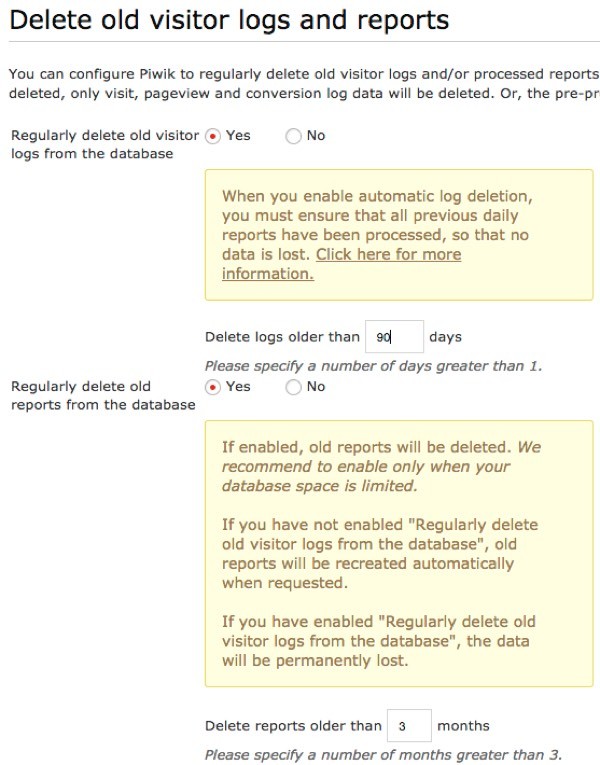
Rolling Up Database Logs
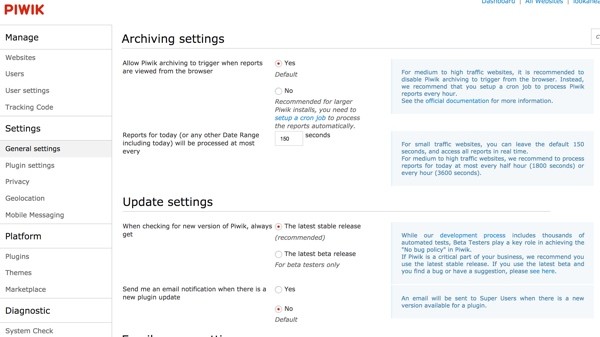
You can also set up Piwik to automatically roll up its logs and reports, to prevent the database from growing too large over time:
Where to Go From Here
Hopefully you've found Piwik useful and interesting. The team has a variety of ways for you to learn more and engage with its community:
I've been impressed with the clean design and relatively robust feature set provided by this free, open source project.
If you have any questions or suggestions, please post them in the comments. If you'd like to keep up on my future Tuts+ tutorials and other series, please visit my instructor page or follow @reifman.

Comments