This is the second tutorial in a series focusing on encrypting your email. The first tutorial introduced the general concepts of encryption and how they can be used to secure and authenticate our emails. In this tutorial, I'll guide you through installing encryption software on your computer and getting started sending your first messages. For this episode, we'll use GPGTools for Mac OS X, an integration of open-source GnuPG.
In addition to reading the first episode, you may want to check out the Electronic Frontier Foundation's The Surveillance Self-Defense Guide and their explainer, An Introduction to Public Key Cryptography and PGP. They also have a guide for Windows users: How to Use PGP for Windows PC.
In upcoming episodes, we'll explore encrypting browser-based email and strengthening the "Web of Trust", and then we'll switch topics a bit to encrypting your Internet activities with use of a VPN. Finally, as part of the series on managing your digital assets after your death, we'll use what we've learned to create a secure cache of important information for your descendants in case of emergency.
As always, I do participate in the discussions below. If you have a question or topic suggestion, please post a comment below. You can also follow me on Twitter @reifman or email me directly.
What Is GPGTools?
The GPGTools suite integrates the open-source GnuPG public key support into the Mac OS X operating system to make common, everyday uses of encryption easy for the rest of us. GPGTools consists primarily of three components:
- GPG Keychain: allows you to manage your own PGP keys and public keys from acquaintances to encrypt and decrypt messages.
- Plugin for Apple Mail: allows you to encrypt and sign outbound messages and decrypt and verify inbound messages.
- GPG Services: allows third-party OS X applications to leverage PGP features such as Thunderbird.
Getting Started With GPGTools
Let's walk through how to begin using GPGTools and send our first encrypted message.
Download and Verify the Tools
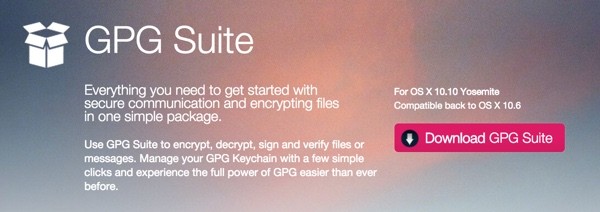
First, visit the GPGTools home page, scroll down and click the Download GPG Suite button:

As we mentioned in part one, if a surveillance authority or hacker wished to pose a man-in-the-middle attack, they could deliver a compromised version of the GPG download to your machine, exposing all of your messaging. So let's check that the digital signature on the download is the same as the one published on the website.
First, we'll check the checksum on our downloaded package from Terminal.
Jeff$ cd ~/Downloads
Jeff$ shasum GPG_Suite-2015.03-b6.dmg
6621fc1da5211650b6ef4aa959fdd385a6a5a6d5  GPG_Suite-2015.03-b6.dmg
Then, we'll peek at the checksum published on the home page:

Since they are the same, we know we received authentic, safe code. See also How to verify the downloaded GPG Suite?
Installation
Once verified, launch the disk image. You'll see the following in Finder:
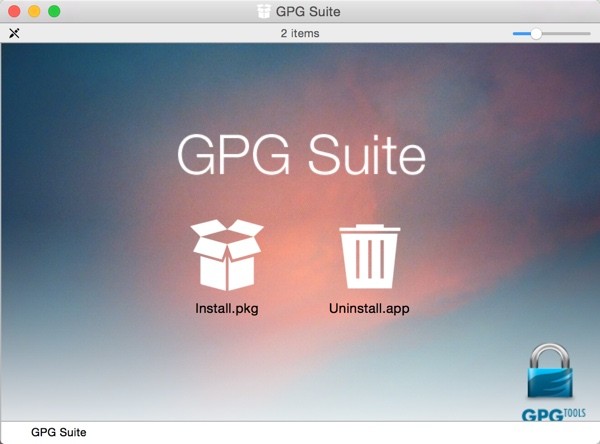
Double click the Install.pkg package to begin the installation.
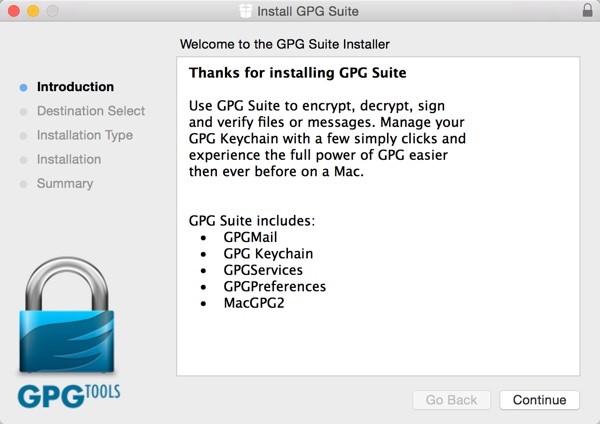
Follow the standard Mac OS X application installation wizard. Eventually, you'll see the success page:

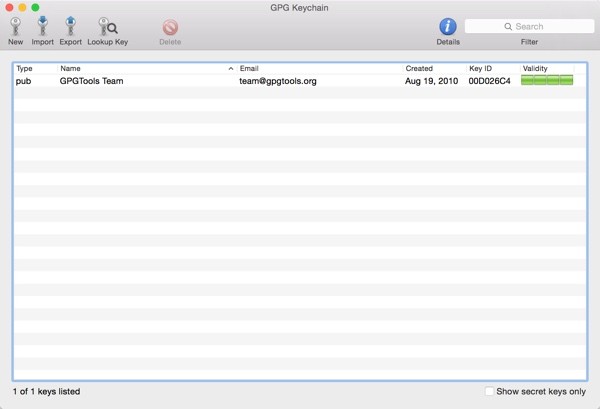
Launch the GPG Keychain application. This is the program that helps you track all of your colleague's public keys as well as your own public and private key:
Creating a Key
To begin signing and encrypting messages, we need to create our own key pair. Click on the New key icon. Fill in your name and email address and a complex passphrase. The Intercept recently published an ideal method of choosing a strong passphrase for your private key: Passphrases That You Can Memorize — But That Even the NSA Can't Guess:
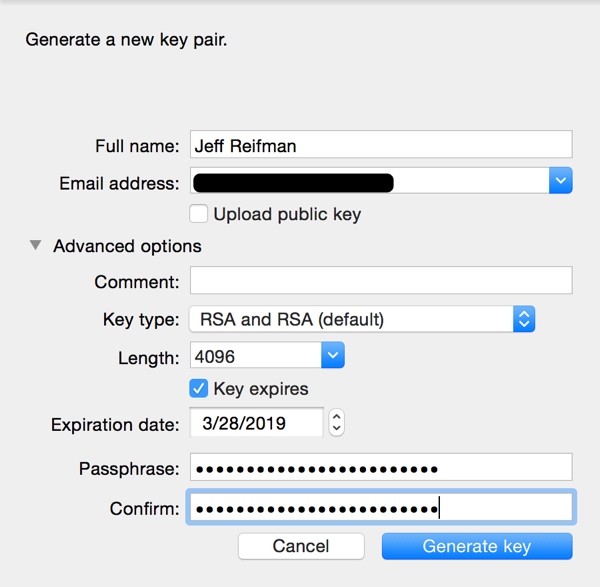
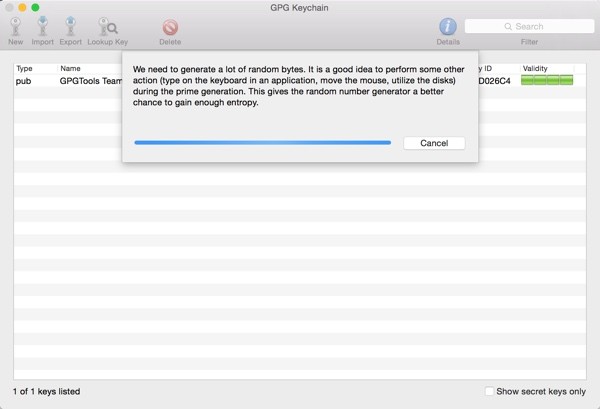
GPGTools will generate a key pair for you using... math, complicated math:
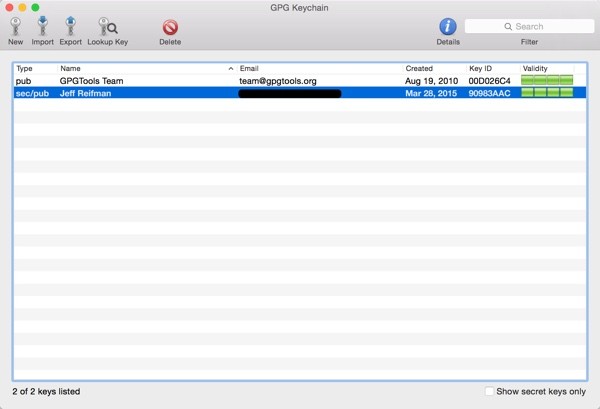
When it's done, it will display a listing for your key pair:
Now, we're almost ready to send encrypted and signed messages.
Signing and Sending an Encrypted Message
You can sign any message simply using your private key, but if you want to encrypt a message, you need the recipient's public key. I downloaded a friend's public key from a trusted key server. Alternately, you could upload a public key given to you on a USB flash drive.
Click Import and select the .asc key file to import it into the GPG Keychain:

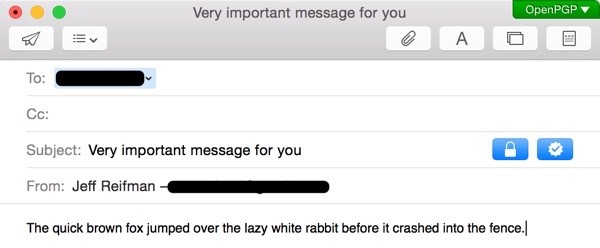
Once that's done, you can send a message to this user. Note the green OpenPGP badge in the upper right corner. And notice the blue lock and checkmark icons on the Subject line. These indicate that my outbound message will be encrypted and signed.
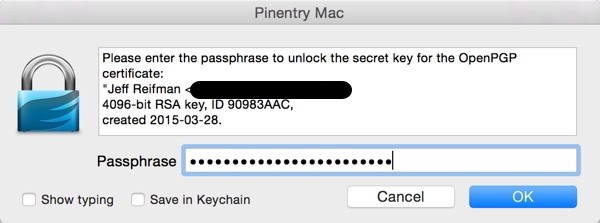
When I click send, GPGTools will ask me to enter my Passphrase for it to access my key pair:
If you look at the message in the Outbox, you'll see that the message is encrypted in a file called encrypted.asc:

Here's an example of that file's contents—gibberish except to the recipient with the proper private key:
-----BEGIN PGP MESSAGE-----
Comment: GPGTools - https://gpgtools.org

hQIOAwfq5Jrby+ZxEAf8CCTvId9rb2iBRKU89YGAjYVEFLcTXR7HStgrEmjkm44m
XUcgRjnuinynE3V4dlaxWPqwNWRu76QmZZ1q+70BJIFwbVPOfgmLjKqm3ZwwU//v
TDcCAC/DqZKmPgVb72xPb4YhVp6milPALWM5VJGJ2ChK83Ne9IOjygzdBsCEAvzF
cfuqBbha7WBQXClt2ZZfZNFJldotTJOtI7HDdojKpc7zNM1II6lOF6byMFv66krD
ujAK5SMVhSHZKY/9baWF4/bQpEWdG3xHxy+Dgf7W6tqffIx12n2ukV3a1VgITaMr
2bPmCQFwfvfwdGM1g6kEBETsZBlK1ApluJtv/1KwZQf+OZAinW9dsxljcH7fBW3s
bisx8EZYzqUqTaCKbrB9oiuJSPv5gvWYbGUkjvPNaYpP/QWcT0w2+RiRa8FzsN94
m7JaCu0pfZCUa5Zv1xeU2qDOMSsE/mKnTYTq3E1CJAeUvzhZaWnvNVWR+XVMSQDw
6ZxheticQ3gdn119qF5c1otYNFAbSfL8g8SaFbTa3IqayCe3mU/dqfiWK2fKwl3n
3pHNxLRYX75b8Je0zz4guOBPW/lARdtpuqojIpsDEPYnGj+VsSIEEYO5o76zEFD8
YGVr0w9PB2pu09B9IUOiXIB+EZzShNCy1H6EzXOD7DjCh/qWYMXH7vKxPz8JFemO
B4UCDAO1Q6o9AydgDQEP/jwGEfChQf+dLWuDfzJQ9X15HC5jcNQ2ovsnO6ZU6AAd
RcehtX6hiqNzNgrzEPl/p4rCguOTnTy2DdCZQMCESHKpDA2gHupbQEv9ZDI8ZA4m
PoYAICROuTFBpsHtqIWRtsrXd3BOd8W9ACP93xH+rpM46ky3dr4xwxAlKeCz/xMF
Mjyc6qgZ3Ht5MrUwU+Xo0Pf8d28Yj6PPwh2l4yC4CSViwcwA7fPVVTYtWTpgV7zA
hUV97PrcgaBAq0M1WLDecEOvdPf7hfbiCzmyDxtVBKzGPRAVi2bfhoOEHfVwUCvr
nD0Mv9RVIPGdH99zkkfHnR5fcO9K+H/Y8id0a5BXtpW+H14REdX77vgbLYDewezz
HMqJ+R8GaVGnyUXew8EZiqKc0QHOAiP9dpHjprocsTb/Eq9voZ1/jLdT8srtoHWJ
nO85HscKT/NCcnjJ5XpABpdApJKritzq/5JLL0OiqUA7RuPLe3y5vUyqE3WwJUxT
SRSrHp6+gLxpxFQeLrwxH37L3KxgF748khC7lMdOMC88Q3Jh27xItRDKRVPD1QKJ
T5X8PAME/JsTDqZ9AGu58iuZJu7+yitKvTXSdUZ3qyne8A2jGK0zBunRcuxR6OA3
g6aAyAfO5uVYyVx2ewo9jXtYfV5338WD2se33R3x8a40YBf2dSkFgkJJbib/m+hO
0uoBXdvMN36TS5nNQJ1qOLbcp32Rw0KBAyFQ+sNXFhxo6zOUHJ+00rmM1X39QngC
bqae1i9qFvamTTlLttEoLXf8uHknQAGjop37r+CGo8Nq5lyczPCmvgkigTEo9iaK
lioAiPc2NYsua0KZiYXWPr7CC25hO26FI9ithXMG6yPTmMknHUBTsDyUDryDib+o
l88lrvYkkJmGWdOLiMkyITySB1JH2qyw9DpLwrVlkylgQckGrJe3z3QzJMFH3EAe
k/skd70SjJNfy3di27frxoNuMrKBAw0PbI1Sdz7LHuDKi9eefvlS/iUoeajVh5H/
5O3383hz5MqmgAaAxBb660TGiLmWc5R5gmkFpGnHi/PKc9Hut/WWV/32vNjgAcdr
mWjc3I8RmJ4udYF02+oyhZVEyH1zmcgWHulMJz/meogb/fVCHvH4db3rVY2lZzWq
tzbfsVrD8Ta3Vke6I+nGQV+sJuf/sqbRqHNC7jQxh1oIs7u/MtGy3PhMuHJamYmp
9CLK2ewukxSjCv/9ag78jQu6QsWAYgZKHeZfYJSdiot3tixSFhsO7mS1Fqu6IBaS
khvDn8EfESrT5b36KQ7f3T61BO5/wIsCwWPlJdIBsPAuxo2D0TLiFDIQ46S2W1PR
mqahFVCOzhlanalale8Mx5zQtVEdUsgKf9oKSFW+UAtjaXjVwRPCEoTSVnUylCep
IspDxCb94Lp3AGatD5O0ymbkd42kvl0C5r8yXRvAV8N3DSIPm78SOEv6E6P0yl+G
fBSg6jX11X++zi1sER5aCfsBbUQNEKMXLe/4AYH0KpH7jUT+Ti/UQdgMdcVOJaoJ
VhakATO2mhIdFdcRnyZmJ4GOt8edxbihpKaMfYiXHktejSMDLxD8kbVyapSForqh
S3BGwhqKzzINTwhGseGKtIom2HUxC+y0hB3Jhyrj7R/BH2hmxotAb/bN46wV6Mm2
Pdz/k4iV8ssACzTcaVZwS/70YwZkfBc0Mys25wRS8rmL84Gi0jle2uZNF8LYq0bO
d9s4Kgsu5yWo4QWcjveAiBfQQDhYj1Zj18jMgf01resffy0izWDn/DCp/A0PPEWX
4Ssla7LP2ilRgmY4iUa9mj/a0Su+VW06duVVflvKHy1YKkCgJSqU7YFXMO6+Qk/O
hil73ofbmvrEBmLJ+XVLZmMonsBQKASRR8AuZTgf3raL3LkfoROnduIbbKBpnpA7
cGl4prPhGYJWt0GYdjb3tMGMX2VtS8gLpMPI3n88J5HW3tqpeSL2Hoj8t+juGy84
MTUr2ZYUz7ZsgUeM5vAbZTHMNKj5TdLdjBLXDyBH8YyQ7qf6WOozzPwmzkh8RVSm
bmu0k+Jmo9GdX/9PwLqexDwpC1cAsVmKQsFKDsRw
=XaKD
-----END PGP MESSAGE-----
Decrypting and Authenticating a Message
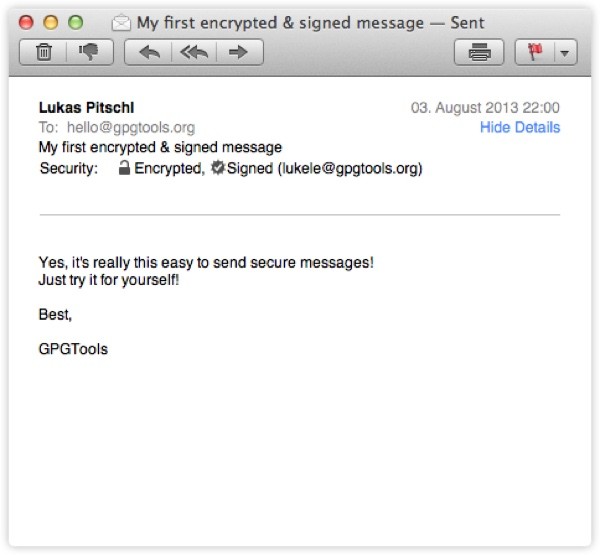
When you receive messages that have been encrypted with your public key, Apple Mail will use GPGTools to automatically verify the sender's digital signature and decrypt the message contents. Note the Security: Encrypted, Signed indicators:
What's Next?
I hope you've recruited a few friends to send and receive encrypted messages with. Coming up in the next tutorial, I'll guide you through using a new service which strengthens the Web of Trust, creating a sophisticated audit trail of authentication for the validity of public keys.
Please feel free to post your questions and comments below. You can also reach me on Twitter @reifman or email me directly. You can find my other tutorials by browsing my Tuts+ instructor page.


Comments