Introduction
At WWDC 2015, Apple officially announced iOS 9. In addition to many new features and improvements, this update also gives developers the opportunity to make the content of their apps more discoverable and accessible through Spotlight search. New APIs available in iOS 9 allow you to index any content or interface state within your app, making it accessible to your users through Spotlight. The three components of these new search APIs are:
- the
NSUserActivityclass, which is designed for viewed app content - the Core Spotlight framework, which is designed for any app content
- web markup, designed for apps that have content that is mirrored on a website
In this tutorial, I'm going to show you how you can use the NSUserActivity class and the Core Spotlight framework in your own applications.
Prerequisites
This tutorial requires that you are running Xcode 7 on OS X 10.10 or later. To follow along with me, you also need to download the starter project from GitHub.
1. Using NSUserActivity
In the first part of this tutorial, I'm going to show you how you can index an app's content through the NSUserActivity class. This API is the same one that is used for Handoff, a feature introduced in iOS 8 last year, and handles both saving and restoring an application's current state.
If you have not worked with NSUserActivity before, then I suggest you first read my my tutorial covering the basics of Handoff and NSUserActivity before continuing with this one.
Before writing any code, open the starter project and run the app in the iOS Simulator or on a test device. At this stage, you will see that the app simply displays a list of four TV shows and a detail page for each one.
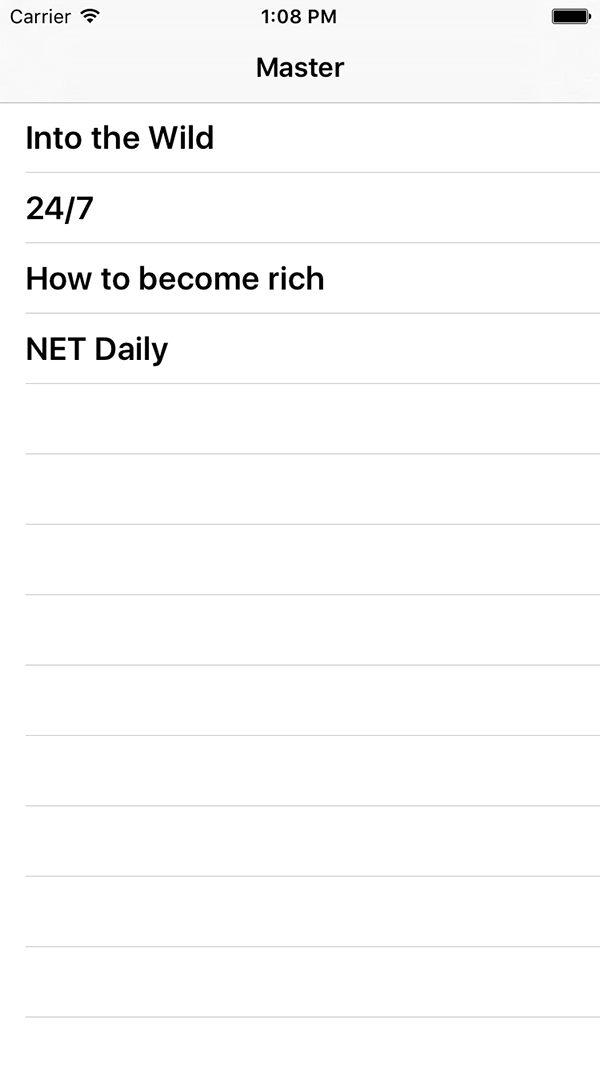

To begin, open the starter project and navigate to DetailViewController.swift. Replace the configureView method of the DetailViewController class with the following implementation:
func configureView() {
    // Update the user interface for the detail item.
    if self.nameLabel != nil && self.detailItem != nil {
        self.nameLabel.text = detailItem.name
        self.genreLabel.text = detailItem.genre

        let dateFormatter = NSDateFormatter()
        dateFormatter.timeStyle = .ShortStyle
        self.timeLabel.text = dateFormatter.stringFromDate(detailItem.time)

        let activity = NSUserActivity(activityType: "com.tutsplus.iOS-9-Search.displayShow")
        activity.userInfo = ["name": detailItem.name, "genre": detailItem.genre, "time": detailItem.time]
        activity.title = detailItem.name
        var keywords = detailItem.name.componentsSeparatedByString(" ")
        keywords.append(detailItem.genre)
        activity.keywords = Set(keywords)
        activity.eligibleForHandoff = false
        activity.eligibleForSearch = true
        //activity.eligibleForPublicIndexing = true
        //activity.expirationDate = NSDate()

        activity.becomeCurrent()
    }
}
The code that configures the labels in the view controller is unchanged, but let's go through the user activity code step by step:
- You create a new
NSUserActivityobject with the unique identifier com.tutsplus.iOS-9-Search.displayShow. The starter project has already been configured to use this identifier so be sure to leave this identifier unchanged. - You then assign a
userInfodictionary to the user activity. This will be used later to restore the state of the application. - You give the activity's
titleproperty a string value. This is what will show up in the Spotlight search results. - To ensure that the content is searchable by more than just its title, you also provide a set of keywords. In the above code snippet, the set of keywords includes each word of the show's name as well as its genre.
- Next, you set a number of properties of the
NSUserActivityobject to tell the operating system what you want this user activity to be used for. In this tutorial, we are only looking at the search component of the API so we disable Handoff and enable search. - Finally, you call the
becomeCurrentmethod on the user activity at which point it is automatically added to the device's index of search results.
In the above implementation, you probably noticed the two lines in comments. While we won't be using these properties in this tutorial, it's important to know what each property is used for.
- With the above implementation, a user activity and search result is created for each individual show only once the application has been opened. When you make your user activity
eligibleForPublicIndexing, Apple begins to monitor the usage and interaction of this particular activity from the user's search results. If the search result is engaged by many users, Apple promotes the user activity to its own cloud index. Once the user activity is in this cloud index, it is searchable by anyone who has installed your application, regardless of whether they have opened that particular content or not. This property should only be set totruefor activities that are accessible by all users of your application. - A user activity can also have an optional
expirationDate. When this property is set, your user activity will only show up in search results up until the specified date.
Now that you know how to create an NSUserActivity capable of displaying search results in Spotlight, you are ready to test it out. Build and run your app, and open up a few of the shows in your application. Once you have done this, go back to the home screen (press Command-Shift-H in the iOS Simulator) and swipe down or scroll to the far left screen to bring up the search view.
Start typing the title of one of the shows that you opened and you will see that it shows up in the search results as shown below.
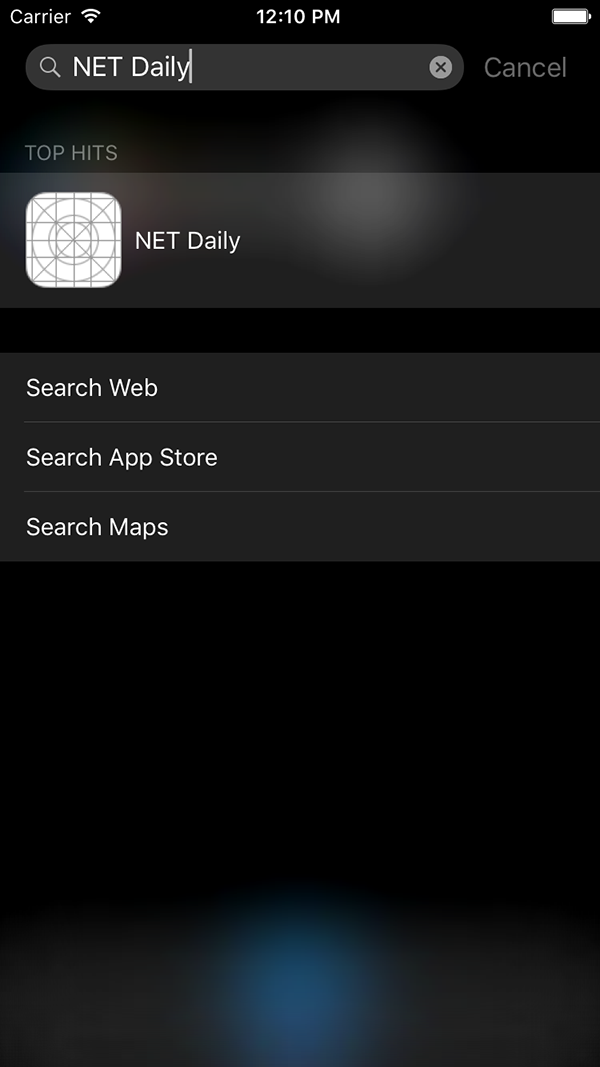
Alternatively, enter the genre of one of the shows you opened. Because of the keywords that you assigned to the user activity, this will also cause the show to be listed in the search results.
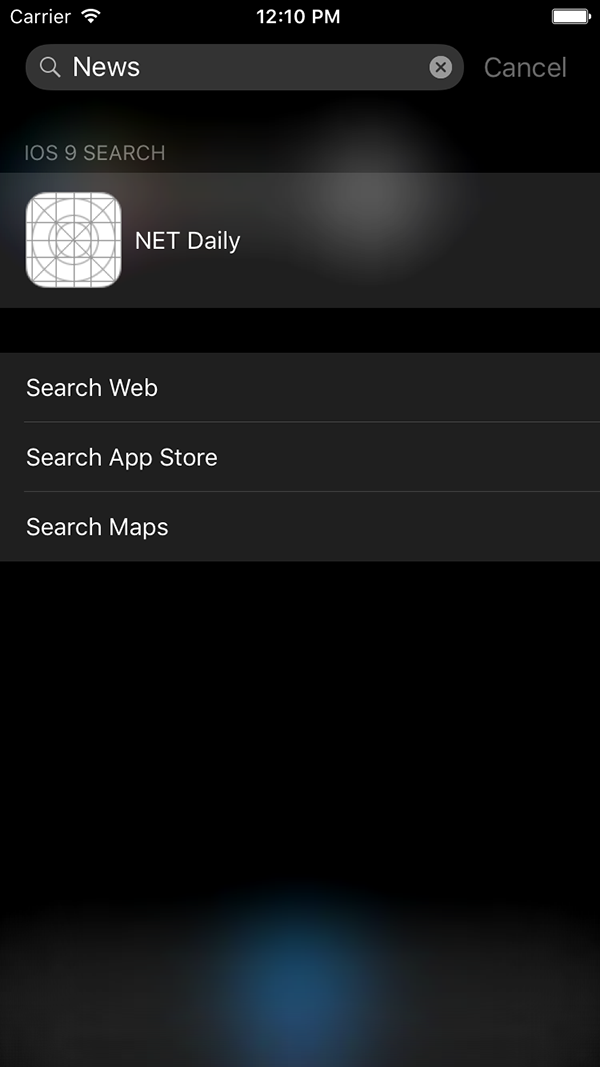
Your application's content is correctly indexed by the operating system and results are showing up in Spotlight. However, when you tap a search result, your application doesn't take the user to the respective search result. It merely launches the application.
Luckily, as with Handoff, you can use the NSUserActivity class to restore the correct state in your application. To make this work we need to implement two methods.
Implement the application(_:continueUserActivity:restorationHandler:) method in the AppDelegate class as shown below.
func application(application: UIApplication, continueUserActivity userActivity: NSUserActivity, restorationHandler: ([AnyObject]?) -> Void) -> Bool {
    let splitController = self.window?.rootViewController as! UISplitViewController
    let navigationController = splitController.viewControllers.first as! UINavigationController
    navigationController.topViewController?.restoreUserActivityState(userActivity)
    return true
}
Next, implement the restoreUserActivityState(_:) method in the MasterViewController class.
override func restoreUserActivityState(activity: NSUserActivity) {
    if let name = activity.userInfo?["name"] as? String,
        let genre = activity.userInfo?["genre"] as? String,
        let time = activity.userInfo?["time"] as? NSDate {
        let show = Show(name: name, genre: genre, time: time)
        self.showToRestore = show

        self.performSegueWithIdentifier("showDetail", sender: self)
    }
    else {
        let alert = UIAlertController(title: "Error", message: "Error retrieving information from userInfo:\n\(activity.userInfo)", preferredStyle: .Alert)
        alert.addAction(UIAlertAction(title: "Dismiss", style: .Cancel, handler: nil))

        self.presentViewController(alert, animated: true, completion: nil)
    }
}
At the time of writing, the latest version of Xcode 7 (Beta 3) contains an issue where the userInfo property of a user activity being restored can be empty. That is why I handle any errors and display an alert with the userInfo that is returned by the operating system.
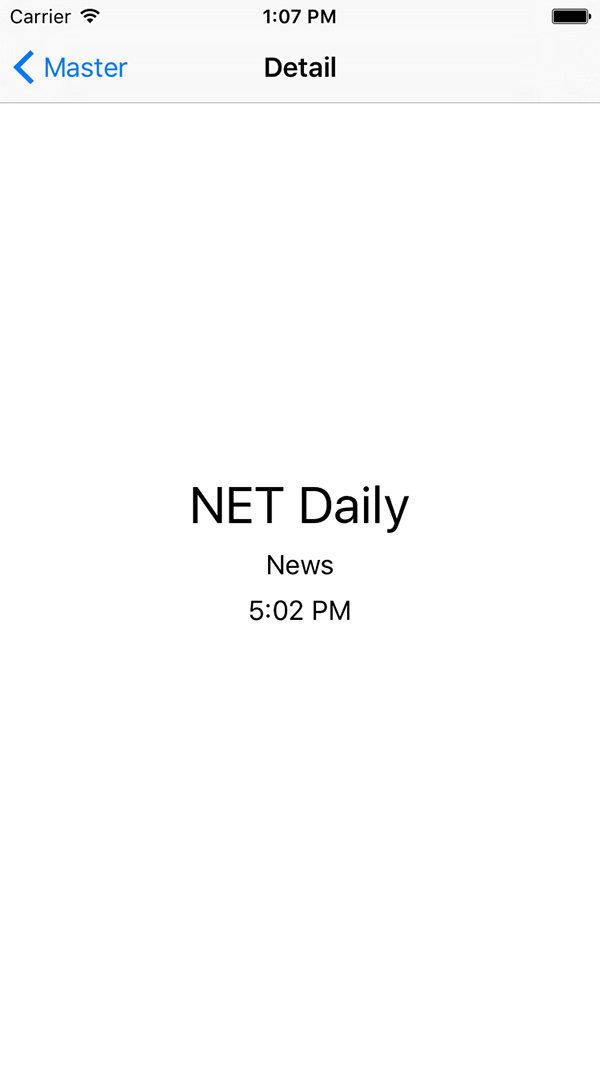
Build and run your app again, and search for a show. When you tap on a show in the search results, the app should take you straight to the detail view controller and display the current information for the show you tapped.
2. Using the Core Spotlight Framework
Another set of APIs available in iOS 9 to make your content searchable for users is the Core Spotlight framework. This framework has a database-style design and lets you provide even more information about the content that you want to be searchable.
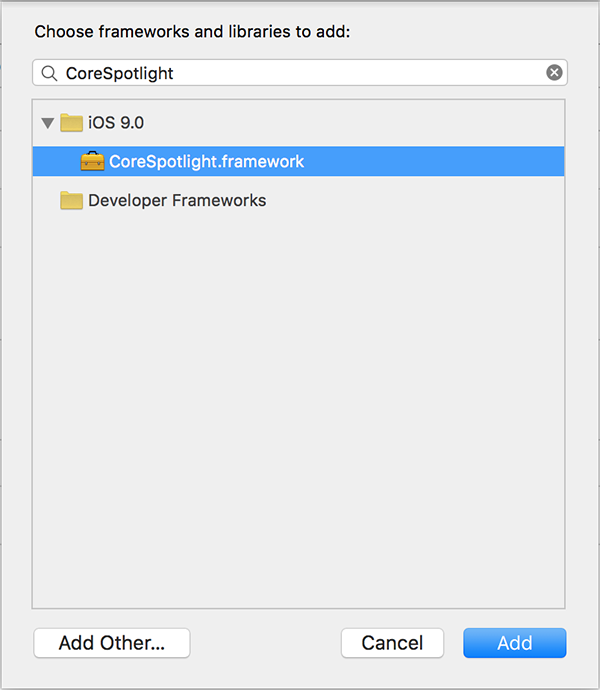
Before you can use the Core Spotlight framework, we need to link the project against the framework. In the Project Navigator, select the project and open the Build Phases tab at the top. Next, expand the Link Binary With Libraries section and click the plus button. In the menu that appears, search for CoreSpotlight and link your project against the framework. Repeat these steps for the MobileCoreServices framework.
Next, to ensure that the search results our app provides are from Core Spotlight, delete your app from your test device or the iOS Simulator and comment out the following line in the DetailViewController class:
activity.becomeCurrent()
Finally, open MasterViewController.swift and add the following lines before the Show structure definition:
import CoreSpotlight
import MobileCoreServices
Next, add the following code to the viewDidLoad method of the MasterViewController class:
var searchableItems: [CSSearchableItem] = []
for show in objects {
    let attributeSet = CSSearchableItemAttributeSet(itemContentType: kUTTypeItem as String)

    attributeSet.title = show.name

    let dateFormatter = NSDateFormatter()
    dateFormatter.timeStyle = .ShortStyle

    attributeSet.contentDescription = show.genre + "\n" + dateFormatter.stringFromDate(show.time)

    var keywords = show.name.componentsSeparatedByString(" ")
    keywords.append(show.genre)
    attributeSet.keywords = keywords

    let item = CSSearchableItem(uniqueIdentifier: show.name, domainIdentifier: "tv-shows", attributeSet: attributeSet)
    searchableItems.append(item)
}

CSSearchableIndex.defaultSearchableIndex().indexSearchableItems(searchableItems) { (error) -> Void in
    if error != nil {
        print(error?.localizedDescription)
    }
    else {
        // Items were indexed successfully
    }
}
Before we test this code, let's go through each step of the for loop.
- You create a
CSSearchableItemAttributeSetobject, passing in a content type for the item. If your search result links to a photo, for example, you would pass in thekUTTypeImageconstant. - You assign the show's name to the
titleproperty of the attribute set. Just like withNSUserActivity, this title is what will appear at the top of your search results. - Next, you create a descriptive string and assign this to the
contentDescriptionproperty of your searchable attribute set. This string will be displayed below the result's title in Spotlight. - You create an array of keywords form the search result just as you did with
NSUserActivity. - Lastly, you create a
CSSearchableItemwith a unique item identifier, unique domain identifier to group items together, and an attribute set. Unlike withNSUserActivity, which returns the user activity from the search result, the unique identifiers you use for aCSSearchableItemare the only information that you receive from the operating system when your search result is selected by the user. You need to use these identifiers to restore your app back to the correct state.
Once you have created a CSSearchableItem for the TV shows, you index them using the indexSearchableItems(_:completionHandler:) method on the default CSSearchableIndex object.
Build and run your app, and all of your shows will be indexed by Spotlight. Navigate to the search view and search for one of the shows.
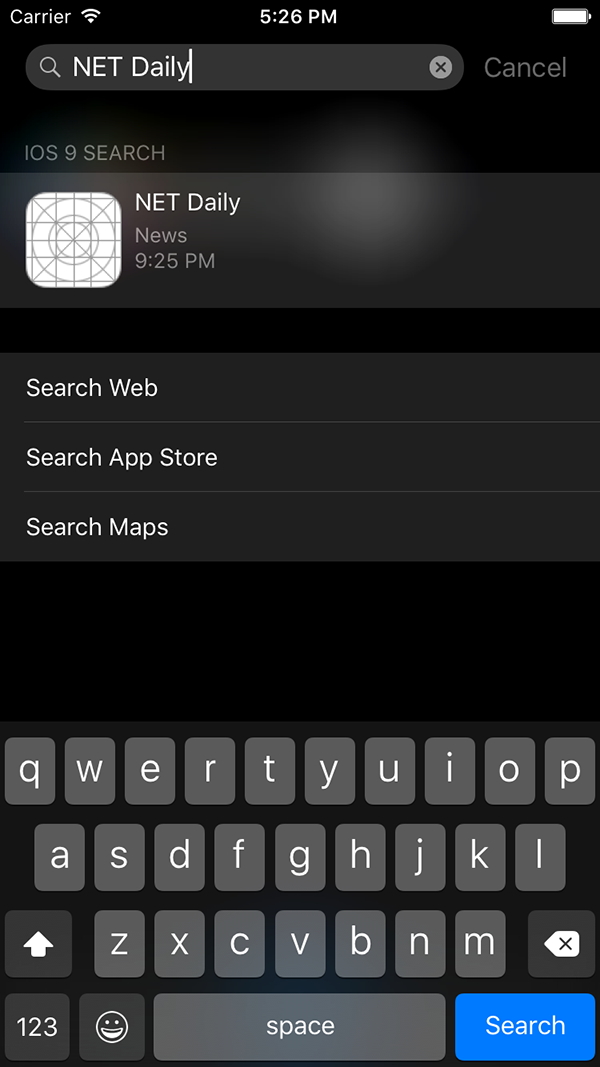
Core Spotlight search results are handled by the same methods as those from NSUserActivity, but the process is slightly different. When a CSSearchableItem is selected from the search results, the system creates an NSUserActivity object for you that contains the unique identifier of the selected item.
In your app delegate's application(_:continueUserActivity:restorationHandler:) method, you can use the following implementation to retrieve the information you need from a Core Spotlight search result:
if userActivity.activityType == CSSearchableItemActionType {
    if let identifier = userActivity.userInfo?[CSSearchableItemActivityIdentifier] as? String {

        //  Use identifier to display the correct content for this search result

        return true
    }
}
A good practice when indexing content from your app with the Core Spotlight framework is to also delete your items when they are no longer needed. The CSSearchableIndex class provides three methods to delete searchable items:
deleteAllSearchableItemsWithCompletionHandler(_:)deleteSearchableItemsWithDomainIdentifiers(_:completionHandler:)deleteSearchableItemsWithIdentifiers(_:completionHandler:)
As an example, add the following code to the end of the viewDidLoad method of the MasterViewController class:
CSSearchableIndex.defaultSearchableIndex().deleteSearchableItemsWithDomainIdentifiers(["tv-shows"]) { (error) -> Void in
    if error != nil {
        print(error?.localizedDescription)
    }
    else {
        // Items were deleted successfully
    }
}
Build and run your app one more time. When you try to search for any of your shows, no results are returned, because they have been deleted from the index.
3. Combining NSUserActivity and Core Spotlight
Another new addition to the NSUserActivity class in iOS 9 is the contentAttributeSet property. This property allows you to assign a CSSearchableItemAttributeSet, just like the ones you created earlier. This attribute set allows your search results for NSUserActivity objects to show the same amount of detail as Core Spotlight search results.
Start by adding the following imports at the top of DetailViewController.swift:
import CoreSpotlight
import MobileCoreServices
Next, update the configureView method in the DetailViewController class with the following implementation:
func configureView() {
    // Update the user interface for the detail item.
    if self.nameLabel != nil && self.detailItem != nil {
        self.nameLabel.text = detailItem.name
        self.genreLabel.text = detailItem.genre

        let dateFormatter = NSDateFormatter()
        dateFormatter.timeStyle = .ShortStyle
        self.timeLabel.text = dateFormatter.stringFromDate(detailItem.time)

        let activity = NSUserActivity(activityType: "com.tutsplus.iOS-9-Search.displayShow")
        activity.userInfo = ["name": detailItem.name, "genre": detailItem.genre, "time": detailItem.time]
        activity.title = detailItem.name
        var keywords = detailItem.name.componentsSeparatedByString(" ")
        keywords.append(detailItem.genre)
        activity.keywords = Set(keywords)
        activity.eligibleForHandoff = false
        activity.eligibleForSearch = true
        //activity.eligibleForPublicIndexing = true
        //activity.expirationDate = NSDate()

        let attributeSet = CSSearchableItemAttributeSet(itemContentType: kUTTypeItem as String)
        attributeSet.title = detailItem.name
        attributeSet.contentDescription = detailItem.genre + "\n" + dateFormatter.stringFromDate(detailItem.time)

        activity.becomeCurrent()
    }
}
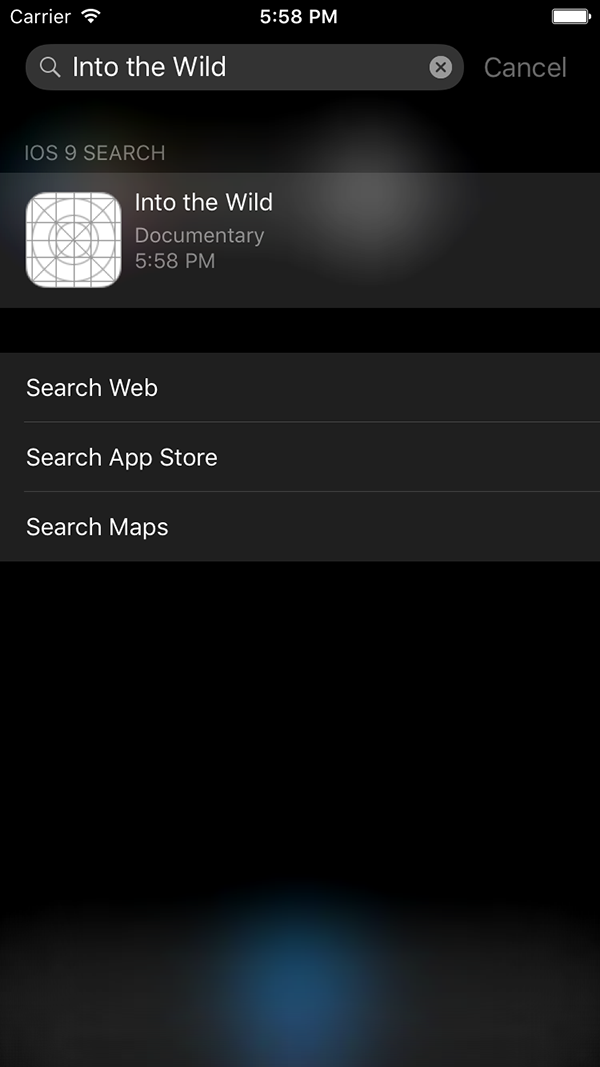
Build and run your app one final time, and open a few of your shows. When you now search for a show, you will see that your results, created with NSUserActivity, contain the same level of detail as the Core Spotlight search results.
Conclusion
In this tutorial, you learned how to make your application's content accessible through iOS Spotlight by using the NSUserActivity class and the Core Spotlight framework. I also showed you how to index content from your application using both APIs and how to restore your application's state when a search result is selected by the user.
The new search APIs introduced with iOS 9 are very easy to use and make your application's content easier to discover and more accessible to your application's users. As always, if you have any comments or questions, leave them in the comments below.


Comments