This is a short and easy step-by-step guide to using the jQuery menu plugin, Superfish, developed by Joel Birch.
Step 1 Downloading
Download the Superfish pack zip from the official website.
Step 2 File Structure
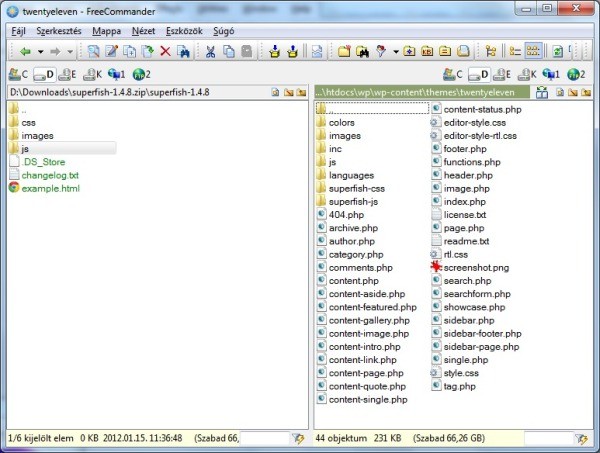
Copy the CSS and JS to the theme's folder. For our tut, the target is the twentyeleven folder. The directory names are superfish-css and superfish-js.
Step 3 Import Commands
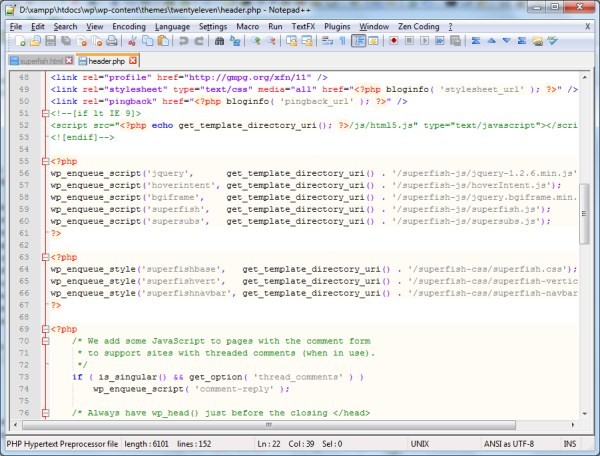
Import the CSS & JS files to header.php with the wp_enqueue_script and wp_enqueue_style WordPress functions.
<?php
add_action( 'wp_enqueue_scripts', 'superfish_libs' );
function superfish_libs()
{
	// Register each script, setting appropriate dependencies
	wp_register_script('hoverintent', get_template_directory_uri() . '/superfish-js/hoverIntent.js');
	wp_register_script('bgiframe',    get_template_directory_uri() . '/superfish-js/jquery.bgiframe.min.js');
	wp_register_script('superfish',   get_template_directory_uri() . '/superfish-js/superfish.js', array( 'jquery', 'hoverintent', 'bgiframe' ));
	wp_register_script('supersubs',   get_template_directory_uri() . '/superfish-js/supersubs.js', array( 'superfish' ));

	// Enqueue supersubs, we don't need to enqueue any others in this case, as the dependencies take care of it for us
	wp_enqueue_script('supersubs');

	// Register each style, setting appropriate dependencies
	wp_register_style('superfishbase',   get_template_directory_uri() . '/superfish-css/superfish.css');
	wp_register_style('superfishvert',   get_template_directory_uri() . '/superfish-css/superfish-vertical.css', array( 'superfishbase' ));
	wp_register_style('superfishnavbar', get_template_directory_uri() . '/superfish-css/superfish-navbar.css', array( 'superfishvert' ));

	// Enqueue superfishnavbar, we don't need to enqueue any others in this case either, as the dependencies take care of it
	wp_enqueue_style('superfishnavbar');
}
?>
Step 4 Class Setting
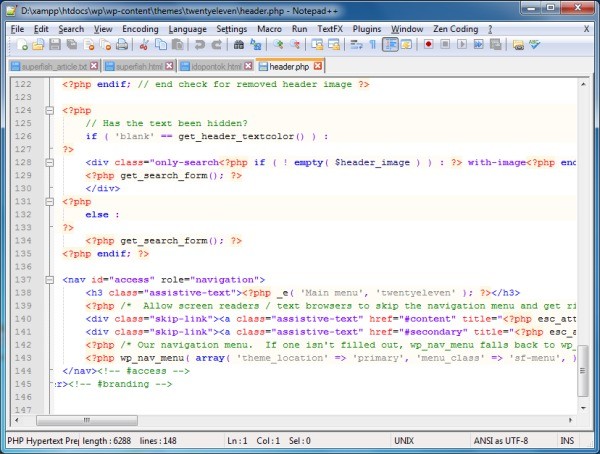
Search the line shown below and change as indicated. This way, we make WordPress to use the Superfish version for the main menu:
// Change from this:
<?php wp_nav_menu( array( 'theme_location' => 'primary' ) ); ?>

// To this:
<?php wp_nav_menu( array( 'theme_location' => 'primary', 'menu_class' => 'sf-menu', ) ); ?>
Step 5 Creating a Menu
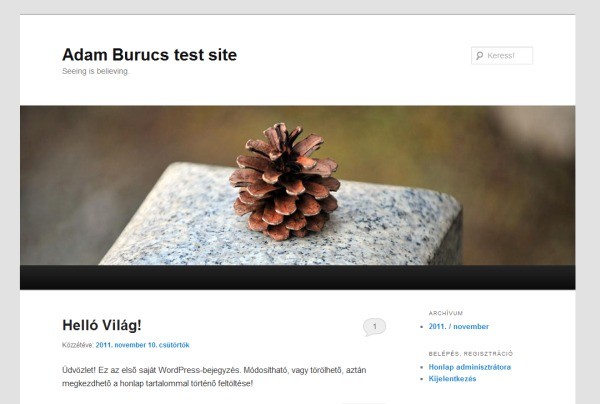
Make and save a menu system in the WordPress admin, then it will show up in the appropriate part of the site. The picture below shows the site before the menu added:
Step 6 Menu Added
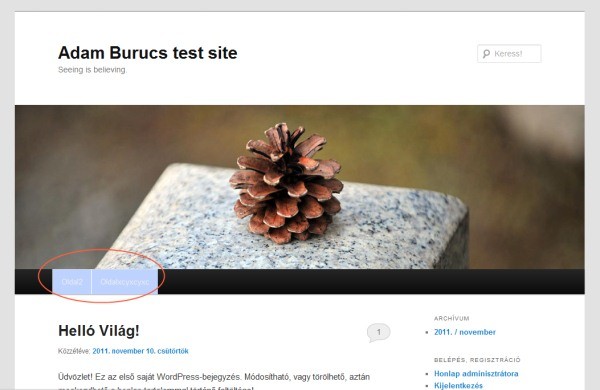
After the menu is added:
Step 7 Styling
Modify the Superfish styles to match the Twenty Eleven theme. The file is called superfish.css. Below are the details:
/* Change this: */
.sf-menu a, .sf-menu a:visited  { /* visited pseudo selector so IE6 applies text colour*/
	color:			#13a;
}
.sf-menu li {
	background:		#BDD2FF;
}

/* To this: */
.sf-menu a, .sf-menu a:visited  { /* visited pseudo selector so IE6 applies text colour*/
	color:			#999; /*#13a;*/
}
.sf-menu li {
	background:		#ccc;/*#BDD2FF;*/
}
/* Change this: */
.sf-menu li:hover, .sf-menu li.sfHover,
.sf-menu a:focus, .sf-menu a:hover, .sf-menu a:active {
	background:		#CFDEFF;
	outline:		0;
}

/* To this: */
.sf-menu li:hover, .sf-menu li.sfHover,
.sf-menu a:focus, .sf-menu a:hover, .sf-menu a:active {
	background:		#eee;
	outline:		0;
	color: 			#111;
}
/* Change this: */
.sf-shadow ul {
	background:	url('../images/shadow.png') no-repeat bottom right;
	padding: 0 8px 9px 0;
	-moz-border-radius-bottomleft: 17px;
	-moz-border-radius-topright: 17px;
	-webkit-border-top-right-radius: 17px;
	-webkit-border-bottom-left-radius: 17px;
}

/* To this: */
.sf-shadow ul {
	/*background:	url('../images/shadow.png') no-repeat bottom right;
	padding: 0 8px 9px 0;
	-moz-border-radius-bottomleft: 17px;
	-moz-border-radius-topright: 17px;
	-webkit-border-top-right-radius: 17px;
	-webkit-border-bottom-left-radius: 17px;*/
}
Step 8 Finished Version
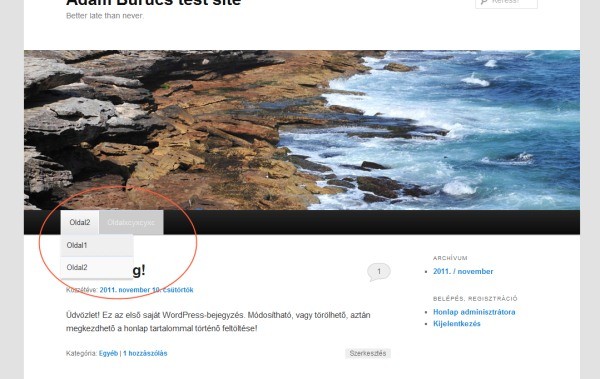
Here is how it will look like when it's finished:


Comments