
Welcome to my third tutorial about optimizing your Google Page Speed. For those that don't know, Google PageSpeed is a free tool that assesses the performance and usability of your website for mobile and desktop platforms. It's extra important because Google uses it in determining key elements of our SEO ranking, i.e. how high we appear in their search results.
So webmasters know it's somewhat important to have a good PageSpeed, although there is debate over this. For example, The New York Times page speed is currently at 60 and 68 out of 100.
In the first episode, I walked you through trying to improve my PageSpeed with a theme made by a now defunct provider, Hands On Improving Google PageSpeed (Envato Tuts+). Ultimately, I made it to a PageSpeed for mobile of 70 and desktop 86.
In the second episode, I made my blog a focused development site and customized my WordPress code in ways to reach PageSpeed 100 on both mobile and desktop. See Optimizing Google PageSpeed to 100 in WordPress (Envato Tuts+).
And I was successful at this for a time:

Today, I'm going to tell you more about my experience with PageSpeed optimization and a lesser known alternative to doing it yourself, Google's own PageSpeed module. You can install it for Apache and nginx.
PageSpeed can integrate with your Apache or Nginx web server to automatically optimize your site. — Google
Before we get started, please remember, I do try to participate in the discussions below. If you have a question or topic suggestion, please post a comment below or contact me on Twitter @reifman. I'm interested in your experience with WordPress and PageSpeed.
Maintaining an Optimal PageSpeed
If my blog was my full-time focus, then perhaps it wouldn't have been too hard to maintain the optimized code for PageSpeed as WordPress plugin updates and theme updates came along. But it's not. And, frankly, maintaining this work proved overly time-consuming.
I longed to return to the old days of mouse-click updates.
Google Doesn't Reward You for High PageSpeed
I also noticed that after I switched to a new theme and optimized my PageSpeed to 100, traffic actually went down and stayed down. Certainly, the responsive theme layout had something to do with it, but Google never rewarded me for reaching 100 PageSpeed.
Similarly, as I discussed in Installing AMP in WordPress (Envato Tuts+), AMP was created to capture media publishers' attention, but doesn't add much for small publishers. Google never provided additional traffic to my blog after I provided AMP support.
So I decided to step down my focus on PageSpeed and switch to a new theme which would help users navigate my site more easily. I've also uninstalled AMP for the time being.
Trying Out the Google PageSpeed Module
It seemed like the perfect opportunity to disable all of my custom JavaScript and CSS bundling and experiment with Google's PageSpeed module, which works at the server level to do this for you.
About the Google PageSpeed Module
Basically, the Google PageSpeed Module automates a lot of the performance optimizations that its PageSpeed rankings look for. And it's available on popular open-source servers Apache and nginx.
The PageSpeed Module compresses and combines included files such as JavaScript and CSS stylesheets but will also replace images with compressed, progressive file formats (.webp).
Snapshots of my PageSpeed Prior to Installation
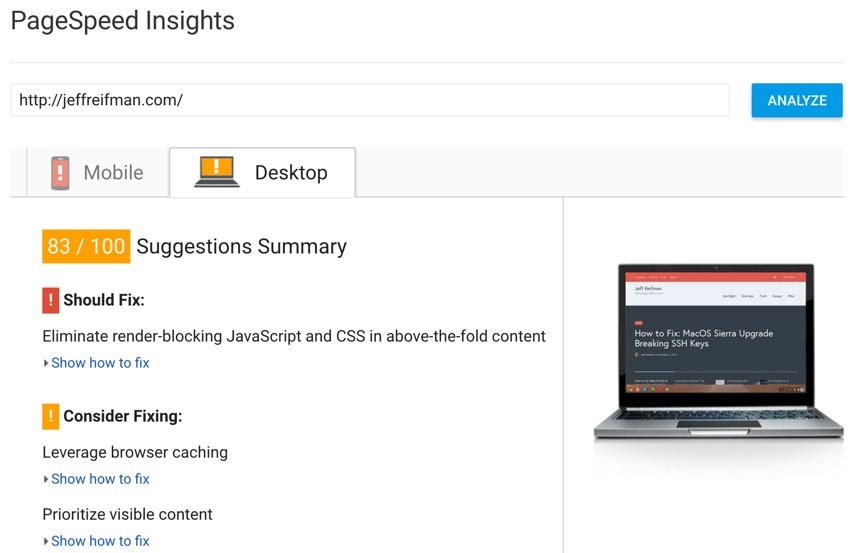
After installing my new theme, I took "before" snapshots of my PageSpeed score. I received an 83 for desktop:
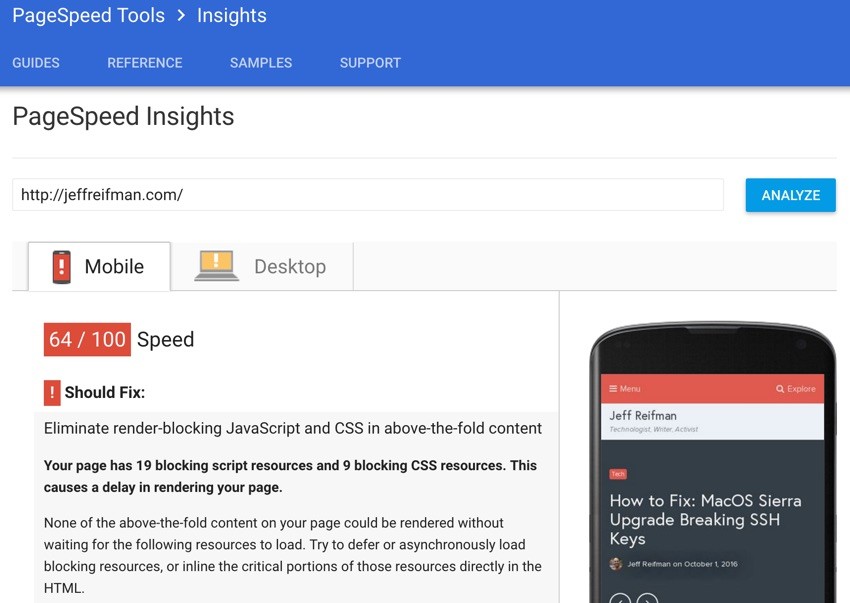
And a lower 64 for mobile:
Installing the PageSpeed Module
For this tutorial, I'll guide you through the install for Apache. Google offers nginx installation instructions too.
The PageSpeed module isn't included in Ubuntu package directories so you need to manually download it via wget:
$ wget https://dl-ssl.google.com/dl/linux/direct/mod-pagespeed-stable_current_amd64.deb
--2016-10-02 15:10:54--  https://dl-ssl.google.com/dl/linux/direct/mod-pagespeed-stable_current_amd64.deb
Resolving dl-ssl.google.com (dl-ssl.google.com)... 74.125.22.136, 74.125.22.91, 74.125.22.190, ...
Connecting to dl-ssl.google.com (dl-ssl.google.com)|74.125.22.136|:443... connected.
HTTP request sent, awaiting response... 200 OK
Length: 7009850 (6.7M) [application/x-debian-package]
Saving to: ‘mod-pagespeed-stable_current_amd64.deb’

100%[=========================================================================>] 7,009,850   38.6MB/s   in 0.2s

2016-10-02 15:10:54 (38.6 MB/s) - ‘mod-pagespeed-stable_current_amd64.deb’ saved [7009850/7009850]
Then, use dpkg to install the module:
$ sudo dpkg -i mod-pagespeed-*.deb
Selecting previously unselected package mod-pagespeed-stable.
(Reading database ... 668500 files and directories currently installed.)
Preparing to unpack mod-pagespeed-stable_current_amd64.deb ...
Unpacking mod-pagespeed-stable (1.11.33.2-r0) ...
Setting up mod-pagespeed-stable (1.11.33.2-r0) ...
Enabling module pagespeed.
To activate the new configuration, you need to run:
  service apache2 restart
And finally, apt-get -f install to fix any dependencies:
$ sudo apt-get -f install
  [sudo] password for ...:
  Reading package lists... Done
  Building dependency tree
  Reading state information... Done
  The following packages were automatically installed and are no longer required:
    ca-certificates-java default-jre default-jre-headless fonts-dejavu-extra
    gconf-service gconf-service-backend gconf2 gconf2-common icedtea-6-jre-cacao
    icedtea-6-jre-jamvm icedtea-netx icedtea-netx-common java-common
    java-wrappers libasyncns0 libatk-wrapper-java libatk-wrapper-java-jni
  ...
  ...
    openjdk-7-jre openjdk-7-jre-headless sound-theme-freedesktop
    ttf-dejavu-extra tzdata-java
  Use 'apt-get autoremove' to remove them.
  0 upgraded, 0 newly installed, 0 to remove and 0 not upgraded.
Then, restart the Apache server:
$ sudo service apache2 restart
 * Restarting web server apache2
Supporting Files From Your CDN
Earlier, I wrote a sponsored post Accelerate Your Content Delivery With KeyCDN and still use it. If you use a CDN for your site, then you need to tell the PageSpeed module about it.
Here's how to view and edit the module's configuration file:
$ sudo nano /etc/apache2/mods-available/pagespeed.conf
And here's the basic configuration:
<IfModule pagespeed_module>
    # Turn on mod_pagespeed. To completely disable mod_pagespeed, you
    # can set this to "off".
    ModPagespeed on

    # We want VHosts to inherit global configuration.
    # If this is not included, they'll be independent (except for inherently
    # global options), at least for backwards compatibility.
    ModPagespeedInheritVHostConfig on
All of your sites will work with it by default. But you have to add the CDN sub-domains manually:
# ModPagespeedDomain
   # authorizes rewriting of JS, CSS, and Image files found in this
   # domain. By default only resources with the same origin as the
   # HTML file are rewritten. For example:
   #
   #   ModPagespeedDomain cdn.myhost.com
   #
   # This will allow resources found on http://cdn.myhost.com to be
   # rewritten in addition to those in the same domain as the HTML.
   #
   # Other domain-related directives (like ModPagespeedMapRewriteDomain
   # and ModPagespeedMapOriginDomain) can also authorize domains.
   #
   # Wildcards (* and ?) are allowed in the domain specification. Be
   # careful when using them as if you rewrite domains that do not
   # send you traffic, then the site receiving the traffic will not
   # know how to serve the rewritten content.
ModPagespeedDomain c?.jeffreifman.com
My CDNs are at c1-, c2-, c3- and c4- .jeffreifman.com, so I used a ? wildcard character to refer to all four above.
Then, of course, you must restart Apache again, as we did earlier.
Reviewing the PageSpeed Module Results
You can check the source code on your site to see if the PageSpeed module is working. Here's an example from the top of the page at JeffReifman.com:
<!DOCTYPE html>
<html lang="en-US" prefix="og: http://ogp.me/ns#">
<head>
<meta charset="UTF-8">
<meta name="viewport" content="width=device-width, initial-scale=1">
<link rel="profile" href="http://gmpg.org/xfn/11">
<link rel="pingback" href="http://jeffreifman.com/xmlrpc.php">
<script type="text/javascript"
 src="http://jeffreifman.com/wp-content/cache/minify/568f4.js.pagespeed.jm.7B4hJGmADB.js">
 </script>
Notice the src URL is now:
568f4.js.pagespeed.jm.7B4hJGmADB.js
Here's a larger, manually placed image (incidentally one of my house ads) which PageSpeed converts to .webp:
<img src="http://c3.jeffreifman.com/wp-content/uploads/2016/10/
xssd-virtual-servers-300x250.jpg.pagespeed.ic.g1foLP8khJ.webp"
All of this happens automatically.
Underwhelming Changes to PageSpeed
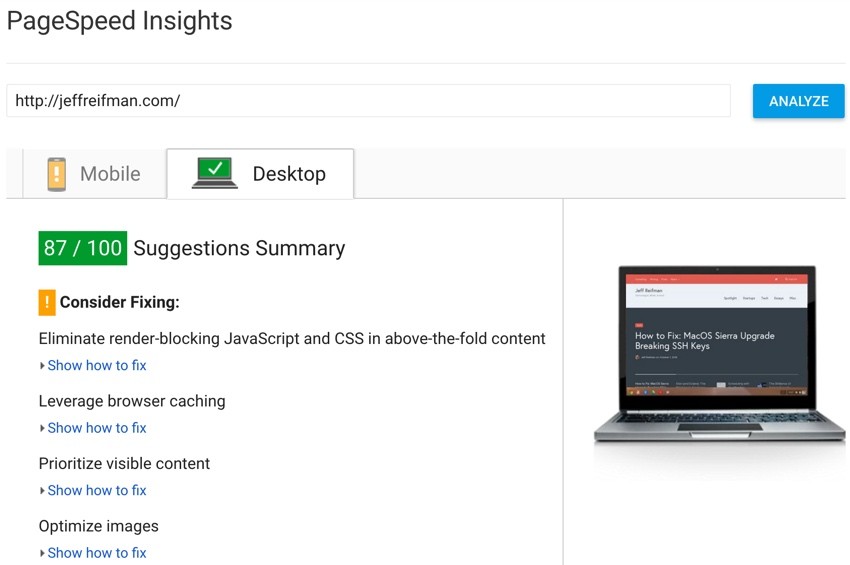
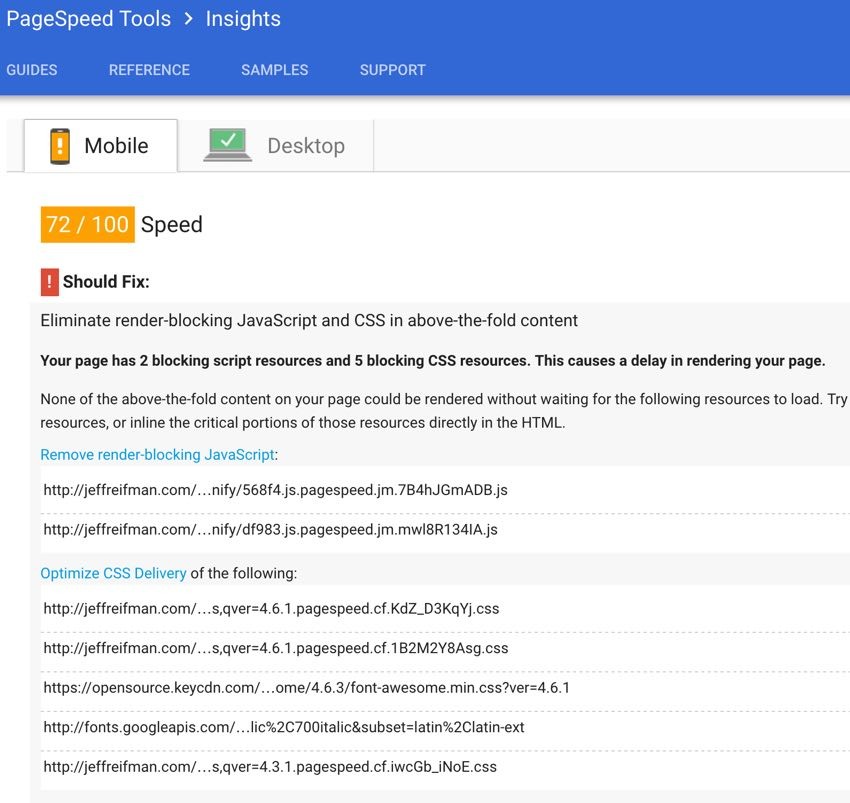
Overall, the results from using the PageSpeed module were underwhelming on their own. I gained 4 points on desktop and (better) 8 points on mobile.
Here's the after score for desktop:
Here's the after score for mobile:
In Closing
If you're a system administrator, the Google PageSpeed module will be very helpful. It's fully configurable, and you can customize it in a variety of ways for better impact. However, for the average developer, I have doubts about its efficacy:
- The basic performance gains were limited.
- Further customization is very complex.
- PageSpeed gains don't clearly (if at all) map to increased search engine traffic.
I'm glad that Google offers the module, and it's designed to work within complex systems, but its impact for everyday DIY system administrators is limited.
If you have questions, please post them below. Or you can contact me on Twitter @reifman. Please check out my Envato Tuts+ instructor page to see other tutorials I've written, such as Cloning WordPress in Linux (in 90 seconds.) And I encourage you to check out my two programming series here: How to Program With Yii2 and Building Your Startup With PHP.


Comments