In the Code category of Envato Tuts+, we cover a lot of content. This ranges from anything such as how to write code using some of the latest JavaScript frameworks to how to achieve certain things with content management systems such as WordPress and OpenCart.
Because we tend to focus much of our content on those who already have some level of familiarity with computing, we often assume that certain things are already in place before starting our tutorials.
For example, sometimes we assume that you have a working knowledge of JavaScript before jumping into the actual framework. Or maybe we assume that you have a level of familiarity with PHP or Ruby before starting a tutorial on how to build a web application using a new library.
In the How To articles that we're publishing, we're working to provide tutorials that give readers the steps that are absolutely necessary to get up and running with a particular piece of software, especially those that play well with many of the items that are available in Envato Market.
If you're interested in building a website with WordPress, then it stands to reason that you should have a working definition of what a WordPress theme should be as well as a working knowledge of how to install a WordPress theme.
Understanding WordPress Themes
Before taking a look at how to install WordPress themes, let's define what a WordPress theme should be. I distinguish this from what a WordPress theme is because you're often going to find themes that do more than they should. These themes make it hard to try out a different theme should you choose to change your theme's design.
I'll talk more about this momentarily.
What a Theme Should Be
For now, let's work with the definition provided in the WordPress Codex:
Fundamentally, the WordPress Theme system is a way to "skin" your weblog. Yet, it is more than just a "skin." Skinning your site implies that only the design is changed. WordPress Themes can provide much more control over the look and presentation of the material on your website.
The key takeaway from this definition is that a WordPress theme provides the presentation of your site. That is, it's responsible for giving your website or your blog a specific look.
It affects anything that you can see, that styles your content, and that affects your fonts, color scheme, and so on.
What About Theme Lock-In?
When installing a WordPress theme, it's important to pay attention to the features that it offers. Modern themes often include much more than just presentation. That is, they introduce functionality.
Functionality can be defined as anything that changes the behavior of your theme. For example, let's say that your theme offers some type of search engine optimization option on the post editor screen.
And because that is outside the realm of presentation, that is considered functionality. And if a theme offers something like this, then you're in danger of suffering from what's called "theme lock-in".
Here's how it works: You install a theme that offers more than just presentation (such as the SEO functionality outlined above). Should you choose to update your site to a new theme that does not offer the exact same implementation of the SEO functionality, you lose it. All of it.
You may end up with a great design, but you've lost the work that you did supplying all of the SEO information to your theme. Thus, you're either locked into using the same theme that you started with, or you're faced with using a new theme and losing all of that work.
Ultimately, themes should not be including this type of functionality. Functionality is reserved for plugins. This is something that we'll talk about in another post.
For now, remember that themes should be all about presentation. If you're okay with theme lock-in, then selecting a theme that provides a lot of functionality might be okay for you; however, if you're looking to eventually change out your design from time to time, then try to stick with themes that strictly adhere to modifying the presentation of your site.
Installing a WordPress Theme
With that said, now we can talk about the process that is required to install a WordPress theme. There are actually two ways to go about doing this:
- You can install a theme from within WordPress.
- You can install a theme via S/FTP and then activate it within WordPress.
Though the first option is arguably the easiest, we'll be covering both options in this guide to make sure that we've provided you with the most comprehensive information possible.
Note this guide assumes you already have WordPress installed on your computer or your web host. We're going to walk through the process of obtaining a theme and installing it via WordPress or via FTP.
With that said, let's get started.
Downloading a WordPress Theme
There are a lot of places on the web to download WordPress themes; however, it's not always safe to download a theme from just anywhere. It's important to vet the reputation of the provider of the theme.
That's outside the scope of this post; however, you can't go wrong with selecting a theme from the WordPress Theme Repository or from Envato Market.
For the purposes of this tutorial, we're going to be using the freely available Twenty Sixteen theme. First, we're going to install it from within WordPress, and then we'll see how to install it via S/FTP.
For the following steps, I'm assuming that you're starting from within the dashboard of WordPress:
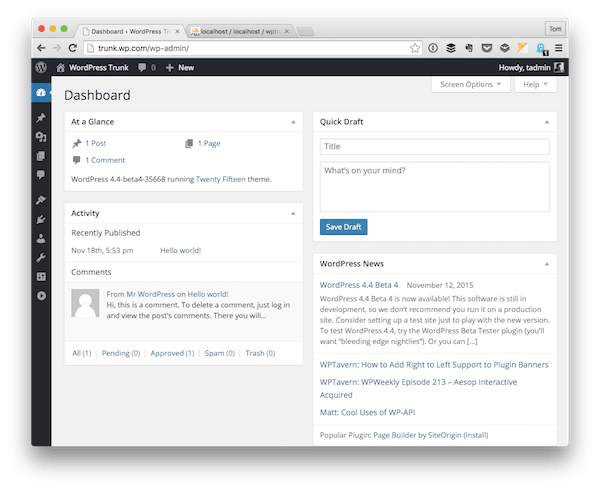
Regardless of the method that you opt to use to install a theme, this is where we'll begin the steps of our tutorial.
Installing a Theme From Within WordPress
To install a theme from within WordPress itself, click on the Appearance menu and then select the Themes option.
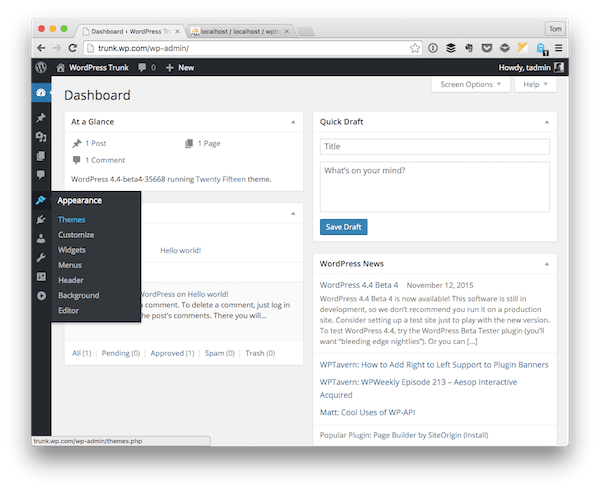
From there, you'll be presented with all of the themes that have been installed.
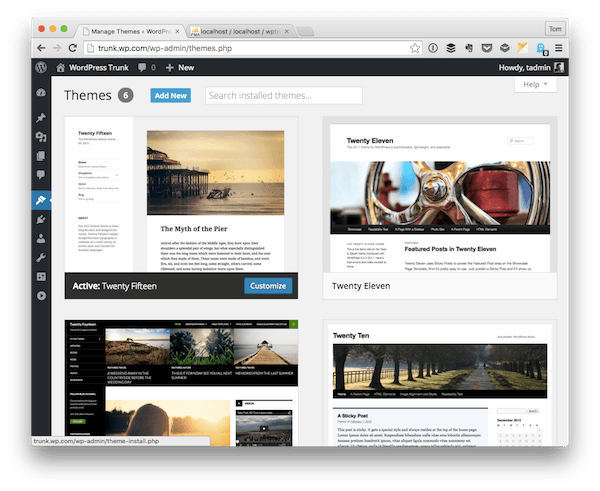
Next, click on the Add New button at the top of the screen. From here, you'll be taken to a screen that looks like this:

Notice the Search Themes field at the top of the page. In this field, type Twenty Sixteen without quotes, and it should return the following screen:
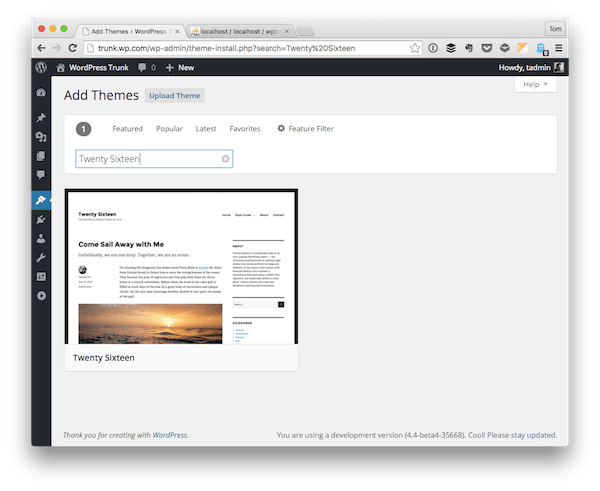
After that, click on the option to Install the theme. After that, WordPress will give you the option to preview the theme or to activate the theme. The same options will be presented for those who have uploaded a theme via S/FTP, as well.
So, for the moment, we're going to take a look at the steps necessary to install a theme by uploading the files. If you're not interested in the following, alternative steps, then you may skip down to the Activating a Theme section below.
Installing a Theme via S/FTP
This version of installing a theme assumes that you're comfortable with the terms server, port, username, and password. It also assumes that you're familiar with the wp-content and theme directories. If not, then the best course of action may be to stick with the method above.
If, however, none of the above sounds like jargon, then let's proceed. For the purposes of this demo, I'm going to be using Transmit as my S/FTP client; however, feel free to use whatever client you prefer.
First, we need to download Twenty Sixteen from the WordPress Theme Repository.
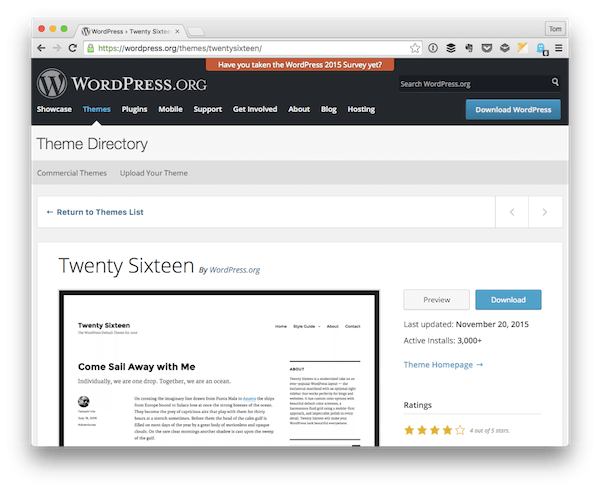
Once you click on Download, this will place a zip file of the theme in the directory that you chose.

Next, you'll want to extract the archive. This will create a subdirectory containing all of the theme files in the directory in which the zip file exists.
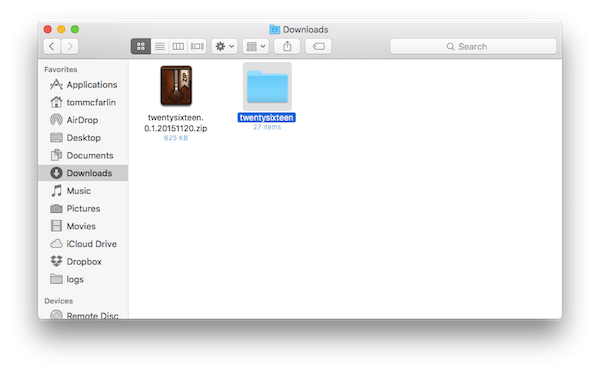
After that, connect to your web server and navigate to your WordPress installation's wp-content/themes directory.
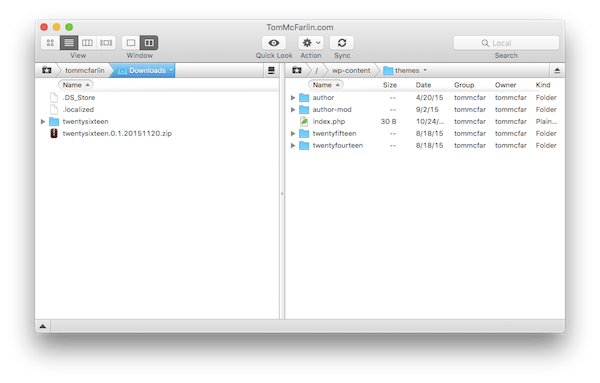
Upload the directory that was created when you extracted the theme files. From there, hop into the WordPress dashboard and navigate to the Themes page. You should see a copy of Twenty Sixteen appear in the theme listing.
At this point, we're ready to proceed with activating the theme regardless of how we've installed it. That is, if you've opted to use S/FTP or you've chosen to install the theme from within WordPress, you'll be presented with the same set of options.
So let's do it.
Activating a Theme
Once the theme has been downloaded via WordPress or uploaded via S/FTP, then you have everything you need in order to activate the theme and update the look and feel of your website.
After you've acquired the theme, you should be presented with an option to activate the theme:
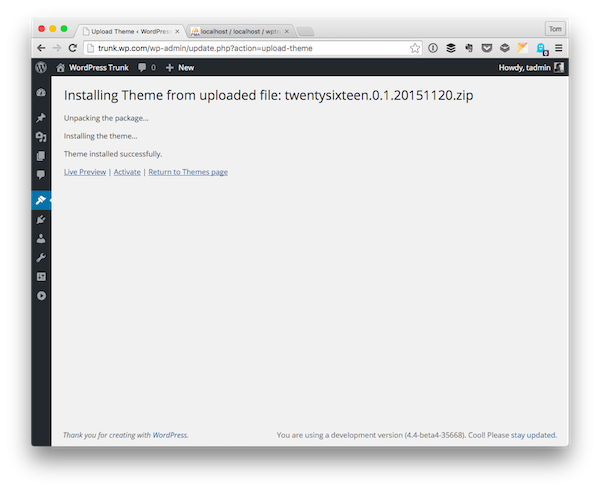
From here, you can select Live Preview to see how it's going to alter your current content, or you can click on Activate to go ahead and set it up. I'm choosing to go with the latter.
Once done, you should see the following screen:

From there, you should be able to continue working in WordPress as you were prior to installing this theme. This means you can continue adding posts, pages, categories, and so on.
Depending on the theme, you may also have the opportunity to update the header image, the background image, and so on. Note that this is dependent on the theme that was installed.
To know exactly what your theme offers, it's important to consult the documentation.
Conclusion
As you can see, installing a WordPress theme is a relatively simple process, especially if you do it from within the WordPress application. Even if you're a little intimidated by the process using an FTP client, it's still relatively easy to activate the theme once you've uploaded the files.
Secondly, note that it's important to make a distinction between the type of theme you want. Do you want a single theme with a lot of functionality that you'll likely never change, or do you want a theme that plays nicely with a set of plugins, allowing you to change the look and feel of your website independent of the functionality?
Whatever the case, you should have everything you need in order to select a theme, install it, and activate it in whatever way is most comfortable to you.
And finally, if you're looking for a solid selection of themes to fit nearly any situation then be sure to check out what we have available in Envato Market.
Remember, you can catch all of my courses and tutorials on my profile page, and you can follow me on my blog and/or Twitter at @tommcfarlin where I talk about software development in the context of WordPress.
As usual, please don't hesitate to leave any questions or comments in the feed below, and I'll aim to respond to each of them.


Comments