Banner ads are an important source of revenue for many app developers. In this tutorial you will learn how to add AdMob ads to your iOS app, using Swift 3 and Xcode 8.
Create a Banner Unit ID
The very first thing to do to prepare your iOS app to show banner ads is to create its Unit ID on the AdMob website. If you don't have a Google account, I suggest you sign up for a new one—it's free, and it gives you access to all Google services.
Once you've entered the AdMob home page, click on the red Monetize New App button.

If your app is not on the iTunes App Store yet, you will have to select Add Your App Manually. Then type your application's name, select the iOS Platform, and click the Add App button.

On the next screen, you will see your newly generated AdMob App ID below the Apple grey icon. Please note that it is not the same as the Unit ID that needs to be pasted into your Xcode project. We'll get to the Unit ID in a little bit.
Click Banner to select the ad format. I suggest you leave the Ad type, Automatic refresh, and Text ad style settings at their default values. If you do want to customize the Ad style, you can click on the Standard combo box and select Customized. For a custom banner, you can customize the background, border, title, text, and URL color.
Finally, type a name in the Ad unit name box. That will not be your banner identifier, but just a reference name for your Unit ID. Click Save to move on to the third step.

Step 3 is optional and lets you link your AdMob app to Firebase and to share your data from the free Firebase Analytics tool. For now, just click on Skip to go on.

Finally, you can download the latest GoogleMobileAds.framework file from the Firebase server. This fourth step will also show you the Ad unit ID you'll have to paste into the main .swift file of your Xcode project, as we'll see later.

Click on the Download the Google Mobile Ads SDK link. A new tab will open up in your browser, and you'll be able to download the latest official package zip file.

Go back to the AdMob website and click Done. The next screen will show you the Ad unit ID you've just created, ready to be copied and pasted in your .swift file in Xcode. I'm assuming you've already created a new Xcode project or you have your own one into which you want to add AdMob ads.
Implement AdMob in Your Xcode project
Extract the googlemobileadssdkios.zip file you've previously downloaded from the Firebase server, open its folder, and copy GoogleMobileAds.framework only.

Paste it into your project folder.

Now enter your Xcode project and go to the General tab, scroll down to the Linked Frameworks and Library section, and drag the GoogleMobileAds.framework file over to it.

You may have to add additional iOS Frameworks to your Xcode project in order for AdMob to receive and display banners in your app.
Click on the + sign at the bottom and import the following frameworks one by one:
- EventKit
- EventKitUI
- AVFoundation
- AdSupport
- AudioToolbox
- AVFoundation
- CoreGraphics
- CoreTelephony
- CoreMedia
- MessageUI
- StoreKit
- SystemConfiguration

The thing to do is to switch to the Build Settings tab and search for bitcode. Xcode will bring up the Enable Bitcode option, and you will have to set it to be No.

You're now ready to write some code to make AdMob ads show up in your app!
The Code
Based on how your app is built, you'll want AdMob ads to show up in your view controllers. So you need to enter the .swift file of the controller you want ads to be displayed and import the following frameworks at the top of the file:
import GoogleMobileAds
import AudioToolbox
Adopt the GADBannerViewDelegate protocol by adding it to the end of your class declaration:
class ViewController: UIViewController,
GADBannerViewDelegate
{
Add the AdMob banner view above the viewDidLoad() method in your class:
// Ad banner and interstitial views
var adMobBannerView = GADBannerView()
The following line of code is a simple string that recalls the Ad unit ID you've previously created:
// IMPORTANT: REPLACE THE RED STRING BELOW WITH THE AD UNIT ID YOU'VE GOT BY REGISTERING YOUR APP IN http://apps.admob.com
let ADMOB_BANNER_UNIT_ID = "ca-app-pub-9733347540588953/7805958028"
Here you'll have to replace ca-app-pub-9733347540588953/6145924825 with your own banner unit ID, so go back to your AdMob Ad Units page in your browser to copy that string and paste it in the code above.
Now add the functions below inside your viewDidLoad() method:
override func viewDidLoad() {
        super.viewDidLoad()

    // Init AdMob banner
    initAdMobBanner()
}
Lastly, paste the following method declaration wherever you want in your .swift file (before the class closing bracket and not into an existing method):
// MARK: -  ADMOB BANNER
func initAdMobBanner() {

    if UIDevice.current.userInterfaceIdiom == .phone {
        // iPhone
        adMobBannerView.adSize =  GADAdSizeFromCGSize(CGSize(width: 320, height: 50))
        adMobBannerView.frame = CGRect(x: 0, y: view.frame.size.height, width: 320, height: 50)
    } else  {
        // iPad
        adMobBannerView.adSize =  GADAdSizeFromCGSize(CGSize(width: 468, height: 60))
        adMobBannerView.frame = CGRect(x: 0, y: view.frame.size.height, width: 468, height: 60)
    }

    adMobBannerView.adUnitID = ADMOB_BANNER_UNIT_ID
    adMobBannerView.rootViewController = self
    adMobBannerView.delegate = self
    view.addSubview(adMobBannerView)

    let request = GADRequest()
    adMobBannerView.load(request)
}


// Hide the banner
func hideBanner(_ banner: UIView) {
        UIView.beginAnimations("hideBanner", context: nil)
        banner.frame = CGRect(x: view.frame.size.width/2 - banner.frame.size.width/2, y: view.frame.size.height - banner.frame.size.height, width: banner.frame.size.width, height: banner.frame.size.height)
        UIView.commitAnimations()
        banner.isHidden = true
}

// Show the banner
func showBanner(_ banner: UIView) {
        UIView.beginAnimations("showBanner", context: nil)
        banner.frame = CGRect(x: view.frame.size.width/2 - banner.frame.size.width/2, y: view.frame.size.height - banner.frame.size.height, width: banner.frame.size.width, height: banner.frame.size.height)
        UIView.commitAnimations()
        banner.isHidden = false
}

// AdMob banner available
func adViewDidReceiveAd(_ view: GADBannerView!) {
        showBanner(adMobBannerView)
}

// NO AdMob banner available
func adView(_ view: GADBannerView!, didFailToReceiveAdWithError error: GADRequestError!) {
        hideBanner(adMobBannerView)
}
Please note that AdMob banners have different sizes based on the device used, so the first lines of code in func initAdMobBanner() set the size of the banners for iPhone/iPod Touch and iPad.
If you're curious about the available banner sizes for AdMob ads, you can check out the AdMob documentation. Anyway, the best banner sizes for iPhone and iPad devices are the ones we've set in the code above:
- 320 x 50 px for iPhones
- 468 x 60 px for iPads
CodeCanyon Template
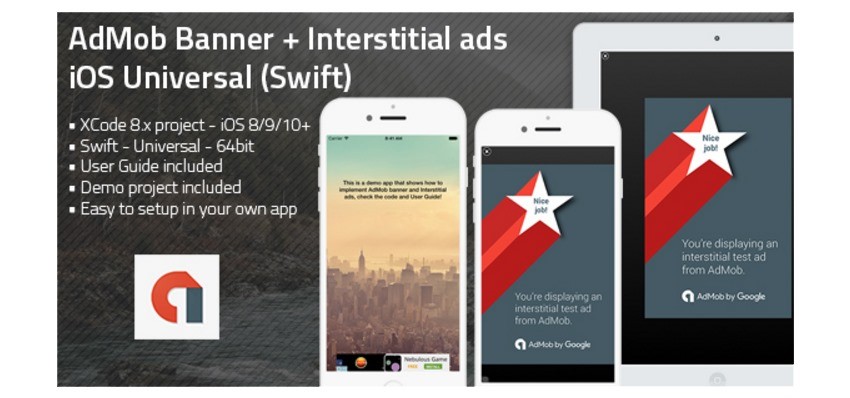
On CodeCanyon, I'm selling an iOS app template that comes with AdMob banners built in, and also has support for interstitial ads. So, if you want to speed up your development, you can just purchase that template and kick-start your app.

Find it here: iOS AdMob Banner + Interstital Ads Template | Universal (Swift).
There are hundreds of other iOS app templates on CodeCanyon. Go check them out! You might just save hours of work on your next app.
Conclusion
Thanks for reading, and I'll see you next time! Please check out some of our other courses and tutorials about iOS app development with Swift.


Comments