Welcome to part 3 of Developing BuddyPress Themes. In this tutorial, we'll focus on BuddyPress' latest release - version 1.5, as well as how to customize the user experience through editing member pages and adding custom functions.
This tutorial is the last part in this Developing BuddyPress Themes series. We have gone from the API to creating a custom theme that is built around a specific community. Today, we'll take that a bit farther.
What We Will Do
In this tutorial we will :
- take an in-depth look at BuddyPress 1.5 - "Lombardi" - and the changes that it brings
- continue editing our theme's style.css to change group and member pages
- use the API to customize group and member loops
- use custom functions to enhance and guide the user's experience
By the end of this tutorial series, you should have a comprehensive understanding of BuddyPress' new changes and a great reference point as you start, or continue, developing your own BuddyPress themes.
Upgrading to BP Version 1.5
First, if you haven't already updated BP, go ahead and take the plunge and update. You can do that manually, or through the WP dashboard. Once you have updated, you will see a notice at the top of the screen telling you that you need to configure the update.
Click that and then you should see this:

- First, the database needs to be updated so do that, and click save.
- Next, you will edit the components that you want activated on your site. Don't worry, you can also activate or deactivate these later. Save the settings and continue.
- Next, BuddyPress now lets you select certain pages that you want components to be on. For example, before 1.5, you would have to edit components' slugs in bp-custom.php. However, now, you can tie components to pages and change their URL directly from the WP dashboard.
- Finally, save all of your changes, and the new BuddyPress menu will actually appear at the bottom of your left-hand WP dashboard navigation menu - instead of at the top. Thanks BP devs for that change in placement!
The theme we created should be fine. Don't worry about enqueueing the stylesheets or anything like that, as it's actually unnecessary as far as I can tell. If anyone's got a comment on that, be sure to throw it out there!
If the update wasn't so kind to your theme, visit the BuddyPress theme designer and developer page here.
What are the Highlights of BP Lombardi?
Since it's release last week, I've played around minimally, but I will echo the highlights posted on the BuddyPress website. They are as follows:
- New custom field UI. No you can drag and drop custom fields, and preview them before they go live. Here's a screenshot of a new field that I created:

- While it's not what we've been talking about here, Lombardi's new default theme comes with the ability to change the default background, change the default header, and use a WP custom menu. The default theme also:
- has 5 widgetized areas - 1 in the sidebar and 4 in the footer
- can display featured images (as custom header images on pages and posts).
contains an optional one-column layout - is responsive, so it resizes to fit any screen size
- has a new forums tab in the member's page navigation that allows you to quickly access topics that you have started or replied to
- Quick embed support with oEmbed. I'll go over this more in detail below.
- BuddyPress is now faster and more efficient. The devs went through the code searching on ways to make the plugin work faster and more efficiently, and, quite frankly, it really does.
For a complete list of features and highlights, click here. Be sure to note some changes to loops and basic BP functions. These should really help you in your BP theme development.
Embedding in BuddyPress 1.5
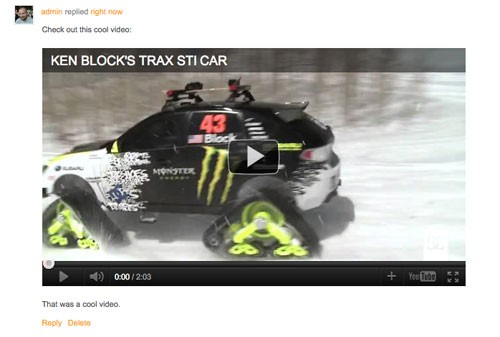
One important thing that I specifically want to go over in BuddyPress 1.5 is how to embed. BuddyPress now uses Wordpress' native embedding, which allows you to directly embed content via the URL. For instance, if I want to add a video to my forum topic I would post something like :
	Hey, check this out and let me know what you think.

	http://www.youtube.com/watch?v=ROBmgYcIBww
This will result in:
If you prefer, you can also put the above URL in an embed shortcode and specify the height and width like so:
[embed height="240" width="320"]http://www.youtube.com/watch?v=ROBmgYcIBww [/embed]
That should help if you are using a theme that uses a styling that's different than the default, as the width of the embed might be larger than you want.
Editing New Member Template Pages
Now, let's look at editing member templates, a feature of BuddyPress 1.5. As we are editing the member templates, I also want to show you how to add your custom profile field data to the templates in order to really strengthen your online community.
Before we start, you will need to copy the members folder from bp-default, and paste it in your child theme folder.
Step 1 Working with the Member Template
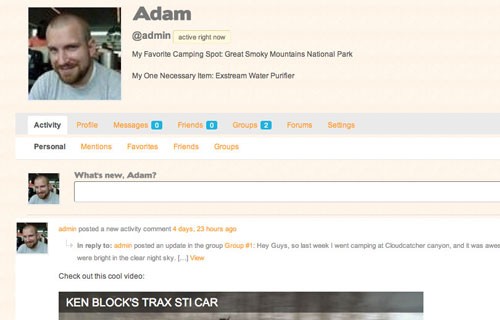
Still working in the members folder that you copied to your child theme, open the folder named single. This folder contains the elements that make up what a member sees when they visit their profile. My page currently looks like this:
The main files that we will be working with are home.php and member-header.php, as those are the files that control what the user sees when they look at their info.
Step 2 Integrating Custom Profile Field Data
First, open the file member-header.php. This file is used to display the user's avatar, info, and navigation elements.
Since the site I am making is about the great outdoors and specifically camping, I want members to have info that is relevant. For that, I've created the following custom profile fields:
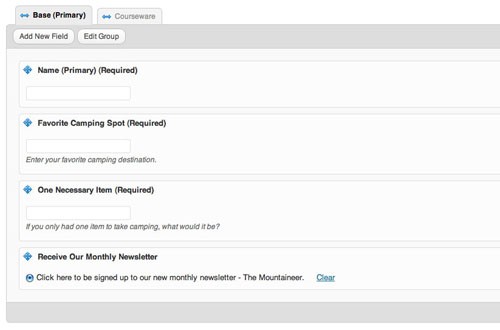
One great thing about the new UI is that it is much easier to navigate. You can quickly create and edit completely new profile fields for each group that you have, thereby really customizing each group in BuddyPress.
To integrate those fields into my member page header, under line 29, which is:
<span class="activity"><?php bp_last_activity( bp_displayed_user_id() ); ?></span>
place the following:
	<?php

	$favorite_spot = bp_get_profile_field_data( 'field=Favorite Camping Spot' ) ;
  echo '<p class="profile-fields">My Favorite Camping Spot: ' .$favorite_spot. '</p>';

	$necessary_item = bp_get_profile_field_data( 'field=One Necessary Item' ) ;
  echo '<p class="profile-fields">My One Necessary Item: ' .$necessary_item. '</p>';

	?>
Here, I retrieved the custom profile fields "Favorite Camping Spot" and "One Necessary Item", and displayed them in new paragraphs below the last activity info. I also gave them the class "profile-fields" so that I can easily style them via CSS.
In addition to this, you could add conditionals that direct users to update their profiles if the data is missing.
Create a bp-custom.php to Enhance the Overall User Experience
So far, we've talked a lot about child themes, and how to add your own functions to that via the functions.php in your child theme folder. However, what about changes that you want to make to BuddyPress regardless of the theme being used? What about changing global things like the registration process or other overall user experience elements?
Well, to do changes on a global scale regardless of the theme, you'll need to create a new file called bp-custom.php and place it in wp-contents/plugins/. To create that file, open up a new file and place the following in it:
	<?php
/* We'll place our mods and hacks in this file */
	?>
Save it as bp-custom.php, put it in wp-contents/plugins and you're done! Once you add functions there they will load regardless of theme.
Adding a Basic Twitter Feed via bp-custom.php
Finally, I wanted to quickly demonstrate how to use custom fields and bp-custom.php to display a Twitter feed. I know that there are plugins out there that also achieve this functionality, but I wanted to put some of the concepts that we have been talking about together in an example.
First, I placed the following code in my bp-custom file:
function CNBTgetTwitterStatus()
{ 	 ?><h2><?php bp_displayed_user_fullname(); ?>'s Twitter Feed</h2><?php

        $twitter_username = bp_get_profile_field_data( 'field=Twitter Username' ) ;
        $count = '5';
	$transient = "$twitter_username"."_$count";
	//Get Tweets From the Cache
	$getTweets = get_transient($transient);
	if ($getTweets)
	{
		echo $getTweets;
	}
	elseif ($twitter_username != false)
	{
		$site = "http://twitter.com/statuses/user_timeline.json?screen_name=$twitter_username&count=$count";
		//Perform Http request to get JSON feed of Twitter User Status
		$result = wp_remote_get($site);
		$json = $result['body'];
		//Convert JSON String to PHP Array
		$tweets = json_decode($json);
		$getTweets = '';

		foreach ( (array) $tweets as $tweet)
		{
			/*
			Use these values to customize your output.
			//gets twitter status
			$tweet->text;
			//gets the time the status was created
			$tweet->created_at;
			//gets the User Profile Image URL
			$tweet->user->profile_image_url;
			//gets the User Screen Name
			$tweet->user->screen_name;
			//gets the User location
			$tweet->user->location;
			//gets the User Name
			$tweet->user->name;
			//Get the follower count.
			$tweet->user->followers_count;
			//Get the User Website URL.
			$tweet->user->url
			*/

			// Convert twitter Usernames and links to Hyperlinks
			$tweetcontent = linkify($tweet->text);
			$getTweets .= "<p class='member_tweet'> $tweetcontent </p>";
		}

		//Set Cache if it does not exist
		set_transient($transient, $getTweets, 10);
		echo $getTweets;
	}
	else
	{
		return false;
	}
}

	/* Credit Jeremy Parrish http://rrish.org/  */
	function linkify($status_text)
	{
	  // linkify URLs
	  $status_text = preg_replace(
	    '/(https?:\/\/\S+)/',
	    '<a href="\1">\1</a>',
	    $status_text
	  );

	  // linkify twitter users
	  $status_text = preg_replace(
	    '/(^|\s)@(\w+)/',
	    '\1@<a href="http://twitter.com/\2">\2</a>',
	    $status_text
	  );

	  // linkify tags
	  $status_text = preg_replace(
	    '/(^|\s)#(\w+)/',
	    '\1#<a href="http://search.twitter.com/search?q=%23\2">\2</a>',
	    $status_text
	  );

	  return $status_text;
}

add_action ('bp_after_member_home_content' , 'CNBTgetTwitterStatus');
This code produces this:

To break this down a bit, I first use a template tag to display a header with the user's name, you know, to make it feel more personal.
<h2><?php bp_displayed_user_fullname(); ?>'s Twitter Feed</h2>
Then, we build the function that will output our twitter updates. For the sake of time, I actually found this function. There are other functions out there that you can easily use to create the Twitter feed that you want. If you notice, I also put a class on each tweet, so I could style it in my style.css:
$getTweets .= "<p class='member_tweet'> $tweetcontent </p>";
At the end of this function, I call it and use a template tag to place it after the member home page content.
add_action ('bp_after_member_home_content' , 'CNBTgetTwitterStatus');
And now, you have a simple Twitter feed that you can display and customize to connect your users even more!
Conclusion
In conclusion, I hope you have seen throughout this series that BuddyPress is a powerful tool that can be effectively used in your projects. It isn't beyond understanding! Better yet, it has an active dev team and community working to make it even more efficient and functional. I've enjoyed walking through this series with you, and if I can help please let me know.
Thanks for reading!

Comments