Imagine that you have a large set of data with millions of rows and you're faced with the task of extracting information from the data. How do you make sense of a large set of data? The simple answer to this question is that we do so via data visualization, but what is that, exactly?
Data visualization is the pictorial representation of data to figure out what is hidden inside the information. In this three-part series, we'll create a visualization app to extract information and make sense of a large set of data.
Querying large chunks of data without proper hardware can result in performance issues. Google provides a solution to this problem in the form of BigQuery. Backed by Google's infrastructure, it enables you to query large chunks of data. We'll be using a dataset from Google BigQuery for our visualization application.
In this tutorial, I'll take you through the process of creating a visualization application using Python, Google BigQuery, and the D3.js JavaScript library. We'll be using Google App Engine (or GAE) to host our application. This tutorial assumes that you have a basic knowledge of Python and JavaScript. For creating graphs, we'll be using D3.js.
Note also that the code from the above tutorial is available on GitHub, and a demo is hosted on AppSpot.
Getting Started With Google App Engine
Step 1: Downloading and Using The GAE Python SDK
Let's get started by setting up our development environment. Download the Google App Engine Python SDK and extract it. We'll be using the webapp2 framework for Python.
From Google's documentation:
A webapp2 application has two parts:
1) one or more RequestHandler classes that process requests and build responses
2) a WSGIApplication instance that routes incoming requests to handlers based on the URL.
The aforementioned points will become more clear when we create our request handler class.
Create a directory called PythonD3jsMashup which will be our project directory. Navigate to the project directory and create a file called app.py. This will be our application module. Let's create a request handler class to process the request and build a response, and a WSGIApplication instance to route requests.
Here is how app.py should look:
import webapp2

class ShowHome(webapp2.RequestHandler):
    def get(self):
        ## Code to render home page

## Here is the WSGI application instance that routes requests

application = webapp2.WSGIApplication([
    ('/', ShowHome),
], debug=True)
When a / request occurs, it's routed to the ShowHome class which renders the home page.
Let's write the Python code to display our homepage.
First, create a new folder called Templates in the PythonD3jsMashup folder. Inside it, create an HTML page called index.html.
It should contain the following code:
<!DOCTYPE html>
<html lang="en">

<head>
    <link rel="icon" href="http://getbootstrap.com/favicon.ico">
    <title></title>
    <link href="http://getbootstrap.com/dist/css/bootstrap.min.css" rel="stylesheet">
    <link href="http://getbootstrap.com/examples/justified-nav/justified-nav.css" rel="stylesheet">


</head>

<body>

    <div class="container">

        <div class="masthead">
            <h3 class="text-muted">Data Visualization App</h3>
            <ul class="nav nav-justified">
                <li class="active"><a href="#">Home</a>
                </li>

                <li><a href="#">Source Code</a>
                </li>
                <li><a href="#">About</a>
                </li>
            </ul>
        </div>

        <!-- Jumbotron -->
        <div class="jumbotron">
            <h1>Data Visualization App</h1>
            <p class="lead">Python & D3.js Mashup app</p>
            <p><a class="btn btn-lg btn-success" href="#" role="button">Click here</a>
            </p>
        </div>


        <!-- Site footer -->
        <div class="footer">
            <p>© Company 2014</p>
        </div>

    </div>
    <!-- /container -->


</body>

</html>
In order to render templates, we'll need to import the template library. After doing so, we'll use it to render the index.html page as shown below:
import webapp2
from google.appengine.ext.webapp import template

class ShowHome(webapp2.RequestHandler):
    def get(self):
        temp_data = {}
        temp_path = 'Templates/index.html'
        self.response.out.write(template.render(temp_path,temp_data))

application = webapp2.WSGIApplication([
    ('/', ShowHome),
], debug=True)
Next, navigate to the project directory PythonD3jsMashup and create a file called app.yaml. This file will act as a configuration file for our application. It should look like this:
application: appid
version: 1
runtime: python27
api_version: 1
threadsafe: true

handlers:
- url: /.*
  script: app.application
As you can see, we have defined a number of things in the app.yaml. Most of the parameters are self-explanatory. The handlers directive dictates that every URL request that matches /.* be handled by the application object in the app module.
To run the application locally, navigate to the GAE SDK and run the following command:
./dev_appserver.py <path-to-PythonD3jsMashup-folder>
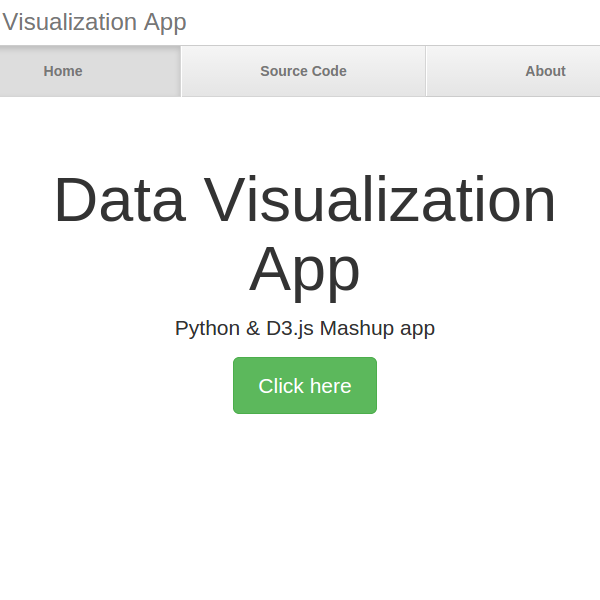
Point your browser to http://localhost:8080 and you should see this page:
Deploying an App to AppSpot
Next, we'll be deploying our app onto the Google App Engine. In order to deploy the app, first log in to the GAE console:
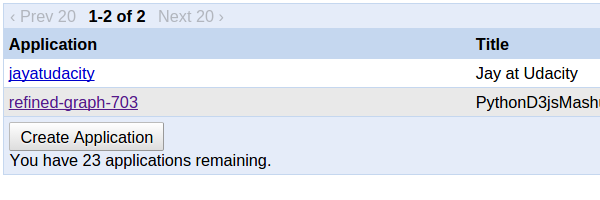
From the dashboard click on the Create Application button.
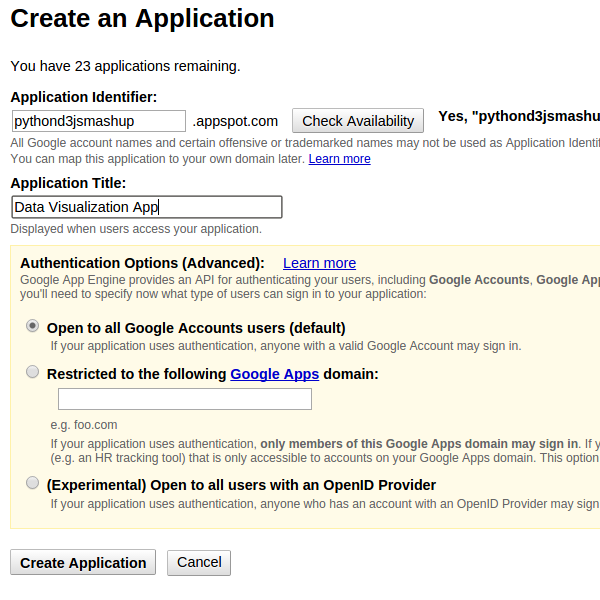
Next, you'll see a screen similar to the one shown below. Type an Application Identifier and Application Title for the app and click Create Application.
Once the application is registered successfully you'll be greeted with a success message:
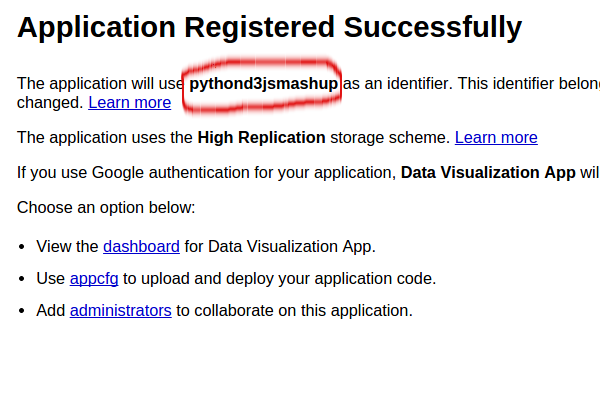
Make a note of the red circled text which will be used as application identifier later.
Click on the dashboard link. From the left menu in the Dashboard, under the Administration tab, click on the Application Settings. You'll see the following screen:
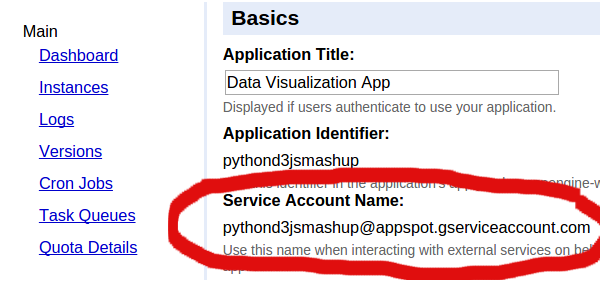
Make a note of the Service Account Name. We'll need this in the Google developer console.
Next, modify the application name to pythond3jsmashup in app.yaml.
application: pythond3jsmashup
version: 1
runtime: python27
api_version: 1
threadsafe: true

handlers:
- url: /.*
  script: app.application
Now to deploy the app to GAE, navigate to GAE Python SDK and type the following command:
./appcfg.py update PythonD3jsMashup/
Once deployed, try browsing the AppSpot URL.
Getting Started With Google BigQuery
To get started with Google BigQuery, log in to the Google API console. You should see a dashboard listing all the available projects in your Google account. Click on the project name PythonD3jsMashup.
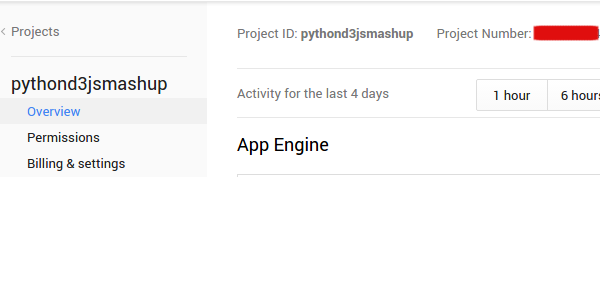
Make a note of the Project Number, which we'll use while connecting with Google BigQuery.
From the left side menu, click on the APIs & auth tab. From the listed items click on APIs. Now you should see a list of available APIs:
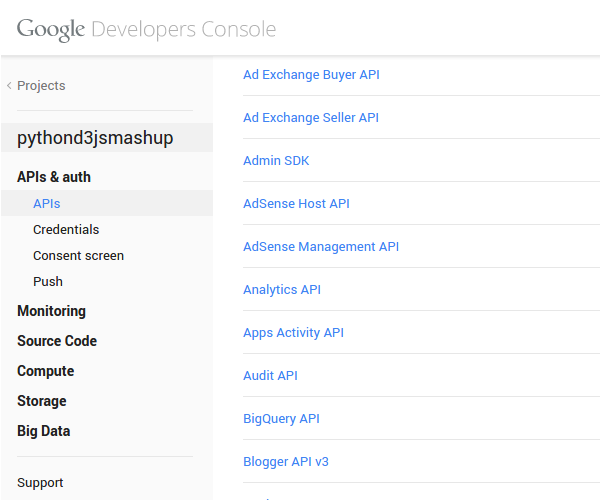
BigQuery API is turned OFF. Click on the OFF status to turn it ON.
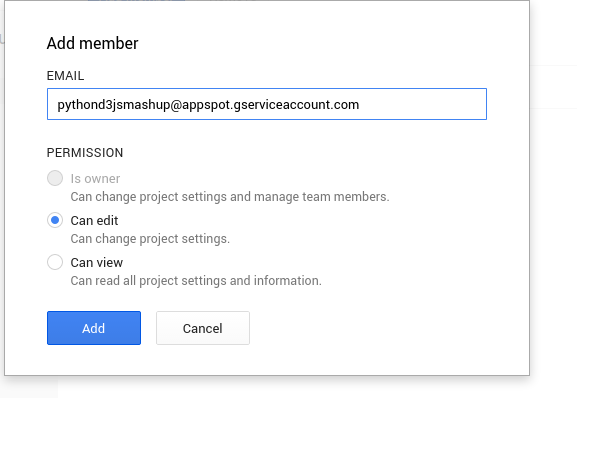
Click on the project name pythond3jsmashup on the left side menu and click Permissions. Click Add Member and add the Service Account Name (which we noted down earlier) with "Can edit" permissions as shown below:
Collecting Data From Google BigQuery
Until now, we created our simple app and deployed it on GAE with BigQuery API enabled. Next, we'll be connecting to one of the freely available datasets on BigQuery.
Let's start by creating a new page called Templates/chart.html where we'll show the visualization. Create a method to route the Click Here link on our home page to chart.html.
Here is what it looks like:
class ShowChartPage(webapp2.RequestHandler):
    def get(self):
        temp_data = {}
	    temp_path = 'Templates/chart.html'
	    self.response.out.write(template.render(temp_path,temp_data))
Also modify the request handler to route the request /chart to ShowChartPage as shown below:
application = webapp2.WSGIApplication([
    ('/chart',ShowChartPage),
    ('/', ShowHome),
], debug=True)
Next, modify the href attribute of the Click here link as shown:
<a class="btn btn-lg btn-success" href="http://pythond3jsmashup.appspot.com/chart" role="button">Click here</a>
Now try running the app and on clicking Click here, and you should be redirected to chart.html.
Next, we'll try to authenticate our app with Google BigQuery and fetch some data. For authentication, we'll require Google API Python client. Download google-api-python-client-gae-1.2.zip and extract it into the project folder.
Include the following libraries in app.py.
import httplib2
from apiclient.discovery import build
from oauth2client.appengine import AppAssertionCredentials
First, to query a dataset from BigQuery we need to build a BigQuery service as shown:
url = 'https://www.googleapis.com/auth/bigquery'
credentials = AppAssertionCredentials(scope=url)
httpss = credentials.authorize(httplib2.Http())
bigquery_service = build('bigquery','v2',http=httpss)
Second, we need to create a query that we'll be executing against the BigQuery dataset. We'll be using the Shakespeare dataset. Here is the query that we'll be executing against the dataset:
queryData = {'query':'SELECT word FROM [publicdata:samples.shakespeare] LIMIT 1000'}
To query the data we'll create a job from the bigquery_service:
tableData = bigquery_service.jobs()
And then query from the created job:
response = tableData.query(projectId=PROJECT_NUMBER,body=queryData).execute()
Replace PROJECT_NUMBER with the project number we had noted down earlier. So, here is the modified app.py:
import httplib2
import webapp2
from google.appengine.ext.webapp import template
from apiclient.discovery import build
from oauth2client.appengine import AppAssertionCredentials

url = 'https://www.googleapis.com/auth/bigquery'
PROJECT_NUMBER = 'xxxxxxxxxxxxx'

credentials = AppAssertionCredentials(scope=url)
httpss = credentials.authorize(httplib2.Http())
bigquery_service = build('bigquery','v2',http=httpss)

class ShowChartPage(webapp2.RequestHandler):
    def get(self):
        temp_data = {}
	    temp_path = 'Templates/chart.html'
	    queryData = {'query':'SELECT word FROM [publicdata:samples.shakespeare] LIMIT 1000'}
	    tableData = bigquery_service.jobs()
	    response = tableData.query(projectId=PROJECT_NUMBER,body=queryData).execute()
	    self.response.out.write(response)
	    #self.response.out.write(template.render(temp_path,temp_data))

class ShowHome(webapp2.RequestHandler):
    def get(self):
        template_data = {}
        template_path = 'Templates/index.html'
        self.response.out.write(template.render(template_path,template_data))


application = webapp2.WSGIApplication([
    ('/chart',ShowChartPage),
    ('/', ShowHome),
], debug=True)
The response from the query would be printed out on chart.html. Save all your code and upload the modified code to GAE using appcfg.py update PythonD3jsMashup/.
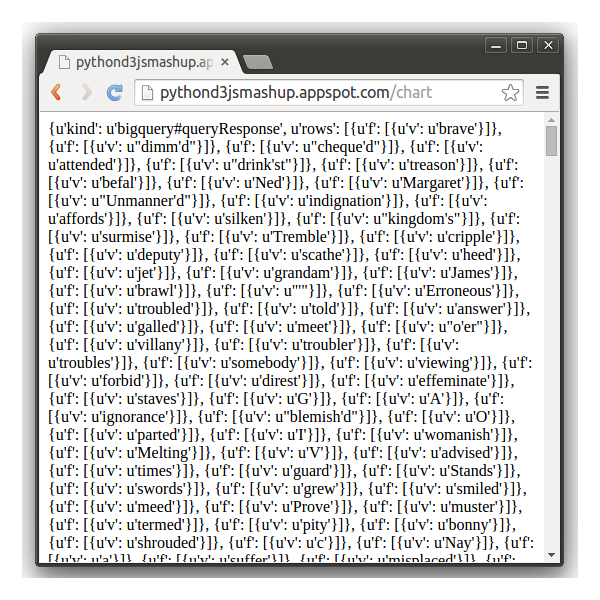
Now if you point your browser to http://pythond3jsmashup.appspot.com/chart you'll see the json response returned from querying the dataset.
Conclusion
In this tutorial, we created a Python application and deployed it on Google App Engine. We connected our application with Google BigQuery and fetched data from the freely available dataset.
Next, we'll try to parse the data fetched from Google BigQuery and visualize it using JavaScript library D3.js. In the meantime, please don't hesitate to leave any questions or comments in the feed below.


Comments