In the previous tutorial, you learned how to define common constraints in the data model. In this tutorial, I show you how you can define more advanced constraints in code.
1. Project Setup
Download the project we created in the previous tutorial from GitHub and open it in Xcode. Open AppDelegate.swift and update the implementation of application(_:didFinishLaunchingWithOptions) as shown below.
func application(application: UIApplication, didFinishLaunchingWithOptions launchOptions: [NSObject: AnyObject]?) -> Bool {
    if let entity = NSEntityDescription.entityForName("User", inManagedObjectContext: self.managedObjectContext) {
        // Create Managed Object
        let user = NSManagedObject(entity: entity, insertIntoManagedObjectContext: self.managedObjectContext)

        // Populate Managed Object
        user.setValue(44, forKey: "age")
        user.setValue("Bart", forKey: "first")
        user.setValue("Jacobs", forKey: "last")
        user.setValue("[email protected]", forKey: "email")

        do {
            try user.validateForInsert()

        } catch {
            let validationError = error as NSError

            print(validationError)
        }

    }

    return true
}
If you run the application in the simulator or on a physical device, no errors should be thrown. In other words, the managed object we create in application(_:didFinishLaunchingWithOptions) passes validation for insertion into the application's persistent store.
2. Subclassing NSManagedObject
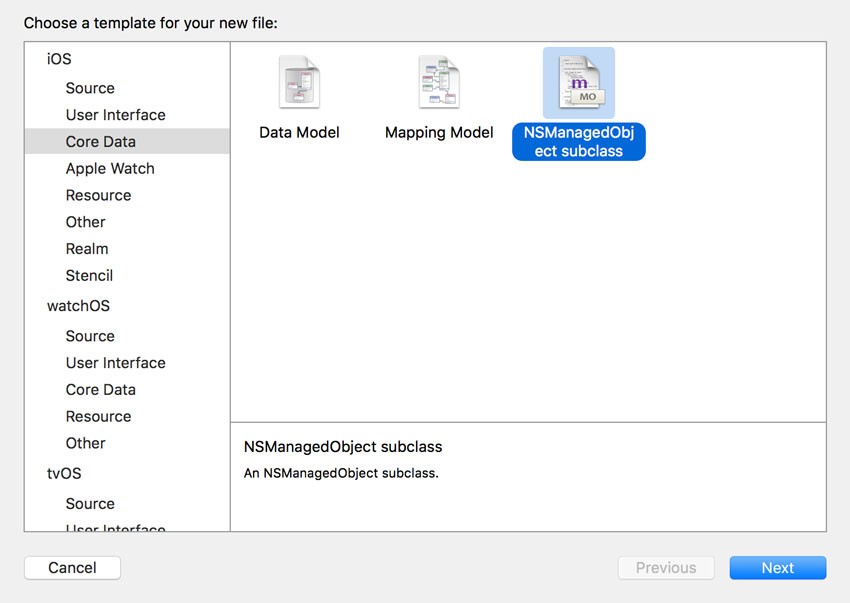
To validate the value of an attribute in code, we need to create an NSManagedObject subclass. Choose New > File... from Xcode's File menu and select the Core Data > NSManagedObject subclass template from the list of templates.

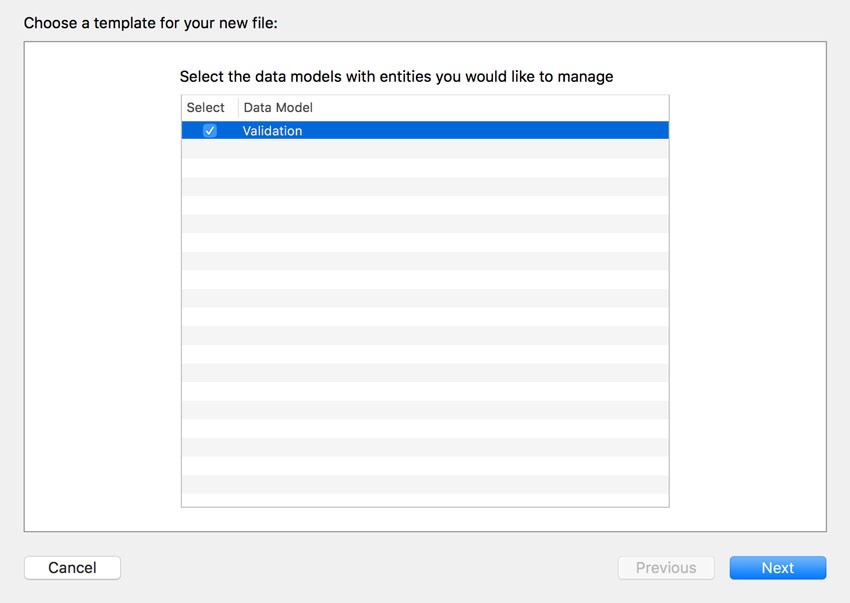
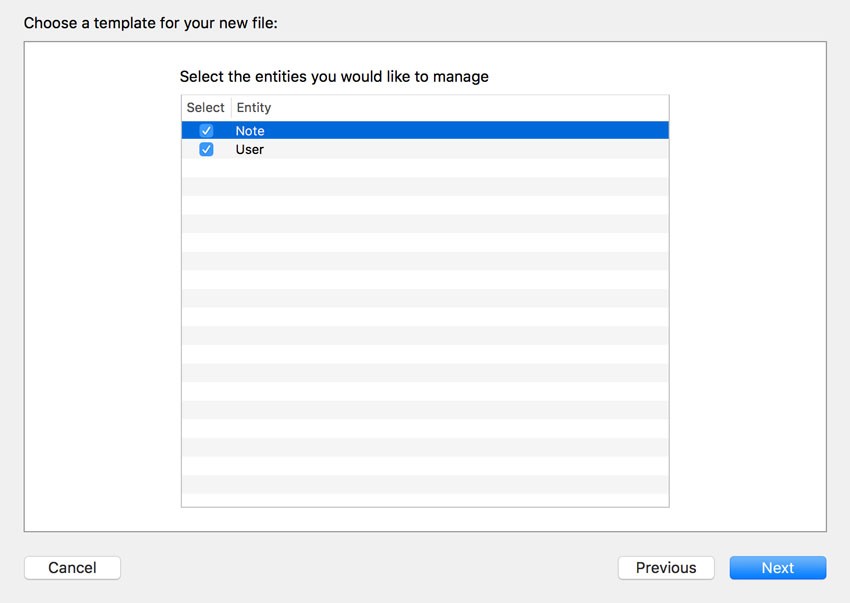
Select the data model of the project and check the entities for which you want to create an NSManagedObject subclass.


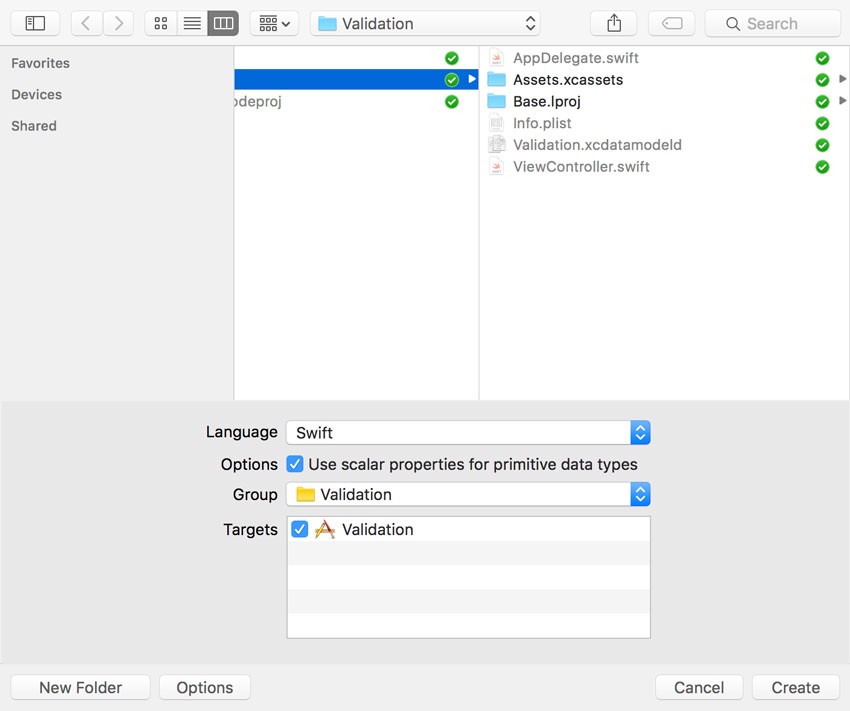
Check Use scalar properties for primitive data types, tell Xcode where you want to save the files for the subclasses, and click Create.

3. Property Validation
To validate the property of an entity, you implement a method that takes the following format, validate<PROPERTY>(_:). The method should be a throwing method. If the validation fails, an error is thrown, notifying Core Data that the value for the property is invalid.
In the example below, I have implemented a validation method for the first property of the User entity. Add the following snippet to User.swift.
import CoreData
import Foundation

class User: NSManagedObject {

    let errorDomain = "UserErrorDomain"

    enum UserErrorType: Int {
        case InvalidFirst
    }

    func validateFirst(value: AutoreleasingUnsafeMutablePointer<AnyObject?>) throws {
        var error: NSError? = nil;

        if let first = value.memory as? String {
            if first == "" {
                let errorType = UserErrorType.InvalidFirst
                error = NSError(domain: errorDomain, code: errorType.rawValue, userInfo: [ NSLocalizedDescriptionKey : "The first name cannot be empty." ] )
            }

        } else {
            let errorType = UserErrorType.InvalidFirst
            error = NSError(domain: errorDomain, code: errorType.rawValue, userInfo: [ NSLocalizedDescriptionKey : "The first name cannot be blank." ] )
        }

        if let error = error {
            throw error
        }
    }

}
The validation method accepts one parameter of type AutoreleasingUnsafeMutablePointer<AnyObject?>. What is that? Don't let the type of the parameter scare you. As the name of the type indicates, the AutoreleasingUnsafeMutablePointer structure is a mutable pointer. It points to an object reference. We can access the value to which the pointer points through its memory property.
As I mentioned a moment ago, the validateFirst(_:) method is throwing. If the value that is handed to us isn't valid, we throw an error. By throwing an error, we inform Core Data that the managed object is invalid.
In the next example, I implement a validation method for the email property of the User class. We make use of a regular expression to validate the value of the email property.
func validateEmail(value: AutoreleasingUnsafeMutablePointer<AnyObject?>) throws {
    var error: NSError? = nil

    if let email = value.memory as? String {
        let regex = "^.+@([A-Za-z0-9-]+\\.)+[A-Za-z]{2}[A-Za-z]*$"
        let predicate = NSPredicate(format: "SELF MATCHES %@", regex)

        if !predicate.evaluateWithObject(email) {
            let errorType = UserErrorType.InvalidEmail
            error = NSError(domain: errorDomain, code: errorType.rawValue, userInfo: [ NSLocalizedDescriptionKey : "The email address is invalid." ] )
        }

    } else {
        let errorType = UserErrorType.InvalidEmail
        error = NSError(domain: errorDomain, code: errorType.rawValue, userInfo: [ NSLocalizedDescriptionKey : "The email address is invalid." ] )
    }

    if let error = error {
        throw error
    }
}
Even though you can modify the value of the property in a validation method, Apple strongly discourages this. If you modify the value that is handed to you in a validation method, memory management may go haywire. With that in mind, the data validation flow becomes very simple. Validate the value of the property and throw an error if it is invalid. It is that simple.
Modify the values of the attributes in application(_:didFinishLaunchingWithOptions) and run the application in the simulator. If the values you entered are invalid, an error should be thrown.
4. Object Validation
The NSManagedObject class exposes three additional hooks subclasses can override for data validation:
validateForInsert()validateForUpdate()validateForDelete()
These methods are invoked by Core Data on the managed object before inserting, updating, or deleting the corresponding record in the persistent store. Each of these methods is throwing. If an error is thrown, the corresponding insert, update, or delete is aborted.
Even though the benefit these hooks have over the property validation methods we discussed earlier may not be immediately obvious, they are invaluable in several scenarios. Imagine that a user record cannot be deleted as long as it has one or more note records associated with it. In that case, you can override the validateForDelete() method in the User class.
override func validateForDelete() throws {
    try super.validateForDelete()

    var error: NSError? = nil

    if let notes = notes {
        if notes.count > 0 {
            let errorType = UserErrorType.OneOrMoreNotes
            error = NSError(domain: errorDomain, code: errorType.rawValue, userInfo: [ NSLocalizedDescriptionKey : "A user with notes cannot be deleted.." ] )
        }
    }

    if let error = error {
        throw error
    }
}
Note that we use the override keyword and invoke the validateForDelete() implementation of the superclass at the top. If the user record is tied to one or more note records, an error is thrown, preventing the user record from being deleted.
5. Which Option Should You Use?
Data validation is an important aspect of every application that works with data. Core Data provides developers with several APIs for implementing data validation. But you may be wondering which option, or options, to use in your application.
This depends on your preference and the requirements of the project. For a simple data model with common constraints, the options the data model offers may be sufficient. That said, some developers prefer to keep validation logic in the model classes, that is, in the NSManagedObject subclasses. The advantage is that the logic for a particular model class is located in one place.
For more complex validation logic, custom validation methods for properties or the validateForInsert(), validateForUpdate(), and validateForDelete() hooks are recommended. They add power and flexibility to object validation and you also have the benefit that the model layer includes the validation logic.
It is important to understand that data validation consists of two aspects, the logic for data validation and when data validation should be performed. The model layer is in charge of data validation. The controller is in charge of deciding when data validation should be performed, for example, when the user taps a button to create an account. This is a subtle but important difference.
Last but not least, avoid putting data validation logic in the controller layer. It unnecessarily clutters up the controllers of your project and it usually leads to code duplication.
Conclusion
Core Data makes data validation easy and straightforward. The data model helps you with common constraints, but the framework also exposes several more advanced APIs for custom data validation.


Comments