In this article we'll be discussing how to create your own mobile modules for Appcelerator's Titanium using just JavaScript and a bit of CommonJS knowledge. The module we'll be creating will be one for Picasa, Google's image service, and will allow our users to view albums and photos from Picasa without knowing any details about the Picasa API itself. Once we've tested our module, we will also run through packaging it for both iOS and Android!
Why Create a Module Using CommonJS?
Why package into a module at all? The code we're creating is JavaScript after all. We could just copy and paste our code files into any Appcelerator Titanium project in order to utilize them. There's a number of very good reasons to do this as a module, however.
- Your modules can be shared and treated as a "black-box" component, just like any other native module can be.
- Your modules are compiled, meaning you can protect your code should you need to.
- Modules are easy to maintain and grow across your projects, allowing you to more easily reuse your code.
Now that we have the "why" out of the way, let's move onto the "how" and create our module!
Setting Up Your Module Project
The easiest way to set up a new mobile module project is via Titanium Studio, so that's what we're going to do. Open Titanium Studio and from the File menu, select New > Mobile Module Project. You'll be presented with a screen like the one below. I'm calling our module "Picasa" and giving it a module ID of "com.boydlee.picasa". Make a note of what your module ID is should you decide to use a different identifier. This will be very important when we create our JavaScript files later on!
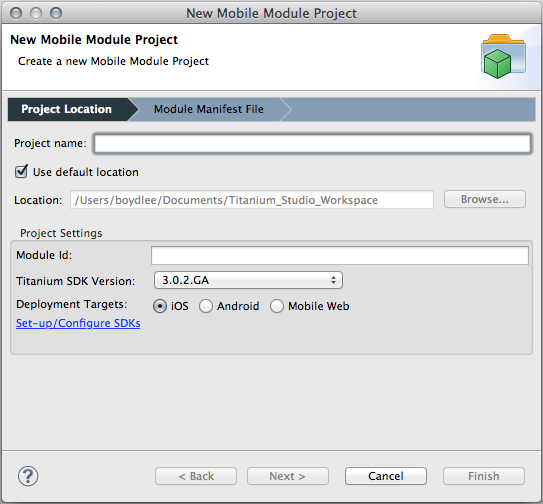
You'll probably note at this stage that you can only create your module for iOS OR Android. This is because modules are compiled separately for each platform. I'm going to select and use iOS for our module right now. It's much quicker to build and test than Android is. We'll build our Android module using the same code at the end of the tutorial. Hit the Finish button and Titanium Studio should create your module project and display it in the App Explorer pane. Let's start coding!
Creating Your Module's JavaScript Entry File
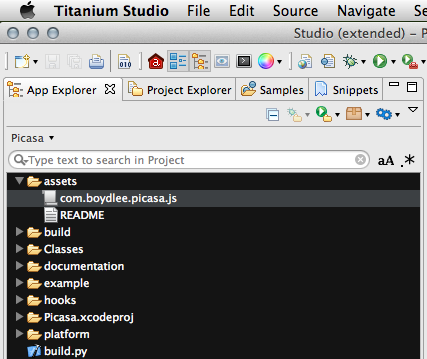
The first thing we need to do is create the JavaScript entry file for our module, which will go into the /assets directory. It must be named in a particular way, which needs to be: your.module.id.js. As I have named my module com.boydlee.picasa, the JavaScript file I need to create needs to be called com.boydlee.picasa.js. Your App Explorer pane should then look something like the photo.
Titanium automatically looks for the entry point file when it loads your module, and that entry point file must have the same name as your module's identifier. Let's start building our CommonJS module, starting with the shell code, which will create our Picasa function, add an "Access Levels" object to it for convenience using prototype, and then export the function via CommonJS.
/*
* Our Picasa CommonJS Module
*/
function Picasa(){
   this._username = '';
   this._accessLevel = 'public';
};

Picasa.prototype.ACCESS_LEVELS = {
    PUBLIC: 'public',
    PRIVATE: 'private'
};

//finally, export the module
//you MUST export it in this manner, not using methods.export = !
exports.Picasa = Picasa;
Building Out the Picasa Functionality
Now that we have our basic module shell done, it's time to fill it out with some functions using prototype. We're going to keep this module fairly simple, so it's only going to have two main objectives: search for and return a list of the user's albums, and return a list of all photographs for an album. First, let's create a few public getters and setters so we can set the username and access levels.
/*
Getters and setters for our private functions
 */
Picasa.prototype.setUsername = function(value){
    this._username = value;
};

Picasa.prototype.getUsername = function(){
    return this._username;
};

Picasa.prototype.setAccessLevel = function(value){
    this._accessLevel = value;
};

Picasa.prototype.getAccessLevel = function(){
    return this._accessLevel;
};
We're also going to need a function that can perform HTTP requests. Rather than creating multiple requests for both albums and photo calls to Picasa, we can create one request function that's reusable. Let's do that now.
/*
 * Our xhr function accepts a URL and 2 callback functions
 */
Picasa.prototype.xhr = function(url, success, error){
    var client = Ti.Network.createHTTPClient({
         // function called when the response data is available
         onload : function(e) {
             Ti.API.info("Received JSON Text: " + this.responseText);
             var json = JSON.parse(this.responseText);
             success(json);
         },
         // function called when an error occurs, including a timeout
         onerror : function(e) {
             Ti.API.debug(e.error);
             error(e.error);
         },
         timeout : 5000 //in milliseconds
     });

     client.open("GET", url); // Prepare the connection.
     client.send();  // Send the request.
};
Let's expand our Picasa function with some functions that will take the username and access level and return back valid URLs for the Picasa photo service. We'll use these URLs later on when we build our HttpRequests.
function Picasa(){
    this._username = '';
    this._accessLevel = 'public';
    var _this = this;

    this.albumnsEndpoint = function(username, accessLevel){
       username = (username === undefined) ? _this._username : username;
       accessLevel = (accessLevel === undefined) ? _this._accessLevel : accessLevel;
       return 'https://picasaweb.google.com/data/feed/api/user/' + username + '?kind=album&access=' + accessLevel + '&alt=json';
    };

    this.albumPhotosEndpoint = function(albumId, username, accessLevel){
       if(albumId === undefined){
           Ti.API.error('This method requires an album ID!');
           return;
       }

       username = (username === undefined) ? _this._username : username;
       accessLevel = (accessLevel === undefined) ? _this._accessLevel : accessLevel;
       return 'https://picasaweb.google.com/data/entry/api/user/' + username + '/albumid/' + albumId + '?alt=json';
    };

};
Accessing Album Data via Picasa
Now that the basic structure of our module is there, we can start building against the Picasa API and adding real functionality and usefulness to our module. The first thing we'll do is create a function that will allow our user to fetch back a list of their Picasa albums. The JSON information Picasa returns for this call is extremely complex, so we'll also be simplifying it into a nice neat array of objects that you can easily understand at first glance. Go ahead and create the following function in your CommonJS module.
/*
 * This function will fetch the albums url, parse the JSON response and simplify before
 * passing it to our callback function
 */
Picasa.prototype.getAlbums = function(callback){
    if(this._username !== undefined){
        var albumsUrl = this.albumnsEndpoint(this._username);

        this.xhr(
            albumsUrl,
            function(response){
               var albums = [];
               for(var i = 0; i < response.feed.entry.length; i++){
                   var album = {
                        title: response.feed.entry[i].title.$t,
                        thumbnail: response.feed.entry[i].media$group.media$thumbnail[0].url,
                        thumbnailWidth: response.feed.entry[i].media$group.media$thumbnail[0].width,
                        url: response.feed.entry[i].link[0].href
                   };
                   albums.push(album);
               }

               callback(albums);
            },
            function(failure){
               callback(failure);
        });

    };
};
Accessing Photo Data via Album Links
Now that we're able to access the album data, we need to use Picasa's photo endpoints to retrieve a list of a photos for a particular album. This can be done two ways. You can use the album ID and build up a Photos URL endpoint, or you can simply use the URL that is returned back in the album's HTTP Request. We'll create both functions just for the sake of usefulness, and a third function called createPhotosArray that will take in a JSON response object and return back a simplified array of images. In your CommonJS module, create the following functions.
/*
 * Takes in a photos URL response JSON object and just returns
 * the important information (an array photo objects)
 */
Picasa.prototype.createPhotosArray = function(response){
    var photos = [];

    for(var i = 0; i < response.feed.entry.length; i++){
        var photo = {
           title: response.feed.entry[i].title.$t,
           url: response.feed.entry[i].content.src
        };

        photos.push(photo);
    }

    return photos;
};

/*
 *
 */
Picasa.prototype.getPhotosByUrl = function(url, callback){
     var _this = this;

    this.xhr(
       url,
       function(response){
          callback(_this.createPhotosArray(response));
       },
       function(failure){
          callback(failure);
    });
};


/*
 *
 */
Picasa.prototype.getPhotosByAlbumId = function(albumId, callback){
    var _this = this;

    if(this._username !== undefined && albumId !== undefined){
        var photosUrl = this.albumPhotosEndpoint(albumId, this._username);

        this.xhr(
            photosUrl,
            function(response){
                callback(_this.createPhotosArray(response));
            },
            function(failure){
               callback(failure);
        });
    }
};
That's about it as far as our CommonJS module goes! We are now able to set our username and access levels via public property functions, fetch back a list of albums and use that information to then fetch back a corresponding list of photos for each Album ID/Album URL. On to the next section, where we'll talk about packaging our module for use in a real Titanium Mobile application!
Packaging and Testing Your New Module
Packaging your module couldn't be simpler when using Titanium Studio. First, click on the "Package" icon within the App Explorer pane. The Package icon looks like a closed box. Then, click on the submenu option "Package - iOS Module". A new popup window will appear that looks like the one below, with three different packaging options.
- Titanium SDK - This will package your module and install it directly to your Titanium SDK's "Modules" directory. On a Mac, this is located with the ~/Application Support/Titanium folder.
- Mobile Project - This will package your module and install it directly to an app that is currently within your Project Explorer pane. If you want to test a module that you're working on, this is generally the easiest way.
- Location - This will package your module and save the resulting ZIP file to a folder you specify. This is the best method if you wish to share your module or potentially upload it to the Appcelerator Marketplace.

We're going to go ahead and choose the first option, create the package, and store it in our Titanium SDK folder. Select that and press "Finish". Now just sit back and wait for a minute. Titanium Studio will build your new module and when it's completed you'll see a yellow notification message appear in the bottom right of the screen. Success!

Now that our module is packaged we should probably test it out, right? Let's create a new mobile project. Choose Titanium Classic from the templates menu, and then Default Project. We are going to create our example project in very simple, "classic" Titanium code. This is because once it's working, we'll want to copy our test code into the example.js file of our module for other people to use as a reference. I'm calling my test app Picasa-TestApp with an app ID of com.boydlee.picasatestapp, but you can call yours whatever you like.

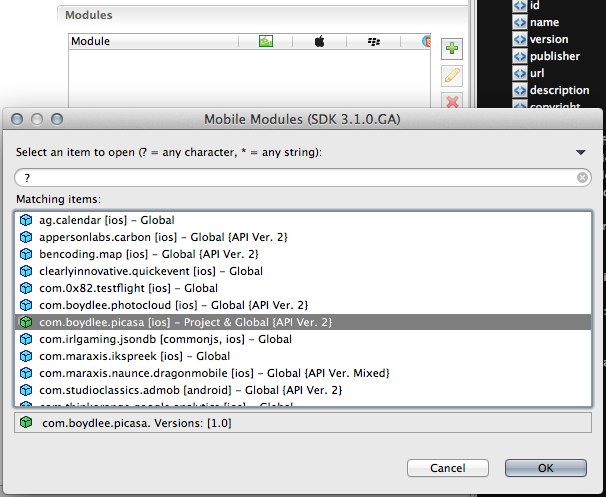
This basic template consists of a TabGroup and two windows, all defined within your app.js file. We're going to simplify the code so that we just have the one tab and the one window. We'll add a TableView which we'll populate with our albums data, but before we do, we need to add our new module to our test project. Open the tiapp.xml file, click the "+" button next to the list of app modules, and then choose the Picasa module we packaged up in the previous section.
Now let's add the test code into app.js, which will return a list of albums to our user and show them in a TableView. We'll also do a require and create a new Picasa object via our module.
//require our Module and create a new instance of it
var PicasaModule = require('com.boydlee.picasa');
var picasa = new PicasaModule.Picasa();

//set the username
picasa.setUsername('boydlee');
//set the access level using our public 'CONSTANTS' object
picasa.setAccessLevel(picasa.ACCESS_LEVELS.PUBLIC);


// this sets the background color of the master UIView (when there are no windows/tab groups on it)
Titanium.UI.setBackgroundColor('#000');

// create tab group
var tabGroup = Titanium.UI.createTabGroup();


//
// create base UI tab and root window
//
var win = Titanium.UI.createWindow({
    title:'Picasa Albums',
    backgroundColor:'#000'
});
var tab1 = Titanium.UI.createTab({
    icon:'KS_nav_views.png',
    title:'Albums',
    window: win
});

//get the albums for this user and access level
picasa.getAlbums(function(response){
   //openAlbumPhotosView(response.feed.entry[0].gphoto$name.$t, response.feed.entry[0].link[0].href);
   var table = Ti.UI.createTableView({
       width: Ti.UI.FILL,
       height: Ti.UI.FILL,
       top: 0,
       left: 0
   });
   table.addEventListener('click', function(e){
       openAlbumPhotosView(e.row.data.title, e.row.data.url);
   });

   var rows = [];

   for(var i = 0; i < response.length; i++){
       var img = Ti.UI.createImageView({
           width: 60,
           height: 60,
           highres: true,
           image: response[i].thumbnail,
           left: 5,
           top: 5
       });
       var label = Ti.UI.createLabel({
           text: response[i].title,
           height: 60,
           font: {
               fontSize: 20,
               fontWeight: 'bold'
           },
           top: 5,
           left: 80,
           width: Ti.UI.SIZE
       });

       var row = Ti.UI.createTableViewRow({
           className: 'albumRow',
           height: 70,
           data: response[i]
       });

       row.add(img);
       row.add(label);
       rows.push(row);
   }

   table.setData(rows);
   win.add(table);
});

//  add tab
tabGroup.addTab(tab1);


// open tab group
tabGroup.open();
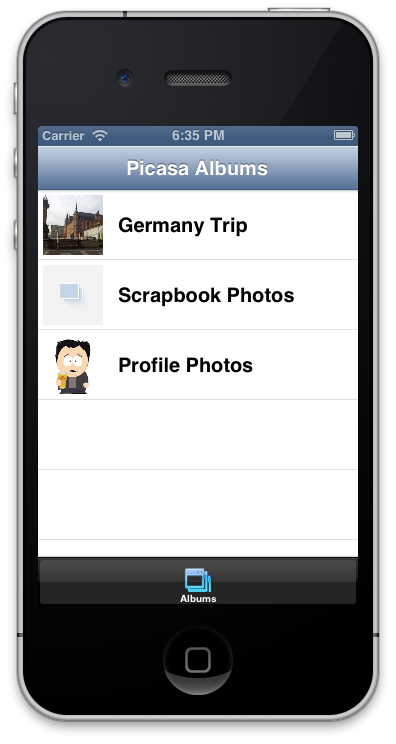
Note that I've set the access to public and the username to boydlee, which will access the photos on my Picasa account. Once that's done, try launching your app in the simulator.
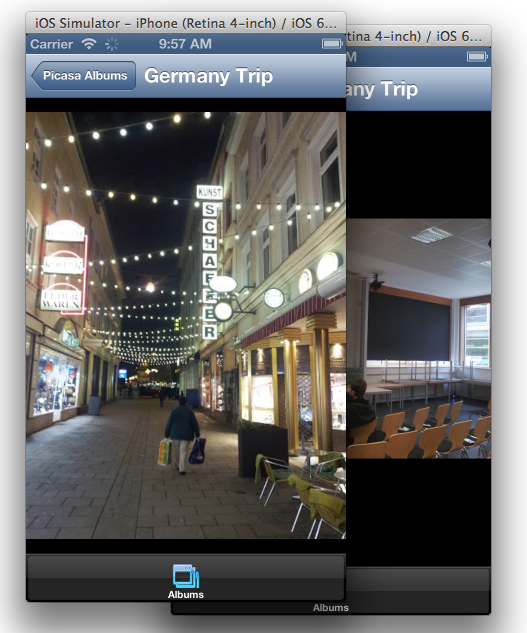
Finally, we need to add a function called openAlbumPhotosView, which is going to accept an album title and URL, open a new window in the current tab, and then pull back and display all the photos for that album in a ScrollableView.
function openAlbumPhotosView(title, url){
    Ti.API.info('Getting photos for album: ' + title);
    var detailsWin = Ti.UI.createWindow({
        title: title,
        backgroundColor: '#000',
        height: Ti.UI.FILL,
        width: Ti.UI.FILL
    });


    picasa.getPhotosByUrl(url, function(response){
        Ti.API.info(response);
        var imageViews = [];

        for(var i = 0; i < response.length; i++){
            var img = Ti.UI.createImageView({
                image: response[i].url,
                title: response[i].title
            });

            imageViews.push(img);
        }

        var scrollableView = Ti.UI.createScrollableView({
           height: Ti.UI.FILL,
           width: Ti.UI.FILL ,
           views: imageViews
        });

        detailsWin.add(scrollableView);
    });

    tab1.open(detailsWin);
}
Run your code in the simulator for one last time. You should now be able to fetch back a list of albums, select one from the TableView, and then view a Scrollable slide show of the photos for that album. Neat!
Packaging The Picasa Module
All that's left to do now is package the Picasa module for iOS and Android. First, copy all the code from your test app.js file and paste it into the module project's /example/app.js. We want this code as an example for other people that want to use our module. Once that's done, just hit the Package button and you can choose to export your module via a Location, just like we explained back in the Packaging & Testing Your New Module section. For Android, the process is the same, but we have to create a separate module project for that by creating a new Mobile Module project for Android this time around. Copy and paste the example/app.js and com.boydlee.picasa.js code files we already created into the right locations in your Android mobile module project. You can then build and distribute for Android just like we did in iOS!
Tip: You may need to install JDT before you're able to create modules for Android. An easy step by step guide is available at appcelerator.com
Conclusion
Hopefully you've found this tutorial useful. The next time you consider building out Titanium functionality that you wish to share, or use amongst multiple projects, you'll probably consider wrapping it up into a CommonJS module!

Comments