Introduction
In the fourth and final part of this series, we continue where we left of in the previous tutorial. We'll create enemy planes the player needs to avoid or shoot, and we'll also create a game over screen.
1. generateEnemys
The generateEnemys function generates a number between three and seven, and calls the generateEnemyPlane function every two seconds for however many times numberOfEnemysToGenerate is equal to. Enter the following code snippet to gamelevel.lua.
function generateEnemys()
    numberOfEnemysToGenerate = math.random(3,7)
    timer.performWithDelay( 2000, generateEnemyPlane,numberOfEnemysToGenerate)
end
We also need to invoke this function in the enterScene method as shown below.
function scene:enterScene( event )
    --SNIP--
    Runtime:addEventListener("enterFrame", gameLoop)
    startTimers()
    generateEnemys()
end
Let's see what the implementation of generateEnemyPlane looks like.
2. generateEnemyPlane
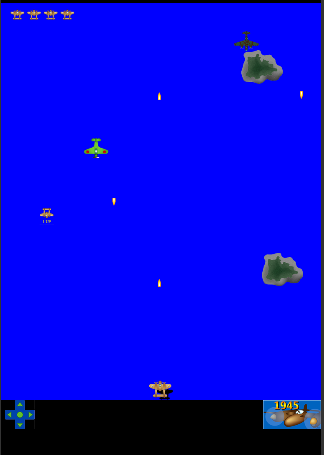
The generateEnemyPlane function generates one enemy plane. There are three types of enemy planes in this game.
- Regular , moves down the screen in a straight line
- Waver, moves in a wave pattern on the x axis
- Chaser, chases the player's plane
function generateEnemyPlane()
    if(gameOver ~= true) then
	local randomGridSpace = math.random(11)
   	local randomEnemyNumber = math.random(3)
	local tempEnemy
	if(planeGrid[randomGridSpace]~=0) then
	    generateEnemyPlane()
	return
	else
	    if(randomEnemyNumber == 1)then
                tempEnemy =  display.newImage("enemy1.png", (randomGridSpace*65)-28,-60)
	        tempEnemy.type = "regular"
	    elseif(randomEnemyNumber == 2) then
	         tempEnemy =  display.newImage("enemy2.png", display.contentWidth/2 -playerWidth/2,-60)
		tempEnemy.type = "waver"
	    else
		tempEnemy =  display.newImage("enemy3.png", (randomGridSpace*65)-28,-60)
		tempEnemy.type = "chaser"
	   end
      planeGrid[randomGridSpace] = 1
      table.insert(enemyPlanes,tempEnemy)
      planeGroup:insert(tempEnemy)
      numberOfEnemysGenerated = numberOfEnemysGenerated+1;
	 end
     if(numberOfEnemysGenerated == numberOfEnemysToGenerate)then
         numberOfEnemysGenerated = 0;
        resetPlaneGrid()
        timer.performWithDelay(2000,generateEnemys,1)
    end
end
end
We first check to make sure the game isn't over yet. We then generate a randomGridSpace, a number between 1 and 11, and a random randomEnemyNumber, a number between 1 and 3. The randomGridSpace is used to position the plane in one of eleven slots at the top of the screen on the x axis. If you think of the game area being divided into eleven sections, then we only want to place new planes in a slot that hasn't been taken yet by another plane. The planeGrid table contains eleven 0's and when we place a new plane in one of the slots, we set the corresponding position in the table to 1 to indicate that slot has been taken by a plane.
We check if the index of the randomGridSpace in the table isn't equal to 0. If it isn't, we know that slot is currently taken and we shouldn't continue, so we call generateEnemyPlane and return from the function.
Next, we check what randomEnemyNumber is equal to and set tempEnemy to one of the three enemy images, we also give it a property of either regular, waver, or chaser. Because Lua is a dynamic language, we can add new properties to an object at runtime. We then set whatever index is equal to randomGridSpace to 1 in the planeGrid table.
We insert tempEnemy into the enemyPlanes table for later reference and increment numberOfEnemysGenerated. If numberOfEnemysGenerated is equal to numberOfEnemysToGenerate, we reset numberOfEnemysGenerated to 0, invoke resetPlaneGrid, and set a timer that will call generateEnemys again after two seconds. This process repeats for as long as the game isn't over.
3. moveEnemyPlanes
As you may have guessed, the moveEnemyPlanes function is responsible for moving the enemy planes. Depending on the plane's type, the appropriate function is called.
function moveEnemyPlanes()
    if(#enemyPlanes > 0) then
        for i=1, #enemyPlanes do
            if(enemyPlanes[i].type ==  "regular") then
               moveRegularPlane(enemyPlanes[i])
	    elseif(enemyPlanes[i].type == "waver") then
	       moveWaverPlane(enemyPlanes[i])
            else
	       moveChaserPlane(enemyPlanes[i])
	    end
	end
    end
end
This function needs to be invoked in the gameLoop function.
function gameLoop()
    --SNIP--
    checkFreeLifesOutOfBounds()
    checkPlayerCollidesWithFreeLife()
    moveEnemyPlanes()
end
4. moveRegularPlane
The moveRegularPlane simply moves the plane down the screen across the y axis.
function moveRegularPlane(plane)
    plane.y = plane.y+4
end
5. moveWaverPlane
The moveWaverPlane function moves the plane down the screen across the y axis and, in a wave pattern, across the x axis. This is achieved by using the cos function of Lua's math library.
If this concept is foreign to you, Michael James Williams wrote a great introduction to Sinusoidal Motion. The same concepts apply, the only difference is that we are using cosine. You should think sine when dealing with the y axis and cosine when dealing with the x axis.
function moveWaverPlane(plane)
    plane.y =plane.y+4 plane.x = (display.contentWidth/2)+ 250* math.cos(numberOfTicks * 0.5 * math.pi/30)
end
In the above snippet, we use the numberOfTicks variable. We need to increment this each time the gameLoop function is called. Add the following as the very first line in the gameLoop function.
function gameLoop()
    numberOfTicks = numberOfTicks + 1
end
6. moveChaserPlane
The moveChaserPlane function has the plane chasing the player. It moves down the y axis at a constant speed and it moves towards the player's position on the x axis. Take a look at the implementation of moveChaserPlane for clarification.
function moveChaserPlane(plane)
    if(plane.x < player.x)then
	plane.x =plane.x +4
    end
    if(plane.x  > player.x)then
	plane.x = plane.x - 4
   end
    plane.y = plane.y + 4
end
If you test the game now, you should see the planes moving down the screen.
7. fireEnemyBullets
Every so often, we want the enemy planes to fire a bullet. We don't want all of them firing at the same time, however, so we choose only a couple of planes to fire.
function fireEnemyBullets()
    if(#enemyPlanes >= 2) then
	local numberOfEnemyPlanesToFire = math.floor(#enemyPlanes/2)
   	local tempEnemyPlanes = table.copy(enemyPlanes)
   	local function fireBullet()
    	local randIndex = math.random(#tempEnemyPlanes)
    	local tempBullet = display.newImage("bullet.png",  (tempEnemyPlanes[randIndex].x+playerWidth/2) + bulletWidth,tempEnemyPlanes[randIndex].y+playerHeight+bulletHeight)
    	tempBullet.rotation = 180
    	planeGroup:insert(tempBullet)
	table.insert(enemyBullets,tempBullet);
	table.remove(tempEnemyPlanes,randIndex)
   	end
   	for i = 0, numberOfEnemyPlanesToFire do
            fireBullet()
	end
    end
end
We first check to make sure the enemyPlanes table has more than two planes in it. If it does, we get the numberOfEnemyPlanes to fire by taking the length of the enemyPlanes table, divide it by two, and round it down. We also make a copy of the enemyPlanes table, so we can manipulate it separately.
The fireBullet function chooses a plane from the tempEnemyPlanes table and makes the plane fire a bullet. We generate a random number based on the length of the tempEnemyPlanes table, create a bullet image, and position it by using whichever plane is at the randIndex in the tempEnemyPlanes table. We then remove that plane from the temporary table to ensure it won't be chosen again next time fireBullet is called.
We repeat this process however many times numerOfEnemyPlanesToFire is equal to and call the fireBullet function.
We need to start the timer that calls this function every so often. To accomplish this, add the following to the startTimers function.
function startTimers()
    firePlayerBulletTimer = timer.performWithDelay(2000, firePlayerBullet ,-1)
    generateIslandTimer = timer.performWithDelay( 5000, generateIsland ,-1)
    generateFreeLifeTimer = timer.performWithDelay(7000,generateFreeLife, - 1)
    fireEnemyBulletsTimer = timer.performWithDelay(2000,fireEnemyBullets,-1)
end
8. moveEnemyBullets
We also need to move the enemy bullets that are on-screen. This is pretty simple using the following code snippet.
function moveEnemyBullets()
    if(#enemyBullets > 0) then
	for i=1,#enemyBullets do
           enemyBullets[i]. y = enemyBullets[i].y + 7
	end
    end
end
Invoke this function in the gameLoop function.
function gameLoop()
    --SNIP--
    checkPlayerCollidesWithFreeLife()
    moveEnemyPlanes()
    moveEnemyBullets()
end
9. checkEnemyBulletsOutOfBounds
In addition to moving the enemy bullets, we need to check when the enemy bullets have gone off-screen and remove them when they do. The implementation of checkEnemyBulletsOutOfBounds should feel familiar by now.
function checkEnemyBulletsOutOfBounds()
    if(#enemyBullets > 0) then
	for i=#enemyBullets,1,-1 do
	    if(enemyBullets[i].y > display.contentHeight) then
		enemyBullets[i]:removeSelf()
		enemyBullets[i] = nil
		table.remove(enemyBullets,i)
	    end
	end
    end
end
Invoke this function in the gameLoop function.
function gameLoop()
    --SNIP--
    moveEnemyBullets()
    checkEnemyBulletsOutOfBounds()
end
10. checkEnemyPlanesOutOfBounds
We should also check if the enemy planes have moved off-screen.
function checkEnemyPlanesOutOfBounds()
    if(#enemyPlanes> 0) then
	for i=#enemyPlanes,1,-1 do
            if(enemyPlanes[i].y > display.contentHeight) then
	       enemyPlanes[i]:removeSelf()
	       enemyPlanes[i] = nil
	       table.remove(enemyPlanes,i)
           end
	end
    end
end
Invoke this function in the gameLoop function
function gameLoop()
    --SNIP--
    moveEnemyBullets()
    checkEnemyBulletsOutOfBounds()
    checkEnemyPlanesOutOfBounds()
end
11. checkPlayerBulletsCollideWithEnemyPlanes
The checkPlayerBulletCollidesWithEnemyPlanes function uses the hasCollided function to check whether any of the player's bullets has collided with any of the enemy planes.
function checkPlayerBulletsCollideWithEnemyPlanes()
    if(#playerBullets > 0 and #enemyPlanes > 0) then
        for i=#playerBullets,1,-1 do
	    for j=#enemyPlanes,1,-1 do
	         if(hasCollided(playerBullets[i], enemyPlanes[j])) then
		     playerBullets[i]:removeSelf()
	             playerBullets[i] =  nil
	             table.remove(playerBullets,i)
		     generateExplosion(enemyPlanes[j].x,enemyPlanes[j].y)
                     enemyPlanes[j]:removeSelf()
	             enemyPlanes[j] = nil
	             table.remove(enemyPlanes,j)
		     local explosion = audio.loadStream("explosion.mp3")
		     local backgroundMusicChannel = audio.play( explosion, {fadein=1000 } )
	         end
	    end
        end
    end
end
This function uses two nested for loops to check whether the objects have collided. For each of the playerBullets, we run through all the planes in the enemyPlanes table and call the hasCollided function. If there's a collision, we remove the bullet and plane, call the generateExplosion function, and load and play an explosion sound.
Invoke this function in the gameLoop function.
function gameLoop()
    --SNIP--
    checkEnemyBulletsOutOfBounds()
    checkEnemyPlanesOutOfBounds()
    checkPlayerBulletsCollideWithEnemyPlanes()
end
12. generateExplosion
The generateExplosion function uses Corona's SpriteObject class. Sprites allow for animated sequences of frames that reside on Image or Sprite Sheets. By grouping images into a single image, you can pull certain frames from that image and create an animation sequence.
function generateExplosion(xPosition , yPosition)
    local options = { width = 60,height = 49,numFrames = 6}
    local explosionSheet = graphics.newImageSheet( "explosion.png", options )
    local sequenceData = {
  	 { name = "explosion", start=1, count=6, time=400,   loopCount=1 }
	}
    local explosionSprite = display.newSprite( explosionSheet, sequenceData )
    explosionSprite.x = xPosition
    explosionSprite.y = yPosition
    explosionSprite:addEventListener( "sprite", explosionListener )
    explosionSprite:play()
end
The newImageSheet method takes as parameters the path to the image and a table of options for the Sprite Sheet. The options we set are the width, the height, and the numFrames, how many individual images make up this sheet. There are six separate explosion images as shown in the image below.

Next, we set up a table, sequenceData, which is needed by the SpriteObject. We set the start property to 1, the count to 6, and time to 400. The start property is the frame that the animation will start on, the count is how many frames the animation includes, and the time property is how long the animation takes to play through.
We then create the SpriteObject passing in the explosionSheet and sequenceData, set the x and y positions, and add a listener to the sprite. The listener will be used to remove the sprite once it has finished its animation.
13. explosionListener
The explosionListener function is used to remove the sprite. If the event's phase property is equal to ended, then we know the sprite has finished its animation and we can remove it.
function explosionListener( event )
     if ( event.phase == "ended" ) then
        local explosion = event.target
	explosion:removeSelf()
	explosion = nil
	end
end
14. checkEnemyBulletsCollideWithPlayer
The checkEnemyBulletsCollideWithPlayer checks to see if any of the enemies' bullets have collided with the player's plane.
function checkEnemyBulletsCollideWithPlayer()
    if(#enemyBullets > 0) then
        for i=#enemyBullets,1,-1 do
	    if(hasCollided(enemyBullets[i],player)) then
	        enemyBullets[i]:removeSelf()
	         enemyBullets[i] = nil
		 table.remove(enemyBullets,i)
		 if(playerIsInvincible == false) then
			killPlayer()
		end
	   end
        end
    end
end
We loop through the enemyBullets table and check if any of them have collided with the player. If true, we remove that particular bullet, and, if playerIsInvincible is false, we invoke killPlayer.
Invoke this function in the gameLoop function.
function gameLoop()
    --SNIP--
    checkEnemyPlanesOutOfBounds()
    checkPlayerBulletsCollideWithEnemyPlanes()
    checkEnemyBulletsCollideWithPlayer()
end
15. killPlayer
The killPlayer function is responsible for checking whether the game is over and spawning a new player if it isn't.
function killPlayer()
    numberOfLives = numberOfLives- 1;
    if(numberOfLives == 0) then
        gameOver = true
        doGameOver()
   else
        spawnNewPlayer()
        hideLives()
        showLives()
        playerIsInvincible = true
   end
end
We first decrement numberOfLives by 1, and, if it's equal to 0, we call the gameOver function. It the player has lives left, we call spawnNewPlayer, followed by hideLives, showLives, and set playerIsInvincible to true.
16. doGameOver
The doGameOver function tells the storyboard to go to the gameover scene.
function  doGameOver()
    storyboard.gotoScene("gameover")
end
17. spawnNewPlayer
The spawnNewPlayer function is responsible for spawning a new player after it has died. The player's plane blinks for a few seconds to show that it's temporarily invincible.
function spawnNewPlayer()
    local numberOfTimesToFadePlayer = 5
    local numberOfTimesPlayerHasFaded = 0
    local  function fadePlayer()
        player.alpha = 0;
        transition.to( player, {time=200, alpha=1})
        numberOfTimesPlayerHasFaded = numberOfTimesPlayerHasFaded + 1
        if(numberOfTimesPlayerHasFaded == numberOfTimesToFadePlayer) then
             playerIsInvincible = false
  	end
    end
    	timer.performWithDelay(400, fadePlayer,numberOfTimesToFadePlayer)
end
To make the player's plane blink, we fade it in and out five times. In the fadePlayer function, we set the plane's alpha property to 0, which makes it transparent. We then use the transition library to fade the alpha back to 1 over a period of 200 milliseconds. The to method of the transition object takes a table of options. In our example, the options table includes a time in milliseconds and the property we'd like to animate, alpha, and the desired value, 1.
We increment numberOfTimesThePlayerHasFaded and check if it's equal to the number of times we wanted the player to fade. We then set playerIsInvincible to false. We use a timer to call the fadePlayer function however many times numberOfTimerToFadePlayer is equal to.
There is a way to do all this without using the timer and that is by using the transition's iterations property in combination with its onComplete handler. Read through the documentation to learn more about this alternative approach.
18. checkEnemyPlaneCollidesWithPlayer
There is one more collision check we should do and that is to see if an enemy plane collides with the player's plane.
function checkEnemyPlaneCollideWithPlayer()
    if(#enemyPlanes > 0) then
        for i=#enemyPlanes,1,-1 do
	    if(hasCollided(enemyPlanes[i], player)) then
	        enemyPlanes[i]:removeSelf()
		enemyPlanes[i] = nil
		table.remove(enemyPlanes,i)
		if(playerIsInvincible == false) then
		    killPlayer()
		end
	  end
	end
    end
end
We loop through the enemy planes and see if any one of them collides with the player's plane. If true, we remove that enemy plane and call killPlayer. If you think it makes the game more interesting, you could also generate an explosion here.
19. exitScene
When the game is over, we transition to the gameover scene. Remember from earlier in the tutorial, the exitScene function is where you remove any event listeners, stop timers, and stop audio that's playing.
function scene:exitScene( event )
    local group = self.view
    rectUp:removeEventListener( "touch", movePlane)
    rectDown:removeEventListener( "touch", movePlane)
    rectLeft:removeEventListener( "touch", movePlane)
    rectRight:removeEventListener( "touch", movePlane)
    audio.stop(planeSoundChannel)
    audio.dispose(planeSoundChannel)
    Runtime:removeEventListener("enterFrame", gameLoop)
    cancelTimers()
end
scene:addEventListener( "exitScene", scene )
We are basically undoing what we did in the enterScene function. We call the dispose method on the audio object to release the memory associated with the audio channel. Calling stop alone does not release the memory.
20. cancelTimers
As its name indicates, the cancelTimers function does the opposite of startTimers, it cancels all the timers.
function cancelTimers()
    timer.cancel( firePlayerBulletTimer )
    timer.cancel(generateIslandTimer)
    timer.cancel(fireEnemyBulletsTimer)
    timer.cancel(generateFreeLifeTimer)
end
21. Game Over Scene
It's time to create the gameover scene. Start by adding a new Lua file to your project named gameover.lua, and add the following code to it.
local storyboard = require( "storyboard" )
local scene = storyboard.newScene()
local gameOverText
local newGameButton

return scene
22. createScene
Add the following to gameover.lua above return scene. From here on out, all code should be placed above the return scene statement.
function scene:createScene( event )
    local group = self.view
    local background = display.newRect( 0, 0, display.contentWidth, display.contentHeight)
    background:setFillColor( 0,.39,.75)
    group:insert(background)
    gameOverText = display.newText( "Game Over", display.contentWidth/2,400, native.systemFont, 16 )
    gameOverText:setFillColor( 1, 1, 0 )
    gameOverText.anchorX = .5
    gameOverText.anchorY = .5
    group:insert(gameOverText)
    newGameButton = display.newImage("newgamebutton.png",264,670)
    group:insert(newGameButton)
    newGameButton.isVisible = false
 end
As we did in the previous two scenes, we give the gameover scene a blue background. We then create a TextObject instance by calling newText on display. The newText method takes a few options, the text for the object, its position, and the font to use. We give it a yellow color by invoking setFillColor, passing in RGB values as percentages. Finally, we create a button and hide it for the time being.
23. enterScene
When the storyboard has fully transitioned to the gameover scene, the enterScene method is called.
In enterScene, we remove the previous scene from the storyboard. We use the convenience method scaleTo from the Transition Library to scale the gameOverText by a factor of 4. We add an onComplete listener to the transition that calls the showButton function once the transition has completed. Lastly, we add a tap event listener to the game button that invokes the startNewGame function.
function scene:enterScene( event )
    local group = self.view
    storyboard.removeScene("gamelevel" )
    transition.scaleTo( gameOverText, { xScale=4.0, yScale=4.0, time=2000,onComplete=showButton} )
    newGameButton:addEventListener("tap", startNewGame)
end
24. showButton
The showButton function hides the gameOverText and shows the newGameButton.
 function showButton()
    gameOverText.isVisible = false
    newGameButton.isVisible= true
 end
25. startNewGame
The startNewGame function tells the storyboard to transition to the gamelevel scene.
function startNewGame()
    storyboard.gotoScene("gamelevel")
end
26. exitScene
We need to do some cleanup when we leave the gameover scene. We remove the tap event listener we added earlier to the newGameButton.
function scene:exitScene( event )
    local group = self.view
    newGameButton:removeEventListener("tap",startNewGame)
end
27. Add Scene Listeners
The final piece of the puzzle is adding the scene event listeners we talked about earlier. To do this, addd the following code snippet to gameover.lua.
scene:addEventListener( "createScene", scene )
scene:addEventListener( "enterScene", scene )
scene:addEventListener( "exitScene", scene )
Conclusion
We have come to the end of this series and now have a fully functional plane fighting game. I hope you've found these tutorials useful and have learned something along the way. Thanks for reading.

Comments