We'll be looking at how to create a XMPP chat application that can be used in many different scenarios. You'll learn how to integrate an external database with Ignite Realtime's Openfire Jabber Server and how to use the XIFF library to create custom XMPP extensions that can be used to send custom data across a network.
You could use this to build a standard standard chat room app, with a page devoted to it, or you could run it alongside another piece of Flash content, like Kongregate does with its games.
Final Result Preview
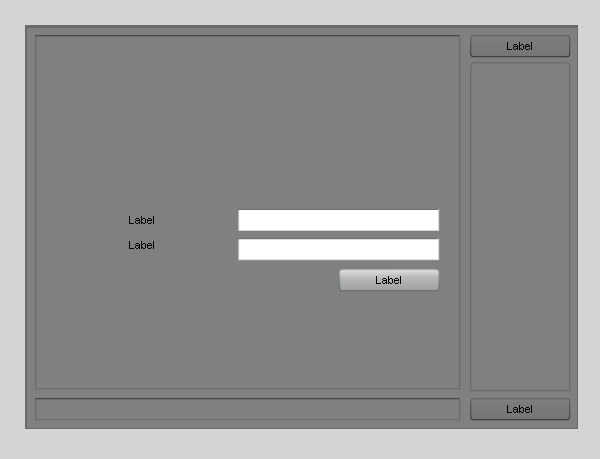
Let's take a look at the interface of the final result we will be working towards (this demo does not function as an actual chat client):
Here's a video demo that shows it in action:
Step 1: Prerequisites
This tutorial assumes that you have some experience with PHP. You must be have Wamp Server installed on your system and you should also be somewhat familiar with PhpMyAdmin. If you do not have WAMP you can download it here. You will also need to download the Openfire Jabber Server and the XIFF API library from the Ignite Realtime website. I will walk you through the Openfire installation process. Finally you will need the latest version of Java installed on your operating system and Flash CS4 or later. I will be using Flash CS5 Professional in this tutorial. If you do not have the latest version of Java, you can download the latest version here.
Step 2: Setting Up Our Database
Make sure that Wamp Server is running on your computer and navigate to http://localhost/phpmyadmin/ in your web browser.
Create a new database called MyContentSite using PhpMyAdmin.

Create a new table in the MyContentSite database called myMembers with eight fields.

After the myMembers table has been sucessfully created by PhpMyAdmin, create the following fields:
- uid
- first_name
- last_name
- my_username
- my_password
- status_message
- country
Your screen should look as follows:

Let me break down each field. The uid field should be of type INT. You can change the field's type from the Type column. Make this field the primary index and set this field to auto-increment itself. Do this by selecting the PRIMARY option underneath the INDEX column within this fields row. Then check the checkbox under the Auto-Increment column. This field represents the userID of the current member of our website. The first_name, last_name, my_username, my_password, email, and country fields should be have the datatype or VARCHAR and the Length/Value should be set to 255.
Note: The my_password fields shown in the images hold an MD5 of the user's password. You may choose to store passwords plain without any encryption but for this tutorial I will be using hashed passwords.

Finally, the status_message field should be of the of type MEDIUMTEXT.
Once you have created the all of the fields click the save button.

Now we are ready to create two dummy accounts that we will use to login to our website and join chat rooms later in this tutorial. Click on the Insert tab. You will be presented with a form for creating a new row in the table.
Leave the uid field empty because we want this field to automatically increment itself. Set the first_name to Jane and the last_name field to Doe. Set the my_username to janedoe with all lower cass letters. For the my_password field, we'll be using the hashed value for our password which is tutsplus in all lower case letters. Type ca28ad0733a3dde9dc1f30e32718d209 into the my_password field. You can set the email field to an email address of your choosing and the status_message field to whatever you'd like. Set the country field to whatever country you'd like as well. When you are finished click on the save button . Repeat this process to create an account for a John Doe with the my_username field set to johndoe123 in all lower case letters. Use the same password as before.


Step 2: Installing Openfire
Once you have downloaded Openfire from the Ignite Realtime website, run the installation exe file (or dmg file if you are using a Mac).

Select your langauge.

Click Next to continue.

Accept the License Agreement.

Choose a directory and click Next to continue.

Select a Start Menu folder.

Click Next to begin the installation.

Once the installation has completed, click Finish to to run Openfire. The Openfire service will start automatically when the program is run. Click the Launch Admin button when Openfire has finished booting.


Now we will set up Openfire. Select your preferred language and click Continue.

Leave the Admin Console Port field and Secure Admin Console Port field to their default values. For this tutorial leave the Domain field to it's default value as well. You can change this later to your website's domain. Click Continue.

Select the Standard Database Connection option and click Continue.

Under Database Driver Presets, choose MySQL. Type com.mysql.jdbc.Driver in the JDBC Driver Class field. Change [host-name] to localhost and change [database-name] to mycontentsite in the Database URL field. Set Username and Password to your MySQL database's username and password. For this tutorial I used the default username for MySQL which is root and the Password field remains blank. Click Continue to move on.


Leave the Profile Settings to Default. Click Continue to move on.

Choose an email address for your Administrator Account and a password then continue.

We are now done the setup process. You may now login to the admin console. Use the default username admin and the password the you chose during setup.
Step 3: Setting Up the Chat Rooms
Our application allow users to communicate within chat rooms. But for this to happen our users must have chat rooms to join. Let's create the chat rooms using the Openfire Admin Console. If you haven't already, start Openfire Server. Log in the Openfire's Admin Console. Navigate to the Group Chat Rooms page by clicking on the Group Chat tab.
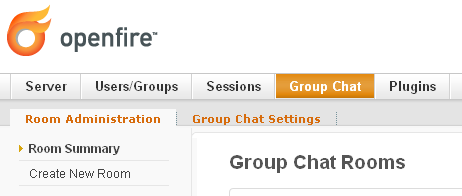
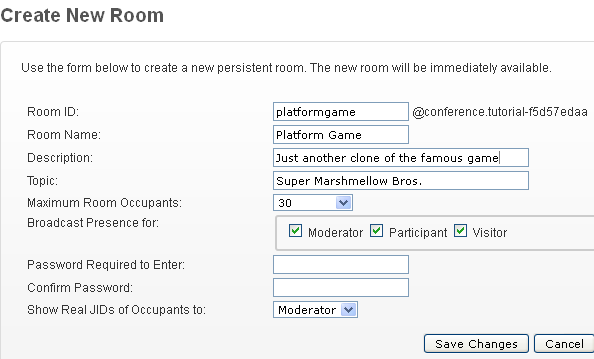
Click Create New Room on the left hand side of the screen. Fill out the details as you see them in the image below.
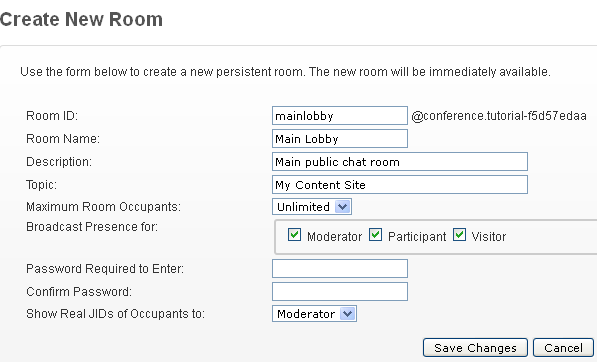
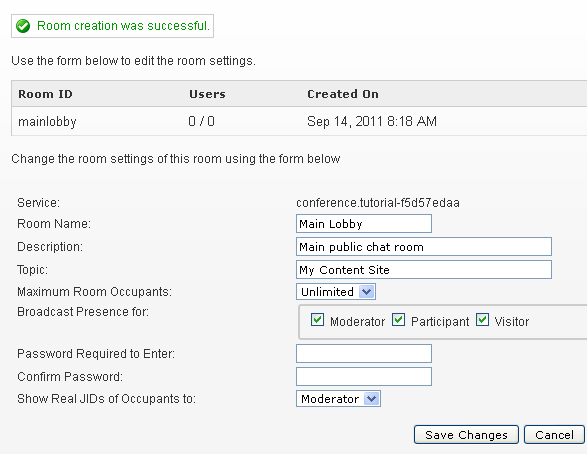
When you are finished, click on the Save Changes button. If the room was created successfully, you should see a message and a Green check.
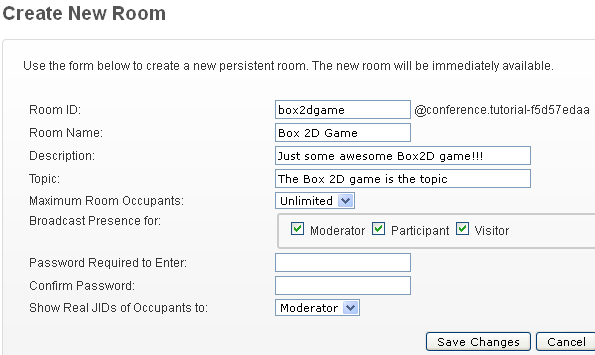
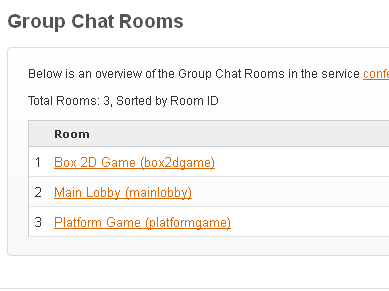
Follow the same steps to create two more chat rooms.
Step 4: Integrating Openfire with MySQL
In this tutorial, our make-believe website uses a MySQL database to store data about each user. Openfire can be integrated with an external database, a MySQL database in this case. First we must configure Openfire to do this.
Open the openfire.xml file using Notepad or preferrably a rich text editor such as Notepad++ as I mentioned before. The file will be located in the Openfire/conf/ folder within the Program Files directory folder on your PC.
<?xml version="1.0" encoding="UTF-8"?>

<!--
    This file stores bootstrap properties needed by Openfire.
    Property names must be in the format: "prop.name.is.blah=value"
    That will be stored as:
        <prop>
            <name>
                <is>
                    <blah>value</blah>
                </is>
            </name>
        </prop>

    Most properties are stored in the Openfire database. A
    property viewer and editor is included in the admin console.
-->
<!-- root element, all properties must be under this element -->
<jive>
  <adminConsole>
    <!-- Disable either port by setting the value to -1 -->
    <port>9090</port>
    <securePort>9091</securePort>
  </adminConsole>
  <locale>en</locale>
  <!-- Network settings. By default, Openfire will bind to all network interfaces.
      Alternatively, you can specify a specific network interfaces that the server
      will listen on. For example, 127.0.0.1. This setting is generally only useful
       on multi-homed servers. -->
  <!--
    <network>
        <interface></interface>
    </network>
    -->
  <connectionProvider>
    <className>org.jivesoftware.database.EmbeddedConnectionProvider</className>
  </connectionProvider>
  <database>
    <defaultProvider>
      <driver>com.mysql.jdbc.Driver</driver>
      <serverURL>jdbc:mysql://localhost:3306/mycontentsite</serverURL>
      <username>root</username>
      <password/>
      <testSQL>select 1</testSQL>
      <testBeforeUse>true</testBeforeUse>
      <testAfterUse>true</testAfterUse>
      <minConnections>5</minConnections>
      <maxConnections>25</maxConnections>
      <connectionTimeout>1.0</connectionTimeout>
    </defaultProvider>
  </database>
  <setup>true</setup>
</jive>
This is what my openfire.xml file looks like. Your openfire.xml file should look similar to mine. Here is a link to the Openfire Custom Database Integration Guide on the Ignite Realtime website. You will noticed that you are instructed to make changes directly to the openfire.xml configuration file in this guide.
Do not make any changes to this file unless it does not resemble mine.
Note: It is very likely that your openfire.xml file will be using DefaultConnectionProvider. If it is, you may have trouble logging in to the Admin Console. Try to log in with the default first. If the password you specified during setup doesn't work, use the default password to login. The default username is admin and the default password is admin as well.
If you can't log in, change DefaultConnectionProvider to EmbeddedConnectionProvider. Then restart Openfire and try to log in again. If you are still having trouble, run the setup to Openfire again. Change the setup tag's value from false to true within the openfire.xml file. Then restart Openfire to run the setup again. Do this as a last resort - this shouldn't be necessary.
I have followed the steps on the Ignite Realtime website countless times only to find myself in a hole later on. One of the problems I faced was that users couldn't connect to the server and when I tried to fix the problem in the admin console, I couldn't log in. In fact the only thing I can conceive of that might be more frustrating than the problems that I faced was being stuck inside of a Saw trap.
I don't want you to go through what I had to so please follow the following steps carefully. Openfire has a brilliant way of editing and creating properties that I find to be a lot more efficient than having to edit an xml file on your system.
Log into Openfire's Admin Console. Click the System Properties link on the right hand side of the main page.
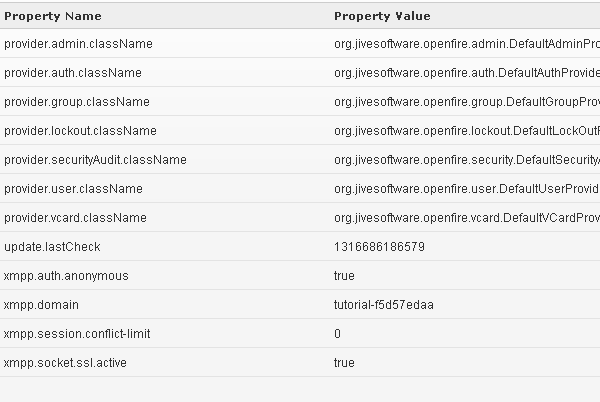
Your server's System Properties page should look something like this.
Important: If your System Properties page is missing some or all of the properties within the image below, you can add the properties in manually. When we modify a property in the tutorial, if you don't have the property that we are modifying, just use the same steps that you would to modify a property to create the property instead. Otherwise, if you already have a property that we are creating, just modify the property with the values that I specify.
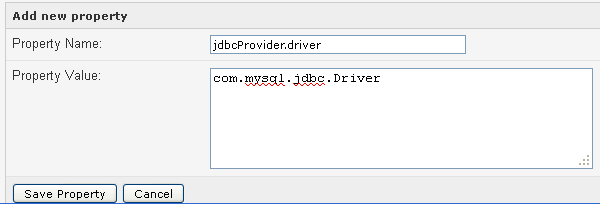
Towards the bottom of the screen you will see a section with the title Add new property. It has two fields. The first field Property Name. The second field is Property Value. Within the Property Name field, type in jdbcProvider.driver and within the Property Value field, type com.mysql.jdbc.Driver into the field. Click on the Save Property button when you are finished. You will be following these steps to create more properties as well as to modify existing properties.
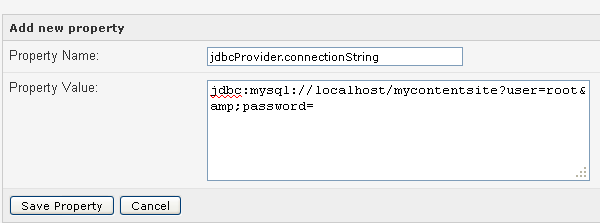
Create a property called jdbcProvider.connectionString with the value jdbc:mysql://localhost/mycontentsite?user=root&password=.
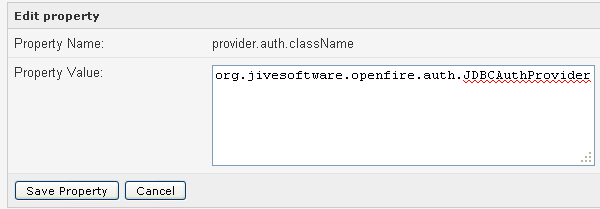
Now we are going to make our first modification to an existing property. Click on the Edit link that correspondes to the provider.auth.className property. Change its value to org.jivesoftware.openfire.auth.JDBCAuthProvider using the Edit property table. Click the Save Property button when you are finished.
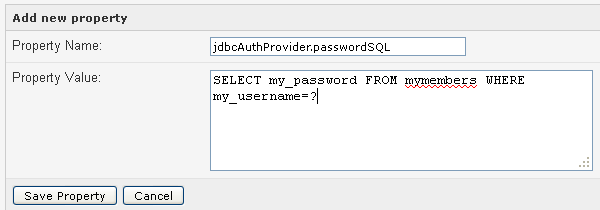
Create a new property with the name jdbcAuthProvider.passwordSQL. Give it a value of SELECT my_password FROM mymembers WHERE my_username=?. This property's value is the MySQL query string that will be used to authenticate a user.
Note: Notice that it contains a question mark (?). The question mark will be replaced with the value inside the username field.
Create a new property called jdbcAuthProvider.passwordType. Give it a value of md5.
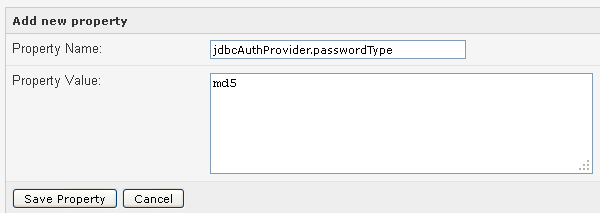
Note: The jdbcAuthProvider properties will be hidden if you have followed the steps correctly.

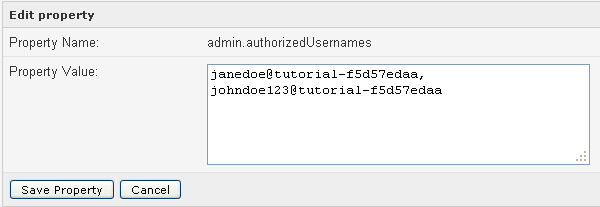
Create a new property called admin.authorizedUsernames. The value should be the jid of the usernames that you would like to be able to log into the Admin Console with.
Note: Look at the image below. Notice that the Jane and John Doe's jid's are their usernames concatenated with an @ sign and the server's XMPP domain.
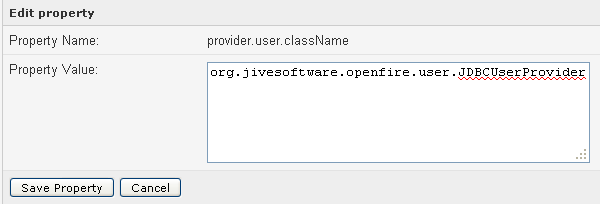
Modify the property provider.user.className by changing its value to org.jivesoftware.openfire.user.JDBCUserProvider.
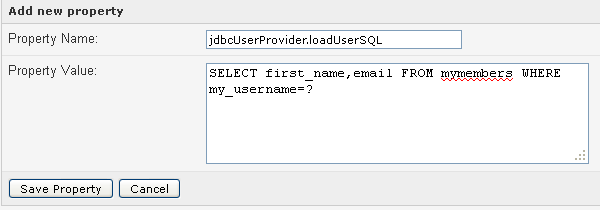
Create a new property called jdbcUserProvider.loadUserSQL with the value SELECT first_name,email FROM mymembers WHERE my_username=?.
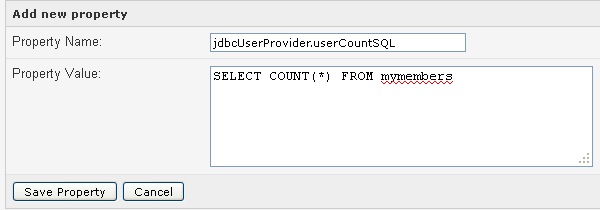
Create a new property called jdbcUserProvider.userCountSQL and give it the value SELECT COUNT(*) FROM mymembers.
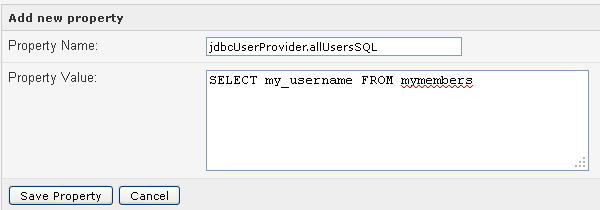
Create a new property called jdbcUserProvider.allUsersSQL. Set the value to SELECT my_username FROM mymembers.
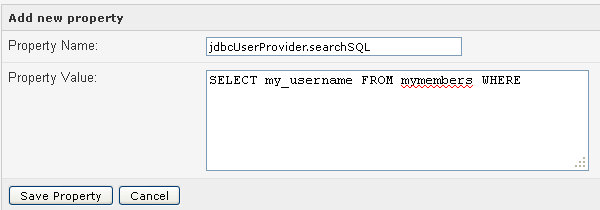
Create a new property called jdbcUserProvider.searchSQL. Give it the value SELECT my_username FROM mymembers.
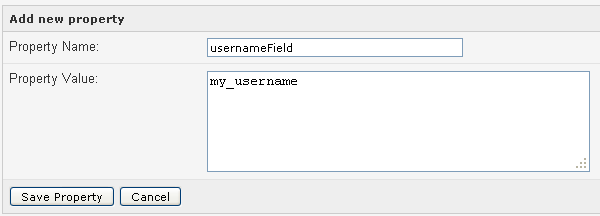
Create a new property called usernameField. Set its value to my_username.
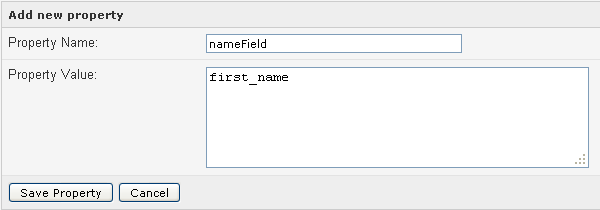
Create a new property called nameField. Set its value to first_name.
Create a new property called emailField. Set its value to email.
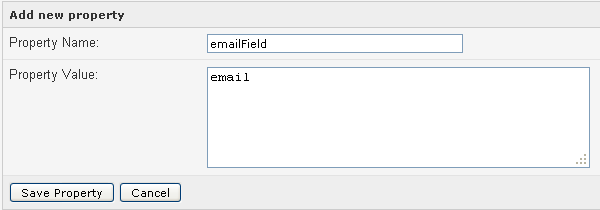
Now that we have added and modified the properties needed we can log out of the Admin Console. Restart Openfire and attempt to log back into the Admin Console with an actual user.
Access denied!
Now try to log in with the username, admin.
Access denied again! What's going on here?
Let's take a look at the openfire.xml file. Yours should look the same as it did before. We need to add the modifications to the xml file. I have found that by making modifications in the Admin Console first, then changing the openfire.xml file after, is more consistent than just making changes to the xml. As I described before, I just couldn't log in using a client or into the Admin Console after I had made these modifications.
Change your openfire.xml file so that it looks like this.
<?xml version="1.0" encoding="UTF-8"?>
<!--
This file stores bootstrap properties needed by Openfire.
Property names must be in the format: "prop.name.is.blah=value"
That will be stored as:
<prop>
<name>
<is>
<blah>value</blah>
</is>
</name>
</prop>
Most properties are stored in the Openfire database. A
property viewer and editor is included in the admin console.
-->
<!-- root element, all properties must be under this element -->
<jive>
<adminConsole>
<!-- Disable either port by setting the value to -1 -->
<port>9090</port>
<securePort>9091</securePort>
</adminConsole>
<locale>en</locale>
<!-- Network settings. By default, Openfire will bind to all network interfaces.
Alternatively, you can specify a specific network interfaces that the server
will listen on. For example, 127.0.0.1. This setting is generally only useful
on multi-homed servers. -->
<!--
<network>
<interface></interface>
</network>
-->
<connectionProvider>
<className>org.jivesoftware.database.DefaultConnectionProvider</className>
</connectionProvider>
<database>
<defaultProvider>
<driver>com.mysql.jdbc.Driver</driver>
<serverURL>jdbc:mysql://localhost:3306/mycontentsite?user=root&password=</serverURL>
<username>root</username>
<password/>
<testSQL>select 1</testSQL>
<testBeforeUse>true</testBeforeUse>
<testAfterUse>true</testAfterUse>
<minConnections>5</minConnections>
<maxConnections>25</maxConnections>
<connectionTimeout>1.0</connectionTimeout>
</defaultProvider>
</database>
<jdbcProvider>
<driver>com.mysql.jdbc.Driver</driver>
<connectionString>jdbc:mysql://localhost/mycontentsite?user=root&password=</connectionString>
</jdbcProvider>
<provider>
<auth>
<className>org.jivesoftware.openfire.auth.JDBCAuthProvider</className>
</auth>
<user>
<className>org.jivesoftware.openfire.user.JDBCUserProvider</className>
</user>
</provider>
<jdbcAuthProvider>
<passwordSQL>SELECT my_password FROM mymembers WHERE my_username=?</passwordSQL>
<passwordType>md5</passwordType>
</jdbcAuthProvider>
<jdbcUserProvider>
<loadUserSQL>SELECT first_name,email FROM mymembers WHERE my_username=?</loadUserSQL>
<userCountSQL>SELECT COUNT(*) FROM mymembers</userCountSQL>
<allUsersSQL>SELECT my_username FROM mymembers</allUsersSQL>
<searchSQL>SELECT my_username FROM mymembers WHERE</searchSQL>
<usernameField>my_username</usernameField>
<nameField>first_name</nameField>
<emailField>email</emailField>
</jdbcUserProvider>
<setup>true</setup>
<admin>
<authorizedUsernames>janedoe, johndoe123</authorizedUsernames>
</admin>
</jive>
Make sure to change you are using the DefaultConnectionProvider instead of the EmbeddedConnectionProvider then close Openfire and restart it. Attempt to log into the Admin Console as a member from your website's database. I logged in as John Doe. If done correctly, you should be back in the Admin Console and the username should be in the top right hand corner of the home page.
Note: Before moving on, make sure that all of the properties within the openfire.xml file are showing up on the System Properties of the Admin Console. If they aren't you now know how to add them in manually.

Step 5: PHP
We need to use PHP to grab data from a MySQL database and present the data to Flash. For those of you who are new to PHP I will briefly explain what each script accomplishes. Let's start with the MySQLConnection class.
The MySQLConnection class connects to and disconnects from a MySQL database.
	class MySQLConnection {

		private $db_host = "localhost"; // Your Websites domain
		private $db_user = "root"; // Your databases username
		private $db_pass = ""; // Your databases password
		private $db_name = "mycontentsite"; // The name of your database
		private $connected = 0;

		public function connect() {

			mysql_connect($this->db_host, $this->db_user, $this->db_pass) or die ( "Error: Script aborted. Could not connect to database." );
			mysql_select_db($this->db_name) or die ( "Error: Script aborted. No database selected." );
			$this->connected = 1;
			session_start();
		}

		public function close() {

			mysql_close();
			$this->connected = 0;
		}

		public function get_connected() {

			return $this->connected;
		}
	}
The LoginManager class handles user logins. A user can be authenticated then logged in and out with this class.
	require_once "MySQLConnection.php";

	class LoginManager {

		public function __construct() {

		}

		public function login( $username, $password ) {

			$username = strip_tags( $username );

			$username = stripslashes( $username );

			$username = mysql_real_escape_string( $username );

			$passHash = md5( $password ); // Applies MD5 encoded hash to the password

			$connection = new MySQLConnection();
			$connection->connect();

			$sql = "SELECT * FROM mymembers WHERE my_username = '$username' AND my_password = '$passHash' LIMIT 1";
			$query = mysql_query( $sql );

			if ($query) {

				$count = mysql_num_rows( $query );
			}
			else {

				die ( mysql_error() );
			}

			if ( $count > 0 ) {

				while ( $row = mysql_fetch_array( $query ) ) {

					$_SESSION['username'] = $username;
					$_SESSION['pw'] = $password;
					$uid = $row['uid'];
					session_name( $username . $uid );
					setcookie( session_name(), '', time() + 42000, '/' );
					$connection->close();
					die ( "login=1" );
				}

				die ( "login=0&error=Invalid username or password" );

			}
			else {

				$connection->close();
				die ( "login=0&error=Invalid username or password" );
			}
		}

		public function checkLogin() {

			if ( isset ( $_SESSION['username'] ) && isset ( $_SESSION['pw'] ) ) {

				$user = $_SESSION['username'];
				$pw = $_SESSION['pw'];
				die ( "login=1&username=$user&password=$pw" );
			}
			else {

				die ( "login=0" );
			}
		}

		public function logout() {

			setcookie(session_name(), '', time() - 42000, '/');
			if ( isset( $_SESSION['username'] ) ) unset( $_SESSION['username'] );
			if ( isset( $_SESSION['pw'] ) ) unset( $_SESSION['pw'] );

			//Destroy session
			session_destroy();

			//return result to Flash (swf)
			die ("logout=1");
		}
	}
We call upon login.php to log the user in and logout.php to log the user out using the LoginManager class. To check to see if a user is logged in we call the check_login.php script.
    // login.php

	require_once "classes/LoginManager.php";

	if (isset($_POST['username']) && $_POST['password']) {

		login();
	}

	function login() {

		$username = $_POST['username'];
		$password = $_POST['password'];
		unset($_POST['username']);
		unset($_POST['password']);

		$login = new LoginManager();
		$login->login( $username, $password) ;
	}
    // logout.php

	require_once "classes/LoginManager.php";

	$login = new LoginManager();
	$login->logout();
    // check_login.php

	require_once "classes/LoginManager.php";

	session_start();

	$login = new LoginManager();
	$login->checkLogin();
	exit();
The final script that is called from ActionScript is the grab_user_data.php script that is used to select the user's data from our MySQL database.
	require_once "classes/MySQLConnection.php";

	if ( isset( $_POST['username'] ) ) {

		$connection = new MySQLConnection();
		$connection->connect();
		$username = $_POST['username'];
		$sql = "SELECT * FROM mymembers WHERE my_username = '$username' LIMIT 1";
		$query = mysql_query( $sql );

		while ( $row = mysql_fetch_array( $query ) ) {

			$uid = $row['uid'];
			$xml = '<user id="' . $uid . '">' . "\n";
			$xml .= "	<firstName>" . $row['first_name'] . "</firstName>\n";
			$xml .= "	<lastName>" . $row['last_name'] . "</lastName>\n";
			$xml .= "	<country>" . $row['country'] . "</country>\n";
			$xml .= "	<statusMessage>" . $row['status_message'] . "</statusMessage>\n";
			$xml .= "</user>\n";
		}

		echo $xml;
		$connection->close();
		exit();
	}
These PHP scripts serve a very important role in our application but are very basic.
Step 6: Setting Up Flash
Open up Flash Professional. Set the document class to ChatApp. Set the size of the stage to 550 x 400.

Note: I like to use a framerate of 30 FPS but our application doesn't have any animation so you can use whatever framerate works best for you.
Step 7: Build the Client's User Interface
From the Components panel, select and drag a Button component on to the stage. Position the button so that it sits in the top right corner of the stage. Set the instance name of the button to logoutBtn. Add another button in the bottom right of the stage and set its instance name to sendBtn.
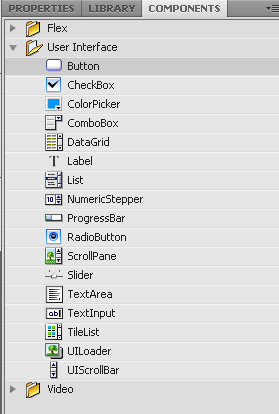
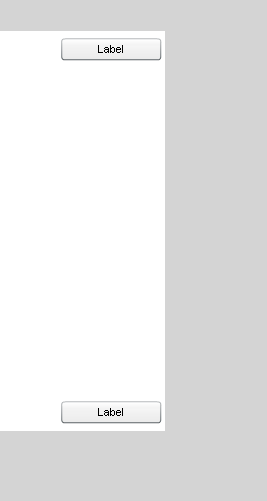
Add a List compenent to the stage. Position it directly beneath logoutBtn and resize the component so that it fits nicely between both buttons. Set its instance name to list.

We'll be using logoutBtn to logout of the user's session and sendBtn to allow our users to send messages. The List will display all of the online users within the current chat room. When an item in the list is clicked, the user's profile will be loaded.
Now we need a component that will display incoming and outgoing chat messages as well as a textfield that our users can use to input new messages. Add a TextArea component to the stage. Resize and position it to take up most of the remainder of the stage, leaving room for an input textfield at the bottom that is the same height as sendBtn. Set the instance name to displayTxt.
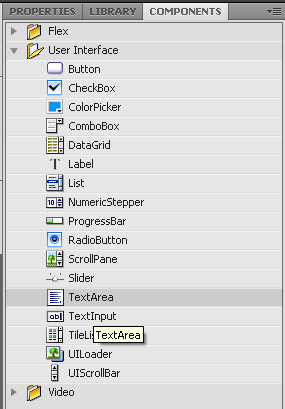
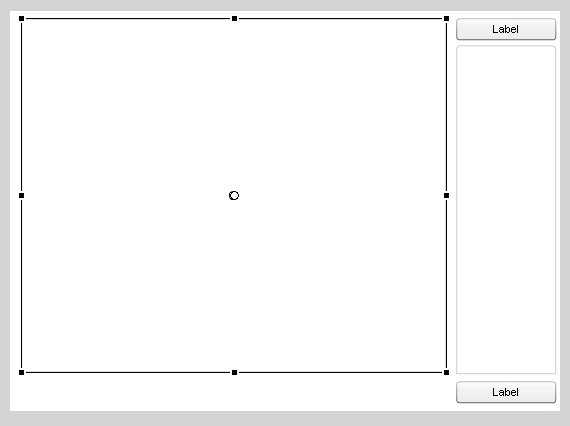
Finally we need to add a TextInput component to the stage. Position the component directly beneath displayTxt and to the left of sendBtn. Set the instance name to inputTxt.

Select all of the components on the stage. Convert the selection to a symbol. The symbol should be a MovieClip named UserInterface. Select the Export for ActionScript option. The Class field should read UserInterface. Set the instance name to our new symbol to ui. Finally name the current layer of the main timeline interface. This will help you organize your project better.


Step 8: The Login Screen
Our chat application would be useless if user's couldn't log in to our application. Let's build the login screen. Create a new layer on the Main Timeline. Name the layer login.

Using the Rectangle tool, draw a rectangle on the stage that is the same size as the stage. The rectangle's stoke should be set to 0. The rectangle should not have a line and should be filled black with a tranparency of 50%.


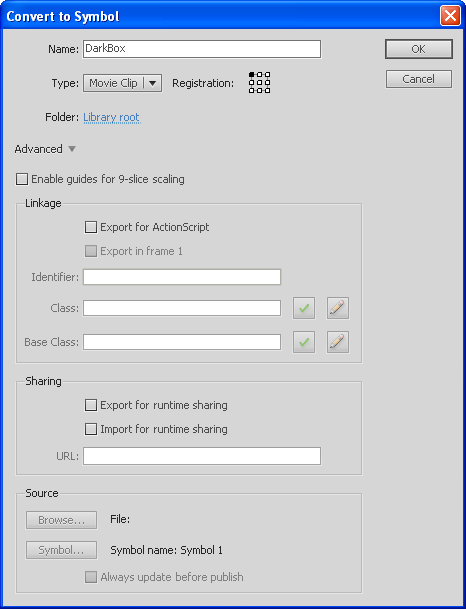
Highlight the black rectangle and convert it to a new MovieClip symbol called DarkBox. We will use this object to darken the screen while the log in components are being displayed. Set the instance name of the DarkBox object to darkBox.
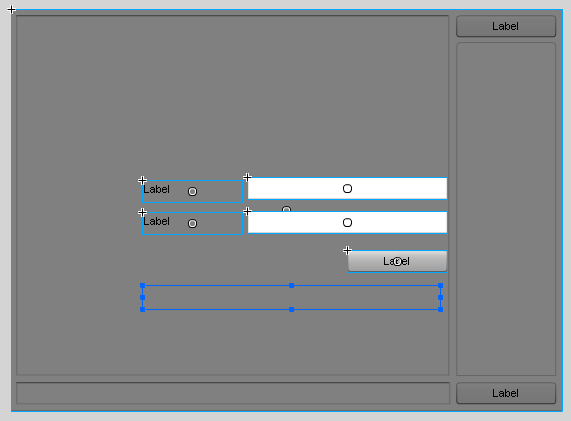
Add two InputText components, two Label components, and a Button component to the stage. Make sure you aren't adding these objects on top of the interface layer. Position the components as they are in the image below with the username field first then the password field.
Set the instance name of the first lable to userLabel and set the instance name of the second label to passLabel. Set the instance name for the first input text field to usernameTxt and set the instance name of the second input text field to passwordTxt. Set the instance name of the button to loginBtn.
Use the Text tool to add a Dynamic TextField to the stage. Set the text size to 18 and make the text color Red. Set the instance name to errorTxt. Position errorTxt beneath loginBtn as seen below.
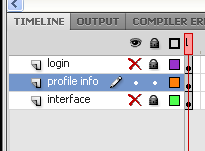
We are going to convert everything on the login layer to a single new MovieClip symbol named LoginScreen but before we can do this we need to lock everything on the interface layer so we do not accidently select an object of that layer. Lock the interface layer by selecting the Lock Layer button next to the layer. When the layer is locked you will see a symbol of a lock next to the layer.
You may now safely select all of the objects on the login layer that we just created, and convert the selection to a symbol with a linkage of LoginScreen. Set the instance name to loginScreen.

Step 9: Creating the Profile Window
Lock and hide all of the current layers on the Main Timeline. Create a new layer and call it profile info.
Note: This is just a layer that we will use for development. You may delete this layer at the end of this step if you wish.
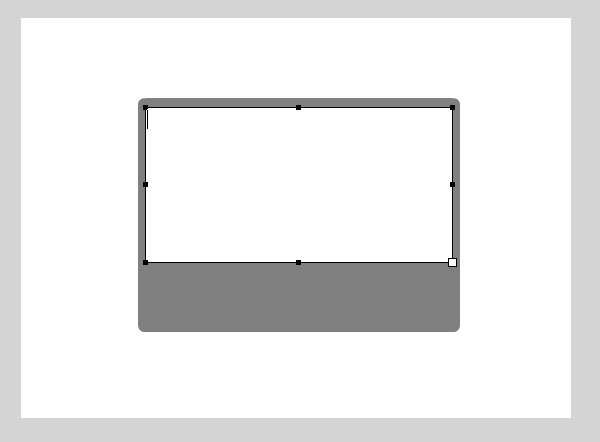
Using the Rectangle tool, draw a rectangle with the radius of each corner set to 10.00. The rectangle should have a fill identical to the DarkBox object (Black with a transpareny of 50%) and a fully opaque White line with a stroke value of 4.00. I set the color of the stage to a Burnt Orange in the image below so that you can see how everything should look more clearly.

Add a Dynamic Text to the stage directly on top of the rectangle. Position and resize the text field so that it takes up most of the rectangle's area but leaves room for a button. Set the instance name of the text field to txt. Make sure that the text color is White and the size of the text is at least 18px.
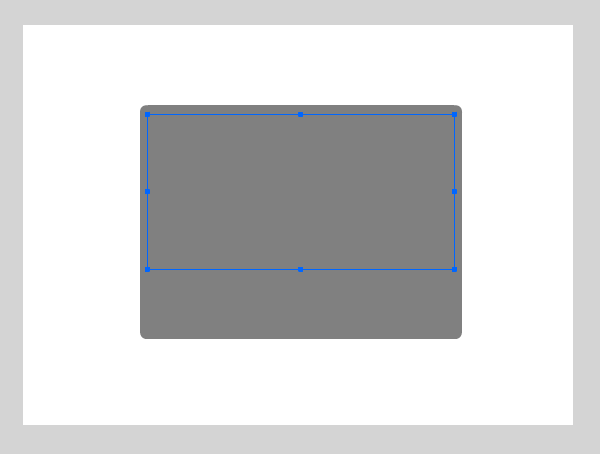
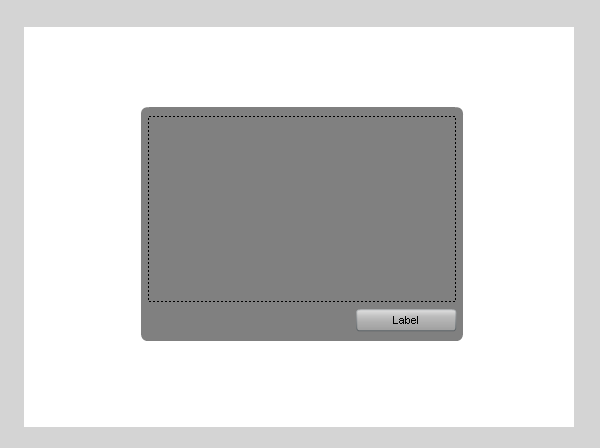
Add a new Button component on top of the rectangle and set the instance name to closeBtn.
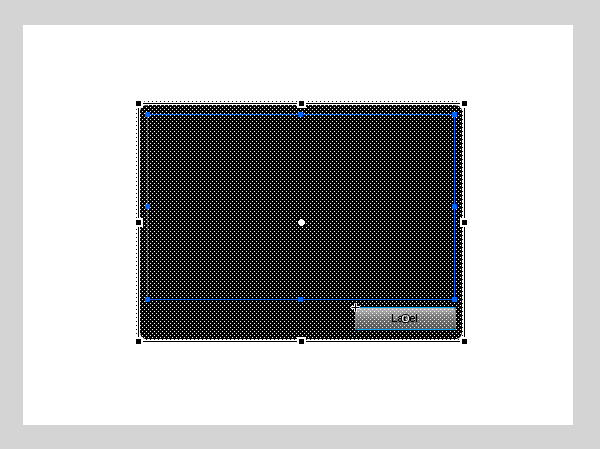
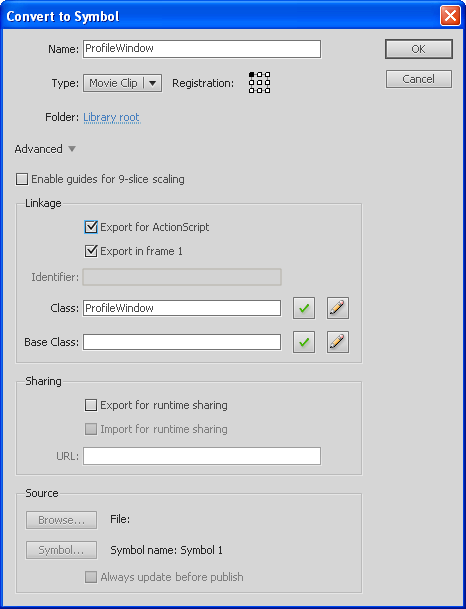
Select all of the object's on the profile info layer and convert them to a MovieClip symbol named ProfileWindow. Check the field Export for ActionScript so that this symbol has a linkage of ProfileWindow. Now remove the ProfileWindow object from the stage. We will be instantiating this object with code.
Step 10: Our First ActionScript Code
Create a new ActionScript file and name it ChatApp.as. Add the following lines of code to the class.
package {

	import flash.display.Sprite;
	import flash.events.Event;
	import flash.events.ErrorEvent;
	import flash.display.StageScaleMode;
	import flash.display.StageAlign;
	import flash.events.TimerEvent;
	import flash.utils.Timer;
	import flash.system.Security;
	import flash.external.ExternalInterface;
	import org.igniterealtime.xiff.core.XMPPConnection;
	import org.igniterealtime.xiff.events.ConnectionSuccessEvent;
	import org.igniterealtime.xiff.events.LoginEvent;
	import org.igniterealtime.xiff.events.DisconnectionEvent;
	import org.igniterealtime.xiff.events.XIFFErrorEvent;
	import org.igniterealtime.xiff.events.RoomEvent;
	import org.igniterealtime.xiff.events.IncomingDataEvent;
	import org.igniterealtime.xiff.events.OutgoingDataEvent;

	public class ChatApp extends Sprite {

		private static const SERVER:String = "tutorial-f5d57edaa";//= "[host name] // Your server's host name here
		private static const PORT:Number = 5222; // Your servers public port here
		private static const RESOURCE:String = "MyContentSite";//[resource name] // Resource name	ex.: ==> MyJabberApp
		private static const DEFAULT_ROOM:String = "Main Lobby";

		private var grabber:LoginCredentialsGrabber;
		private var userData:UserDataGrabber;
		private var connection:XMPPConnection;
		private var requireLogin:Boolean;
		private var roomName:String;

		public function ChatApp() {

			super();
			if (stage) init()
			else addEventListener(Event.ADDED_TO_STAGE, onAdded);
		}

        private function init():void {

			stage.align = StageAlign.TOP_LEFT;
			stage.scaleMode = StageScaleMode.NO_SCALE;
			loginScreen.visible = false;
			loginScreen.userLabel.text = "username";
			loginScreen.passLabel.text = "password";
			ui.visible = false;

			UserDataExtension.enable();
			grabber = new LoginCredentialsGrabber();
			userData = new UserDataGrabber();

			var flashVars:Object = this.loaderInfo.parameters;

			if ( flashVars.hasOwnProperty( "room" ) ) {

				roomName = flashVars.room;
			}

			checkLogin();
		 }

        private function onAdded( e:Event ):void {

			removeEventListener(Event.ADDED_TO_STAGE, onAdded);
			init();
		}
	}
}
Within the code above we check to see if the stage exists in the class constructor. If the stage does not exist, we listen for the ADDED_TO_STAGE event and the onAdded event handler method is called when the stage is available. The onAdded method simply stops listening for the ADDED_TO_STAGE event and calls the init method. If the stage exists we skip this first step and just call the init method which initialized our application.
We initialize the stage and the loginScreen, and we make the UserInterface object (ui) invisible. You may notice the enable method from the UserDataExtension class being called. We will write this class later but for now just know that it is very important to remember to always call this method when instantiating the application. The enable method registers our custom extension(the class) with the ExtensionClassRegistry class in the XIFF library. We'll talk more about this later.
Instantiate a new instance of the LoginCredentialsGrabber class and assign it to the grabber variable. Also instantiate a new instance of the UserDataGrabber class and assign it to the userData variable. We will write these classes later also. When our SWF file is embeded in a web page we want our application to connect to a specific chat room that is related to the content on the page. Later we are going to pass the name of the chat room, that our app should connect to, into the flashVars parameter at embed time. But for now we'll just first check to see if the variable exists and then we grab the value and assign it to the roomName variable. Finally we run the checkLogin method which is self-explanatory.
Step 11: Checking Whether the User Is Logged In
Write the checkLogin method in the Document Class( ChatApp ).
private function checkLogin():void {

	grabber.addEventListener( Event.COMPLETE, onLoginCredentials );
	grabber.grab();
}
As you can see the method is very simple. This is because all of the functionality is encapsulated within the LoginCredentialsGrabber class. Listen for the COMPLETE event to be dispatched so that the onLoginCredentials event handler method can be called. Call the grab method on LoginCredentialsGrabber object. This methods checks to see whether the user is logged in - or, more specifically, it checks to see whether the user's session exists.
Next, we'll write the onLoginCredentials method.
(Note: We are still in the Document class.)
private function onLoginCredentials( e:Event ):void {

	grabber.removeEventListener( Event.COMPLETE, onLoginCredentials );

	if ( grabber.isLoggedIn ) {

		// Connect to Openfire
		ui.visible = true;
		connect( grabber.username, grabber.password );
	}
	else {

		// Display login
		displayLogin();
	}
}
This method is also really simple. The LoginCredentialsGrabber checks to see if the user is logged in by grabbing the session cookies using PHP. PHP renders out data to the LoginCredentialsGrabber object and the data is parsed.
Note: We will be writing the LoginCredentialsGrabber class next. All we need to do now is check to see if the user is logged in. If they are we display the user interface and call the connect method to connect to Openfire. We pass the user's username and password into the connect method as required parameters. If the user is not logged in we display the Login Screen.
Step 12: Grabbing Login Credentials
Write the LoginCredentialsGrabber class.
package {

	import flash.events.Event;
	import flash.events.EventDispatcher;
	import flash.net.URLLoader;
	import flash.net.URLRequest;
	import flash.net.URLVariables;
	import flash.net.URLRequestMethod;

	public class LoginCredentialsGrabber extends EventDispatcher {

		private static const PASSCODE:String = "letmein123";
		private static const SOURCE:String = "http://localhost/mycontentsite/scripts/check_login.php";

		private var _data:*;
		private var _username:String;
		private var _password:String;
		private var _isLoggedIn:Boolean;

		public function LoginCredentialsGrabber() {

			super();
		}

		public function grab():void {

			var loader:URLLoader = new URLLoader();
			var req:URLRequest = new URLRequest( SOURCE + "?cb=" + new Date().time );

			loader.addEventListener( Event.COMPLETE, onComplete );
			loader.load( req );
		}

		private function onComplete( e:Event ):void {

			e.target.removeEventListener( Event.COMPLETE, onComplete );
			_data = e.target.data;
			var results:URLVariables = new URLVariables( _data.toString() );

			if ( results.login == "1" ) {

				_isLoggedIn = true;
				_username = results.username;
				_password = results.password;
			}
			else {

				_isLoggedIn = false;
			}

			dispatchEvent( new Event( Event.COMPLETE ) );
		}

		public function get data():* {

			return _data;
		}

		public function get isLoggedIn():Boolean {

			return _isLoggedIn;
		}

		public function get username():String {

			return _username;
		}

		public function get password():String {

			return _password;
		}
	}
}
We have two constants and four read-only properties before the constructor method. The SOURCE constant is a String that represents the location of the PHP script that checks to see if the user is logged in. We also store the passcode needed to execute the PHP script in a constant. When the grab method is called the URLLoader object loads the PHP script passing the passcode with the URLRequest and the script returns data back to flash. The data is a set of url variables that we can parse using the URLVariables class. If a user is logged in, the PHP script will give us the user's username and password so that we can use this information to connect the user to Openfire. Finally we provide getter methods to grant read-only access to outside code.
Step 13: Display the Login Screen
Write the displayLogin method in the Document class(ChatApp.as).
private function displayLogin():void {

	// Displays the login screen
	loginScreen.visible = true;
	loginScreen.addEventListener( LoginManager.LOGIN, onLoggingIn );
}
We set the loginScreen's visible property to true and wait for the loginScreen to dispatch LOGIN event. Then the onLoggingIn method is called. Let's write this method now.
private function onLoggingIn( e:Event ):void {

	ui.visible = true;
	connect( loginScreen.manager.username, loginScreen.manager.password );
}
We make the user interface visible and then we call the connect method.
Important: Notice that we are using the username and password from the loginScreen's manager object(loginScreen.manager) instead of the grabber object's username and password as we did in the onLoginCredentials method.
Step 14: Connecting to Openfire
At last, we can write the connect method. The method accepts two required parameters: the first is the user's username and the second is the users's password.
private function connect( username:String, password:String ):void {

	connection = new XMPPConnection();
	connection.username = username;
	connection.password = password;
	connection.server = SERVER;
	connection.port = PORT;
	connection.resource = RESOURCE;
	connection.addEventListener( ConnectionSuccessEvent.CONNECT_SUCCESS, onConnected );
	connection.addEventListener( LoginEvent.LOGIN, onLogin );
	connection.addEventListener( DisconnectionEvent.DISCONNECT, onDisconnected );
	connection.addEventListener( XIFFErrorEvent.XIFF_ERROR, onXiffError );
	connection.addEventListener( IncomingDataEvent.INCOMING_DATA, onIncomingData );
	connection.addEventListener( OutgoingDataEvent.OUTGOING_DATA, onOutgoingData );
	connection.connect( XMPPConnection.STREAM_TYPE_FLASH );
}
Instantiate the XMPPConnection object and assign it to the connection variable. Set the user's username and password along with the server(SERVER) and the resource(RESOURCE). Then add event listeners to the connection object. Finally we call the connect method on the XMPPConnection object.
Write the following methods:
private function onConnected( e:ConnectionSuccessEvent ):void {

	trace( "connected" );
}

private function onLogin( e:LoginEvent ):void {

	trace( "logged in" );
	ui.connection = connection;
	grabUserData();
	startTimer();
}

private function onDisconnected( e:DisconnectionEvent ):void {

	trace( "disconnected" );
	loginScreen.visible = true;
	ui.visible = false;
	loginScreen.displayError( "disconnected" );
}

private function onXiffError( e:XIFFErrorEvent ):void {

	trace("Error: " + e.errorMessage);
	if ( loginScreen.visible ) loginScreen.displayError( e.errorMessage );
}

private function onIncomingData( e:IncomingDataEvent ):void {

	trace( e.data.toString() );
}

private function onOutgoingData( e:OutgoingDataEvent ):void {

	trace( e.data.toString() );
}
The onConnected, onIncomingData, and onOutgoingData methods can have many different uses but for this tutorial we will only use them to trace output so that we can debug our application when and if we need to(specifically if their is a problem connecting to the server). The onDisconnected method makes the loginScreen visible and displays an error to the user notifying them that their connection was lost. The onLogin method prepares the User Interface for XMPP chat by assigning the XMPPConnection object to the connection property within the ui object. This allows the UserInterface object to call methods directly from the XMPPConnection object through a reference. Now that the user is logged into the Jabber server(Openfire), we can start working toward logging the user into a chat room but first we need to identify exactly who our user is. We call the grabUserData method to do so. Finally we call the startTimer method.
Step 15: Grabbing User Data
By now the user's session cookie is stored in the user's browser and the user is logged into the Jabber server. Now we need to grab basic information about our user. We know the user's username, so we can use it to access additional information about the user that is stored in our MySQL database. Create the grabUserData method in the Document class.
private function grabUserData():void {

	userData.addEventListener( Event.COMPLETE, joinRoom );
	userData.grab( connection.username );
}
All of the magic happens within the UserDataGrabber class. All we have to do is call the grab method and listen for the COMPLETE event. Note that the grab method on the UserDataGrabber object accepts one parameter: the user's username. Use the user's username from the connection instance.
This class wouldn't have any magic right now because it doesn't exist yet. Let's write this class now. Create a new class called UserDataGrabber that extends flash.events.EventDispatcher.
package {

	import flash.events.Event;
	import flash.events.EventDispatcher;
	import flash.net.URLLoader;
	import flash.net.URLRequest;
	import flash.net.URLVariables;

	public class UserDataGrabber extends EventDispatcher {

		private static const SOURCE:String = "http://localhost/mycontentsite/scripts/grab_user_data.php"; // Replace with your own php script

		private var _data:*;
		private var _uid:String;
		private var _firstName:String;
		private var _lastName:String;
		private var _username:String;
		private var _country:String;
		private var _statusMessage:String;

		public function UserDataGrabber() {

			super();
		}

		public function grab( username:String ):void {

			var loader:URLLoader = new URLLoader();
			var req:URLRequest = new URLRequest( SOURCE + "?cb=" + new Date().time );
			var vars:URLVariables = new URLVariables();

			_username = username;
			vars.username = username;
			req.data = vars;
			req.method = "POST";
			loader.addEventListener( Event.COMPLETE, onComplete );
			loader.load( req );
		}

		private function onComplete( e:Event ):void {

			e.target.removeEventListener( Event.COMPLETE, onComplete );
			_data = e.target.data;
			trace( "User Data:\n" + data );
			var user:XML = new XML( _data );
			_uid = [email protected]();
			_firstName = user.firstName.toString();
			_lastName = user.lastName.toString();
			_country = user.country.toString();
			_statusMessage = user.statusMessage.toString();
			dispatchEvent( new Event( Event.COMPLETE ) );
		}

		public function get data():* {

			return _data;
		}

		public function get uid():String {

			return _uid;
		}

		public function get firstName():String {

			return _firstName;
		}

		public function get lastName():String {

			return _lastName;
		}

		public function get username():String {

			return _username;
		}

		public function get country():String {

			return _country;
		}

		public function get statusMessage():String {

			return _statusMessage;
		}

	}
}
First we create a const that stores the location to the PHP script as a string. We created the grab_user_data.php script earlier. This is the script that performs a query in the database using a specified username to fetch and echo out the user's data as xml.
Next we create our variables. I always place an underscore (_) in front of the name of any private or protected variable (property) that will be read-only - o,r in some rare cases, write-only. All of the variables in this class read-only. We use getter methods to permit read-only access to each variable.
All variables are set when the xml data, which is rendered out from the php file, is parsed with the exception of the _username variable which is set from the username parameter of the grab method.
Now for the grab method. Nothing complicating here. Create a new URLLoader object, a new URLRequest object and a new URLVariables object. The URLRequest constructor accepts one parameter, the url that you would like to load data from. In this case, the url is stored in the SOURCE constant. I'm sure by now you've noticed that the the string ?cb= concatenated with the current time has been concatenated with the SOURCE. The cb stands for cache buster. This prevents our script from being loaded from out of a cache (memory).
Initialize URLRequest object and the URLVariables object. The URLVariables object holds that the username variable that the php script needs to perform a query in the database. This variable is passed along with the URLRequest. Call the URLLoader's load method and listen for the COMPLETE event to be dispatched from loader so that the onComplete event handler method can be called.
In the onComplete method, create a new XML object. Pass the data assigned from the URLLoader object(e.target in this case) into the constructor's parameter. Set the class's variables and dispatch the COMPLETE event.
Step 16: The LoginScreen Class
Up to this point, we have assumed that the user is already logged in. If the user isn't logged in we display the loginScreen. The LoginScreen class will have methods encapsulated within it that handle the user's login status. Create the LoginScreen class. The class must extend the MovieClip class since it is linked to a library symbol of that type.
package {

	import flash.display.MovieClip;
	import flash.events.MouseEvent;
	import flash.events.Event;
	import flash.events.ErrorEvent;
	import flash.events.KeyboardEvent;
	import flash.ui.Keyboard;

	public class LoginScreen extends MovieClip {

		public var manager:LoginManager;

		public function LoginScreen() {

			super();
			manager = new LoginManager();
			init();
		}

		public function init():void {

            userLabel.text = "username:";
			passLabel.text = "password:";

			errorTxt.selectable = false;
			passwordTxt.displayAsPassword = true;

			loginBtn.label = "Login";
			loginBtn.addEventListener( MouseEvent.CLICK, login );
			stage.addEventListener( KeyboardEvent.KEY_DOWN, login );
			stage.addEventListener( Event.RESIZE, onStageResize );
		}

		private function login( e:Event ):void {

			loginBtn.removeEventListener( MouseEvent.CLICK, login );
			stage.removeEventListener( KeyboardEvent.KEY_DOWN, login );

			if ( e is KeyboardEvent ) {

				var ke:KeyboardEvent = e as KeyboardEvent;

				if ( ke.keyCode != Keyboard.ENTER ) {

					loginBtn.addEventListener( MouseEvent.CLICK, login );
					stage.addEventListener( KeyboardEvent.KEY_DOWN, login );
					return;
				}
			}

			if ( usernameTxt.length > 0 && passwordTxt.length > 0 ) {

				if (!manager) manager = new LoginManager();
				manager.addEventListener( Event.COMPLETE , onLogin );
				manager.addEventListener( ErrorEvent.ERROR , onLoginError );
				manager.login( usernameTxt.text, passwordTxt.text );
			}
			else if ( usernameTxt.length == 0 ) {

				// Display error
				errorTxt.text = "Please enter your username";
			}
			else {

				// Display error
				errorTxt.text = "Please enter your password";
			}

			loginBtn.addEventListener( MouseEvent.CLICK, login );
			stage.addEventListener( KeyboardEvent.KEY_DOWN, login );
		}

		private function onLogin( e:Event ):void {

			manager.removeEventListener( Event.COMPLETE , onLogin );
			manager.removeEventListener( ErrorEvent.ERROR , onLoginError );
			stage.removeEventListener( KeyboardEvent.KEY_DOWN, login );
			visible = false;
			dispatchEvent( new Event( LoginManager.LOGIN ) );
		}

		private function onLoginError( e:ErrorEvent ):void {

			manager.removeEventListener( Event.COMPLETE , onLogin );
			manager.removeEventListener( ErrorEvent.ERROR , onLoginError );
			errorTxt.text = e.text;
			loginBtn.addEventListener( MouseEvent.CLICK, login );
			stage.addEventListener( KeyboardEvent.KEY_DOWN, login );
		}

		private function onStageResize( e:Event ):void {

			darkBox.width = stage.stageWidth;
			darkBox.height = stage.stageHeight;
		}

		public function displayError( error:String ):void {

			errorTxt.text = error;
		}
	}
}
We start the class of by creating a new LoginManager object. We'll write this class in the next step but for now just know that this class manages logging the user in.
The functionally of this class is quite simple. We initialize the display and when a user pressed the Enter key or clicks loginBtn we check to see if they have typed anything into the text fields. If so we use manager to log them in. Otherwise we display an error. We display errors to the user by calling the displayError method and passing in a message as a String in the method's parameter. If the LoginManager object dispatches an ErrorEvent, the error's message will be displayed to the user. On the contrary if the LoginManager object dispatches the COMPLETE event, we dispatch the LOGIN event and we make our LoginScreen invisible.
Step 17: The LoginManager Class
The LoginManager class logs the user in and out. Create the LoginManager class.
package {

	import flash.events.Event;
	import flash.events.EventDispatcher;
	import flash.events.ErrorEvent;
	import flash.net.*;
	import org.igniterealtime.xiff.bookmark.UrlBookmark;

	public class LoginManager extends EventDispatcher {

		private static const LOGIN_SOURCE:String = "http://localhost/mycontentsite/scripts/login.php"; // Your website's login script location
		private static const LOGOUT_SOURCE:String = "http://localhost/mycontentsite/scripts/logout.php";
		private static const INDEX:String = "http://localhost/mycontentsite/index.php";

		private var _data:*;
		private var _isLoggedIn:Boolean;
		private var _username:String;
		private var _password:String;

		public static const LOGIN:String = "login";


		public function LoginManager() {

			super();
		}

		public function login( username:String, password:String ):void {

			var loader:URLLoader = new URLLoader();
			var req:URLRequest = new URLRequest( LOGIN_SOURCE + "?cb=" + new Date().time );
			var vars:URLVariables = new URLVariables();

			_username = username;
			_password = password;
			vars.username = username;
			vars.password = password;
			req.data = vars;
			req.method = URLRequestMethod.POST;
			loader.addEventListener( Event.COMPLETE, onLoginComplete );
			loader.load( req );
		}

		public function logout():void {

			var loader:URLLoader = new URLLoader();
			var req:URLRequest = new URLRequest( LOGOUT_SOURCE );
			loader.addEventListener( Event.COMPLETE, onLogoutComplete );
			loader.load( req );
		}

		private function onLoginComplete( e:Event ):void {

			e.target.removeEventListener( Event.COMPLETE, onLoginComplete );
			_data = e.target.data;
			var results:URLVariables = new URLVariables( _data.toString() );

			if ( results.login == "1" ) {

				_isLoggedIn = true;
			}
			else {

				_isLoggedIn = false;
				dispatchEvent( new ErrorEvent( ErrorEvent.ERROR, false, false, results.error ) );
				return;
			}

			dispatchEvent( new Event( Event.COMPLETE ) );
		}

		private function onLogoutComplete( e:Event ):void {

			e.target.removeEventListener( Event.COMPLETE, onLogoutComplete );
			var req:URLRequest = new URLRequest();
			navigateToURL( new URLRequest( INDEX ), "_self" );
		}

		public function get data():* {

			return _data;
		}

		public function get isLoggedIn():Boolean {

			return _isLoggedIn;
		}

		public function get username():String {

			return _username;
		}

		public function get password():String {

			return _password;
		}

	}
}
Create the class constants and instance variables but do not assign the variables any values yet. The login method should have two parameters: the first is a String that represents the user's username and the second is another String that represents the user's password. Create and initialize a new URLLoader object, a new URLRequest object and a new URLVariables object.
Initialize URLRequest object and the URLVariables object. The URLVariables object holds the username POST variable and the password POST variable that the php script requires to execute. These variables are passed along with the URLRequest. Call the URLLoader's load method and listen for the COMPLETE event to be dispatched from loader so that onLoginComplete event handler method can be called.
The login.php script renders out a url variable that specifies a Boolean (0 or 1). A 1 represents true, of course. If that value is a 1, than the user has been successfully logged in. If that value is a 0, an error has occurred and we dispatch an ERROR event containing the error message echoed out by our PHP script. In all such cases the error will be invalid login data.
The logout method works in the same way except the user's browser will navigate to the main index page of our website when logout.php successfully logs the user out.
Step 18: Keep Alive
An XMPP server can be configured to terminate any idel connections that may still be open. By default, Openfire will do this. In order to prevent this from occuring, a chat client must send the ping to the server. Within the XIFF library, this is done by calling the sendKeepAlive method on a XMPPConnection object. This method should be called at least once a minute. You may remember that we called a upon a method within the Document class(ChatApp) called startTimer. This method was undefined at the time. Let's create it now.
private function startTimer():void {

	var aliveTimer:Timer = new Timer( 1000 * 60, 0 );
	aliveTimer.addEventListener( TimerEvent.TIMER, keepAlive );
	aliveTimer.start();
	trace( "starting alive timer" );
}
The startTimer method creates a new Timer object, listens for the TIMER event, then calls the start method on the new Timer object.
Now let's create the keepAlive method which is called when the aliveTimer's TIMER event is dispatched.
private function keepAlive( e:TimerEvent ):void {

	connection.sendKeepAlive();
}
Just call the XMPPConnection object's keepAlive method. Nothing more.
Step 19: The UserInterface Class
Create the joinRoom method within the Document class.
private function joinRoom( e:Event ):void {

	userData.removeEventListener( Event.COMPLETE, joinRoom );
	if ( !roomName ) roomName = DEFAULT_ROOM;
	ui.joinRoom( connection, userData, roomName );
}
If you can't remember, the joinRoom method is called when the user's data has been loaded(when we know who the user is). The UserInterface class will also have a method called joinRoom that we will call from the Document class's joinRoom method. Before we call the method on the ui object. We check to make sure that the roomName variable has been set. If it hasn't for whatever reason, we set it to our default room, which in this case is the main lobby.
Create a new class and name it, UserInterface. Make sure it extends the MovieClip class. Add the following to the class path.
import flash.display.MovieClip;
import flash.events.Event;
import fl.data.DataProvider;
import org.igniterealtime.xiff.core.XMPPConnection;
import org.igniterealtime.xiff.core.EscapedJID;
import fl.controls.List;
import org.igniterealtime.xiff.events.RoomEvent;
import org.igniterealtime.xiff.conference.Room;
import org.igniterealtime.xiff.core.UnescapedJID;
import flash.events.MouseEvent;
import org.igniterealtime.xiff.data.Message;
import org.igniterealtime.xiff.data.Presence;
import flash.events.KeyboardEvent;
import flash.ui.Keyboard;
import flash.display.MovieClip;
Define the following variables.
private var dp:DataProvider;
private var profileData:Vector.<String>;
private var names:Vector.<String>;
private var usernames:Vector.<String>;
private var items:Vector.<Object>;
private var darkBox:DarkBox;
private var room:Room;

public var connection:XMPPConnection;

public static const SERVER_NAME:String = "[ your server's name ]";
We need a DataProvider to display any users that are in the current chat room within the List object. Will be storing different sets of data in Vector objects. We created a DarkBox object earlier that we will display when a profile window is open. The last private variable we need is an org.igniterealtime.xiff.conference.Room object which in fact is, if you haven't already guessed it, our chat room.
The XMPPConnection object(connection) was set within the Document class's onLogin event handler method. It is just a reference to the XMPPConnection object within the Document class.
Create the class constructor and the init method.
public function UserInterface() {

	super();
	dp = new DataProvider();
	profileData = new Vector.<String>();
	names = new Vector.<String>();
	usernames = new Vector.<String>();
	items = new Vector.<Object>();
	darkBox = new DarkBox();
	init();
}

private function init():void {

	UserDataExtensionManager.onUserData = onUserDataExtension;
	disable();
	list.dataProvider = dp;
	list.addEventListener( Event.CHANGE, onGuestSelected );
	displayTxt.editable = false;
	sendBtn.label = "Send";
	logoutBtn.label = "Logout";
	darkBox.visible = false;
	addChild( darkBox );
	positionContents();
	stage.addEventListener( Event.RESIZE, onStageResize );
	logoutBtn.addEventListener( MouseEvent.CLICK, logout );
}
Everything's pretty simple in the constructor. Just instantiate new instances of each object and assign them to the appropriate variable. The init method accomplishes several tasks. The first is that we have to tell the UserDataExtensionManager class that we would like to recieve and handle the User Data Extension within the current instance of the UserInterface class. There are different ways to handle incoming custom extensions but I like letting a class that is associated with the custom extension, handle the custom extension. You can also listen for incoming data so that you can parse the data yourself or you can check to see if a particular extension has been attached to an incoming XMPPStanza(e.g. Message Stanza), and take the extension directly out of its parent XMPPStanza object. Here's an example.
Important: The two methods that follow are just hypothetical examples. Implement them into your own scripts as you see fit.
// example
private function onMessage( e:MessageEvent ):void {

    // Some block of code to display the message

	var msg:Message = e.data as Message;
    var extensions:Array = msg.getAllExtensions();

	if ( extensions ) {

    	for each( var ext:Extension in extensions ) {

        	switch ( ext.get_NS() ) {

            	case "mysite:extensions:mycustomextension" :
                break;
                default :
                	// Handle invalid extension
            }
        }
    }
}
// another example
private function onMessage( e:MessageEvent ):void {

    // Some block of code to display the message

	var msg:Message = e.data as Message;
    var ext:Extension = msg.getExtension( "myCustomExtension" );

    if ( ext ) {

        // Handle extension code
    }
}
But again for this tutorial we'll be using my express delivery method since there will only be one connection going on at a time. Otherwise we'd be implementing one of the above methods. We will be writing the UserDataExtension and UserDataExtensionManager classes within the next step.
Initially within we want the ui to be disabled so we call the disable method, which disables all components within the interface, from the init method. Last we initialize the display and the DataProvider object.
Write the following methods in the UserInterface class.
private function positionContents():void {

	displayTxt.width = stage.stageWidth - list.width - displayTxt.x - 10 - 10 - 10;
	list.x = displayTxt.y + displayTxt.width + 10;
	inputTxt.width = displayTxt.width;
	sendBtn.x = list.x;
	logoutBtn.x = list.x;

	displayTxt.height = stage.stageHeight - inputTxt.height - 10 - 10 - 10;
	list.height = displayTxt.height - logoutBtn.height - 10;
	inputTxt.y = displayTxt.height + displayTxt.y + 10;
	sendBtn.y = inputTxt.y;
	logoutBtn.y = displayTxt.y;

	darkBox.width = stage.stageWidth;
	darkBox.height = stage.stageHeight;
}

private function onStageResize( e:Event ):void {

	positionContents();
}

public function joinRoom( connection:XMPPConnection, userData:UserDataGrabber, roomName:String ):void {

	if ( connection.isLoggedIn() ) {

		trace( "joining room..." );
		var id:String = roomName.toLowerCase().replace( " ", "" );
		var ext:UserDataExtension = new UserDataExtension( null, userData );
		room = new Room( connection );
		room.roomJID = new UnescapedJID( id + "@conference." + SERVER_NAME );
		room.nickname = userData.username;
		room.addEventListener( RoomEvent.ROOM_JOIN, onRoomJoin );
		room.addEventListener( RoomEvent.USER_JOIN, onUserJoined );
		room.addEventListener( RoomEvent.GROUP_MESSAGE, onGroupMessage );
		room.addEventListener( RoomEvent.USER_DEPARTURE, onUserLeave );
		room.join( false, [ ext ] );
	}
	else {

		trace ( "Must be logged in to enter a chat room." );
	}
}

private function enable():void {

	list.enabled = true;
	sendBtn.enabled = true;
	inputTxt.enabled = true;
	displayTxt.enabled = true;
	list.dataProvider = dp;
}

private function disable():void {

	list.enabled = false;
	sendBtn.enabled = false;
	inputTxt.enabled = false;
	displayTxt.enabled = false;
}
All of the methods above are pretty self-explanatory. We talked about the joinRoom method earlier. Now that we have this method written we can take a closer look. After we check to confirm that the connection is still logged in, we join the room. First we modify the roomName so that we can make a valid jid so that we can connect to the proper room. Then we create a new UserDataExtension object. Again we haven't created it yet but the constructor will accept a UserDataGrabber object as a required parameter. More about this later.
Instantiate the Room object passing the connection in as the parameter that is required by the constructor. The room's UnescapedJID must be set and the nickname of the current user. You can use any name like the user's first and last name but I chose to just use the username. After we listen for various events, we call the join method on the Room object.
The method accepts two parameters. The first is a Boolean representing whether or not you would like to create and configure a reserved room. Set this value to false for because have already created and configured our chat rooms in Openfire. The second parameter is an Array containing any custom extensions that you would like to pass along with the user's Presence when entering the chat room. Pass an array containing the instance of the UserDataExtension object, that we just, created into this parameter.
Let's finish up the class.
private function addMessage( msg:String, from:String ):void {

	var now:Date = new Date();
	var nHours:Number = now.hours;
	var sMin:String = now.minutes.toString();
    if ( sMin.length == 1 ) sMin = "0" + sMin;
	var ampm:String = "AM";

	if ( nHours > 12 ) {

		nHours -= 12;
		ampm = "PM";
	}
	var time:String = String( nHours ) + ":" + sMin + " " + ampm;
	var txt:String = "[ " + from + " ] " + time + " ==> " + msg + "\n";
	displayTxt.appendText( txt );
}

private function sendMessage( e:Event ):void {

	if ( !visible ) return;
	if ( inputTxt.length > 0 ) {

		if ( e is KeyboardEvent ) {

			var ke:KeyboardEvent = e as KeyboardEvent;

			if ( ke.keyCode != Keyboard.ENTER ) {

				return;
			}
		}

		addMessage( inputTxt.text , room.nickname );
		room.sendMessage( inputTxt.text );
		inputTxt.text = "";
	}
}

private function onRoomJoin( e:RoomEvent ):void {

	trace( "joined room" );
	enable();
	sendBtn.addEventListener( MouseEvent.CLICK, sendMessage );
	stage.addEventListener( KeyboardEvent.KEY_DOWN, sendMessage );
}

private function onUserJoined( e:RoomEvent ):void {

	var p:Presence = e.data as Presence;
	trace( "user joined" );
	trace( "Presence: " + p.getNode().toString() );
	trace( e.nickname );
}

private function onGroupMessage( e:RoomEvent ):void {

	var msg:Message = e.data as Message;

	for each( var user:String in usernames ) {

		if ( e.nickname == user ) {

			addMessage( msg.body, e.nickname );
			return;
		}
	}
}

private function addToList( item:Object ):void {

	dp.addItem( item );
	trace( "adding " + name + " to list" );
}

private function removeFromList( username:String ):void {

	var index:int = usernames.indexOf( username );

	if ( index > -1 ) {

		trace( "removing " + names[ index ] + " from the list" );
		dp.removeItem( items[ index ] );
		profileData[ index ] = null;
		names[ index ] = null;
		usernames[ index ] = null;
		items[ index ] = null;
	}
}

private function onGuestSelected( e:Event ):void {

	var user:String = list.selectedItem.value.toString();
	var index:int = usernames.indexOf( user );
	trace( "Selected: " + user );

	if ( index > -1 ) {

		// Display Member Information
		darkBox.visible = true;
		var data:String = profileData[ index ];
		var window:ProfileWindow = new ProfileWindow();
		window.text = data;
		window.addEventListener( ProfileWindow.DESTROYED, onDestroyed );
		addChild( window );
	}

	function onDestroyed( e:Event ):void {

		window.removeEventListener( ProfileWindow.DESTROYED, onDestroyed );
		window = null;
		darkBox.visible = false;
	}
}

private function onUserLeave( e:RoomEvent ):void {

	var p:Presence = e.data as Presence;
	var username:String = p.from.toString().replace( room.roomName + "@" + room.conferenceServer + "/", "" );
	removeFromList( username );
}

private function onUserDataExtension( ext:UserDataExtension ) {

	if ( usernames.indexOf( ext.username ) > -1 || ext.username == connection.username ) return;

	var name:String = ext.firstName + " " + ext.lastName;
	var profileText:String = name + "\n\n";
	profileText += "Username: " + ext.username + "\n";
	profileText += "Country: " + ext.country + "\n";
	profileText += "Status: " + ext.statusMessage + "\n";

	var item:Object = {};
	item.label = name;
	item.value = ext.username
	profileData.push( profileText );
	names.push( name );
	usernames.push( ext.username );
	items.push( item );
	addToList( item );
}

private function logout( e:MouseEvent ):void {

	var manager:LoginManager = new LoginManager();
	manager.logout();
}
Okay, let's take a look at what we just wrote. The first method is the addMessage method. This method is called whenever the user send's or recieves a message. The message is displayed within the textfield and is concatentated with the time that the message was sent or recieved. The sendMessage method just sends the message typed out by the user to all of the users in the current chat room. It accepts two parameters: the message as a String, and the name of whoever the message is from as another String. We display the time the message was sent or recieved and the recipent with the message. Nothing too complicated, I hope.
Now for those mysterious event handler methods that are called in accordance to which RoomEvent has been dispatched. The onRoomJoined method is called whenever the current user successfully joins a chat room. All we do is call the enable method which re-enables all of the previously disabled components so that the user can interact with them.
The onUserJoined method is called whenever a user successfully joins the current room. I created this method for debugging so it only traces data. Normally you'd listen for incoming presences and respond to the change in data but here we want to respond to incoming user data extensions through our express delivery service. Again I found express delivery a lot simpler here, but you could try and extract the custom extensions directly from the Presence object from the onUserJoined method.
Note: The presence object is e.data as Presence in this case. You could also get more creative with this method, if you like: maybe have a particular sound play or a notification message pop up for the user whenever another user enters the room. Just some food for thought.
The onGroupMessage method is dispatched when an incoming message is recieved from another user. The room itself (the XMPP server) may even send messages. These are usually configuration messages or error messages. You may want to treat these messages as administration messages and forbid that the be displayed as a regular chat message in the TextArea component. Maybe you can display these messages in a message window of some sort. Just some more food for thought. In our onGroupMessage method we actually filter out any messages coming from the server. We check that the message's sender, e.nickname (the sender's username in this case), is in the usernames Vector, and then we display the message using the addMessage method.
Now for the addToList method. Add a new item to the List object using the DataProvider. Call the addItem method on the DataProvider object and pass an item into the parmeter. The item object should be a primitive Object and have a property called label (a String). The value should also be a String. We'll use the corresponding user's username as the value here. The removeFromList method does just what you think. It removes the specified user from the list. Nothing complicated at all - just the complete opposite of the addItem method.
Whenever our user clicks on an item in the list, we wan't to display a profile window containing information about the user that was selected. The onUserSelected method does just that. The selected user's username is the value of the selected item in the list. We use their username to grab the location (index) of their data String in the profileData Vector.
Note: We'll be adding data into this Vector object within the onUserDataExtension method later.
The index of the username in the usernames Vector is the same as the index of user's data stored in the profileData Vector. You can see why in the onUserDataExtension method if you look ahead. Next a new ProfileWindow is created and displayed to the user. We listen for the window to dispatch the DESTROYED event so that we can remove it from the display. We'll need to write the ProfileWindow class later but as of now the ProfileWindow class is simply the linkage to the object in the library that we created earlier.
The onUserLeave method is dispatched when a user leaves the chat room. When a user leaves we remove them from the list because we only want to display current users. We call the removeFromList method to accomplish this.
Now for the moment we've all been waiting for. Now we get to look at the method that recieves the package delivered by our express delivery service. The onUserDataExtension method accepts one parameter. The deserialized UserDataExtension object delivered fresh from the UserDataExtensionManager class. The UserDataExtension object contains all of data that we need about the user that has just joined the room. We construct the profileData String ahead of time so that we don't have to store the extensions. You can store the extensions instead if you'd like but I constructed the data into a String before the fact. Next we need to push all of the data to the appropriote Vector's and display the user in the list. It's that simple.
The last method is the logout method. This method creates a new LoginManager object and calls it's logout method which logs the current user out (destroying their session cookies) and then navigates to the main index page of the site.
Wow! That was pretty heavy. But not too heavy, I hope. If you found any of this confusing, look over the code carefully until you have a clear understanding of what's going on before you move on. I'm saying this because this is gravy compared to the next sections which cover serializing and deserializing data. I'll try to make it as simple as possible.
Step 20: A Brief Overview of Data Serialization
Before we create our UserDataExtension class which deals with data serialization and deserialization, we need to talk a little about the topic. Serialization in this context refers to taking specific data and converting it into a form that we can use to send the data across our network through XMPP. We can't just take the UserDataGrabber object and send it across the network as a UserDataGrabber object and expect the data to be recieved on the other end in tact. In fact if we even tried to send the UserDataGrabber object using the XMPPConnection object's send method, we just get an argument error because it only excepts an XMPPStanza as a parameter. The method only accepts XMPPStanza objects (Message, Presence, IQ) as a parameter.
So how do we solve this problem? The answer is with data serialization. We must convert an object or data into a format that can be sent along with an XMPP Stanza. So what format do we have to convert the UserDataGrabber object into so that we can send it across our network and recieved by another user? Well the answer is XML. XMPP is just streaming XML. It's not only easy to parse - it's extensible too. But it's up to us to package (serialize) the user's data into XML format so that it can be sent across the network and received by other users.
In summary, serialization is the process of converting data into a format that can be stored/saved, and/or sent across a network. Techically speaking we won't actually be serializing the UserDataGrabber object, but instead we'll be serializing the data that it contains but we could very well do so if we needed to. All we need for this project is the user's data. I said I would keep this as simple as possible and I am. We'll just be serializing primitive data. The more primitive the data, the easier it is to serialize. If we were trying to searialize an object in the library, let's say a MovieClip with a lot of graphics and instance-specific properties, serialization would be a lot more complicated.
Step 21: How We Will Deserialize Data
It is up to the recieving end to take the serialized data (the XML) and convert it back into its original format. We must reverse the process. In our project, the data is represented by String values so it will actually be easy for us to deserialize.
Deserialization is a little more complicated than serialization, though, because we have to make a clone of the data that is received.When an incoming extension is received (as XML data), the UserDataExtension object deserializes (converts) the XML data back into String objects so that we can access them (read-only) through the UserDataExtension object via dot syntax. We will also need to check and make sure the data recieved is valid.
Here's the basic run down of what we will be doing:
- Recieve incoming data(XML in this case)
- Check to see if the data matches the type of data
UserDataExtensionserializes (in other words check to see if it is a valid User Data Extension) - Parse the data and make a clone of the remote
UserDataExtensionobject - Send the extension on an express delivery to the current instance of the
UserInterfaceclass making the data available to the user.
With that all said and done we can now move on to writing the UserDataExtension class.
Step 22: The UserDataExtension Class
No introduction is needed here. Let's dig in. Create a new class and call it UserDataExtension. The class must extend org.igniterealtime.xiff.data.Extension. The class must also implement org.igniterealtime.xiff.data.IExtension and org.igniterealtime.xiff.data.ISerializable. Go ahead and import the XMLNode class and the org.igniterealtime.xiff.data.ExtensionClassRegistry class along with the previous classes.
import flash.xml.XMLNode;
import org.igniterealtime.xiff.data.Extension;
import org.igniterealtime.xiff.data.IExtension;
import org.igniterealtime.xiff.data.ISerializable;
import org.igniterealtime.xiff.data.ExtensionClassRegistry;

public class UserDataExtension extends Extension implements IExtension, ISerializable {
Create the following variables and constants.
private var data:UserDataGrabber;
private var _uid:String;
private var _firstName:String;
private var _lastName:String;
private var _username:String;
private var _country:String;
private var _statusMessage;
private var _isDeserialized:Boolean;

public static const NS:String = "mycontentsite:xmpp:extensions:userdata";
public static const ELEMENT_NAME = "userData";
We need variables to store the data recieved from the other user and two class constants. One to represent a unique namespace (NS) for the extension, and another that represents the name of the XML element.
Create the constructor.
public function UserDataExtension( parent:XMLNode = null, userData:UserDataGrabber = null ) {

	super( parent );

	if ( userData ) data = userData;
}
Important: Make sure to give a null default value to any parameters in the constructor because when we register our Custom Extension with the ExtensionClassRegistry, an instance of the class will be instantiated and will not recieve any arguments. If the constructor is not prepared to not recieve any parameters, an error will be thrown and your application may not function correctly.
Also, pass the parent (XMLNode) into the constructor of the base class (org.igniterealtime.xiff.data.Extension). If userData is not null, assign it to the data property. We will be serializing the information contained within this object in a moment.
Before I forget, let's create the enable method.
public static function enable():void {

	ExtensionClassRegistry.register( UserDataExtension );
}
As you can see, the enable method is staight forward. It is a static method that registers the class/extension with the ExtensionClassRegistry, thus enabling the class/extension.
We will be serializing the data into XML format as I explained earlier. To be more specific, we will be creating XMLNode objects out of our data. Let's create a method to simplify this process for us. Create the generateNode method.
private function generateNode( nodeName:String, nodeValue:String = null, attributes:Object = null ):XMLNode {

	var nameNode:XMLNode = new XMLNode( 1, nodeName );
	var valueNode:XMLNode;

	if ( nodeValue ) {

		valueNode = new XMLNode( 3, nodeValue );
		nameNode.appendChild( valueNode );
	}

	if ( attributes ) {

		nameNode.attributes = attributes;
	}

	return nameNode;
}
This is another self-explanatory method. Based on the parameters given it creates an XMLNode object already packaged and ready to go. Let's start off with the parameters. The first parameter is the nodeName which is a String that represents the element name of the node we want to create. The second is another String that represents the value that the node is to contain. The last parameter is an Object that contains any attributes (as Strings) that the node should contain. The method puts the node together for us so that we don't have to repeat these actions continuously.
Now for the fun part. Create the serialize method.
public function serialize( parent:XMLNode ):Boolean {

	var attributes:Object = {};
	attributes.xmlns = NS;
	attributes.id = data.uid
	var firstNode:XMLNode = generateNode( "firstName", data.firstName );
	var lastNode:XMLNode = generateNode( "lastName", data.lastName );
	var userNode:XMLNode = generateNode( "username", data.username );
	var countryNode:XMLNode = generateNode( "country", data.country );
	var statusNode:XMLNode = generateNode( "statusMessage", data.statusMessage );
	var mainNode:XMLNode = generateNode( "userData", null, attributes );
	mainNode.appendChild( firstNode );
	mainNode.appendChild( lastNode );
	mainNode.appendChild( userNode );
	mainNode.appendChild( countryNode );
	mainNode.appendChild( statusNode );
	setNode( mainNode );

	var node:XMLNode = this.getNode();

	if ( node.parentNode != parent ) {

		parent.appendChild( node );
	}

	return true;
}
When our Extension is added to an XMPPStanza, this method is called. The first thing we need to do is package our data into a main XMLNode. Notice that all of the nodes are children of mainNode. Also, if you haven't noticed already, we have just put our generateNode method to good use. We have named the elements and set the values of each element. The firstName element contains the user's first name, the statusMessage element contains the user's status message, and so on. We have just taken the user's data and stored(serialized) it inside of xml.
To complete the serialization process call the setNode method, which is a method of the base class, to set the node. Also check to see if our parentNode is the same as the paremeter parent XMLNode. If it is not make the our node a child of the parameter parent XMLNode.
Note: The serialize method is an interface method that requires a return type(Boolean). If the data was successfully serialized, you will want to return true. Unless for some awkward reason you are dealing with data that may not be serialized correctly, this method should always return true. Otherwise it should return false.
Write the deserialize method:
public function deserialize( node:XMLNode ):Boolean {

	if ( node.nodeName == ELEMENT_NAME && node.attributes.hasOwnProperty( "xmlns" ) && node.attributes.xmlns == NS ) {

		if ( node.attributes.hasOwnProperty( "id" ) ) {

			_uid = node.attributes.id;
		}
		else {
			trace("invalid node xmlns: " + node.nodeName );
			return false;
		}

		for each( var child:XMLNode in node.childNodes ) {

			switch ( child.nodeName ) {

				case "firstName" :
					var first:XML = new XML( child.toString() );
					_firstName = first;
					break;
				case "lastName" :
					var last:XML = new XML( child.toString() );
					_lastName = last;
					break;
				case "username" :
					var user:XML = new XML( child.toString() );
					_username = user;
					break;
				case "country" :
					var c:XML = new XML( child.toString() );
					_country = c;
					break;
				case "statusMessage" :
					var msg:XML = new XML( child.toString() );
					_statusMessage = msg;
					break;
				default :
					trace("invalid node child: " + node.nodeName );
					return false;
			}
		}

		if ( _firstName && _lastName && _username && _country && _statusMessage ) {

			// Notify the UserDataExtensionManager Class
			setNode ( node );
			_isDeserialized = true;
			UserDataExtensionManager.registerData( this );
			return true;
		}
		else {

			trace("invalid missing data: " + node.nodeName );
			var a:Array = [firstName, lastName, username, country, statusMessage];
			for each(var el:* in a) {

				trace(el);
			}
			return false;
		}
	}

	return false;
}
Unlike the serialize method - which is called when the data is added to an XMPPStanza - the deserialize method is called when a custom extension is recieved on the other end. The method accepts one parameter, an XMLNode that was a child of the XMPPStanza that was recieved. It is our job to check whether the node was packaged by our own mechanism. So if the node is our custom extension, proceed to deserializing the node's data, otherwise return false.
We use a for each loop to iterate through each child node in the parameter XMLNode. You can choose how strict your extension will be. I chose to make our extension fairly strict. If all of the data isn't recieved, the extension returns false, telling the XIFF library that the node isn't valid and was not packaged by our code.
After the XML data is parsed, we check to see whether all of the properties have been set; if they have been set, we call the registerData method on the UserDataExtensionManager class - a class we will create next - to send the extension on an express delivery trip to our user. Finally we return true upon success.
Two interface methods down, and two to go. Here they are:
public function getNS():String {

	return NS;
}

public function getElementName():String {

	return ELEMENT_NAME;
}
Very, very, very, very, simple. These methods are required by the IExtension interface. The getNS() method returns the unique names of the extension and the getElementName() returns the extension's element name. Like I said: very, very, very, very, simple.
Were almost done. Finish up the class by granting read-only access to the user's data and the _isDeserialized property.
public function get uid():String {

	if ( data ) {

		return data.uid;
	}
	else {

		return _uid;
	}
}

public function get firstName():String {

	if ( data ) {

		return data.firstName;
	}
	else {

		return _firstName;
	}
}

public function get lastName():String {

	if ( data ) {

		return data.lastName;
	}
	else {

		return _lastName;
	}
}

public function get username():String {

    if ( data ) {

		return data.username;
	}
	else {

		return _username;
	}
}

public function get country():String {

	if ( data ) {

		return data.country;
	}
	else {

		return _country;
	}
}

public function get statusMessage():String {

	if ( data ) {

		return data.statusMessage;
	}
	else {

		return _statusMessage;
	}
}

public function get isDeserialized():Boolean {

	return _isDeserialized;
}
Step 23: Express Delivery Service
As I explained in earlier steps, there may be different ways to handle incoming extensions but I prefer a method that I call the express delivery method. The concept is simple. A Helper class recieves the extension and sends the extension directly to a specific method(function), that is used for handling the extension, but only if the method has been registered for this action. Let's create the UserDataExtensionManager class.
package {

	public class UserDataExtensionManager {

		public static var onUserData:Function;

		public static function registerData( data:UserDataExtension ) {

			if ( data.isDeserialized ) {

				if ( onUserData != null ) {

					onUserData( data );
				}
			}
		}
	}
}
This class is very light: only 18 lines of code. The registerDate method is called, accepting the deserialized UserDataExtension as a parameter, then the onUserData method is called if it exists. In this case the onUserData method is the onUserDataExtension method from the UserInterface class.
Step 24: The Profile Window Class
In order for a user to view information about another user we need a way to display the information to the user. I chose to use a simple window that contains a text field that we can use to display the info to the user. Let's create the ProfileWindow class.
Remember: This class is linked to a MovieClip symbol in the library.
package {

	import flash.display.MovieClip;
	import flash.events.Event;
	import flash.events.MouseEvent;
	import flash.display.DisplayObject;

	public class ProfileWindow extends MovieClip {

		public static const DESTROYED:String = "destroyed";

		public function ProfileWindow() {

			super();
			addEventListener( Event.ADDED_TO_STAGE, onAdded );
		}

		private function init():void {

			txt.selectable = false;
			txt.wordWrap = true;
			closeBtn.label = "Close";
			closeBtn.addEventListener( MouseEvent.CLICK, destroy );
			stage.addEventListener( Event.RESIZE, onStageResize );
			center();
		}

		private function center():void {

			x = ( stage.stageWidth - width ) / 2;
			y = ( stage.stageHeight - height ) / 2;
		}

		private function onAdded( e:Event ):void {

			removeEventListener( Event.ADDED_TO_STAGE, onAdded );
			init();
		}

		private function onStageResize( e:Event ):void {

			center();
		}

		private function destroy( e:Event ) {

			removeEventListener( MouseEvent.CLICK, destroy );
			stage.removeEventListener( Event.RESIZE, onStageResize );

			if ( this.parent ) {

				for ( var i:int = 0; i < numChildren; i++ ) {

					removeChild( getChildAt( i ) );
				}

                this.parent.removeChild( this );
				dispatchEvent( new Event( DESTROYED ) );
			}
		}

		public function set text( value:String ):void {

			txt.text = value;
		}
	}
}
The constructor method adds and event listener that listens for the ADDED_TO_STAGE event. When the window is added to the stage, the onAdded method is called, then listener is removed and the init method is called.
The init method initialized the text field and the close button. It also ensures that the window will always rest in the center of the stage.
You may notice a class constant at the beginning of the script. The DESTROYED constant is a type of event that the window will dispatch when the user clicks on closeBtn. When closeBtn is clicked, the destroy method is called, all of the children are removed and the window is removed from it's parent. We could have made a custom event class such as ProfileWindowEvent that extends flash.events.Event, but that wasn't nessassary. Instead we dispatch an Event object with the type DESTROYED. This is simple and serves its purpose well.
Finally we have our setter method set text. This could also have been a readable and writable property but again it wasn't necessary. Instead it is write-only because we never need to read this property in any of the rest of our code. The method sets the text of the textfield so that the text is displayed to the user.
Step 25: The Final Step
The last thing we need to do in order for our application to work is set up the HTML page. Our application is a dynamic web application. Earlier we grabbed the roomName variable that had been passed into Flash; the only problem here is that we haven't passed this variable into Flash yet. You'll need to implement this into your code on your own. Here is my code:
<?php

	$flashVars = '"room=mainlobby"';
	$image = '"mainlobby.png"';

	if ( isset( $_GET['content'] ) ) {

		$content = $_GET['content'];

		switch ( $content ) {

			case "box2dgame" :
				$roomName = "Box2d Game";
				break;
			case "platformgame" :
				$roomName = "Platform Game";
				break;
			case "mainlobby" :
			case "" :
			case null :
			default :
				$roomName = "Main Lobby";
				break;
		}

		$flashVars = '"room=' . $roomName . '"';
		$image = '"' . $content . '.png"';
	}

?>
<? xml version="1.0" encoding='utf-8' ?>
<!DOCTYPE html PUBLIC "-//W3C//DTD XHTML 1.0 Strict//EN" "http://www.w3.org/TR/xhtml1/DTD/xhtml1-strict.dtd">
<html xmlns="http://www.w3.org/1999/xhtml" lang="en" xml:lang="en">
	<head>
		<title>My Content Site</title>
		<meta http-equiv="Content-Type" content="text/html; charset=utf-8" />
		<style type="text/css" media="screen">
		//html, body { height:100%; background-color: #ffffff;}
		//body { margin:0; padding:0; overflow:hidden; }
		#flashContent { width:100%; height:100%; align:middle; }
		</style>
	</head>
	<body>

		<div id="myContent">
			<image src=<?php echo $image; ?> alt="game content" align="middle"/>
		</div>

		<div id="flashContent">
			<object classid="clsid:d27cdb6e-ae6d-11cf-96b8-444553540000" width="100%" height="50%" id="chat" align="middle">
				<param name="movie" value="chat.swf" />
				<param name="quality" value="high" />
				<param name="bgcolor" value="#ffffff" />
				<param name="play" value="true" />
				<param name="loop" value="true" />
				<param name="wmode" value="window" />
				<param name="scale" value="showall" />
				<param name="menu" value="true" />
				<param name="devicefont" value="false" />
				<param name="salign" value="" />
				<param name="allowScriptAccess" value="sameDomain" />
				<param name="flashVars" value=<?php echo $flashVars; ?> />
				<!--[if !IE]>-->
		  <object type="application/x-shockwave-flash" data="chat.swf" width="100%" height="50%">
					<param name="movie" value="chat.swf" />
					<param name="quality" value="high" />
					<param name="bgcolor" value="#ffffff" />
					<param name="play" value="true" />
					<param name="loop" value="true" />
					<param name="wmode" value="window" />
					<param name="scale" value="showall" />
					<param name="menu" value="true" />
					<param name="devicefont" value="false" />
					<param name="salign" value="" />
					<param name="allowScriptAccess" value="sameDomain" />
					<param name="flashVars" value=<?php echo $flashVars; ?> />
				<!--<![endif]-->
					<a href="http://www.adobe.com/go/getflash">
						<img src="http://www.adobe.com/images/shared/download_buttons/get_flash_player.gif" alt="Get Adobe Flash player" />
					</a>
				<!--[if !IE]>-->
				</object>
				<!--<![endif]-->
			</object>
		</div>
</body>
</html>
The above PHP script is just an example. Your site will most likely be a lot more inituitive and creative. The GET content variable specifies which chat room to join. Then we pass this information into Flash so that our code knows which chat room to join.
Step 26: Test Our Application
Make sure that WAMP and Openfire are running on your system. If all went well, your application should be runnning fine. Test the application in multiple browsers as different users. Have one user follow another into a chat room to see how well our application handles the change in data. Then chat with yourself. Have fun with it.
Conclusion
Well, we learned a lot and I'm glad to have shared this time with you. The XIFF library is absolutely amazing. I hope this tutorial has encouraged you to explore this incredible library in it's entirety. There's so much you can do with it. You can create implement private chat and rosters into our current application or create an entirely new application that connects to another XMPP server such as one of the servers listed on xmpp.org. Thanks for tuning in. See you next time.
Important: The source files were configured based on my own machine. Remember to reload the XIFF.swc file into the chat.fla file. Also remember to set your server settings within the constants of the Document class (ChatApp.as).


Comments