Sliders can be controversial—we've all had clients who've insisted on them regardless of whether they enhance the site. But they do have their place. They can help to highlight key content, display images on a site where visual elements are important, and bring a site to life.
In most cases, you'll probably have used sliders to display images, which may or may not be associated with content on your site. But you can also use a slider to display text on your site.
In this set of two tutorials, I'll show you how to create a text slider with an interesting effect: it will use a custom post type to pull in one piece of text after another in two blocks, creating the effect of a conversation at the top of the page. This will be overlaid over a photo of two people, so that the effect is that the two of them are talking to each other.
What You'll Need
To follow along, you'll need:
- a development installation of WordPress
- a code editor
- the free Responsive theme installed
The example I'll be working through is a real-world site I'm developing for a client, which is running a child theme of the Responsive theme. I'll be creating a child of the Responsive theme and adding custom styling to that as well as functions in the theme's functions.php file. You could either add this to your own theme or create a child theme of Responsive like me.
In this tutorial, we'll get the slider up and running using a custom post type. Specifically we'll:
- create a child theme for the Responsive theme
- register a custom post type
- create posts using our custom post type
- install and set up a plugin to output the text slider
- add our slider to the site header using an action hook
In the next part, we'll add CSS to our theme to position the text correctly, creating the conversation effect, and to style it.
So let's get started!
Create the Child Theme
First let's create the child theme of the Responsive theme. I'm doing this because I don't want to edit the Responsive theme itself: if you did that, you'd lose your work when you next updated the theme. Alternatively, you could create a plugin to do this.
In your wp-content/themes directory, create a new empty folder. I'm calling mine tutsplus-conversation-banner.
In that folder, create a file called style.css and add this to it:
/*
Theme Name:     Tutsplus Conversation banner Theme
Theme URI:      http://.tutsplus.com/tutorials/create-a-conversation-banner-with-revolving-text-using-a-custom-post-type--cms-25938
Description:    Theme for tuts+ tutorial on creating a conversation banner effect. Child theme for the Responsive theme.
Author:         Rachel McCollin
Author URI:     http://rachelmccollin.co.uk/
Template:       responsive
Version:        1.0
*/

@import url("../responsive/style.css");
Edit the code above to make yourself the author and add your own URI.
Now save that file and activate your new theme.
Add Custom Styling
Because this is a real-world site, I've added custom styling to it, which is in the child theme's stylesheet. I won't go through this in detail as it's outside the scope of the tutorial, but you can see the styling in the code bundle with this tutorial.
Here's how my site looks before adding the slider:
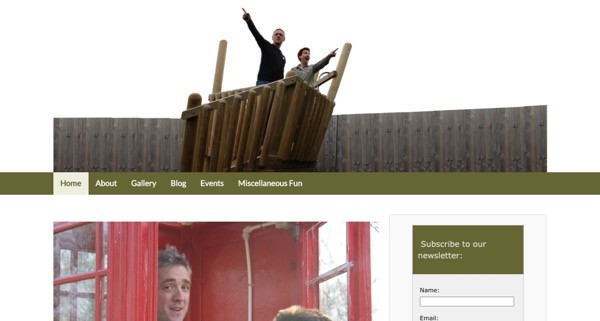
The image in the header has space either side of the two people, and I'll style my slider so that it displays text either side of the people, giving the effect that they're pointing at their words.
Registering the Post Type
The nest step is to register a post type called quote. In your child theme folder, create a new file called functions.php.
Note: It's good practice to use a plugin to register a post type rather than adding them to your theme functions file. I'm using the functions file here to keep everything in one place, so you have a code bundle to download.
Open your functions file and add this code to it:
function tutsplus_create_post_type() {
    $labels = array(
		'name' => __( 'Quotes' ),
		'singular_name' => __( 'Quote' ),
		'add_new' => __( 'New Quote' ),
		'add_new_item' => __( 'Add New Quote' ),
		'edit_item' => __( 'Edit Quote' ),
		'new_item' => __( 'New Quote' ),
		'view_item' => __( 'View Quote' ),
		'search_items' => __( 'Search Quotes' ),
		'not_found' =>  __( 'No Quotes Found' ),
		'not_found_in_trash' => __( 'No Quotes found in Trash' ),
	);
	$args = array(
		'labels' => $labels,
		'has_archive' => false,
		'public' => true,
		'hierarchical' => false,
		'supports' => array(
			'title',
			'editor',
			'excerpt',
			'custom-fields',
			'thumbnail',
			'page-attributes',
			'author'
		),
	);
	register_post_type( 'quote', $args );
}
add_action( 'init', 'tutsplus_create_post_type' );
This registers a new post type called quote.
You can see the new post type in my site, with some quotes I've added:

Note that these are just dummy quotes—the fact that I've used a custom post type makes it easy for my client to add their own quotes once the site is launched. Each of them just has a post title and no content, because if there was post content, the plugin would display both.
Installing and Configuring the Slider Plugin
The next step is to install and configure the slider plugin. I'm using the Smooth Slider plugin, which lets you choose which posts will be added to the slider and manually reorder your posts in the slider's settings screen.
Go to Smooth Slider > Settings and configure it like so:
- Default title text: leave this blank.
- Thumbnail image: uncheck all of the boxes for this.
- Slider content - Pick content from: select Content.
I'm adding styling in my stylesheet because I want to use Google fonts, so I'm not too worried about the settings for the fonts, but you might prefer to tweak those in the settings screen.
Set Up the Sliders
The next step is to add the sliders and populate them with posts.
Create the Sliders
We need to add two sliders: one for each of the two people. Go to Smooth Slider > Sliders and click on Create New Slider. I've called my two sliders 'Heide' and 'Iain' because those are the names of the people.
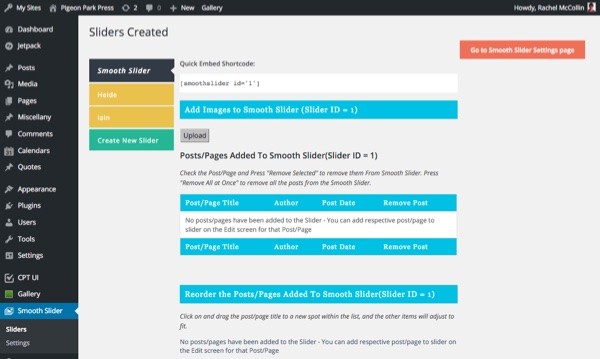
Add Posts to the Sliders
You add posts to a slider from the post editing page. Open one of your posts and scroll down to see the option to add it to a slider:
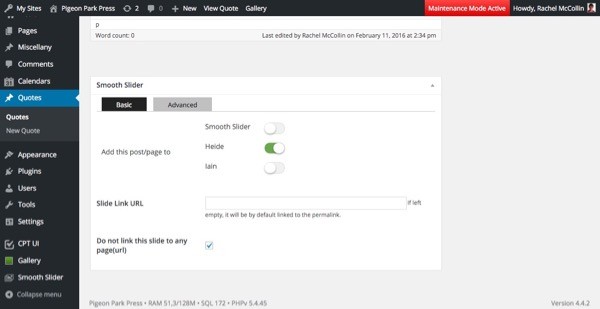
Select the slider you want to add the post to and save it. Repeat this for every post, adding it to the relevant slider.
Order Posts in the Slider
You can manually edit the order in which posts will be shown by the slider. Go to Smooth Slider > Sliders and select the slider you want to work with. Here's my 'Heide' slider:
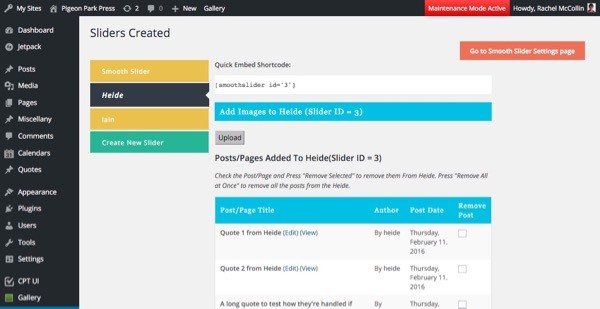
Scroll down to drag the posts into the correct order:
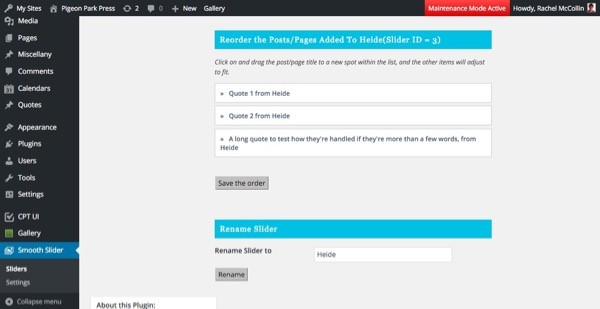
Once you've done this, save the slider.
Add the Sliders to the Page Header
Right now we have two sliders, but they're not appearing in the site. The plugin gives you shortcodes you can use to add sliders to your site: as we'll be adding them in the theme files, we'll use the do_shortcode() function.
The Responsive theme provides us with a hook called responsive_in_header which lets you add code to the page header. This will be displayed above the image but in the header: we'll add CSS to position the sliders correctly in the next part of this two-part tutorial.
Open your theme's functions.php file and add this function:
function tutsplus_slider() { ?>

		<div class="tutsplus-sliders">

			<?php echo do_shortcode( '[smoothslider id="3"]' ); ?>
			<?php echo do_shortcode( '[smoothslider id="4"]' ); ?>

		</div>

<?php }
add_action( 'responsive_in_header', 'tutsplus_slider' );
This creates a div with the tutsplus-sliders class, which we'll target for positioning later, and uses the shortcodes to output the two sliders.
Save your functions file.
The site now looks like this:
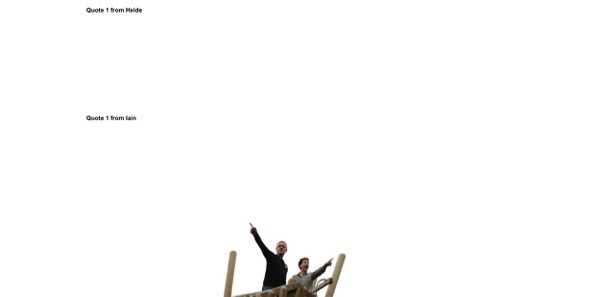
So the sliders are there, and they're working. But they're taking up a huge amount of white space at the top of the page, above the image. We need them to be displayed over the image, next to the two people.
In the next part, we'll go on to fix that. We'll add CSS for positioning the two sliders, and also for styling. We'll register a Google font which will be used for the quotes.
Summary
Sliders aren't just for images: you can use them to display text too. In this tutorial, you've learned how to set up two sliders using a custom post type. Next we'll add the styling to make our text look the way it should.


Comments