In the previous article in this series, you learned about the canvas element, and the basics for drawing on it. In this article, I'm going to demonstrate some of the more advanced drawing functionality.
Setting Up
We'll use the same HTML template from the previous article; so open up your favorite editor and paste in the following code:
<!DOCTYPE html>

<html>
	<head>
		<title>Canvas from scratch</title>
		<meta charset="utf-8">

		<script src="http://ajax.googleapis.com/ajax/libs/jquery/1/jquery.min.js"></script>

		<script>
			$(document).ready(function() {
				var canvas = document.getElementById("myCanvas");
				var ctx = canvas.getContext("2d");
			});
		</script>
	</head>

	<body>
		<canvas id="myCanvas" width="500" height="500">
			<!-- Insert fallback content here -->
		</canvas>
	</body>
</html>
This is nothing more than a basic HTML page with a canvas element and some JavaScript that runs after the DOM has loaded. Nothing crazy.
Drawing Circles
In the last article I showed you how to draw basic shapes and paths; in this section I'm going to show you how to take things a step further and draw circles. It's not as easy as you might think, but it's still not hard at all.
There isn't a method in canvas that lets you draw a circle with a single line of code, like how fillRect works for rectangles. Instead, you have to draw circles with a path using the arc method; a circle is merely a 360 degree arc. The reason for this is that circles are actually very complex shapes, and the arc method allows for all sorts of control over the way that you draw them. For example, you might want to only draw a semi-circle. The arc method allows you to do that. You could even combine the arc method with standard straight paths to draw pizza slices and quarter circles.
I'll explain how the arc method works shortly, but for now, let's draw a circle by adding the following code underneath the ctx variable:
cxt.beginPath();
ctx.arc(100, 100, 50, 0, Math.PI*2, false);
ctx.closePath();
ctx.fill();
This will draw a circle positioned slightly away from the top left of the canvas:
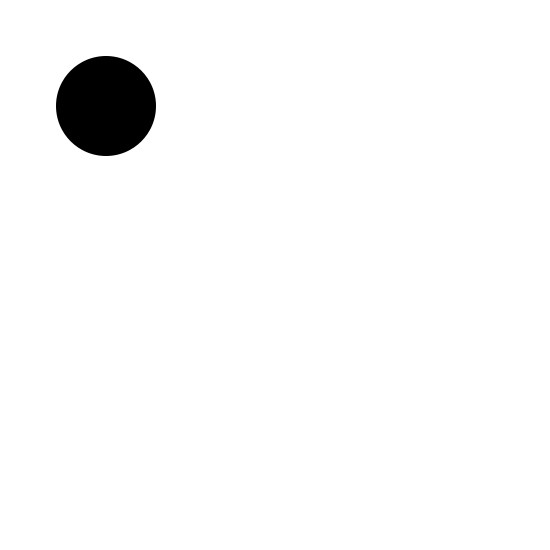
Looks simple, right? And it is, but let's take a closer look at what's going on.
The arc method has a total of six arguments:
- The first is the x position of the origin point (the centre of the circle).
- The second is the y position of the origin point.
- The third is the radius of the circle.
- The forth is the start angle of the circle.
- The fifth is the end angle of the circle.
- And sixth is the direction to draw the arc (true is anti-clockwise, and false is clockwise)
Written in pseudocode, arc would look like this:
arc(x, y, radius, startAngle, endAngle, anticlockwise);
The first three arguments are self-explanatory, as is the last, but what about the start and end angle? Let me explain.
As I mentioned previously, circles are just 360 degree arcs. In canvas, an arc is defined as a curved line that starts at a distance away from an origin point that is the distance of the radius. The curved line starts at the angle defined as the start angle argument (the forth one), and continues around the circumference of an imaginary circle until it reaches the angle defined as the end angle argument (the fifth). Sounds simple, right?
Perhaps an illustration will help explain the situation:
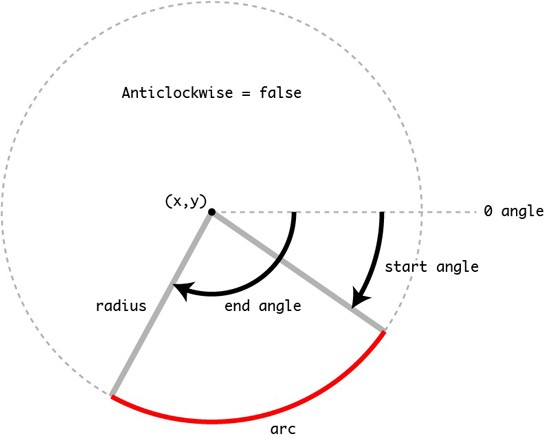
It may look crazy, but it makes a lot of sense once you're able to get your head around it.
Angles in canvas
At this point, it's probably worth mentioning that angles in canvas are done in radians, not degrees. This means that angles go from 0 to pi multiplied by two. Angles in canvas also start from the right hand side, as can be seen in the following illustration:
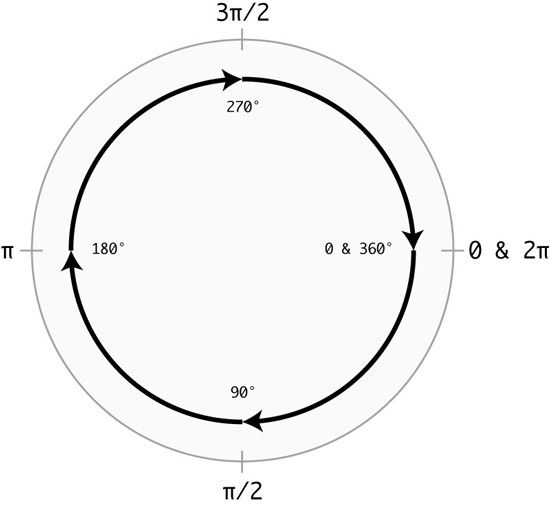
If you really don't like radians, you can easily convert degrees into radians with the following JavaScript formula:
var degrees = 270;
var radians = degrees * (Math.PI / 180);
This formula is dead simple and it's extremely valuable if you want to deal in degrees.
Bézier Paths
Arcs are fun and all, but they're pretty limiting for the kind of curves that can be created with canvas. For anything more complex, you'll want to start looking at the Bézier curve methods quadraticCurveTo, and bezierCurveTo. These methods allow you to create curved paths that have a radius that isn't central to the curve, and also to create paths that have multiple curves.
Bézier paths use control points to define how and where to draw the curves. For example, quadraticCurveTo has one control point, whereas bezierCurveTo has two. Check out the following illustration to see how the control points affect the way a curve is drawn:
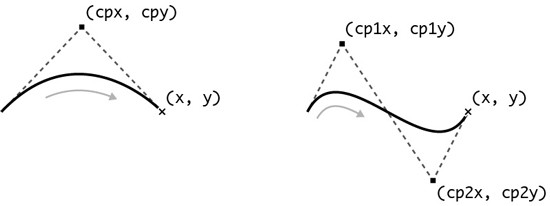
If you've used a vector-based drawing application like Adobe Illustrator before, then you might already be comfortable with these kinds of curves.
Let's jump in and create a quadratic Bézier path. Replace the arc code with the following:
ctx.lineWidth = 8;
ctx.beginPath();
ctx.moveTo(50, 150);
ctx.quadraticCurveTo(250, 50, 450, 150);
ctx.stroke();
This will draw a curved path that looks like the one on the left of the illustration above:
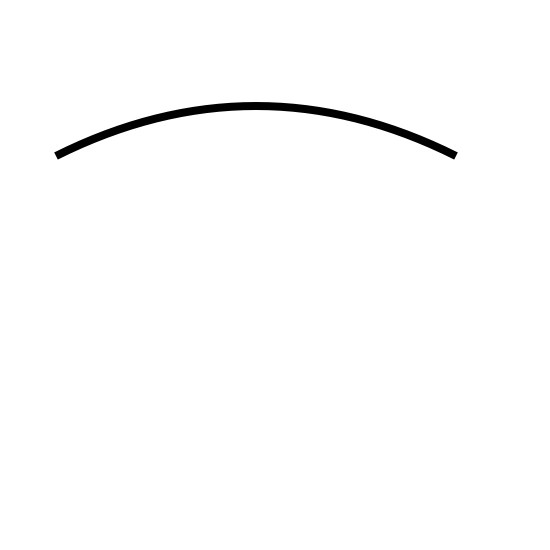
The quadraticCurveTo method takes four arguments:
- The first is the x position of the control point.
- The second is the y position of the control point.
- The third is the x position of the end of the path.
- And the forth is the y position of the end of the path.
Written in pseudocode, quadraticCurveTo would look like this:
quadraticCurveTo(cpx, cpy, x, y);
The start position of the curve is wherever the path currently lies. For example, in the code above you moved the start of the path by calling the moveTo method.
Let's step up a level a create a cubic Bézier path. Replace the previous code with the following:
ctx.lineWidth = 8;
ctx.beginPath();
ctx.moveTo(50, 150);
ctx.bezierCurveTo(150, 50, 350, 250, 450, 150);
ctx.stroke();
This will draw a curved path that looks like the one on the right of the illustration above:
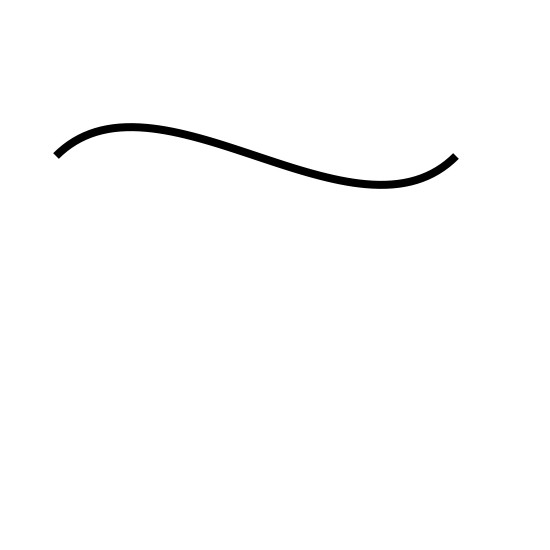
The bezierCurveTo method takes six arguments:
- The first is the x position of the first control point.
- The second is the y position of the first control point.
- The third is the x position of the second control point.
- The forth is the y position of the second control point.
- The fifth is the x position of the end of the path.
- And the sixth is the y position of the end of the path.
Written is pseudocode, bezierCurveTo would look like this:
bezierCurveTo(cp1x, cp1y, cp2x, cp2y, x, y);
On their own Bézier paths aren't super amazing, but when combined with normal paths, or when used multiple times, the results can be pretty profound. They allow you to create all sorts of complicated and crazy shapes in canvas!
You might want to check out the Ai->Canvas plugin for Adobe Illustrator that lets you export your fancy vector drawing as canvas code. It's pretty neat, and will save you loads of time!
Drawing State
In the previous article in this series, I detailed how to change the fill and stroke style of the canvas, as well as how to change the line width. One of the issues to be aware of when changing these properties is that you'll have to manually change the colours and line width back again if you want the colour or width that you had originally. Fortunately, as always, there's a better way to do this; it's called the drawing state.
The drawing state in canvas is essentially a stack on which you can save the current styles, and then restore them again at a later date.
It's a deviously simple concept, but one that allows you to do so much when fully understood. In fact, the drawing state holds a massive amount of visual information about the canvas, like the the transformation matrix, the clipping region, and the following properties; globalAlpha, globalCompositeOperation, strokeStyle, fillStyle, lineWidth, lineCap, lineJoin, miterLimit, shadowOffsetX, shadowOffsetY, shadowBlur, shadowColor, font, textAlign, and textBaseline. Most of these will be new to you, so don't worry. You'll learn about transformations and other fun stuff like shadows in the next article.
Saving the drawing state
Using the drawing state is dead simple, but understanding it fully can take a bit of time. Replace the code from the last section with the following:
ctx.fillStyle = "rgb(0, 0, 255)";
ctx.save();
ctx.fillRect(50, 50, 100, 100);
That's genuinely all you need to save the drawing state: a single call to the save method. I told you it was simple!
What's happening here is that you're changing the fill style of the canvas to blue, then saving the drawing state, which pushes the current state onto the stack that I was talking about earlier. By default, the stack of drawing states is empty.
It's important to remember that the stack works just like a stack of paper on your desk; the first item on the stack is at the bottom, with the newest item at the top. If you want to get at the first item again, you have to first take off all of the items on top of it. This is known as a first in last out system, or last in first out if you want to look at it the other way round.
Restoring the drawing state
Saving the drawing state is great and all, but actually using it again is properly a little more useful. To do that, you're going to use the restore method.
Add the following code to the code above:
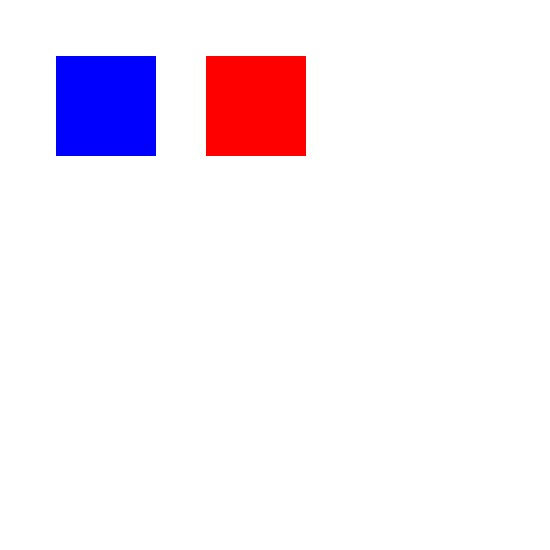
ctx.fillStyle = "rgb(255, 0, 0)";
ctx.fillRect(200, 50, 100, 100);
This will draw another rectangle on the canvas, but this time in a different colour (red):
All pretty standard stuff so far, but what if you want to switch back to the blue colour and draw another rectangle? Well, you could set the fill style manually as blue, but that would be boring. Let's try using the restore method and seeing what happens.
Add the following code:
ctx.restore()
ctx.fillRect(350, 50, 100, 100);
This will draw another rectangle, but this time with the original fill style:
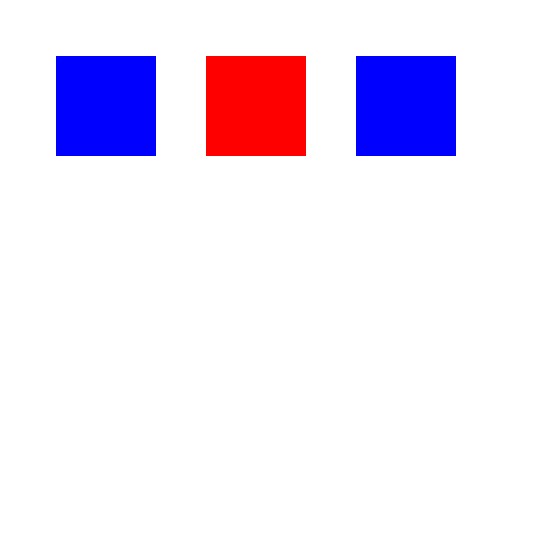
How easy was that? The call to restore pulled out and removed the last drawing state that was added to the stack, and then applied it to the canvas, saving you a whole bunch of time. Ok, well it might not have saved you a massive amount of time in this example, but it would have had you changed all sorts of properties and performed transformations on the canvas.
Using multiple drawing states
So you know how to use the drawing state for a single occurrence, but what happens if you save multiple drawing states? For the sharp-eyed you might remember that I referred to the stack as a pile of paper; last in, first out. Let's see how this works in code.
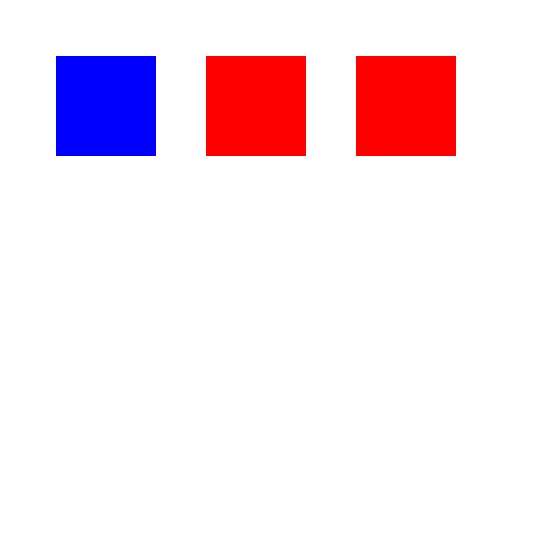
Update the previous code to save the drawing state after setting the fill style to red:
ctx.fillStyle = "rgb(0, 0, 255)";
ctx.save();
ctx.fillRect(50, 50, 100, 100);

ctx.fillStyle = "rgb(255, 0, 0)";
ctx.save();
ctx.fillRect(200, 50, 100, 100);

ctx.restore()
ctx.fillRect(350, 50, 100, 100);
Even though this is practically the same code as before, everything will have changed as the latest drawing state added to the stack contains the red fill style:
To restore the first state (the blue fill style), you'll need to call restore for a second time, so add the following code:
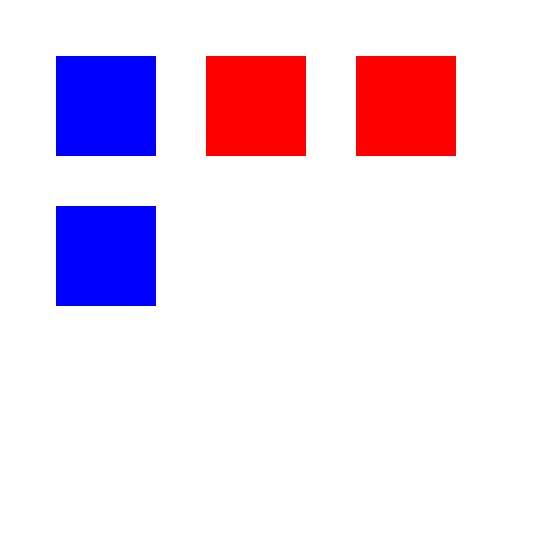
ctx.restore();
ctx.fillRect(50, 200, 100, 100);
This will pull and remove the first state off of the stack and apply it to the canvas, giving you a blue fill style:
By using multiple drawing states like this you can save a whole bunch of time. It's pretty nifty!
Wrapping Things Up
I hope that I haven't gone too fast through all of this. Some of the concepts that we've covered are pretty advanced, and I'd encourage you to reread the article and play around with the code to get a better understanding of what's going on.
In the next article you'll be learning how to perform transformations on the canvas, as well as how to use shadows and gradients. Exciting times!


Comments