Python is one of the most easy to read and easy to write programming languages of all time. Over the years, the popularity of Python has only increased, and it is widely used in web application development, scripting, creating games, scientific computing, etc.
Flask is a Python web application framework which is gaining popularity due to its ease of use for Python beginners. In this tutorial, we'll have a look at EVE, a REST API building framework based on Flask, MongoDB and Redis. From the official docs:
Powered by Flask, MongoDB, Redis and good intentions Eve allows to effortlessly build and deploy highly customizable, fully featured RESTful Web Service.
What We'll Be Creating
In this tutorial, we'll see how to build REST APIs using the EVE framework. Next, using AngularJS we'll design the front end for a simple app and make it functional by consuming the REST APIs built using EVE. In this tutorial, we'll implement the following functionality:
- Create User API
- Validate User API
- Add Items API
- Delete Items API
- Update Items API
Getting Started
Installation
We'll be using pip to install EVE.
pip install eve
We'll be using MongoDB as database. Have a look at the official docs for installation as per your system.
Creating the Basic API
Create a project folder called PythonAPI. Navigate to PythonAPI and create a file called api.py. Inside api.py import EVE and create an EVE object.
from eve import Eve
app = Eve()
Next, run app when the program is executed as a main program.
from eve import Eve
app = Eve()

if __name__ == '__main__':
    app.run()
Run your MongoDB using the following command:
mongod --dbpath= <PATH-TO> /data/db/
As you can see, we need to specify a path for the db files. Simply create data/db in your file system and run the above command.
Along with an instance of MongoDB running, EVE requires a configuration file with info about the API resources. So in the PythonAPI folder create another file called settings.py and add the following code:
DOMAIN = {'user': {}}
The above code informs EVE that a resource for user is available.
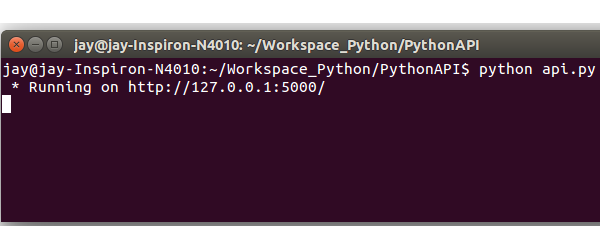
Save all the files and run api.py:
python api.py
The API should be online as shown:
We'll be using Postman REST Client to send requests to the APIs. It's free and can be installed with a simple click. Once done with installation, launch the app and enter the API URL (http://127.0.0.1:5000/) and click send. You should have the response as shown:
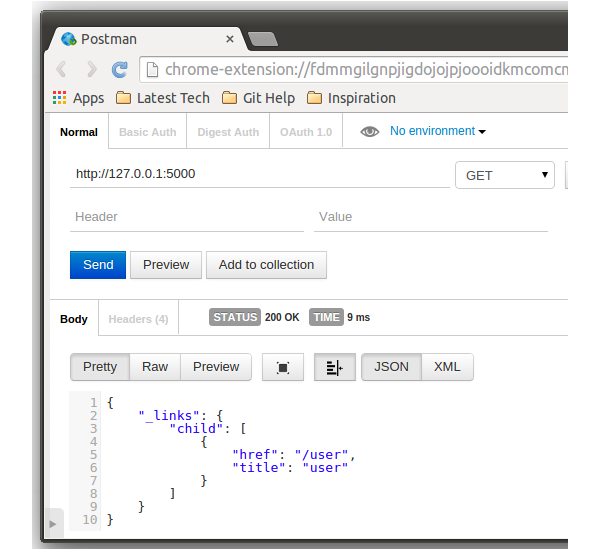
Since we haven't called any specific API resource, it'll show all the available resources. Now, try calling the user resource and you should have the response specific to the user.
Create and Validate User API
Create User API
We'll start by building an API to create or register a user for our application. The user would have certain fields like First Name, Last Name, Username , Password and Phone Number.
So first we'll need to define a schema for a user. Schema defines the fields and data types of the key fields. Open up settings.py and modify the DOMAIN by defining a schema as shown :
DOMAIN = {
    'user': {
        'schema': {
            'firstname': {
                'type': 'string'
            },
            'lastname': {
                'type': 'string'
            },
            'username': {
                'type': 'string',
                 'unique': True
            },
            'password': {
                'type': 'string'
            },
            'phone': {
                'type': 'string'
            }
        }
    }
}
As you can see in the above code, we have defined the key fields which are needed to create a user and its data type defined in the schema. Save the changes and execute api.py. From Postman Client try to do a POST request along with the required parameters to http://127.0.0.1/user as shown:
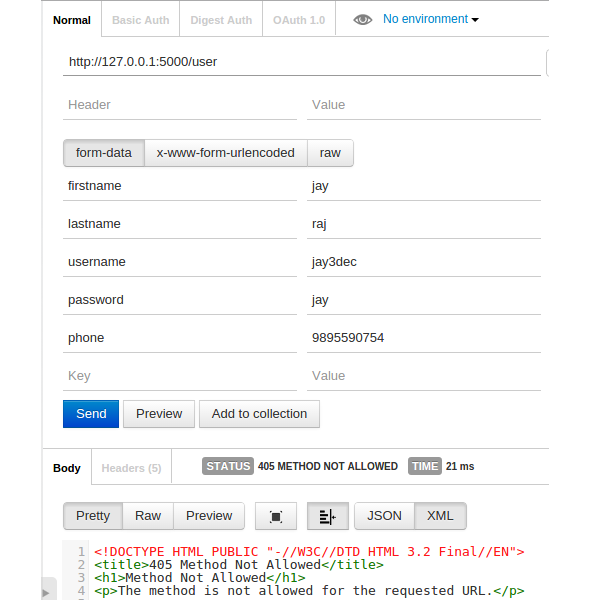
On POST request to user, it threw a 405 Method Not Allowed error. By default EVE accepts only GET requests. If we want to use any other method we need to define it explicitly. Open settings.py and define the resource methods as shown :
RESOURCE_METHODS = ['GET', 'POST']
Save the changes and execute api.py. Now try again to POST to user and you should have the below response:
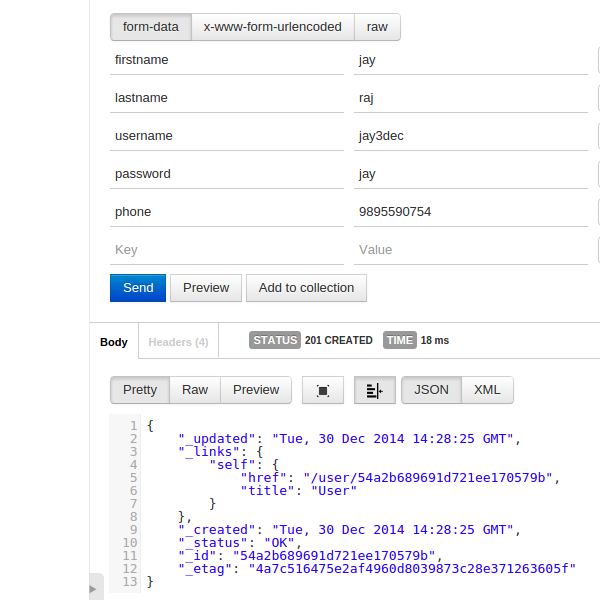
As you can see the above POST request was successful. We haven't defined the database configurations in our settings.py, so EVE completed the request using the running instance of MongoDB. Let's log in to the MongoDB shell and see the newly created record. With MongoDB instance running, trigger the mongo shell:
mongo
Once inside the mongo shell, list all the available databases.
show databases;
There must be an eve database. Switch to the eve database.
use eve;
Execute the show command to list the tables inside the eve database.
show tables;
The listed tables must have a table called user. List the records from the user table using the following command:
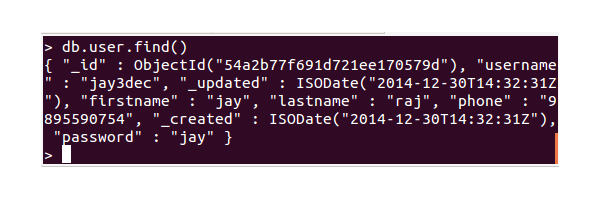
db.user.find()
Here are the selected records from the user tables:
Validate User API
Next we'll create an API to validate an existing user. Normally, if we do a get request to the user endpoint (http://127.0.0.1:5000/user), it will give out details of all registered users from the database. We need to implement two things here. First we need to authenticate a user using first name and password, and second we need to return the user details from the database on successful authentication.
In order to get details based on the first name, we need to add an additional lookup field in the DOMAIN in settings.py.
'additional_lookup': {
            'url': 'regex("[\w]+")',
            'field': 'username',
            }
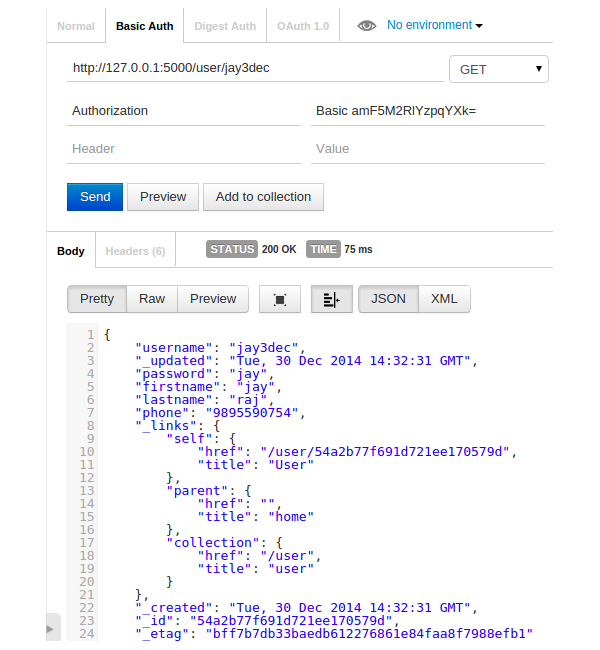
As seen in the above code, we have added a look up field for username. Now when a GET request is send to the http://127.0.0.1:5000/user/<username> it will return the details of the user with the particular username. When making a request to a particular user, we'll also send the username and password for authentication.
We'll be doing basic authentication to verify a particular user based on username and password. First, we need to import the Basic Auth class from EVE. Create a class called Authenticate to implement the authentication as shown:
from eve.auth import BasicAuth

class Authenticate(BasicAuth):
    def check_auth(self, username, password, allowed_roles, resource,
                   method):
Now, when the resource is user and request method is GET, we'll authenticate the user. On successful authentication, the user details of the user with firstname in the API endpoint will be returned. We'll also restrict user creation by providing a username and password. So, if the method is POST and API endpoint is user, we'll check and validate the username and password. So, here is the complete Authenticate class:
class Authenticate(BasicAuth):
    def check_auth(self, username, password, allowed_roles, resource,
                   method):
        if resource == 'user' and method == 'GET':
            user = app.data.driver.db['user']
            user = user.find_one({'username': username,'password':password})
            if user:
                return True
            else:
                return False
        elif resource == 'user' and method == 'POST':
            return username == 'admin' and password == 'admin'
        else:
            return True
We need to pass the Authenticate class name while initiating the API. So modify the API initiating code as shown:
if __name__ == '__main__':
    app = Eve(auth=Authenticate)
    app.run()
Save all the changes and execute the api.py. Try to send a basic auth request with a username and password from Postman to http://127.0.0.1/user/username (replace username with any other existing username). On successful authentication, you should get the user details in response as shown:
Add, Delete, and Update Items
Add Item API
In order to create an Add item API, all we need to do is create a new schema for item in settings.py.
'item': {
        'schema': {
            'name':{
                'type': 'string'
                },
            'username': {
                'type': 'string'
                }
            }
        }
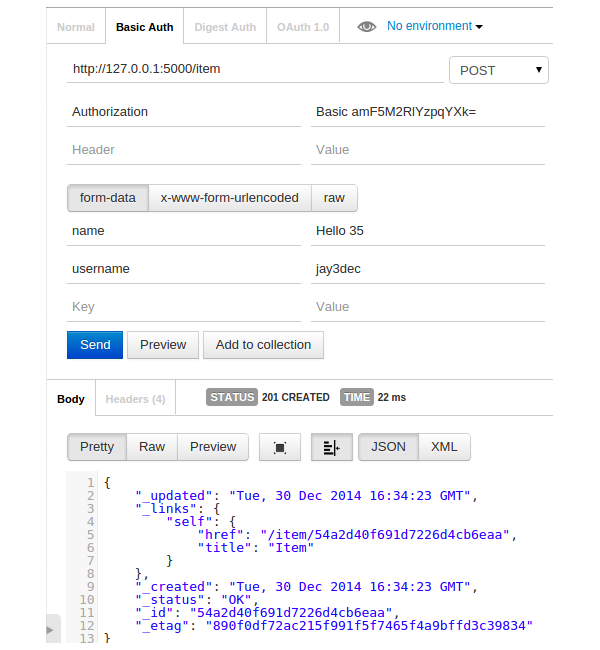
The Add Item API would help each logged in user to add an item. We'll be saving the item along with the username of the user who entered the item. Save the changes and try to do a POST request to http://127.0.0.1/item as shown:
Delete Item API
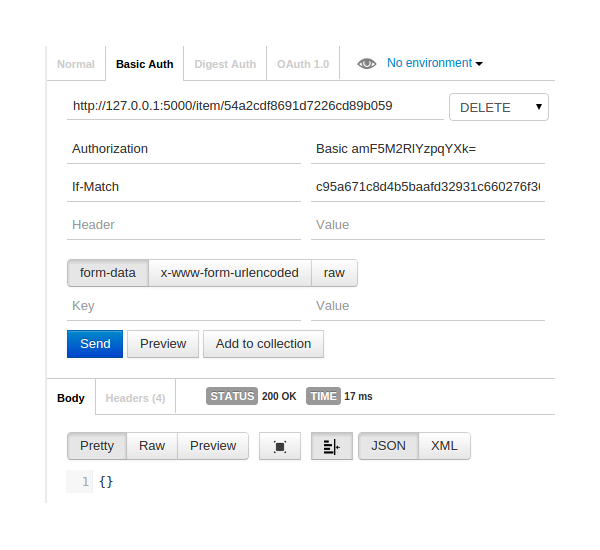
For deleting an item created by an user, all we need to do is call the item endpoint /item_id. But simply calling a DELETE request won't delete the item. In order to delete an item, we also need to provide an _etag related to a particular item. Once item id and _etag match, the item is deleted from the database. Here is how the DELETE method is called in item endpoint.
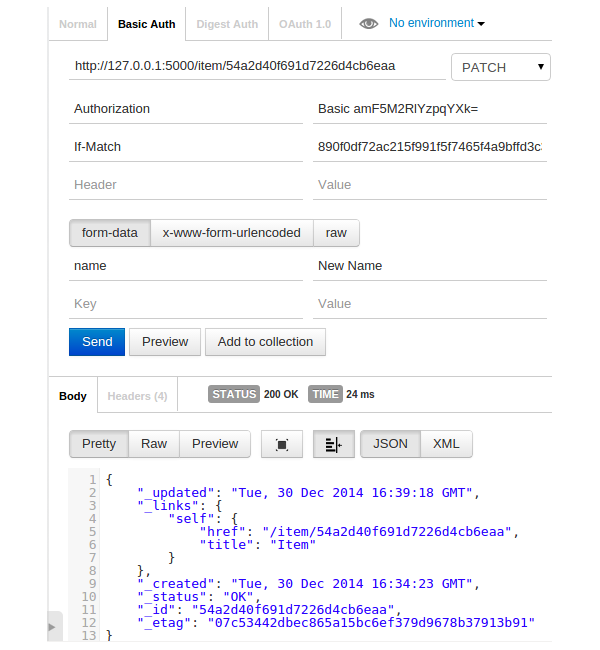
Update Item API
The Update API is similar to the Delete API. All we have to do is send a PATCH request with the item id and _etag and the form fields which need to be updated. Here is how the item details are updated:
Conclusion
In this tutorial, we saw how to get started with creating APIs using the Python EVE framework. We created some basic APIs for CRUD operations which we'll use in the next part of the series while creating an AngularJS App.
Source code from this tutorial is available on GitHub.
Do let us know your thoughts in the comments below!

Comments