In the information age we are living in, we can see how much data the world is exchanging. We are basically creating, storing, and retrieving data, extensively! There should be a way to handle all that—it couldn't be spread everywhere without any management, right? Here comes the Database Management System (DBMS).
The DBMS is a software system that enables you to create, store, modify, retrieve, and otherwise handle data from a database. Such systems also vary in size, ranging from small systems that simply run on your personal computer to larger ones running on mainframes.
Our focus in this tutorial is on Python rather than database design. Yes, Python is wonderfully able to interact with databases, and this is what I'm going to show you in this tutorial.
Let's get started!
Python Database API
As mentioned above, Python is able to interact with databases. But, how can it do that? Python uses what's called the Python Database API in order to interface with databases. This API allows us to program different database management systems (DBMS). For those different DBMS, however, the process followed on the code level is the same, which is as follows:
- Establish a connection to your database of choice.
- Create a cursor to communicate with the data.
- Manipulate the data using SQL (interact).
- Tell the connection to either apply the SQL manipulations to the data and make them permanent (commit), or tell it to abort those manipulations (rollback), thus returning the data to the state before the interactions occurred.
- Close the connection to the database.
SQLite
SQLite is an open-source, full-featured, self-contained (requires little support from external libraries), serverless (does not require a server to run the database engine on, and is a locally stored database), zero-configuration (nothing to install nor configure), SQL-based lightweight database management system (SQL queries can be run on SQLite tables), and uses one data file in order to store data.
The nice thing to know is that SQLite is used by large companies like Google, Apple, Microsoft, etc., which makes it very reliable. In this tutorial, we are going to use SQLite to interact with the database, and more specifically will be working with the sqlite3 module in Python.
Python and SQLite
As mentioned above, working with databases involves five main steps. Let's see those steps in action.
1. Establish a Connection to Your Database of Choice
This step is achieved as follows:
conn = sqlite3.connect('company.db')
As mentioned in the sqlite3 documentation:
To use the module, you must first create aConnectionobject that represents the database.
In the above code, notice that the data will be stored in the file company.db.
2. Create a Cursor to Communicate With the Data
The next step in working with the database is creating a cursor, as follows:
curs = conn.cursor()
3. Manipulate the Data Using SQL
After connecting with the database and creating a cursor, we are now ready to work (interact) with data. In other words, we can now run SQL commands on the database company.db.
Let's say we want to create a new table employee in our database company. In this case, we need to run a SQL command. In order to do that, we will use the execute() method of the sqlite3 module. The Python statement will thus look as follows:
curs.execute('create table employee(name, age)')
This statement will run a SQL command that will create a table called employee, with two columns (fields) name and age.
We can now run a new SQL command that will insert data in the table, as follows:
curs.execute("insert into employee values ('Ali', 28)")
You can also insert multiple values at once, as follows:
values = [('Brad',54), ('Ross', 34), ('Muhammad', 28), ('Bilal', 44)]
In this case, rather than using the method execute(), we will use the method executemany() to execute the above multiple values.
curs.executemany('insert into employee values(?,?)', values)
4. Commit the Changes
In this step, we would like to apply (commit) the changes we have made in the previous step. This is simply done as follows:
conn.commit()
5. Close the Connection to the Database
After performing our manipulations and committing the changes, the last step will be to close the connection:
conn.close()
Let's put all the steps together in one script. The program will look as follows (notice that we have to import the sqlite3 module first):
import sqlite3
conn = sqlite3.connect('company.db')
curs = conn.cursor()
curs.execute('create table employee (name, age)')
curs.execute("insert into employee values ('Ali', 28)")
values = [('Brad',54), ('Ross', 34), ('Muhammad', 28), ('Bilal', 44)]
curs.executemany('insert into employee values(?,?)', values)
conn.commit()
conn.close()
If you run the script, you should get a file called company.db in your current directory. Download this file as we will use it in the next step.
Let's Browse the Database
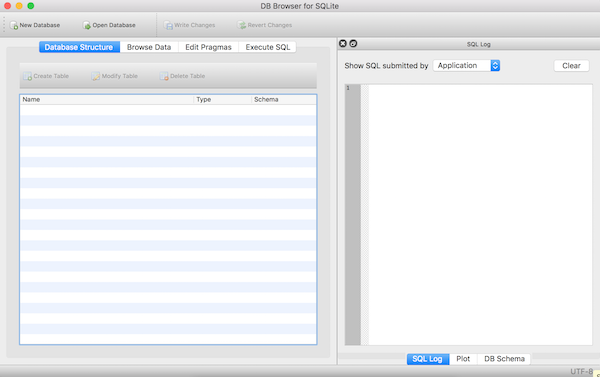
Having created a database, a table, and added some data, let's see what's inside company.db (the file you downloaded in the above section). For this, we are going to use a nice tool: DB Browser for SQLite. Go ahead and download the tool on your machine. Once you open the program, you should get a screen that looks as follows:

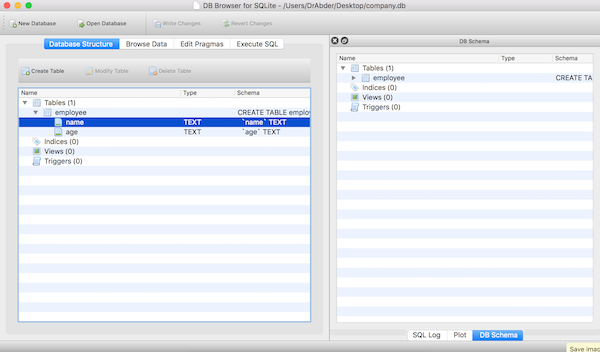
Open the database using the Open Database button at the top, in which case you should get the Database Structure, as follows:

Notice that we have the table employee listed, with two fields name and age.
In order to confirm that our code above worked and the data has been added to the table, click on the Browse Data tab. You should see something like the following:

So, as you can see, a database (company) and a table (employee) have been created, and data has been successfully added to the table.
This tutorial was a scratch on the surface to get you started in working with databases using Python. You can learn about more methods from the sqlite3 module, where you will be able to carry out different database operations such as updating and querying the database. Have fun!


Comments