Android Things, the new platform from Google for creating Internet of Things (IoT) connected devices, is an easy way to get your feet wet with one of the key technologies of the future. In this tutorial you will learn how to get set up with Android Things. You'll create your first simple project and get a start on using GPIO (General Purpose Input/Output) to read button presses and light an LED.
For more background on Android Things, check out my article here on Envato Tuts+.

Flashing Your Board
Before you can begin programming for Android Things, you'll need to set up a physical prototyping board to run the operating system.
There are currently three options for boards:
- Raspberry Pi
- Intel Edison with Arduino Breakout Board
- NXP Pico i.MX6UL
In this tutorial, I'll show you how to get set up with the Raspberry Pi, since it's the most common and affordable of the currently supported prototyping boards. If you are using a different development environment, you can find specific instructions for flashing your board on the official Android Things documentation page.
Raspberry Pi
In order to put Android Things on a Pi, you'll need a Raspberry Pi 3 B and the following additional hardware:
- HDMI cable and a display (like a computer monitor)
- Ethernet cable connected to your internet
- Micro-USB cable
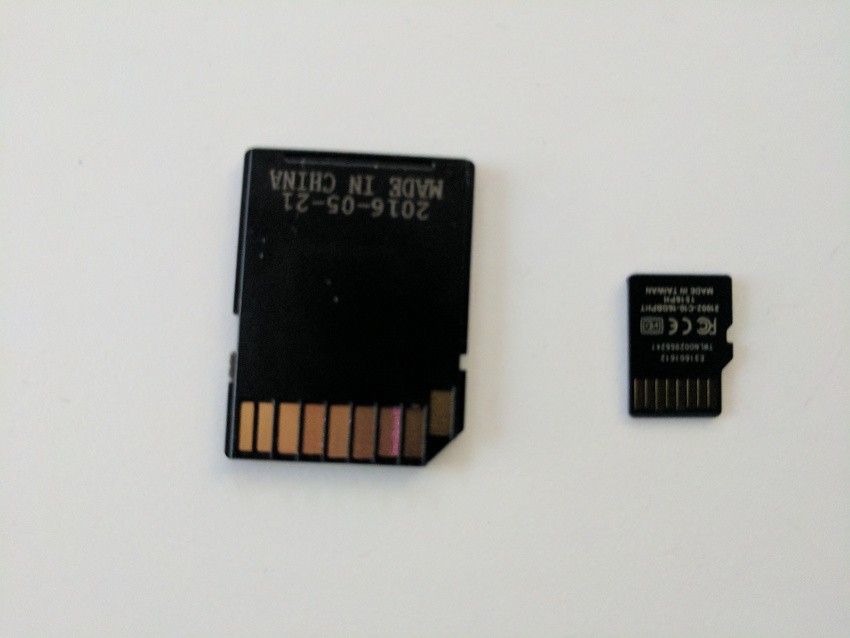
- Micro SD card with at least 8GB of space, and an SD card adapter
- A computer that can read and write to an SD card
Once you have gathered all of the required components, you will need to download the latest system image for the Raspberry Pi from Google. All of the latest images can be found on the Android Things System Image Downloads page.
Once you have downloaded the file, you will need to unzip it to retrieve the .img file. Due to the size of the file, some programs may have a problem unzipping, such as the standard Archive Utility on OS X, which will return a .cpgz or .zip in a loop. If this happens, you can install Unarchiver for OS X or 7zip for Windows to properly extract the file.
With the .img file extracted, you will need to place it on your SD card. This process can vary by operating system. This section will go through the process on OS X, though instructions also exist for Linux and Windows.
First, insert the SD card into your computer. If your SD card is not formatted as FAT-32, you will need to do this now. Next, you will need to run the diskutil list command to find the path to your SD card.
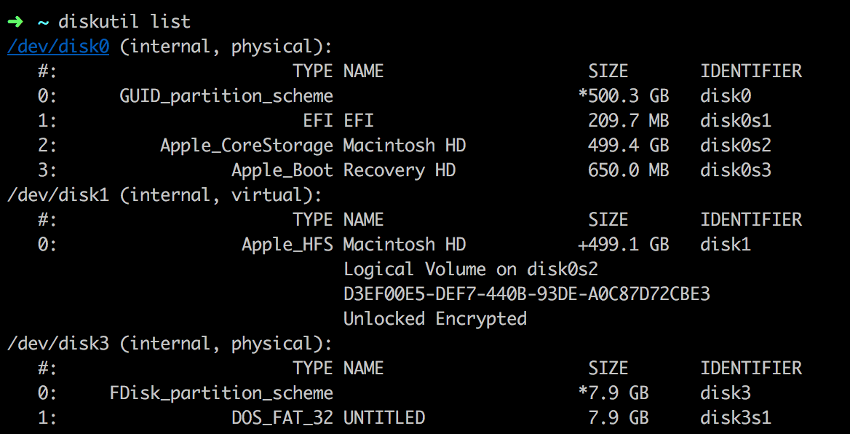
In the above screenshot, the entire SD card has the path /dev/disk3 (not to be confused with the partition identifier disk3s1). Using this path, run the diskutil unmountDisk command so that the disk can be flashed.

The final step in flashing the Android Things image for Raspberry Pi is to copy the image to your SD card with the following command (updated with the correct path for your image and disk number): sudo dd bs=1m if=image.img of=/dev/rdisk<disk# from diskutil>
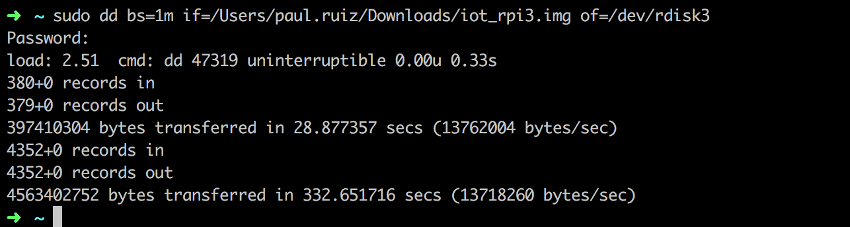
It's important to note that this operation may take a few minutes. You can check current progress with the Control-T command.
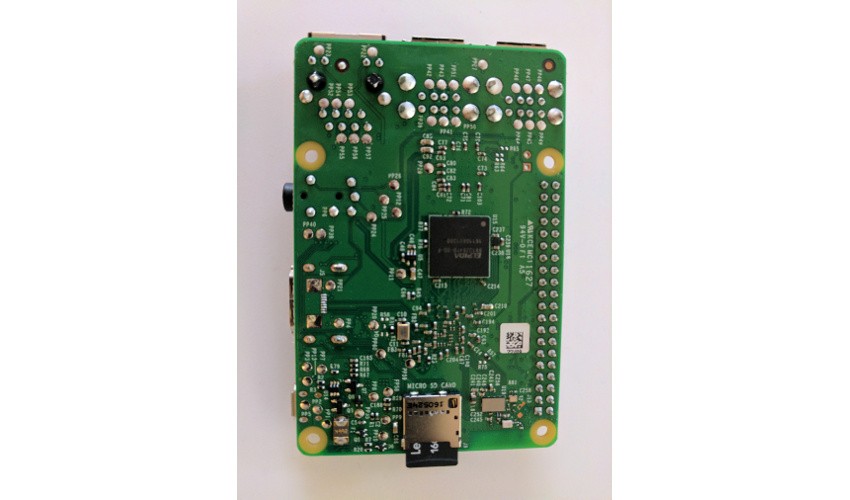
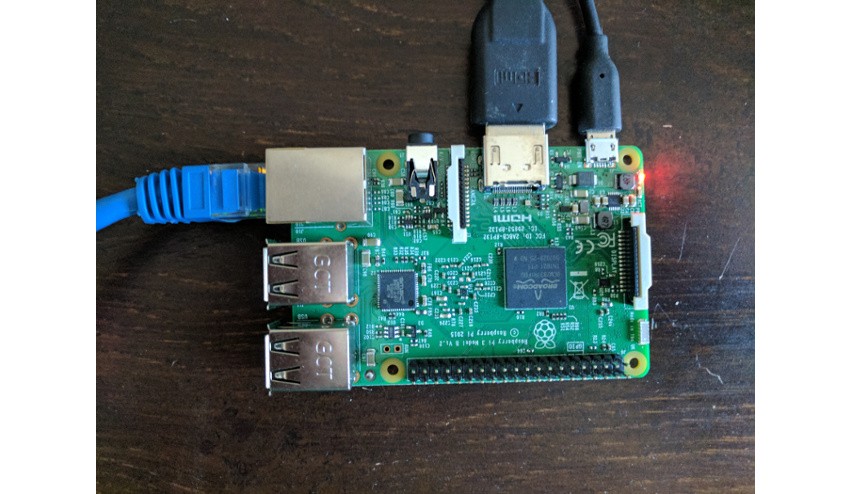
When your image has finished flashing to the SD card, remove the micro SD card from your adapter and insert it into the bottom of the Raspberry Pi.
Next, connect your Raspberry Pi to your display via the HDMI cable, to your network with an ethernet cable, and to a power source (such as your computer) with the micro USB type-B cable.
When your Raspberry Pi has booted, you should see the following on your display.
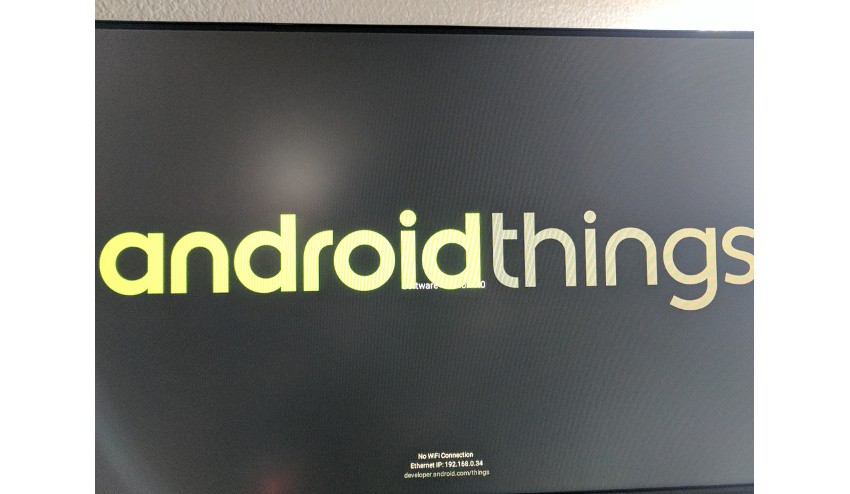
You'll notice your device's IP address on the bottom of the screen. You will need this to connect to your Android Things board with the adb connect <ip address> command.
At this point, you will be able to connect to your newly flashed Android Things board and load apps onto it, which is what we will discuss in the next session. If you want to disconnect your Raspberry Pi from your physical network connection and use the built-in WiFi chip, you will need to run the following command.
adb shell am startservice \
    -n com.google.wifisetup/.WifiSetupService \
    -a WifiSetupService.Connect \
    -e ssid <Network_SSID> \
    -e passphrase <Network_Passcode>
This will allow you to restart your device and to access it through the WiFi network without being tethered to the ethernet connection.
A Simple First Project
Before you start writing code for your new Android Things app, you should make sure that your hardware is set up for the project that you want to build. For our introductory project, we will create a simple device that allows users to press a button, which will turn on an LED. When the button is released, the LED will turn off. You will need the following hardware components:
- an Android Things compatible board that is flashed with the latest version of the OS
- an LED
- a button
- a 10k Ω resistor (resistor color bands brown, black, orange)
- a 470 Ω resistor (resistor color bands yellow, violet, brown)
- wires
- breadboard
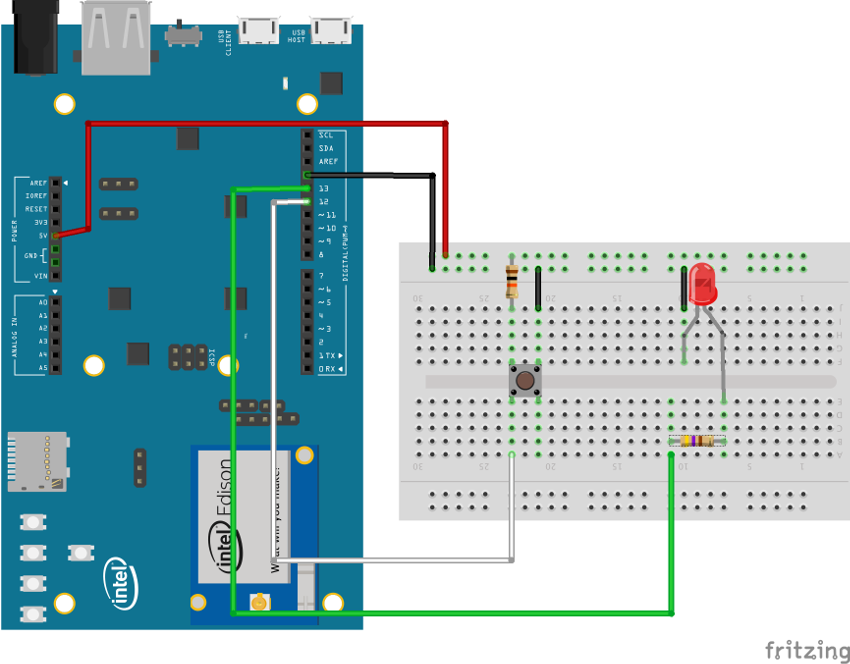
Once you have your components, you can start plugging things in. I have included two diagrams for your first project: one wiring diagram for the Intel Edison with Arduino breakout board, and one for the Raspberry Pi.

Once you have your board wired together, it's time to write your first app.
App Setup
Android Things requires projects to be built with a minimum of SDK 24. You can start this tutorial by creating a new project with that minimum requirement and an empty Activity.
When your base project has been created, open your app module's build.gradle file. Under the dependencies node, include the Android Things library. At the time of this writing, the library is still in developer preview one.
provided 'com.google.android.things:androidthings:0.1-devpreview'
Next, open your AndroidManifest.xml file. You will need to declare that your app uses the Android Things library by adding the following line within your application node.
<uses-library android:name="com.google.android.things"/>
The final thing to do in your manifest file is add an intent-filter to your MainActivity node that lets your device know that it should launch this Activity on startup. Because Android Things launches apps at startup, you will generally only want one app installed on a device at a time.
<activity android:name=".MainActivity">
    <intent-filter>
        <action android:name="android.intent.action.MAIN" />
        <category android:name="android.intent.category.LAUNCHER" />
    </intent-filter>

    <intent-filter>
        <action android:name="android.intent.action.MAIN"/>
        <category android:name="android.intent.category.IOT_LAUNCHER"/>
        <category android:name="android.intent.category.DEFAULT"/>
    </intent-filter>
</activity>
Once you're done with the manifest, you can open MainActivity.java, as this is where the core logic for your first Android Things project will occur. The object that will instantiate your input and output connections is called the PeripheralManagerService, so let's start by getting a reference to it in onCreate().
PeripheralManagerService service = new PeripheralManagerService();
Now that you have your PeripheralManagerService, let's do one more thing before digging into writing our control code. Earlier you wired all of your components together to the board using specific pins. In order to control the peripherals that you have attached to these pins, you will need to know the name of each pin on your board. You can print a list of each component using the PeripheralManagerService like so:
Log.e("AndroidThings", "GPIOs: " + service.getGpioList() );
The above line will print out the following on a Raspberry Pi:
E/AndroidThings: GPIOs: [BCM12, BCM13, BCM16, BCM17, BCM18, BCM19, BCM20, BCM21, BCM22, BCM23, BCM24, BCM25, BCM26, BCM27, BCM4, BCM5, BCM6]
In the Raspberry Pi wiring diagram earlier in this section, you connected the button to BCM21 and the LED to BCM6. In the Intel Edison with Arduino Breakout wiring diagram, you connected the button to IO12 and the LED to IO13. Let's save these values as String items at the top of our Activity. This sample will use the Raspberry Pi values, though you can use whichever pin names are appropriate for your wiring and board.
private final String PIN_LED = "BCM6";
private final String PIN_BUTTON = "BCM21";
In the next couple of sections, we'll use this information to communicate with both components.
Output to LED
Basic components, such as LEDs, can be accessed using Android Thing's Gpio object. At the top of your Activity, create a Gpio object. This will be used to reference our connection to the LED in our app.
private Gpio mLedGpio;
Once you have the reference object, you will need to initialize it in onCreate(). You can do this by calling openGpio with the pin name from your PeripheralManagerService object. You will also want to declare the initialize state of the component, which in this case is DIRECTION_OUT_INITIALLY_LOW (essentially "off"). You will need to wrap I/O setup calls in a try/catch block in case an IOException occurs.
try {
    mLedGpio = service.openGpio(PIN_LED);
    mLedGpio.setDirection(Gpio.DIRECTION_OUT_INITIALLY_LOW);
} catch (IOException e){

}
Now that we have created our LED reference, you will need to be able to change the state of the LED (on and off). You can use the setValue(boolean) method on the Gpio to change a component's state.
private void setLedState(boolean isOn) {
    try {
        mLedGpio.setValue(isOn);
    } catch (IOException e) {

    }
}
Finally, when your Activity is destroyed, you will need to close all connections and nullify your hardware references in onDestroy().
@Override
protected void onDestroy(){
    super.onDestroy();


    if (mLedGpio != null) {
        try {
            mLedGpio.close();
        } catch (IOException e) {
        } finally{
            mLedGpio = null;
        }
    }
}
And that's all there is to writing to a basic component. Although the app can control an LED, there's no logic in place to change the state of the LED. In the next step, we will read button presses to activate or turn off this component.
Reading Button Input
While buttons are fairly straightforward components, Google has still released a set of driver libraries that make it easy to use buttons and various other components. For this section you will use the button driver to connect to the button and read its state, but first you need to import the button driver in your build.gradle file.
compile 'com.google.android.things.contrib:driver-button:0.2'
Next, declare a ButtonInputDriver object as a member variable for your MainActivity class.
private ButtonInputDriver mButtonInputDriver;
You can initialize this object and register it within the try block used in onCreate() for your LED component.
mButtonInputDriver = new ButtonInputDriver(
        BoardDefaults.getGPIOForButton(),
        Button.LogicState.PRESSED_WHEN_LOW,
        KeyEvent.KEYCODE_SPACE);

mButtonInputDriver.register();
Once your ButtonInputDriver is created, it will send button press events to the onKeyDown() and onKeyUp() methods with the key code that you specified at driver creation, which can be overridden in your Activity to change the state of your LED.
@Override
public boolean onKeyDown(int keyCode, KeyEvent event) {
    if (keyCode == KeyEvent.KEYCODE_SPACE) {
        setLEDState(true);
        return true;
    }

    return super.onKeyDown(keyCode, event);
}

@Override
public boolean onKeyUp(int keyCode, KeyEvent event) {
    if (keyCode == KeyEvent.KEYCODE_SPACE) {
        setLEDState(false);
        return true;
    }

    return super.onKeyUp(keyCode, event);
}
Finally, you will need to unregister and nullify your ButtonInputDriver in onDestroy(), just like you did with your LED.
if (mButtonInputDriver != null) {
    mButtonInputDriver.unregister();
    try {
        mButtonInputDriver.close();
    } catch (IOException e) {
        Log.e(TAG, "Error closing Button driver", e);
    } finally{
        mButtonInputDriver = null;
    }
}
Conclusion
In this tutorial, you learned how to flash a Raspberry Pi with Android Things, set up a simple circuit consisting of a button and LED, and wrote an Android app to control the LED based on button presses using a driver library.
At this point, you should be able to use other driver libraries and create your own more complex circuits. In the next tutorial of this series, we will look at the various peripheral input/output types that are available in Android Things, and then we go on to create our own component driver!
In the meantime, check out some of our other courses and tutorials on Android development!


Comments