Introduction
Alongside all of the new features and frameworks in iOS 9 and OS X El Capitan, with this year's releases Apple also created an entirely new framework catered to game developers, GameplayKit. With existing graphics APIs (SpriteKit, SceneKit, and Metal) making it easy to create great looking games on iOS and OS X, Apple has now released GameplayKit to make it easy to create games that play well. This new framework contains many classes and functionalities that can be used to easily add complex logic to your games.
In this first tutorial, I will teach you about two major aspects of the GameplayKt framework:
- entities and components
- state machines
Prerequisites
This tutorial requires that you are running Xcode 7 on OS X Yosemite or later. While not required, it is recommended that you have a physical device running iOS 9 as you will get much better performance when testing the SpriteKit-based game used in this tutorial.
1. Getting Started
You will firstly need to download the starter project for this series of tutorials from GitHub. Once you've done this, open the project in Xcode and run it on either the iOS Simulator or your device.
You will see that it is a very basic game in which you control a blue dot and navigate around the map. When you collide with a red dot, you lose two points. When you collide with a green dot, you gain one point. When you collide with a yellow dot, your own dot becomes frozen for a couple of seconds.
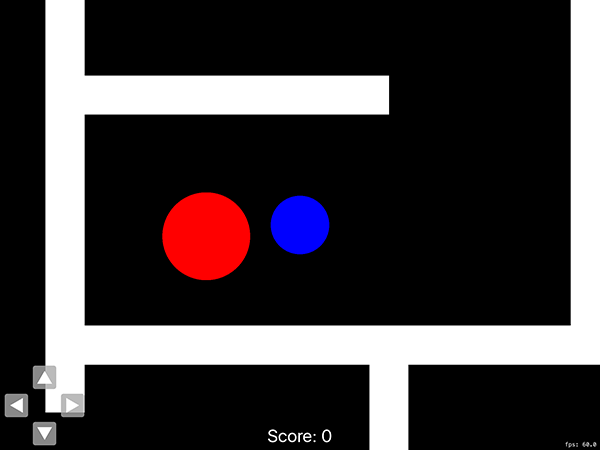
At this stage, it is a very basic game, but throughout the course of this tutorial series, and with the help of GameplayKit, we are going to add in a lot more functionality and gameplay elements.
2. Entities and Components
The first major aspect of the new GameplayKit framework is a code-structuring concept based on entities and components. It works by allowing you, the developer, to write common code that is used by many different object types in your game while keeping it well organized and manageable. The concept of entities and components is meant to eliminate the common inheritance-based approach to share common functionality between object types. The easiest way to understand this concept is with some examples so imagine the following scenario:
You are building a tower defense game with three main types of towers, Fire, Ice, and Heal. The three types of towers would share some common data, such as health, size, and strength. Your Fire and Ice towers need to be able to target incoming enemies to shoot at whereas your Heal tower does not. All that your Heal tower needs to do is repair your other towers within a certain radius as they receive damage.
With this basic game model in mind, let's see how your code could be organized using an inheritance structure:
- A parent
Towerclass containing common data such as health, size, and strength. -
FireTower,IceTower, andHealTowerclasses that would inherit from theTowerclass. - In the
HealTowerclass, you have the logic responsible for healing your other towers within a certain radius.
So far, this structure is okay, but a problem now arises when you need to implement the Fire and Ice towers' targeting ability. Do you just copy and paste the same code into both of your FireTower and IceTower classes? If you need to make any changes, you will then need to change your code in more than one place, which is tedious and error-prone. On top of this, what happens if you want to add in a new tower type that also needs this targeting functionality. Do you copy and paste it a third time?
The best way seems to be to put this targeting logic in the parent Tower class. This would allow you to just have one copy of the code that only needs to be edited in one place. Adding this code here, however, would make the Tower class a lot larger and more complicated than it needs to be when not all of its subclasses need that functionality. If you also wanted to add more shared functionality between your tower types, your Tower class would gradually become larger and larger, which would make it hard to work with.
As you can see, while it is possible to create a game model based on inheritance, it can very quickly and easily become unorganized and difficult to manage.
Now, let's see how this same game model could be structured using entities and components:
- We would create
FireTower,IceTower, andHealTowerentities. More entities could be created for any more tower types you want to add later on. - We'd also create a
BasicTowercomponent that would contain health, size, strength, etc.
- To handle the healing of your towers within a certain radius, we'd add a
Healingcomponent. - A
Targetingcomponent would contain the code needed to target incoming enemies.
Using GameplayKit and this structure you would then have a unique entity type for each tower type in your game. To each individual entity, you can add the desired components that you want. For example:
- Your
FireTowerandIceTowerentities would each have aBasicTowerandTargetingcomponent linked to it. - Your
HealTowerentity would have both aBasicTowerand aHealingcomponent.
As you can see, by using an entity- and component-based structure, your game model is now a lot simpler and more versatile. Your targeting logic only needs to be written once and only links to the entities that it needs to. Likewise, your basic tower data can still be easily shared between all of your towers without bulking up all of your other common functionality.
Another great thing about this entity- and component-based structure is that components can be added to and removed from entities whenever you want. For example, if you wanted your Heal towers to be disabled under certain conditions, you could simply remove the Healing component from your entity until the right conditions are met. Likewise, if you wanted one of your Fire towers to gain a temporary healing ability, you could just add a Healing component to your FireTower entity for a specific amount of time.
Now that you are comfortable with the concept of an entity- and component-based game model structure, let's create one within our own game. In Xcode's File Inspector, find the Entities folder within your project. For convenience, there are already three entity classes for you, but you are now going to create a new entity from scratch.
Choose File > New > File... or press Command-N to create a new class. Make sure to select the Cocoa Touch Class template from the iOS > Source section. Name the class Player and make it a subclass of GKEntity.
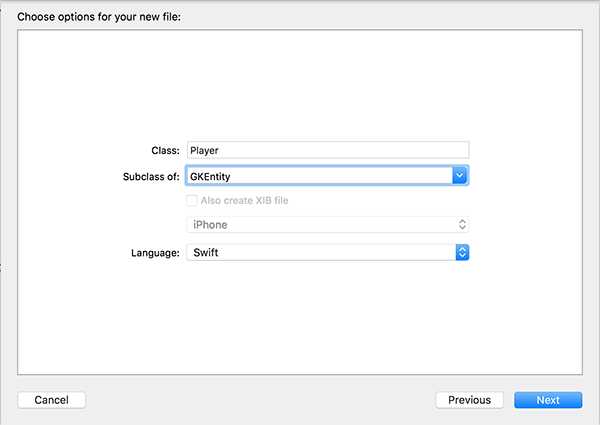
You will see that immediately upon opening your new file Xcode will display an error. To fix this, add the following import statement below the existing import UIKit statement:
import GameplayKit
Go back to PlayerNode.swift and add the following property to the PlayerNode class:
var entity = Player()
Next, navigate to the Components folder in your Xcode project and create a new class just as you did before. This time, name the class FlashingComponent and make it a subclass of GKComponent as shown below.
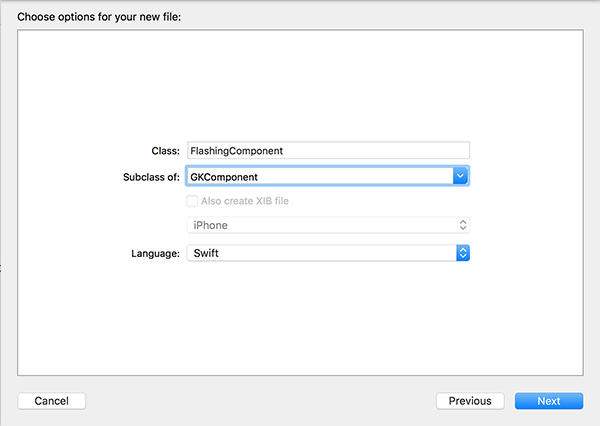
The component you've just created is going to handle the visual flashing of our blue dot when it is hit by a red dot and is in its invulnerable state. Replace the contents of FlashingComponent.swift with the following:
import UIKit
import SpriteKit
import GameplayKit

class FlashingComponent: GKComponent {

    var nodeToFlash: SKNode!

    func startFlashing() {

        let fadeAction = SKAction.sequence([SKAction.fadeOutWithDuration(0.75), SKAction.fadeInWithDuration(0.75)])
        nodeToFlash.runAction(SKAction.repeatActionForever(fadeAction), withKey: "flash")

    }

    deinit {
        nodeToFlash.removeActionForKey("flash")
    }

}
The implementation simply keeps a reference to an SKNode object and repeats fade in and fade out actions in sequence as long as the component is active.
Go back to GameScene.swift and add the following code somewhere within the didMoveToView(_:) method:
// Adding Component
let flash = FlashingComponent()
flash.nodeToFlash = playerNode
flash.startFlashing()
playerNode.entity.addComponent(flash)
We create a FlashingComponent object and set it up to perform its flashing on the player's dot. The last line then adds the component to the entity to keep it active and executing.
Build and run your app. You will now see that your blue dot slowly fades in and out repeatedly.
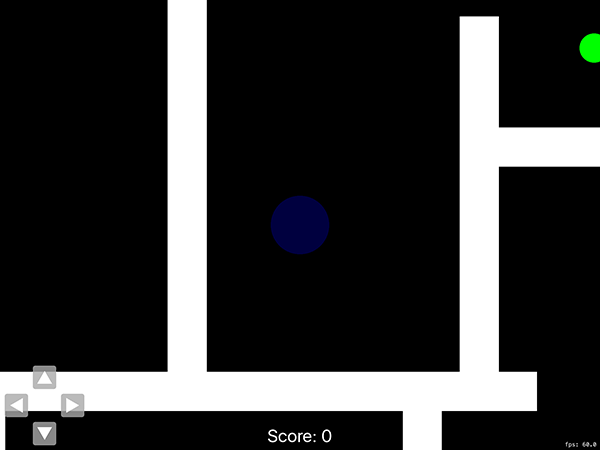
Before moving on, delete the code that you just added from the didMoveToView(_:) method. Later, you will be adding this code back but only when your blue dot enters its invulnerable state.
3. State Machines
In GameplayKit, state machines provide a way for you to easily identify and perform tasks based on the current state of a particular object. Drawing from the earlier tower defense example, some possible states for each tower could include Active, Disabled, and Destroyed. One major advantage of state machines is that you can specify which states another state can move to. With the three example states mentioned above, using a state machine, you could set the state machine up so that:
- a tower can become
DisabledwhenActiveand vice versa - a tower can become
Destroyedwhen eitherActiveorDisabled - a tower can not become
ActiveorDisabledonce it has beenDestroyed
In the game for this tutorial, we are going to keep it very simple and only have a normal and invulnerable state.
In your project's State Machine folder, create two new classes. Name them NormalState and InvulnerableState respectively, with both being a subclass of the GKState class.
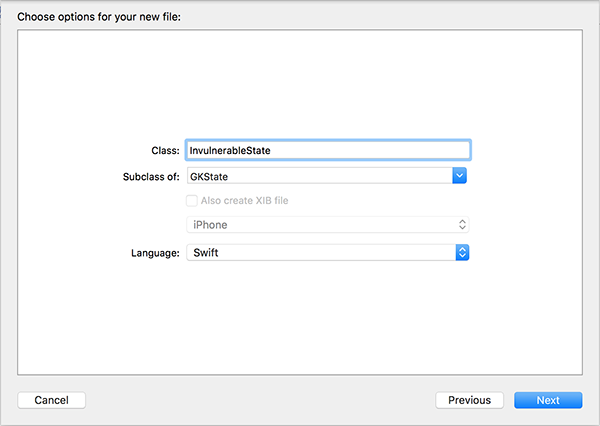
Replace the contents of NormalState.swift with the following:
import UIKit
import SpriteKit
import GameplayKit

class NormalState: GKState {

    var node: PlayerNode

    init(withNode: PlayerNode) {
        node = withNode
    }

    override func isValidNextState(stateClass: AnyClass) -> Bool {
        switch stateClass {
        case is InvulnerableState.Type:
            return true

        default:
            return false
        }
    }

    override func didEnterWithPreviousState(previousState: GKState?) {
        if let _ = previousState as? InvulnerableState {
            node.entity.removeComponentForClass(FlashingComponent)
            node.runAction(SKAction.fadeInWithDuration(0.5))
        }
    }
}
The NormalState class contains the following:
- It implements a simple initializer to keep a reference to the current player's node.
- It has an implementation for the
isValidNextState(_:)method. This method's implementation returns a boolean value, indicating whether or not the current state class can move to the state class provided by the method parameter. - The class also includes an implementation for the
didEnterWithPreviousState(_:)callback method. In the method's implementation, we check if the previous state was theInvulnerableStatestate and, if true, remove the flashing component from the player's entity.
Now open InvulnerableState.swift and replace its contents with the following:
import UIKit
import GameplayKit

class InvulnerableState: GKState {

    var node: PlayerNode

    init(withNode: PlayerNode) {
        node = withNode
    }

    override func isValidNextState(stateClass: AnyClass) -> Bool {
        switch stateClass {
        case is NormalState.Type:
            return true

        default:
            return false
        }
    }

    override func didEnterWithPreviousState(previousState: GKState?) {
        if let _ = previousState as? NormalState {
            // Adding Component
            let flash = FlashingComponent()
            flash.nodeToFlash = node
            flash.startFlashing()
            node.entity.addComponent(flash)
        }
    }
}
The InvulnerableState class is very similar to the NormalState class. The main difference is that upon entering this state you add the flashing component to the player's entity rather than removing it.
Now that your state classes are both complete, open PlayerNode.swift again and add the following lines to the PlayerNode class:
var stateMachine: GKStateMachine!

func enterNormalState() {
    self.stateMachine.enterState(NormalState)
}
This code snippet adds a new property to the PlayerNode class and implements a convenience method to go back to the normal state.
Now open GameScene.swift and, at the end of the didMoveToView(_:) method, add the following two lines:
playerNode.stateMachine = GKStateMachine(states: [NormalState(withNode: playerNode), InvulnerableState(withNode: playerNode)])
playerNode.stateMachine.enterState(NormalState)
In these two lines of code, we create a new GKStateMachine with the two states and tell it to enter the NormalState.
Finally, replace the implementation of the handleContactWithNode(_:) method of the GameScene class with the following implementation:
func handleContactWithNode(contact: ContactNode) {
    if contact is PointsNode {
        NSNotificationCenter.defaultCenter().postNotificationName("updateScore", object: self, userInfo: ["score": 1])
    }
    else if contact is RedEnemyNode && playerNode.stateMachine.currentState! is NormalState {
        NSNotificationCenter.defaultCenter().postNotificationName("updateScore", object: self, userInfo: ["score": -2])

        playerNode.stateMachine.enterState(InvulnerableState)
        playerNode.performSelector("enterNormalState", withObject: nil, afterDelay: 5.0)
    }
    else if contact is YellowEnemyNode  && playerNode.stateMachine.currentState! is NormalState  {
        self.playerNode.enabled = false
    }

    contact.removeFromParent()
}
When the player's blue dot collides with a red enemy dot, the player will enter the InvulnerableState state for five seconds and then revert back to the NormalState state. We also check what the current state of the player is and only perform any enemy-related logic if it is the NormalState state.
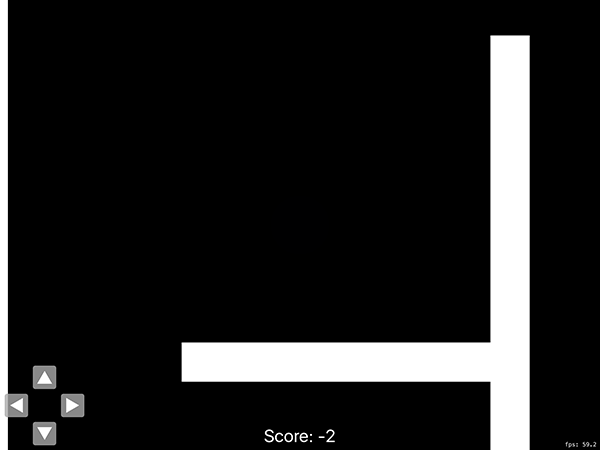
Build and run your app one last time, and move around the map until you find a red dot. When you collide with the red dot, you will see that your blue dot enters its invulnerable state and flashes for five seconds.
Conclusion
In this tutorial, I introduced you to two of the major aspects of the GameplayKit framework, entities and components, and state machines. I showed you how you can use entities and components to structure your game model and keep everything organized. Using components is a very easy way to share functionality between objects in your games.
I also showed you the basics of state machines, including how you can specify which states a particular state can transition to as well as executing code when a particular state is entered.
Stay tuned for the second part of this series where we are going to take this game to another level by adding in some artificial intelligence, better known as AI. The AI will enable enemy dots to target the player and find the best path to reach the player.
As always, if you have any comments or questions, leave them in the comments below.


Comments