Ready to take your PHP skills to the next level? In this new “From Scratch” series, we'll focus exclusively on Zend Framework, a full-stack PHP framework created by Zend Technologies. First in our tutorial series, is "Getting Started with Zend Framework."
Introduction: What is Zend Framework?
Zend Framework is a full-stack PHP framework created by Zend Technologies. For those who aren't familiar with the company, Zend Technologies provides web developers with various tools to help them in their work. Notable examples are Zend Server, a web application server for running and managing PHP applications, and Zend Studio, a full-featured IDE for PHP. Needless to say, Zend is very invested in PHP, which is why Zend Framework is a great tool to add to any developer's arsenal.

Zend: The PHP Company
Zend Framework is made up of many different libraries and classes. This is a double-edged sword — for one, it makes it easier for developers to cherry-pick libraries if they only need some. The downside is that setting up the framework isn't very easy in the beginning since it's just a bunch of classes. That being said, Zend does have a scaffolding tool and a recommended way of setting up your application structure, which we're going to discuss in this particular tutorial.
In this series of tutorials, we'll be diving into how Zend Framework works and learning how to use its different components. By the end of the series, we'll have built a brand new social networking site — complete with basic profile, networking, status updates, and even API functionality. And now, without further ado, let's begin!
Step 1: Download Zend Framework
First and foremost, we need to download Zend Framework. Currently, the latest version is 1.11.11. To begin, go to the Zend Framework website http://framework.zend.com and click on the Download Now button.
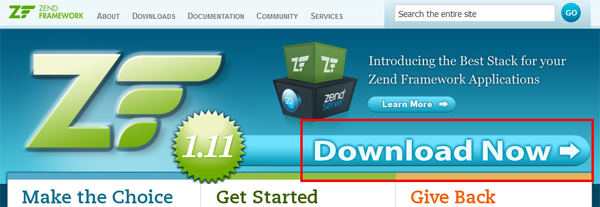
Zend Framework
Download Now link
This should bring you to a screen with a list of different downloads for Zend Framework. In the future, when you update the Zend Framework library, you should download the Minimal version, which contains just the ZF files. For now, let's download Zend Framework 1.11.11 Full, which contains the library with all the demos and tests. It also includes the scaffolding tool that we'll be using later on in the tutorial.
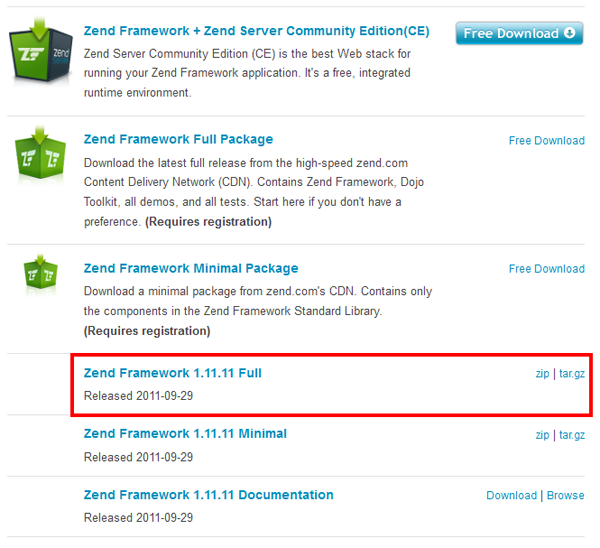
Zend Framework download list
Step 2: Set up your Zend Framework Environment
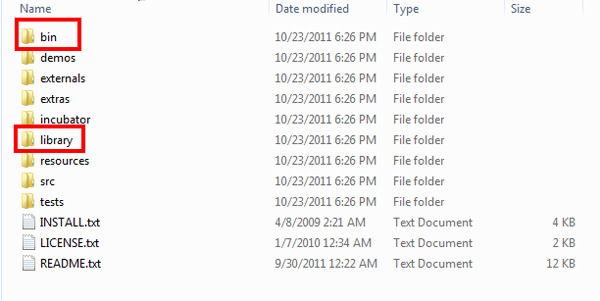
After the download has completed, extract the files to your desktop in order to get a clear view of the contents. Inside, there are a lot of folders, but for the purposes of this tutorial, we will only need two — the bin folder and the library folder.
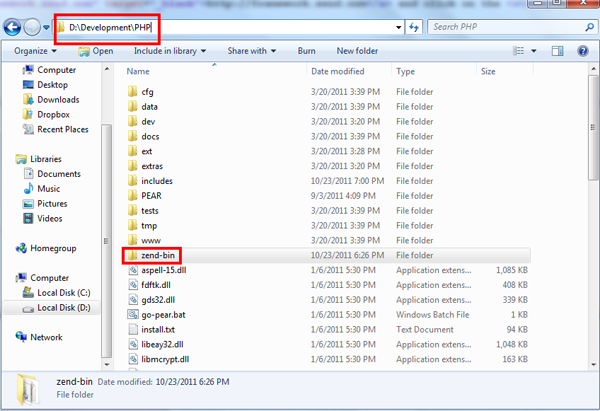
For organization's sake, put the bin folder inside your PHP folder and rename it to zend-bin. Mine is D:\Development\PHP, so the end result should be D:\Development\PHP\zend-bin.
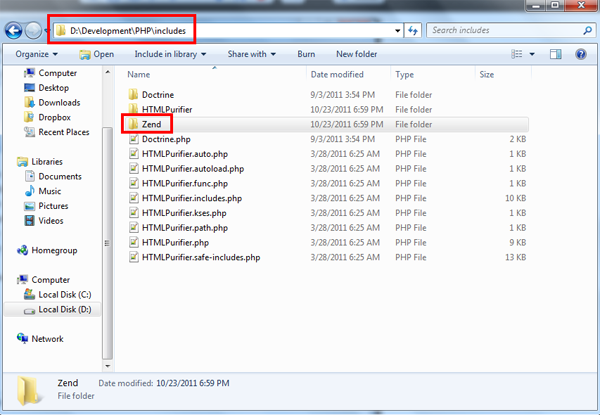
Go into the library folder and you should find a Zend folder. Place this inside your PHP's include_path. For me, that's D:\Development\PHP\includes, so moving it there should result in D:\Development\PHP\includes\Zend. Remember to copy the Zend folder inside the library folder, not the library folder itself.
Lastly, we need to configure the Zend CLI tool inside the zend-bin folder to work in any directory. To do this, we have to add the directory to the Path System variable, so we can call it via the command prompt.
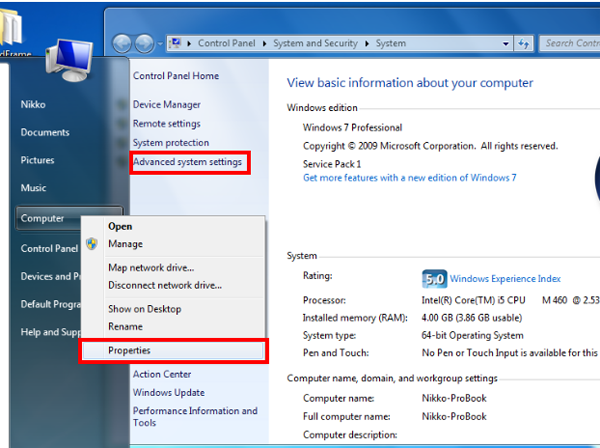
Right click the Computer link under Start to open the System Information window. Here, click on Advanced System Settings.
In the window that opens, click on the Environment Variables button. In the new window, look for the Path variable in the System variables list. Click on Edit and add your zend-bin directory location at the end.
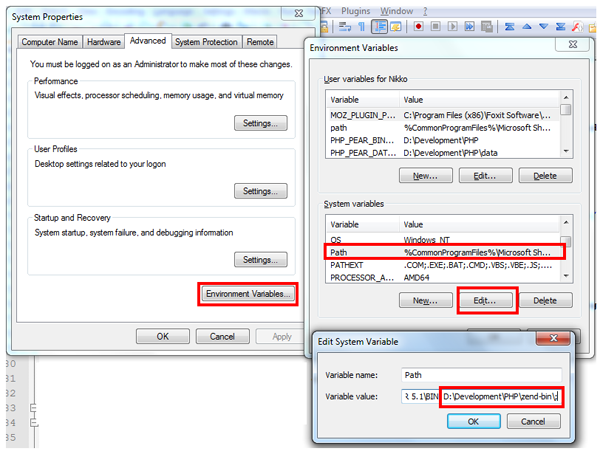
When you're done, just click OK to save it.
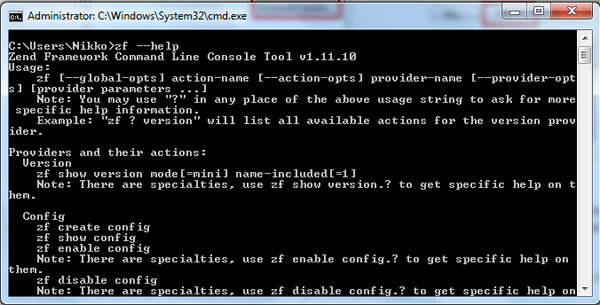
To ensure that our configuration is working, open a command prompt and run the zf --help command. This should output the commands we can use with the Zend CLI tool. If it doesn't, try restarting your machine to make sure the System variables are implemented.
Additionally, there is a zf.sh file inside the zend-bin folder. This is for Unix-based operating systems like OSX or Linux. Just set up the environment variables accordingly to get the same result.
Step 3: Create your First Zend Framework Project
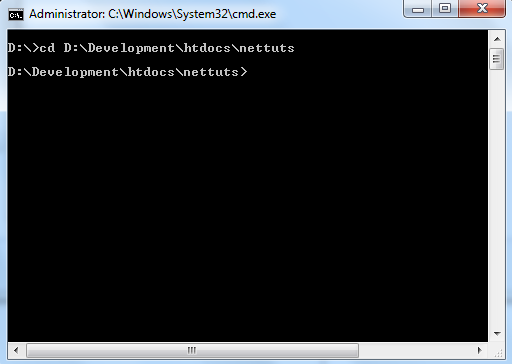
Now, we begin actual development work on our Zend Framework project. In the command prompt, go to the directory where you want to put your project files (ideally this should be the directory where your local web server points to). For me, it's D:\Development\htdocs\nettuts, so I'll run the cd D:\Development\htdocs\nettuts command on my prompt.
Type in the following command to create our base Zend Framework project: zf create project thenextsocial. In the command, thenextsocial is the name of our project. When you start creating your own ZF projects, replace this with the appropriate project name.
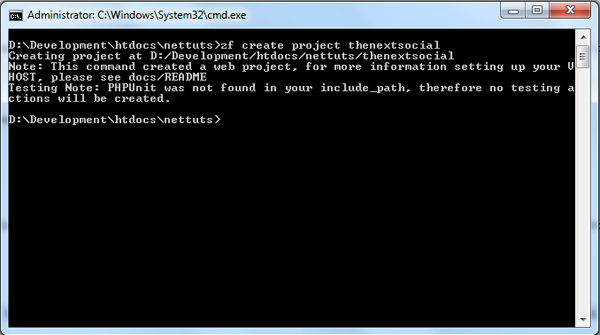
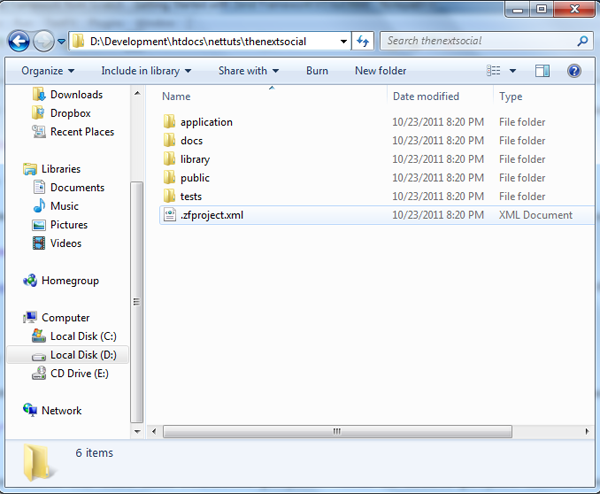
Check out the contents of the folder now — you should see a new thenextsocial folder. Inside the folder, you should see multiple project files. Most importantly, you should see a public folder, which should be the only publicly accessible folder via browser. To make this accessible, we now need to set up a VirtualHost for the project.
To set up a VirtualHost, open your Apache's httpd.conf file. Inside, add the following code:
<VirtualHost *:80>
    ServerName thenextsocial.local
	DocumentRoot "D:/Development/htdocs/nettuts/thenextsocial/public/"
	<Directory "D:/Development/htdocs/nettuts/thenextsocial/public/">
	</Directory>
</VirtualHost>
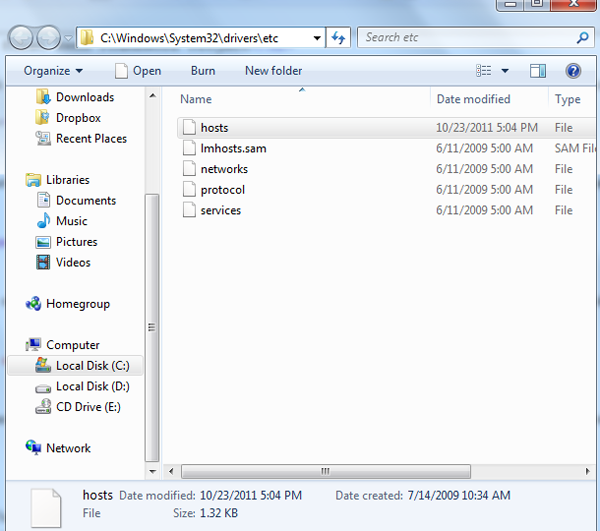
You'll also need to add the domain to your local hosts file. For Windows users, it should be in C:\Windows\System32\Drivers\etc. For Unix-based OS users, it should be in /etc/hosts. Open it up and add thenextsocial.local and point it to 127.0.0.1
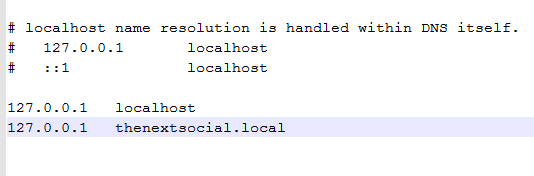
Restart your web server. When you open http://thenextsocial.local on your browser, it should already point to your Zend Framework project.
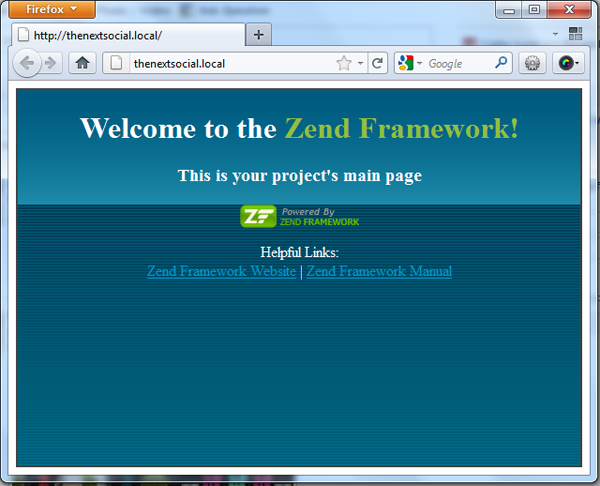
Congratulations You've successfully created your first Zend Framework project!
Step 4: Learn about Zend Framework's MVC Structure
What exactly is this MVC pattern?
From Zend Framework's quickstart introduction:

The MVC pattern models this separation of concerns well.
So what exactly is this MVC pattern everyone keeps talking about, and why should you care? MVC is much more than just a three-letter acronym (TLA) that you can whip out anytime you want to sound smart; it has become something of a standard in the design of modern web applications. And for good reason. Most web application code falls under one of the following three categories: presentation, business logic, and data access. The MVC pattern models this separation of concerns well. The end result is that your presentation code can be consolidated in one part of your application with your business logic in another and your data access code in yet another. Many developers have found this well-defined separation indispensable for keeping their code organized, especially when more than one developer is working on the same application.
The gist of it is this: models contain our business logic, views contain our HTML, and controllers keep everything in line and tell both the views and models what to do.
MVC in a Zend Framework-powered application
The good thing about using the ZF CLI tool is that it automatically sets up your application to make use of Zend Framework's MVC classes, which allows you to begin working on your projects more quickly.
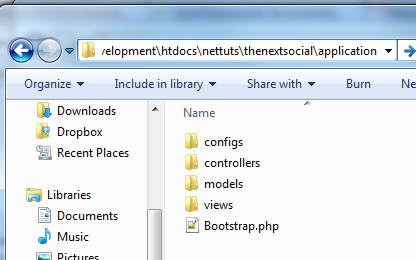
Going back to our project, open the thenextsocial/application folder and you should see — you guessed it — models, views, and controllers folders.
Inside these folders, open controllers/IndexController.php and views/scripts/index/index.phtml. When you look at both of these files closely, you'll see that the home page we saw above (Welcome to Zend Framework) is actually executed by both of these files. So how does Zend Framework call these?
Explaining Zend Framework's default application routing
By default, all URLs on your Zend Framework project will follow a certain format:
[url]/[controller]/[action]/[GET parameter 1 value]/.../[GET parameter x]/[GET parameter x value]
Another default is that if a controller and/or action is not provided, they both default to index. So calling http://thenextsocial.local is actually the same as calling http://thenextsocial.local/index/index or even http://thenextsocial.local/index.
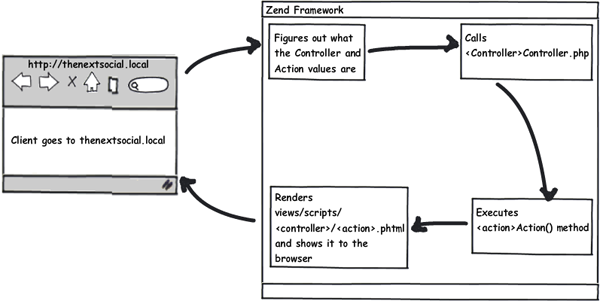
Zend Framework default routing cycle
Zend Framework then takes the controller value and looks for it in the controllers folder, namely, our IndexController.php file. Inside the controller file, it takes our action value and executes that method, which is indexAction. After the action has been executed in the controller, ZF then automatically renders the view file inside the views folder in the following format:
../application/views/scripts/[controller]/[action].phtml
Which is why we see the Welcome to Zend Framework page, since index.phtml contains the HTML code for this page.
Step 5: Pass Data From a Controller to its View
It's relatively simple to pass data from a controller to its view. Each controller object is created, by default, to have a view object instantiate with it. Access to this view object is done via the $this->view accessor.
To send data to the view, we simply assign variables to the view object and give them values, like so:
$this->view->variable_name = "variable value";
Returning to our project, open IndexController.php in the controllers folder, and in the indexAction method, let's pass the current date and time to our view.
public function indexAction()
{
	//action body
	$this->view->current_date_and_time = date('M d, Y - H:i:s');
}
We then need to edit our view to output this variable. To do so, open index.phtml in the view folder, and add the following code:
...
...
...
<div id="welcome">
    <h1>Welcome to the <span id="zf-name">Zend Framework!</span></h1>

	<hr /><h2>It is now <?php echo $this->current_date_and_time; ?></h2>

    <h3>This is your project's main page</h3>
...
...
...
As you can see, accessing the variable from inside the view file is as simple as echoing the variable via the echo PHP command, echo $this->variable_name;.
Now, refresh your browser, and you should see the current date and time on the page.
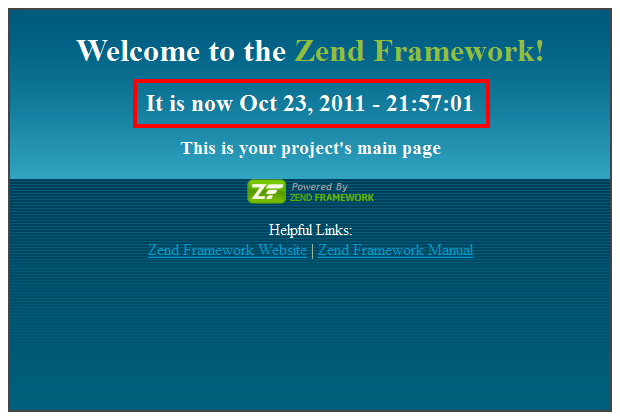
Step 6: Create a Layout in Zend Framework
You might have noticed that the html scripts in our project are just fragments and not complete HTML pages, so they lack html, head, and body tags. This is actually not a flaw but was done by design — this way, all actions return content relative only to the action itself, not the whole application. By creating a global layout for our site, we'll be able to implement a consistent HTML container for all our HTML scripts.
To get started, we again open our command prompt and issue the following command. Make sure you're inside the thenextsocial folder.
zf enable layout

Enabling a layout in our Zend Framework project
The output after running the command suggests that a layout file called layout.phtml has been created inside the application/layouts/scripts folder. Let's open it up and take a look at what's inside:

layout.phtml contents
The command echo $this->layout()->content; is actually the layout file echoing all of the content from the view. To create our global layout then, we need to wrap this command with our HTML:
<!DOCTYPE html>
<html>
	<head>
		<title>The Next Social</title>
		<!-- Load Twitter Bootstrap and jQuery -->
		<link rel="stylesheet" href="http://twitter.github.com/bootstrap/1.3.0/bootstrap.min.css">
		<script src="https://ajax.googleapis.com/ajax/libs/jquery/1.6.4/jquery.min.js"></script>
	</head>
	<body>
		<div id="site_container">
			<div id="header">
				<p>This is the header!</p>
			</div>
			<div id="content">
				<!-- Echo our content here! -->
				<?php echo $this->layout()->content; ?>
			</div>
			<div id="footer">
				<p>This is the footer!</p>
			</div>
		</div>
	</body>
</html>
Now, refresh your browser again and you should see the changes:
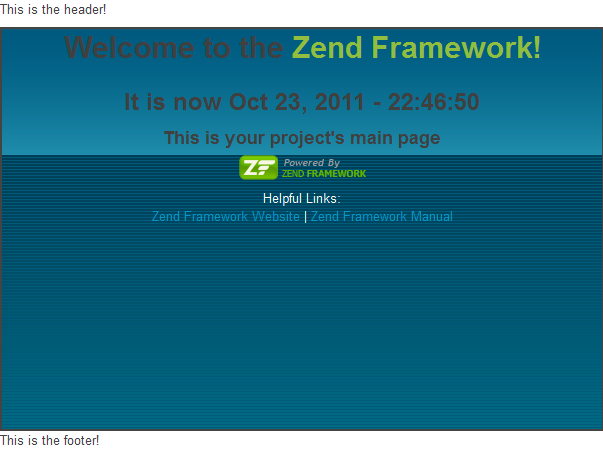
Our index action with accompanying layout
Step 7: Create New Controllers and Actions
By using the ZF CLI tool, we can create new controllers and actions very quickly. To do so, simply run the following command:
zf create controller About
About is our new controller's name. If you check inside the controllers folder, you should see an AboutController.php file, indicating that our controller generation was successful. You can also check the contents of the views folder and see that a new about/index.phtml file has been created for our About controller!
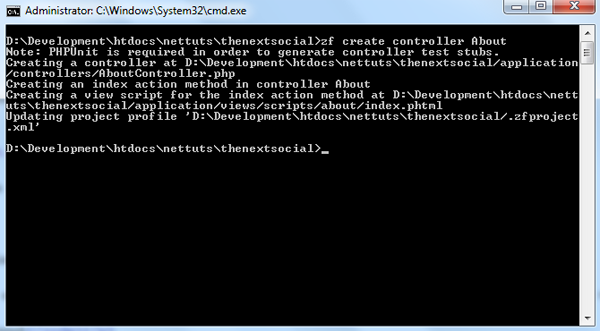
Creating our About controller
We should then be able to access this controller by going to http://thenextsocial.local/about
By default, the ZF CLI tool creates one action for our controller, the indexAction. But what if we wanted to add other actions to the controller?
Creating a new action
Creating a new action is as is easy creating a new controller. To do so, just run the following command:
zf create action us About
This effectively creates a new action called us inside the About controller. Checking the AboutController.php file, you should see a new usAction() method, as well as a new us.phtml file inside the about view folder.
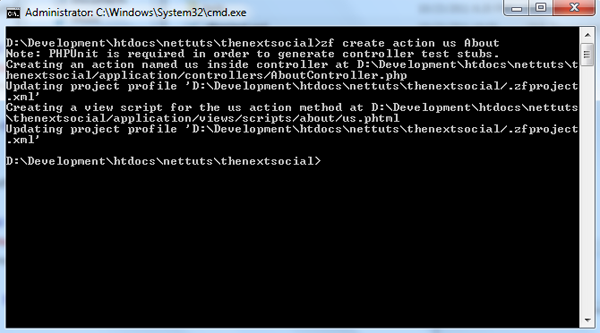
Creating our us action in the About controller
As you can see, we rely heavily on the ZF CLI tool to generate actions and controllers. Manually creating them works the same way; the ZF CLI tool just makes it simpler and automatically does the heavy lifting for us.
Conclusion
After reading this tutorial, you should already know the following:
- Where to download the latest Zend Framework files
- Where and how to set it up locally
- Creating your first Zend Framework project and setting up a VirtualHost on your web server
- How exactly Zend Framework implements the MVC pattern and its default application routing
- Passing data from a controller to its view
- Creating a site-wide layout for your Zend Framework application
- Creating new controllers and actions
From this knowledge, you should easily be able to create static web pages. But we all know this isn't enough!
In our next tutorial, we'll learn all about creating the most crucial part of any web application, the model, and making The Next Social a dynamic site!
Until then, stay tuned!
P.S. I've registered thenextsocial.com for the purposes of this project. Just visit the site regularly and you'll see it transform from a simple site to the full-featured social networking site we intend to have at the end of this series. Additionally, all the source code created in the series will be available on this GitHub repository as well!

Comments