In this tutorial, I'll show you how to take advantage of the new 2D Tools included in Unity to create a 2D Game.
1. Application Overview
In this tutorial, you'll learn how to create a Unity 2D project and create a mobile game using C# and Unity.
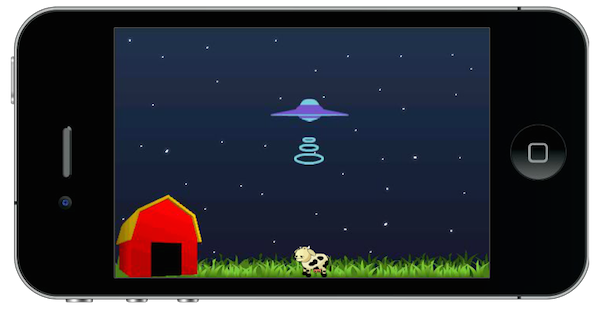
The objective of the game is to shoot a teleporting ray at the cows before they can reach the safety of the barn.
In this project you will learn the following aspects of Unity development:
- setting up a 2D project in Unity
- becoming familiar with the Unity interface
- creating a Prefab
- attaching scripts to game objects
- working with physics collisions
- using timers
2. Create a New Unity Project
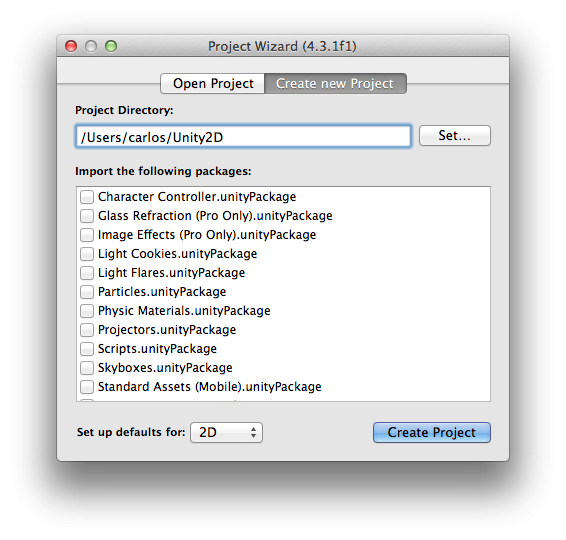
Open Unity and select New Project from the File menu to open the new project dialog. Select a directory for your project and set Set up defaults for to 2D.
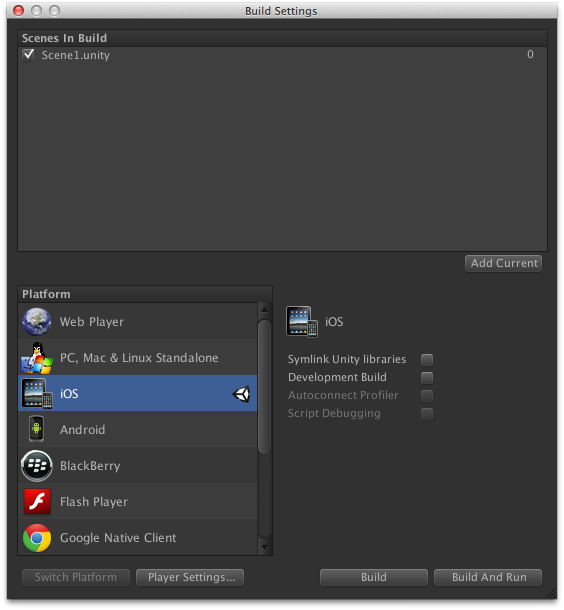
3. Build Settings
In the next step, you're presented with Unity's interface. Set the project up for mobile development by choosing Build Settings from the File menu and selecting your platform of choice.
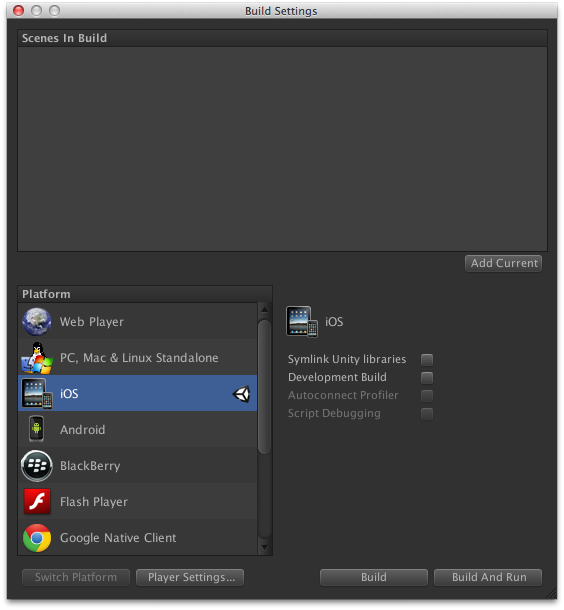
Unity can build for iOS, Android, BlackBerry, and Windows Phone 8, which is great if you plan to create a mobile game for multiple platforms.
4. Devices
Since we're about to create a 2D game, the first thing we need to do after selecting the platform we're targeting, is choosing the size of the artwork that we'll use in the game.
iOS:
- iPad without Retina: 1024px x 768px
- iPad with Retina: 2048px x 1536px
- 3.5" iPhone/iPod Touch without Retina: 320px x 480px
- 3.5" iPhone/iPod with Retina: 960px x 640px
- 4" iPhone/iPod Touch: 1136px x 640px
Because Android is an open platform, there are many different devices, screen resolutions, and pixel densities. A few of the more common ones are listed below.
- Asus Nexus 7 Tablet: 800px x 1280px, 216 ppi
- Motorola Droid X: 854px x 480px, 228 ppi
- Samsung Galaxy SIII: 720px x 1280px, 306 ppi
And for Widows Phone and BlackBerry:
- Blackberry Z10: 720px x 1280px, 355 ppi
- Nokia Lumia 520: 400px x 800px, 233 ppi
- Nokia Lumia 1520: 1080px x 1920px, 367 ppi
Even though we'll be focusing on the iOS platform in this tutorial, the code can be used to target any of the other platforms.
5. Export Graphics
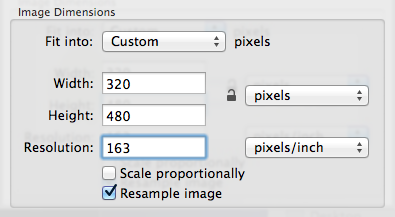
Depending on the device you're targeting, you may need to convert the artwork to the recommended size and pixel density. You can do this in your favorite image editor. I've used the Adjust Size... function under the Tools menu in OS X's Preview application.
6. Unity Interface
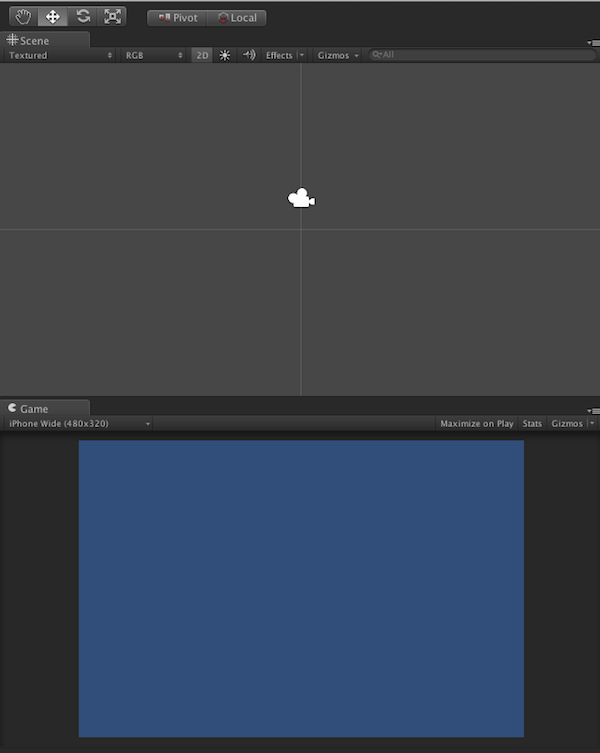
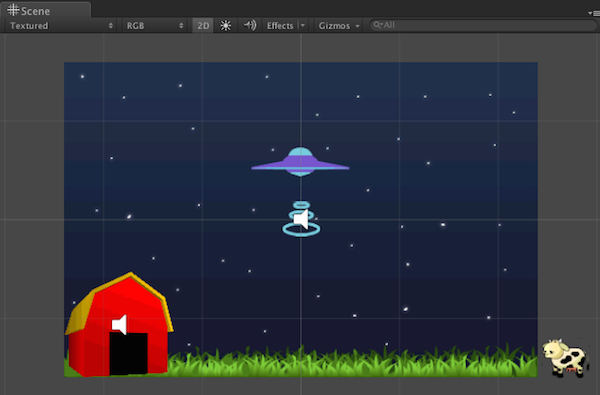
Make sure to click the 2D button in the Scene panel. You can also modify the resolution that's being used to display the scene in the Game panel.
7. Game Interface
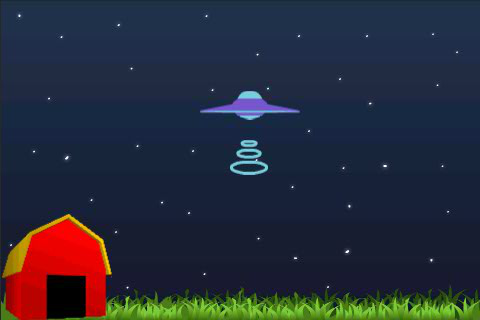
The user interface of our game will be simple. You can find the artwork for this tutorial in the source files of this tutorial.
8. Language
You can use one of three languages in Unity, C#, UnityScript, a language similar to JavaScript in terms of syntax, and Boo. Each language has its pros and cons, but it's up to you to decide which one you prefer. My preference goes to the C# syntax, so that's the language I'll be using in this tutorial.
If you decide to use another language, then make sure to take a look at Unity's Script Reference for examples.
9. 2D Graphics
Unity has built a name for being a great platform for creating 3D games for various platforms, such as Microsoft Xbox 360, Sony PS3, Nintendo Wii, the web, and various mobile platforms.
While it has always been possible to use Unity for 2D game development, it wasn't until the release of Unity 4.3 that it included native 2D support. We'll learn how to work with images as sprites instead of textures in the next steps.
10. Sound Effects
I'll use a number of sounds to improve the game experience. The sound effects used in this tutorial can be found at Freesound.org.
11. Import Assets
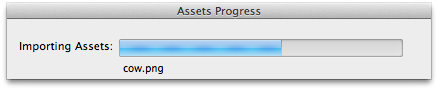
Before we start coding, we need to add our assets to the Unity project. Theres are several ways to do this:
- select Import New Asset from the Assets menu
- add the items to the assets folder in your project
- drag and drop the assets in the project window
After completing this step, you should see the assets in your project's Assets folder in the Project panel.
12. Create Scene
We're ready to create the scene of our game by dragging objects to the Hierarchy or Scene panel.
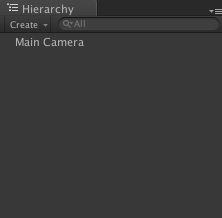
13. Background
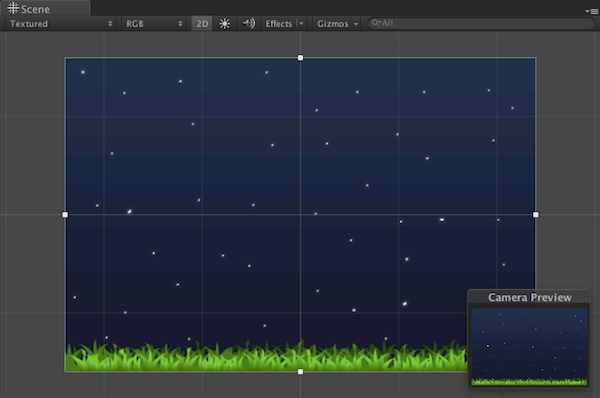
Start by dragging and dropping the background into the Hierarchy panel. It should then appear in the Scene panel.
Because the Scene panel is set to display a 2D view, you'll notice selecting the Main Camera in the Hierarchy shows a preview of what the camera is going to display. You can also see this in the game view. To make the entire scene visible, change the Size value of the Main Camera to 1.6 in the Inspector panel.
14. Ship
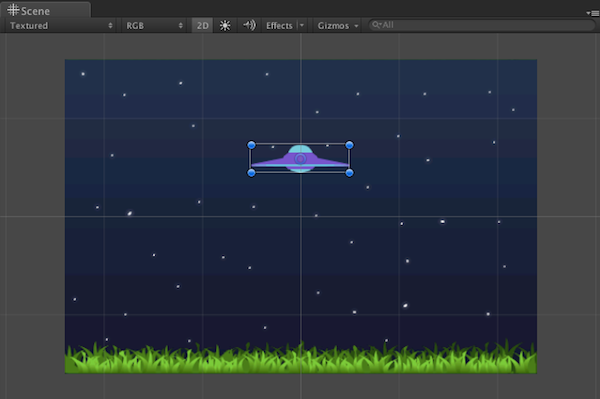
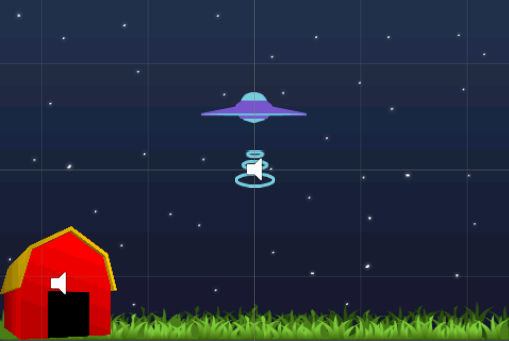
The ship is also a static element the player won't be able to interact with. Position it in the center of the scene.
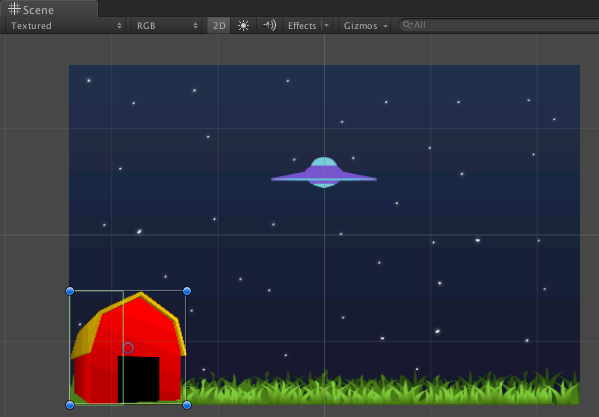
15. Barn
Select the barn from the Assets panel and drag it to the scene. Position it as illustrated in the screenshot below.

16. Barn Collider
To make sure the barn is notified when a cow hits it—enters the barn—we need to add a component, a Box Collider 2D to be precise.
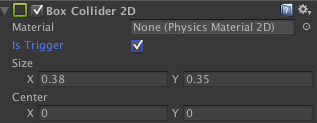
Select the barn in the scene, open the Inspector panel, and click Add Component. From the list of components, select Box Collider 2D from the Physics 2D section. Make sure to check the Is Trigger box.

We want the cow to react when it hits the door of the barn so we need to make the collider a bit smaller. Open the Inspector and change the Size and Center values of the collider to move the box closer to the door of the barn.
17. Barn Collision Script
It's time to write some code. We need to add a script so the application can respond to the collision when a cow enters the barn.
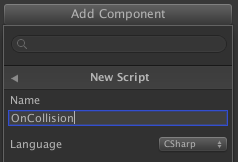
Select the barn and click the Add Component button in the Inspector panel. Select New Script and name it OnCollision. Remember to change the language to C#.
Open the newly created file and add the following code snippet.
using UnityEngine;
using System.Collections;

public class OnCollision : MonoBehaviour
{
    void OnTriggerEnter2D(Collider2D other)
    {
        if (other.gameObject.name == "cow(Clone)")
        {
            /* Play the save cow sound */
            audio.Play();
            /* Destroy the cow */
            Destroy(other.gameObject);
        }
    }
}
The snippet checks for a collision between the object to which the script is linked, the barn, and an object named cow(Clone), which will be an instance of the cow Prefab that we'll create later. When a collision takes place, a sound is played and the cow object is destroyed.
18. Barn Sound
To play a sound when a cow hits the barn, we first need to attach the sound to the barn. Select it from the Hierarchy or Scene view, click the Add Component button in the Inspector panel, and select Audio Source from the Audio section.
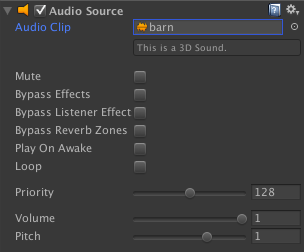
Uncheck Play on Awake and click the little dot on the right, below the gear icon, to select the barn sound.
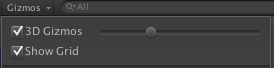
You can increase the size of the icons in Unity's user interface (gizmos) by clicking Gizmos in the Scene panel and adjusting the position of the slider.
19. Ray
Drag the ray graphic from the Assets panel to the scene and add a collider to it. This is necessary to detect a collision with the unlucky cow. Check the Is Trigger option in the Inspector panel.
20. Ray Script
Create a new script by repeating the steps I outlined a few moment ago. Name the script Bullet and replace its contents with the following code snippet:
using UnityEngine;
using System.Collections;

public class Bullet : MonoBehaviour
{
    public AudioClip cowSound;

    // Use this for initialization
    void Start()
    {
        renderer.enabled = false; /* Makes object invisible */
    }

    // Update is called once per frame
    void Update()
    {
        /* Get main Input */
        if (Input.GetButton("Fire1"))
        {
            renderer.enabled = true; /* Makes object visible */
            /* Play the ray sound */
            audio.Play();
        }

        if (renderer.enabled == true)
        {
            transform.position += Vector3.down * (Time.deltaTime * 2);
        }

        /* Check for out of bounds */

        if (this.transform.position.y < -1.5)
        {
            transform.position = new Vector2(0.08658695f, 0.1924166f); /* Return bullet to original position */
            renderer.enabled = false;
        }
    }

    void OnTriggerEnter2D(Collider2D other)
    {
        if (other.gameObject.name == "cow(Clone)")
        {
            AudioSource.PlayClipAtPoint(cowSound, transform.position);
            /* Destroy the cow */
            Destroy(other.gameObject);
            transform.position = new Vector2(0.08658695f, 0.1924166f); /* Return bullet to original position */
            renderer.enabled = false;
        }
    }
}
That's a lot of code, but it isn't complicated. Let's see what is happening. First, we create an AudioClip instance named cowSound, which we'll use to store an audio file. This is just another technique to play a sound if you don't want to add two audio components to the object. We declare the variable as public so we can access it from the Inspector. Click the little dot on the right of cowSound and select the audio file.
We then make the ray invisible by disabling its renderer. We use the same object so we can save resources, which is an important optimization for less powerful devices.
We detect touches on the screen, which make the ray visible and play back the ray sound (see below). If the object is visible, it means that it should be going down to hit a cow.
There's also code to detect if the ray is outside the scene's bounds. If this is the case, we reposition it, ready to fire again (check the ray's x and y values in the Inspector).
The last part checks whether the ray hits a cow. If it does, it plays the cow sound and destroys the cow. The ray is then made invisible and repositioned at its original position, ready to fire again.
21. Ray Audio Source
To add the audio for the ray, select it in the Hierarchy or Scene view and click Add Component in the Inspector panel. Select Audio Source from the Audio section. Uncheck Play on Awake and click the little dot on the right to select the sound file.
22. Add a Cow
Drag the graphic for the cow from the Assets panel and position it in the scene as shown below.
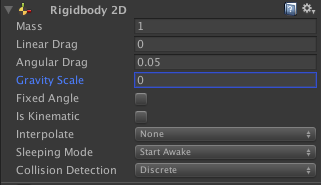
23. Rigid Body 2D
To detect a collision, at least one of the colliding objects needs to have a RigidBody2D component associated with it. As the cow can collide with both the barn and the ray, it's best to add the component to the cow.
24. Cow Collider
We also need to add a collider to the cow so we can detect collisions with the barn and the ray. Make sure to check the Is Trigger checkbox in the Inspector.
25. Move Cow Script
Add a script component to the cow and replace its contents with the following:
using UnityEngine;
using System.Collections;

public class MoveCow : MonoBehaviour
{
    public Vector3 moveSpeed;
    public float spawnTime = 2f;
    public float spawnDelay = 2f;

    // Use this for initialization
    void Start()
    {
        moveSpeed = Vector3.left * Time.deltaTime;
        InvokeRepeating("ChangeSpeed", spawnDelay, spawnTime);
    }

    void ChangeSpeed()
    {
        moveSpeed = new Vector3(Random.Range(-1, -2), 0, 0) * 0.05f;
    }

    // Update is called once per frame
    void Update()
    {
        transform.position += moveSpeed;
    }
}
The MoveCow class animates the cow across the screen using a variable named moveSpeed. The InvokeRepeating method changes the speed of the cow to make it sprint from the moment it reaches the center of the scene. This makes the game more challenging.
26. Create Cow Prefab
With the necessary components added to the cow, it's time to convert it to a Prefab. What is a Prefab? Let's consult the Unity Manual:
"A Prefab is a type of asset—a reusable GameObject stored in Project View. Prefabs can be inserted into any number of scenes, multiple times per scene. When you add a Prefab to a scene, you create an instance of it. All Prefab instances are linked to the original Prefab and are essentially clones of it. No matter how many instances exist in your project, when you make any changes to the Prefab you will see the change applied to all instances."
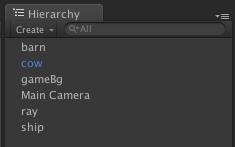
If you're coming from Flash and ActionScript, then this should sound familiar. To convert the cow to a prefab, drag the cow from the Hierarchy panel to the Assets panel. As a result, the name in the Hierarchy will turn blue.
Converting the cow to a prefab allows us to reuse it, which is convenient as it already contains the necessary components.
27. Spawner Script
The Spawner script is responsible for the cows to appear. Open MonoDevelop—or your favorite C# editor—and create a new script:
using UnityEngine;
using System.Collections;

public class Spawner : MonoBehaviour
{

    public float spawnTime = 2f;
    public float spawnDelay = 2f;
    public GameObject cow;

    // Use this for initialization
    void Start()
    {
        InvokeRepeating("Spawn", spawnDelay, spawnTime);
    }

    void Spawn()
    {
        /* Instantiate a cow */

        GameObject clone = Instantiate(cow, transform.position, transform.rotation) as GameObject;
    }
}
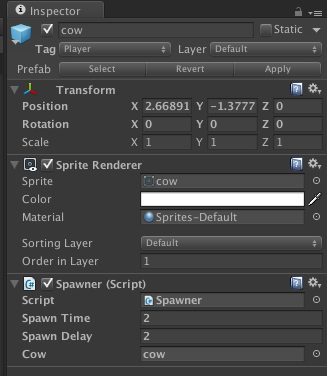
We call the InvokeRepeating method to spawn cows using the values set by spawnTime and spawnDelay. The GameObject cow is set to public and is created using the Inspector. Click the little dot on the right and select the cow Prefab.
28. Spawner Game Object
To instantiate the cow prefab, we'll use the graphic of the cow we've added to the scene a few minutes ago. Select it and remove its components. Then add the Spawner script.
29. Testing
It's time to test the game. Press Command + P to play the game in Unity. If everything works as expected, you are ready for the final steps.
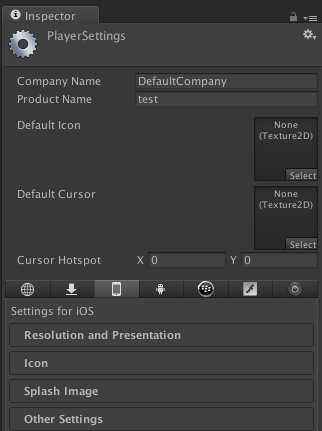
30. Player Settings
When you're happy with your game, it's time to select Build Settings from the File menu and click the Player Settings button. This brings up the Player Settings in the Inspector panel where you can adjust the parameters for your application.
31. Application Icon
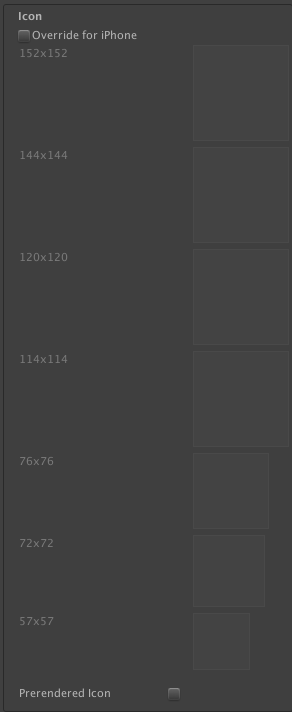
Using the graphics you created earlier, you can now create a nice icon for your game. Unity shows you the required sizes, which depend on the platform you're building for.
32. Splash Image
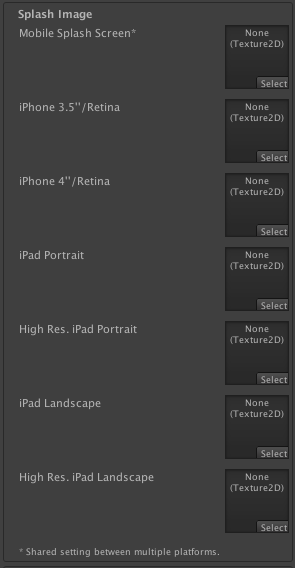
The splash or launch image is displayed when the application is launched.
33. Build
Once your project is properly configured, it's time to revisit the Build Settings and click the Build Button. That's all it takes to build your game for testing and/or distribution.
34. Xcode
If you're building for iOS, you need Xcode to build the final application binary. Open the Xcode project and choose Build from the Product menu.
Conclusion
In this tutorial, we've learned about the new 2D capabilities of Unity, collision detection, and other aspects of game development with Unity.
Experiment with the result and customize it to make the game your own. I hope you liked this tutorial and found it helpful.

Comments