WordPress is a great piece of software: It powers million of websites though its native search feature is not as powerful as it could. In fact, Automattic themselves use a different solution for search on WordPress.com. Check out a great blog post and presentation on blog post and presentation on Elasticsearch at Automattic.
The WordPress Search Problem
What's wrong with WordPress search? Simply put, it is a naive solution with simple MySQL query for look up.
- WordPress sorts the search result by the age of post other than how relevant of the result to the search term.
- The search is just a combination of
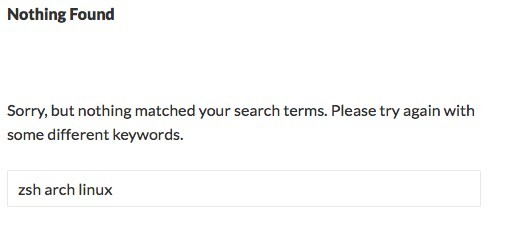
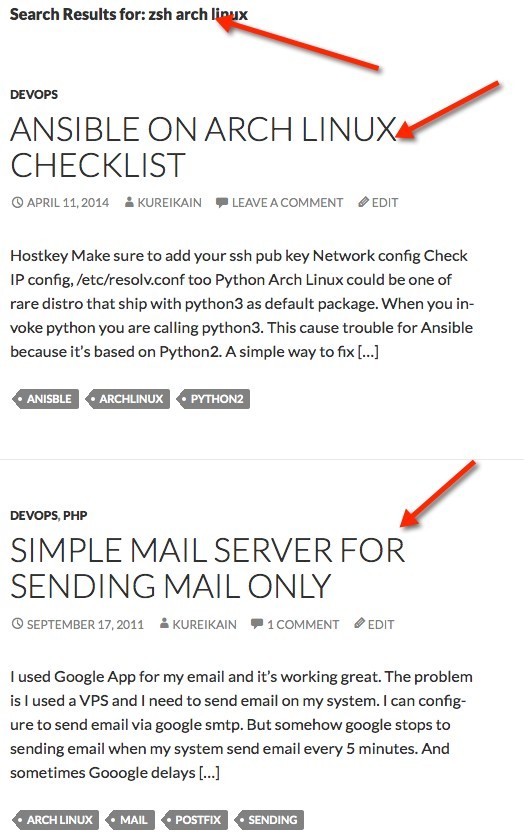
LIKE, with%query%meaning no index is used. Without indexing, it can quickly kill your database on a high traffic site if you have a lot of searching. - It looks for the exact phrase. If I search for "zsh on arch linux" WordPress returns zero results even though you have a lot of posts that contain these words. You usually don't expect a user to enter an exact phrase, do you?
- It doesn't support fuzzy search. If users makes a typo, they have no chance of getting an expected result.
Let's think of a lyric site where users may remember several words of the song and want to find the lyrics of an entire song. To make this more complex, let's say that users may not be an English speaker and are trying to find an English song. They are very likely to make typo when typing English, and without fuzzy search, we lose those users.
We will overcome these issues by using a search engine to index and search our data. We can think of using MySQL Full Text Search or something similar. While it's possible, it may not a be the best solution. You have to define a schema, you have to alter the default WordPress database, add indexes, and so on.
When you want to re-index a big table, you may introduce a lock, and prevent the site from accepting a new post or submission. Moreover, that is still a hit to your MySQL database. In high-traffic site with lots of search, it can slow down the database. When using a product like ElasticSearch, you eliminate those things. It's quick, efficient, optimized for searching with lots of extra features, and it's even schema-less meaning you can add, remove fields easily.
In this tutorial, we will go over the following two steps:
- Setting up ElasticSearch.
- Configure a plugin to index the data into ElasticSearch and search it.
The good thing is the plugin will fallback to default WordPress search if the ElasticSearch server goes down.
Requirements
You have to use a VPS to install a search engine on it. If you use a normal shared hosting service, then you can use OpenShift as alternative server to install our search engine later.
The Beauty of ElasticSearch
ElasticSearch is a flexible and powerful, distributed, real-time search and analytics engine. You can send the data into it, and have it index and available for search quickly. It's highly optimized for its job: Searching. More than that, the results includes a value of how good the data matched the search term. ElasticSearch even comes with a REST API allow you easily query search or play with it during testing/development with a tool like Sense.
Checkout the homepage if you want to learn more about it. Their site is documented extensively. For additional guidance, check out the page on Stack Overflow.
1. Installing ElasticSearch on Your Server
Depending on your Linux distribution, you may need to refer to its documentation in order to see how to install ElasticSearch. Alternatively, you can follow the generic tutorial of ElasticSearch.
Ubuntu/Debian (or APT-based Distributions)
$ wget -O - http://packages.elasticsearch.org/GPG-KEY-elasticsearch | apt-key add -
$ sudo sh -c 'echo "deb http://packages.elasticsearch.org/elasticsearch/1.1/debian stable main" > /etc/apt/sources.list'
$ sudo apt-get update# We need Java for ElasticSearch
$ sudo apt-get install openjdk-7-jre-headless -y
$ sudo apt-get install elasticsearch# Run elasticsearch when booting up
$ sudo update-rc.d elasticsearch defaults 95 10
$ sudo /etc/init.d/elasticsearch start
Centos/RedHat (or YUM-based Distributions)
$ rpm --import http://packages.elasticsearch.org/GPG-KEY-elasticsearch$ vim /etc/yum.repos.d/elastic.repo
After installation, place this in the ElasticSearch configuration file:
[elasticsearch-1.1]name=Elasticsearch repository for 1.1.x packagesbaseurl=http://packages.elasticsearch.org/elasticsearch/1.1/centosgpgcheck=1gpgkey=http://packages.elasticsearch.org/GPG-KEY-elasticsearchenabled=1
Save the file. And continue to install with yum. Note that we have to install Java 6 from third-party repository if your CentOS repository doesn't have Java 6.
$ sudo yum install elasticsearch

# Make it roon when booting

$ sudo /sbin/chkconfig --add elasticsearch
# We need Java6+ for ElasticSearch# Ignore this section if you had Java6+
$ sudo rpm --import http://apt.sw.be/RPM-GPG-KEY.dag.txt

$ sudo wget http://packages.sw.be/rpmforge-release/rpmforge-release-0.5.2-2.el6.rf.x86_64.rpm

$ sudo rpm -Uhv rpmforge-release-0.5.2-2.el6.rf.x86_64.rpm
$ sudo yum install java-1.6.0-openjdk.x86_64 -y# Start it

$ sudo service elasticsearch start
After starting ElasticSearch, you can confirm that it is working properly by visiting your domain on port 9200 as yourdomain.com:9200 in browser or by executing a curl request.
$ curl 127.0.0.1:9200
{
  "ok" : true,
  "status" : 200,
  "name" : "Jessica Jones",
  "version" : {
    "number" : "0.90.7",
    "build_hash" : "36897d07dadcb70886db7f149e645ed3d44eb5f2",
    "build_timestamp" : "2013-11-13T12:06:54Z",
    "build_snapshot" : false,
    "lucene_version" : "4.5.1"
  },
  "tagline" : "You Know, for Search"
}
If you don't have a VPS and still want to use it, you can utilize a platform like OpenShift to install ElasticSearch on it. If you installed ElasticSearch on your server, skip to the next section.
2. Installing ElasticSearch on OpenShift
ElasticSearch can be installed easily via downloading the software package and running the binary. Java 6 is the only dependency that it has. OpenShift give us kind of a virtual server that we can install our own software on it.
Register for an account at https://www.openshift.com/. Next, sign in your dashboard, or enter this URL https://openshift.redhat.com/app/console/applications after you've logged in. Click "Applications", Type 'DIY' to filter the box.
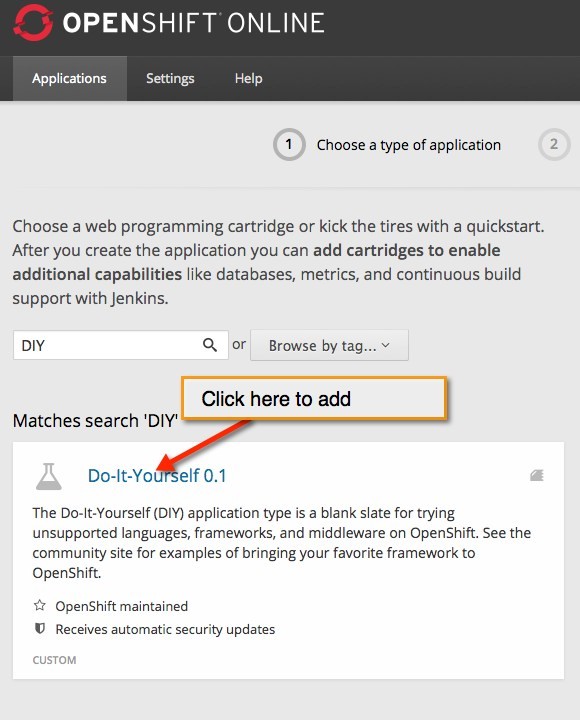
Then click on the title "Do-It-Yourself 0.1" to add the application to your account. This means we will setup the application ourselves. From here, you will have the option to name your app and get a subdomain like appnamesubdomain.rhccloud.com. Wait a moment for the provisioning to complete, then click on "Continue to the application overview page" to go to your application overview page.
On that page, you will see the domain name of your application. We will need it later to configure the ElasticSearch server URL. On the bottom-right, you can see the "Remote Access." With this access, we will be able to run the shell command and install thing just like how we do with a normal VPS. We will gather SSH information to remote access into our app and install ElasticSearch on it.
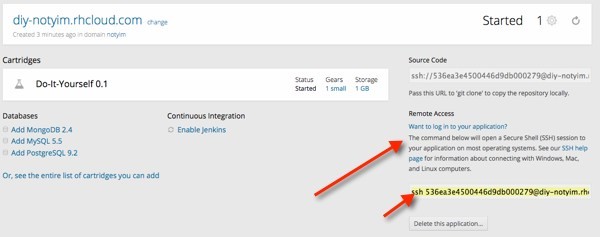
Note the ssh [email protected] command, we will use it to remote access our server on OpenShift. diy-notyim.rhcloud.com is your server address, ssh is the command we use to remote access.
To login via SSH, you have to give your public key to OpenShift. Click on the Setting tab and then click on Add a new key...
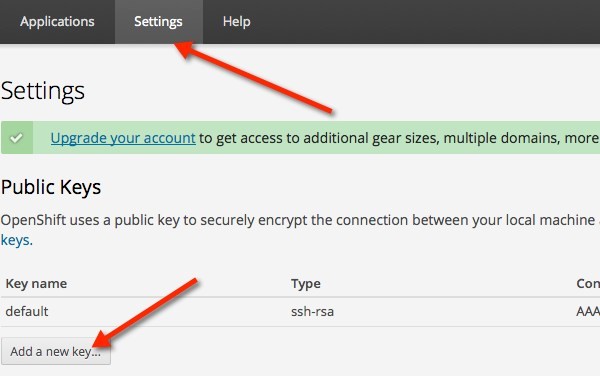
Just copy and paste the content of your public key into it. Your pubic key is usually in ~/.ssh/id_rsa.pub. If you are not familiar with public keys, read these tutorials on how to generate them:
Once you add your key on the OpenShift website, issue this command to connect into it. Note that your address will differ from mine.
You will be welcomed with a screen like this: *********************************************************************
You are accessing a service that is for use only by authorized users.
If you do not have authorization, discontinue use at once.
Any use of the services is subject to the applicable terms of the
agreement which can be found at:
https://www.openshift.com/legal
*********************************************************************
Welcome to OpenShift shell
This shell will assist you in managing OpenShift applications.
!!! IMPORTANT !!! IMPORTANT !!! IMPORTANT !!!
Shell access is quite powerful and it is possible for you to
accidentally damage your application. Proceed with care!
If worse comes to worst, destroy your application with "rhc app delete"
and recreate it
!!! IMPORTANT !!! IMPORTANT !!! IMPORTANT !!!
Type "help" for more info.
[diy-notyim.rhcloud.com 536ea3e4500446d9db000279]\>
We will download and install ElasticSearch manually. However, we have to store download file in folder $OPENSHIFT_DATA_DIR because of its persistence between deployment.
During deployment, OpenShift removes almost all of the files and folders and uses the build
instruction in the application hook to build and deploy your application.
Note that OpenShift has a special folder that is used to store persistent data
between multiple deployments. $OPENSHIFT_DATA_DIR is the environmental variable storage path. Issue below command to download, install and run ElasticSearch.
$ cd $OPENSHIFT_DATA_DIR$ wget https://download.elasticsearch.org/elasticsearch/elasticsearch/elasticsearch-1.1.1.tar.gz
$ tar xvf elasticsearch-1.1.1.tar.gz
$ cd elasticsearch-1.1.1
Once you are inside folder
elasticsearch-1.1.1, you have to change the keys and values in file config/elasticsearch.yml. You can use nano or vi/vim to edit the file and edit those valuenetwork.host: ${OPENSHIFT_DIY_IP}
transport.tcp.port: 3306
http.port: ${OPENSHIFT_DIY_PORT}
discovery.zen.ping.multicast.enabled: false
discovery.zen.ping.unicast.hosts: []
Once you edit and save it. Launch ElasticSearch.# Stop default DIY app to release the port $ ctl_app stop $ bin/elasticsearch &Wait momentarily for it to launch. From here, your ElasticSearch URL can be reached via the domain we setup earlier. In my case, it's http://diy-notyim.rhccloud.com. Note that we don't use default port 9200 because OpenShift doesn't allow us to bind to it; therefore, we use port 8080 which is set by the environmental variable
${OPENSHIFT_DIY_PORT}. We only bind for our internal IP, and OpenShift will forward to public IP at port 80 for us. Because of that, you can access directly URL http://diy-notyim.rhccloud.com without specifying any port. We also have to stop DIY internal app with ctl_app stop to release the port before running elasticsearch.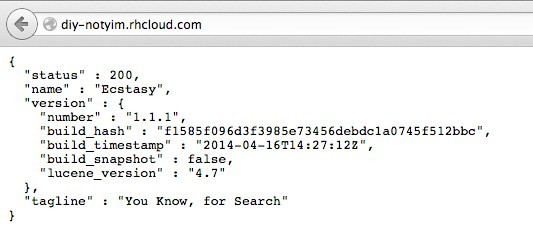
3. Setting Up The Plugin
Download and install plugin at from the WordPress plugin repository. Extract it into the wp-content/plugins folder and activate it. Or If you use wp-cli, it's easy as pie.
wp install fantastic-elasticsearch
wp activate fantastic-elasticsearch
Reloading the WordPress dashboard, a new menu item for ElasticSearch should appear. From here, let's configure it.
Most of the fields are describe clearly to help you set it up. Below are some summarize.
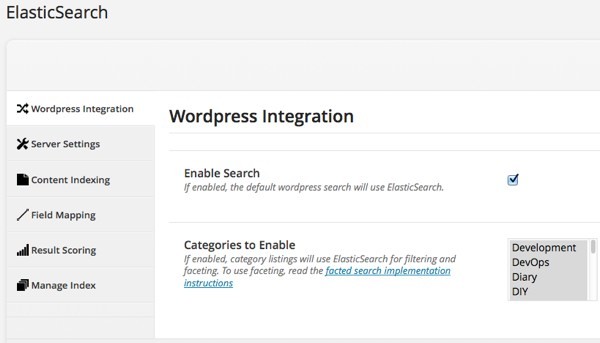
WordPress Integration
This tab contains the setting to enable using ElasticSearch or not. This tab also allows us to select which categories should be contained within ElasticSearch.
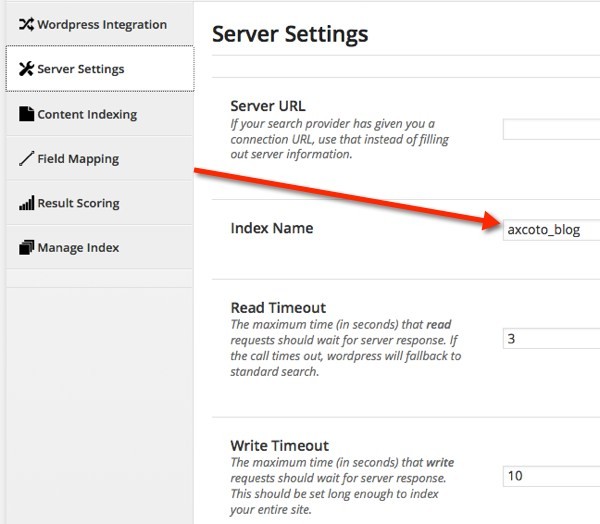
Server Settings
Configure the ElasticSearch server and index name. The index name is like the database name in MySQL. You have a MySQL server and multiple databases inside it. You can use any name there as long as it's used by different service.
If ElasticSearch is installed on same machine, and use default setting, you can leave server name empty; otherwise, specify your URL. For instance, if I used OpenShift as outlined about, I would enter http://diy-notyim.rhcloud.com/ as the server URL.
Content Indexing
You can chose which post type, post field, or taxonomy fields to be indexed by ElasticSearch. Once an item is indexed, it will be searchable via ElasticSearch. You can chose to index posts, pages, custom fields, or any custom post type depending on your need.
Result Scoring
This is an important thing to sort the result. For example, a match in post title can be considered more exact than a match in post content. Therefore we should set a score value smaller for post content. Similarly, if a tag match is more valuable than a match in the title, we will set a higher value for post_tag.
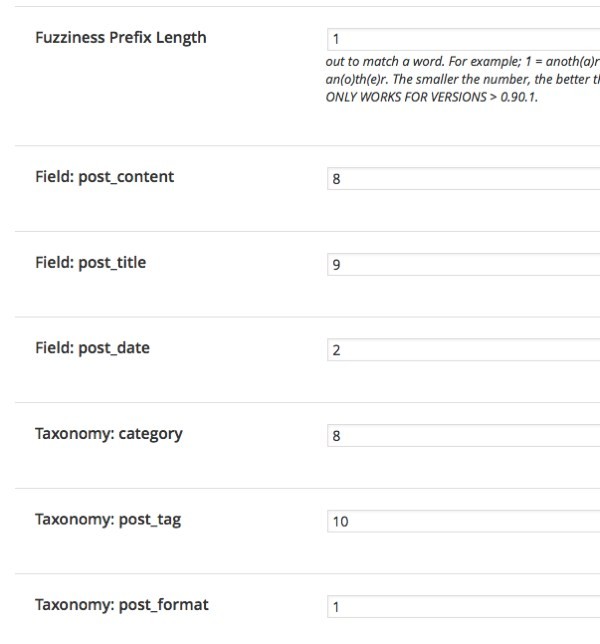
Fuzziness Prefix Length
This refers to the number of characters can be swap out to match words. For example: If I searched for Lonux, then Linux is still consider a match: L(i)nux->L(o)nux. The smaller
the number, the better the performance. Don't set this too high. I think that 0-2 are the most reasonable.
Manage index
Once everything is configured or changed, it's time to apply the change. When you click re-index, it should show something as below:

After indexing is finished. Try to search for something on your site, search for a phrase, toggle the search on/off between default and ElasticSearch to see the difference. Here is my search result with the default WordPress search:
Here is the search result with ElasticSearch.
Conclusion
With just a few simple steps, we've setup a powerful search engine to our site. The more accurate the search result, the better experience our visitors will have. If your site has heavy traffic, and a single ElasticSearch installation isn't able to handle searching, you can add more nodes to ElasticSearch to do a distributed search.
Note that by default, ElasticSearch doesn't come with authentication, but you probably should use a firewall to limit access to ElasticSearch from public IP addresses. Or perhaps a better way is to bind ElasticSearch to internal IP and make it available via LAN only.
Please leave comment and let us know how your site operate after installing this plugin.

Comments