Nowadays in order to be a freelance WordPress developer you often need to develop simultaneously several WordPress sites for different clients. Here's how.
This requires you to adopt the following:
- A flexible local development environment that allows you to easily add a new site, with a modern Version Control System and that allows you to develop both on your desktop computer and on your notebook.
- A reliable and secure deployment system to the remote server.
With this setup you can easily:
- locally develop and test your new plugin or theme in a safe way and deploy it to the production server;
- locally update the WordPress core files or update already installed plugins/themes in a safe way, check that nothing breaks the site and deploy this changes to the production server;
- make quick changes on some files on the remote server and then fetch them on the local environment.
Before We Begin
In this tutorial we refer to Mac OS X but you can easily adapt it to any other OS. Additionally we assume that the remote server has Git already installed and SSH access configured with public key authentication (the SSH and Git installations are out of the scope of this tutorial).
The scenario that we will see consists of a Local Environment that allows the development of a WordPress site with plugins and themes and a Remote Server that will host the "production" WordPress site. In the Local Environment we will use a Desktop computer and a Notebook computer. On both computers we will setup MAMP, Dropbox and Git so that you can work on your Desktop when you are in the office and on your Notebook when you are not in the office and all changes will be synchronized.
We will use Dropbox to synchronize files and DB between Desktop and Notebook, and we will use Git to track changes locally and to deploy them to the Remote Server.
For simplicity we define www.site.dev as the development site on the Local Environment and www.site.com as the production site on the Remote Server.
What We Will Do
On the local environment:
- create a basic directory structure on Dropbox;
- install and setup MAMP (both on your Desktop and your Notebook) to work in a Dropbox environment;
- setup and run WordPress development sites on both your Desktop and your Notebook;
On the remote server:
- configure Git, setup the remote repository and the necessary hook;
- setup MySQL for the WordPress production site;
On the local environment:
- configure Git, setup the local repository;
- modify the WordPress configuration to manage local/remote DB connection;
- make the initial commit and the first deploy to remote server.
Typical workflow examples:
- theme/plugin development;
- WordPress management;
- acknowledge "urgent-on-the-fly" changes on the production server and pull them in the local environment;
What You Need
-
On the Local Environment:
- A Dropbox account, an installed Dropbox client both on your desktop and notebook (see Dropbox website for installation instructions);
- MAMP, you can get it from here;
- Your favorite Text Editor;
- Git (how to install Git locally is covered in the Pro Git book);
-
On the Remote Server:
- PHP and MySQL as per WordPress requirements;
- Git installed (see here);
- An account with SSH access and public key authentication;
Step 1 Create Directory Structure on Dropbox
Download and install Dropbox on your Desktop and your Notebook (see here for instructions). Use the same account on both computers.
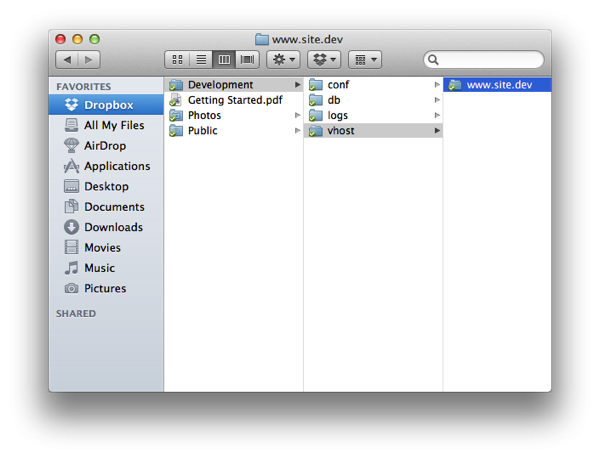
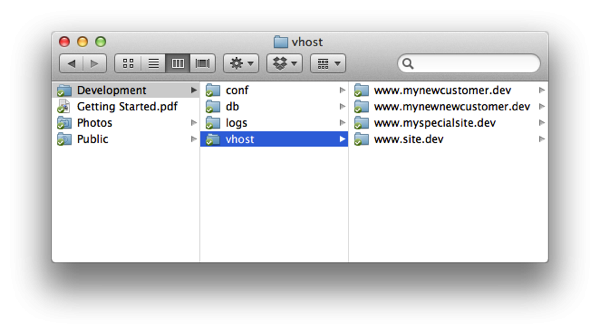
In the Dropbox folder on Desktop, create the following directory structure:
- Dropbox
- Development
- conf
- db
- logs
- vhost
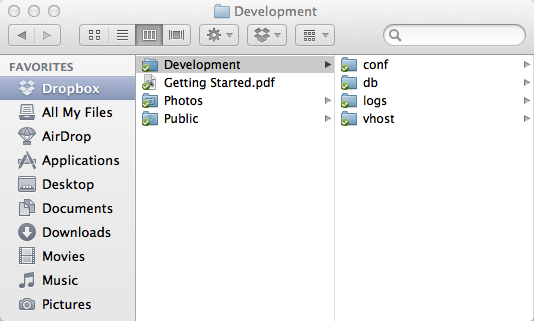
Check that the same directory structure is propagated on Notebook.
Step 2 Install and Configure MAMP
MAMP is an acronym that stands for: Mac, Apache, MySQL and PHP, it is an application that installs a local server environment on your Mac.
Its installation is very easy: download MAMP from here, unzip the archive and double-click it, then follow the instructions. Do this on both Desktop and Notebook. Don't start MAMP yet: before doing this you have to move the database and modify the default configuration.
Move the Database Folder
On Desktop move database folder from MAMP standard location to db directory on Dropbox, to do this open a Terminal and use the following commands:
cd /Applications/MAMP/db
mv * ~/Dropbox/Development/db/
On Notebook open a Terminal and delete the database folder using the following command:
cd /Applications/MAMP
rm -rf ./db
Lastly on both Desktop and Notebook create a symbolic link from MAMP to Dropbox with the following command:
ln -s ~/Dropbox/Development/db /Applications/MAMP/db
Now the symbolic link /Applications/MAMP/db points to the Dropbox shared folder ~/Dropbox/Development/db that contains the MAMP Databases. Don't start MAMP yet: we must first make a change to the configuration.
Change MAMP Ports
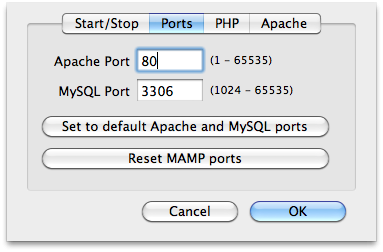
MAMP uses custom ports for Apache and MySQL server instances: Apache runs on port 8888, MySQL runs on port 8889. You can maintain this configuration or, as we suggest, change it to use standard ports: 80 for Apache, and 3306 for MySQL.
To restore standard ports, start MAMP on your Desktop only , click on "Preferences...", then on "Ports", click "Set to default Apache and MySQL ports" and finally click on "OK": MAMP saves the new configuration and restarts automatically.
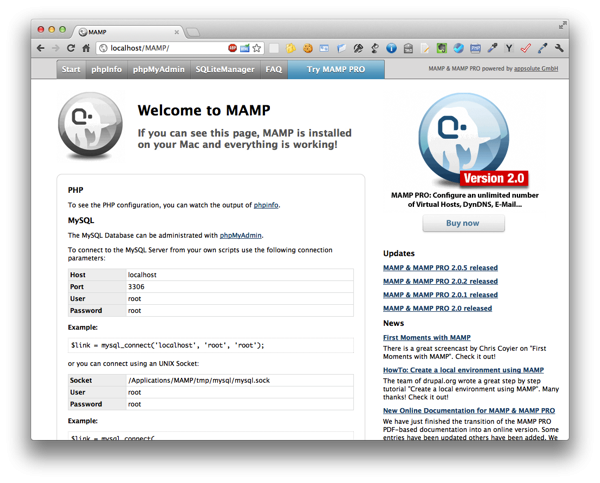
Now on your Desktop open your favorite browser and go to http://localhost/MAMP/: you should see the MAMP Home Page.
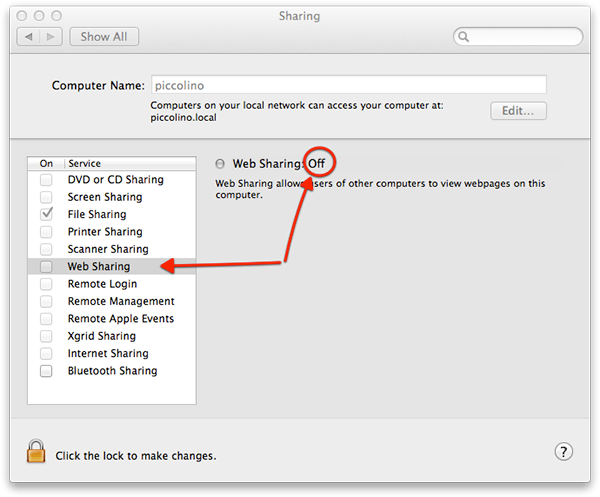
If you don't see the MAMP Home Page probably you have Web Sharing enabled: open the System Preferences, click on Sharing and turn Web Sharing off.
Don't worry if Mac OS X requires a password when you start MAMP: we have setup Apache to run on port 80 that is a privileged port and this requires an administrator password.
Because in this configuration MAMP can't run simultaneously on both your Desktop and your Notebook, quit MAMP on Desktop, start it on Notebook and configure it in the same way. When you finish stop MAMP.
Change MAMP – Apache Configuration
MAMP Apache configuration is stored in /Applications/MAMP/conf/apache/httpd.conf. Edit this file with your favorite text editor and append the following lines (do this on both your Desktop and your Notebook):
# Includes the configuration shared on Dropbox folder
Include /Users/YOURUSERNAME/Dropbox/Development/conf/local-development.conf
Replace YOURUSERNAME with your Mac OS X username (if you don't know it open Terminal and run whoami; it will provide you with your username).
This statement instructs Apache to load an additional configuration file from your Dropbox folder (synchronized between Desktop and Notebook). In this way we can use it as the Local Environment Configuration File.
Setup Apache Virtual Host on MAMP
Apache Virtual Host is a nice feature that allows you to run more than one web site (such as www.site1.com and www.site2.com) on a single server. Virtual hosts can be "IP-based", meaning that you have a different IP address for every web site, or "name-based", meaning that you have multiple names running on one IP address. The last one is the feature that we will use (see here for details).
With your favorite text editor open the Local Environment Configuration File /Users/YOURUSERNAME/Dropbox/Development/conf/local-development.conf and insert the following lines:
<Directory "/Users/YOURUSERNAME/Dropbox/Development/vhosts/">
AllowOverride All
</Directory>

#
# Named Virtual Host
#
LogFormat "%V %h %l %u %t \"%r\" %s %b" vcommon
CustomLog /Users/YOURUSERNAME/Dropbox/Development/logs/access.log vcommon
ErrorLog /Users/YOURUSERNAME/Dropbox/Development/logs/errors.log
UseCanonicalName Off
VirtualDocumentRoot /Users/YOURUSERNAME/Dropbox/Development/vhosts/%0
The string "%0" casts the spell: when the Apache server receives a request for the domain www.site.dev it looks for a directory named www.site.dev in /Users/YOURUSERNAME/Dropbox/Development/vhosts/, and if found serves files from it.
The other statements instruct Apache where to write error and access log files.
Step 3 Setup WordPress
Now we are ready to setup the WordPress development site www.site.dev. In order to do this we have to create a www.site.dev directory (on your Desktop).
and we have to edit (on both Desktop and Notebook) /etc/hosts file to map the hostname www.site.dev to the localhost IP Address. With your favorite text editor open the file /etc/hosts and append the following lines to the end of file (Mac OS X requires your password to modify this system file):
# local development
127.0.0.1	www.site.dev
At this stage it might be useful to do some check: open Terminal and run the following command:
ping -c 3 www.site.dev
You should have a similar response to this:
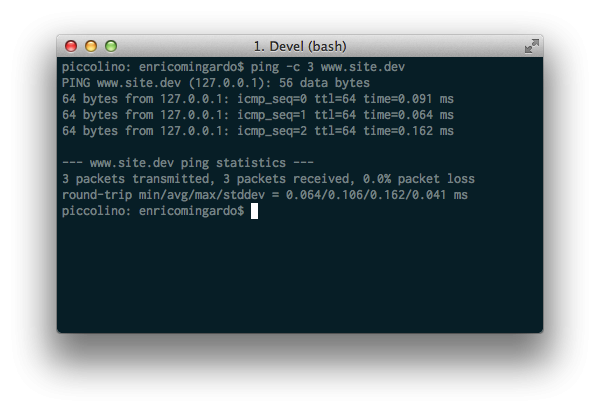
It's now time to set up WordPress: Download the WordPress package from here and unzip in a temporary folder. Move all the content of the temporary folder inside /Users/YOURUSERNAME/Dropbox/Development/vhosts/www.site.dev/.
On your Desktop start MAMP and open your browser at http://localhost/MAMP/. Click on the phpMyAdmin tab and create a new database named site_dev:
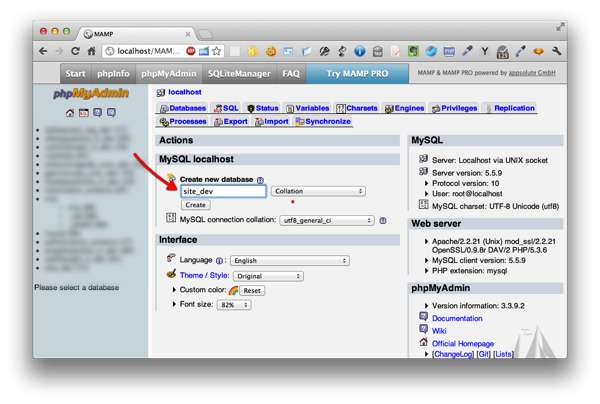
Open your browser at www.site.dev and complete the WordPress installation using these values:
- Database name: site_dev
- User name: root
- Password: root
- Database host: localhost
- Table prefix: wp_
Stop MAMP on the Desktop, wait for Dropbox synchronization and start it on Notebook. Open your Notebook Browser at www.site.dev: WordPress is already configured!
At the end of Step 3 we have a local WordPress development environment based on MAMP and synchronized between Desktop and Notebook via Dropbox, now it's time to configure the remote server.
Step 4 Configure Git on the Remote Server
Git is a Distribuited Version Control System, that records changes to a file or set of files over time and allows pushing changes to a remote server (more detailed description here). In this tutorial we assume that Git is already installed on your server. Accordingly, we proceed with the configuration.
First you have to login to the server. We assume you have an account with SSH access and public key authentication. In this way you don't have to insert a password every time you login. Open a terminal window and connect to the server:
ssh [email protected]
Setup some Git defaults about user and email to avoid Git asking for them every time:
git config --global user.email "[email protected]"
git config --global user.name "Your Name"
Setup and initialize an empty repository:
mkdir site.git
cd site.git
git init --bare
In order to allow the deployment from development to production site you have to setup a Git hook (I use Vi as my text editor for the remote server):
cd hooks
vi post-receive
Then insert the following lines:
#!/bin/bash
#
docroot="/home/yourusername/www"
while read oldrev newrev ref
do
branch=`echo $ref | cut -d/ -f3`

if [ "master" == "$branch" ]; then
git --work-tree=$docroot checkout -f $branch
fi

done
Set the variable docroot to the Web Server DocumentRoot and then make post-receive executable:
chmod 755 post-receive
This Hook is invoked at the end of the process of pushing changes from a client (Desktop or Notebook) to the Remote Server. It makes the deployment to the production Web Server DocumentRoot directory (see here for details about Git Hooks).
Git commands use some environmental variables; we need to setup two of them: GIT_DIR and GIT_WORK_TREE. The first specifies the path to repository, the second the path to the working tree (the DocumentRoot). The default shell on my Remote Server is Bash so I add them to the file .bash_profile.
cd ~
vi .bash_profile
Add the following lines to the end of file:
# GIT
export GIT_DIR=~/repo.git
export GIT_WORK_TREE=~/www
Step 5 Setup MySQL on Remote Server
On the Remote Server you still have to create a Database on MySQL: to do this you can follow the Detailed Installation Instructions on the WordPress Codex. My remote server has cPanel as hosting control panel so I follow these instructions.
Step 6 Setup Git on the Local Environment
Install Git on Mac OS X (more detailed instructions on Pro Git book): download the installer from the Google Code page, double-click the dmg file then the pkg file and follow the instructions. Do this on both Desktop and Notebook.
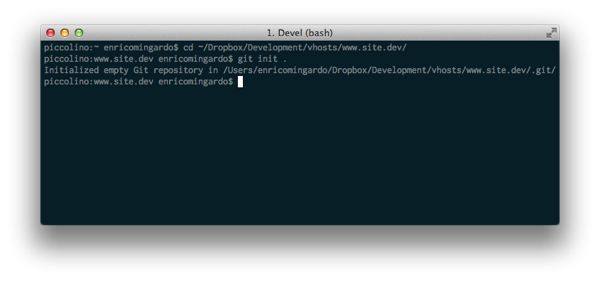
Now you are ready to initialize a Git repository on the Local Environment. To do this open Terminal (on your Desktop or on your Notebook) and use the following commands:
cd ~/Dropbox/Development/vhost/www.site.dev
git init .
You should see something like this:
To check the status of the Git repository use this command:
git status
the output should be like this:
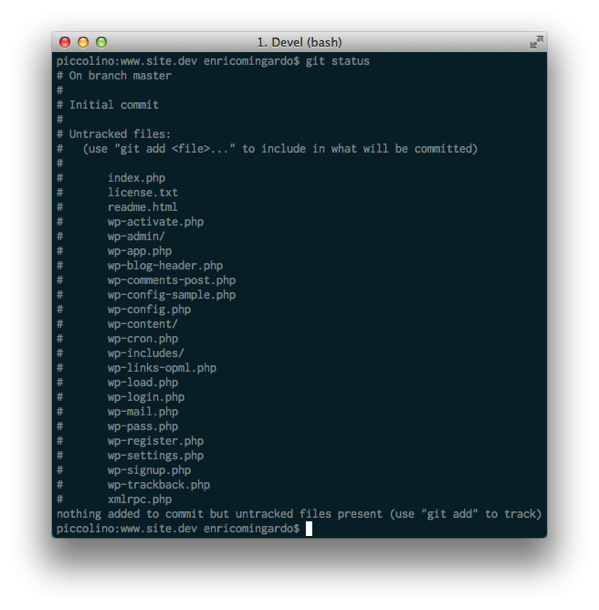
Git is telling you that all these files and directories are not tracked in the repository and suggests to use the git add command to track them.
Before doing this you need to make some changes on the Git configuration. We must tell Git which files it should track and which it shouldn't. To do this use the .gitignore file.
The .gitignore File
This file specifies the untracked files that Git should ignore (see here for more details). The command is simple, let's make an example to understand how it works:
# ignore Mac OS X Desktop Service Store
.DS_Store

# ignore my-test-dir directory and all subdirectories
my-test-dir/

#ignore all .txt files
*.txt
So create the file ~/Dropbox/Development/vhost/www.site.dev/.gitignore and add the following lines:
# ignore Mac OS X Desktop Service Store
.DS_Store
# ignore debug.log
wp-content/debug.log
For the moment this is all you need to do. Later on we will add other files and directories.
Step 7 Modify WordPress Configuration to Manage Local and Remote DB Connections
WordPress on a Local Environment uses DB from MAMP and its configuration file wp-config.php reflects this configuration (standard MAMP MySQL username and password):
// ** MySQL settings - You can get this info from your web host ** //
/** The name of the database for WordPress */
define('DB_NAME', 'site_dev');

/** MySQL database username */
define('DB_USER', 'root');

/** MySQL database password */
define('DB_PASSWORD', 'root');

/** MySQL hostname */
define('DB_HOST', 'localhost');
This works on a Local Environment but what happens if we deploy it to the Remote Server? Obviously it will fail to connect to the DB because DB_NAME, DB_USER, DB_PASSWORD and probably DB_HOST are wrong.
The solution comes from Mark Jaquith's article: modify the wp-config.php file so that configuration for Local Environment is loaded from another file and that file is not tracked by git. To do this open up wp-config.php file and substitute the above lines with these lines:
if ( file_exists( dirname( __FILE__ ) . '/local-config.php' ) ) {
	include( dirname( __FILE__ ) . '/local-config.php' );
}
else {
	define('DB_NAME', 'YOURDBNAME');
	define('DB_USER', 'YOURDBUSER');
	define('DB_PASSWORD', 'YOURDBPASSWORD');
	define('DB_HOST', 'YOURDBHOSTNAME');
}
Replace YOURDBNAME, YOURDBUSER, YOURDBPASSWORD and YOURDBHOSTNAME with the values that you defined in Step 5.
Create the ~/Dropbox/Development/vhost/www.site.dev/local-config.php file and put the Local Environment's defines in there:
define('DB_NAME', 'site_dev');
define('DB_USER', 'root');
define('DB_PASSWORD', 'root');
define('DB_HOST', 'localhost');
Now we have to add local-config.php to .gitignore so that Git will not track it:
# ignore Mac OS X Desktop Service Store
.DS_Store
# ignore debug.log
wp-content/debug.log
# ignore local-config.php
local-config.php
OK, now we are ready to make the first commit.
Step 8 Commit Changes on Local Environment and Push Them on Remote Server
To commit changes to Git repository on Local Environment enter these commands:
cd ~/Dropbox/Development/vhost/www.site.dev/
git add .
git commit -m "Initial import"
The first Git command tracks all files and directories in ~/Dropbox/Development/vhost/www.site.dev/ except that in .gitignore, the second one commits all of them in the Git repository.
It's time to push WordPress on Remote Server, but first we have to setup the remote Git repository:
git remote add website ssh://[email protected]/home/yourusername/site.git
This command tells Git that there is a remote repository called website, hosted on server www.site.com accessible through an SSH connection.
Finally the first deploy on Remote server:
git push website master
The command's output should looks like the following:
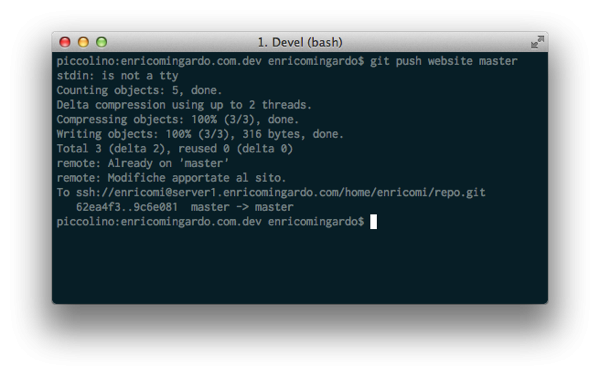
Now you can point your browser to www.site.com and see WordPress site on Remote Server.
Some Examples of Typical Workflows
Theme/Plugin Development
As theme/plugin development example we can create on the Local Environment a Twenty Eleven child theme and deploy it to the Remote Server.
For a detailed instruction on how to create a child theme you can read this article on Wptuts+. Basically we have to create a directory that contains two files: style.css and functions.php (the latter is optional).
So on Desktop (or on Notebook) create the directory ~/Dropbox/Development/vhost/www.site.dev/wp-content/themes/my-twentyeleven-child, then create a file called style.css inside this folder and add the following lines:
/*
Theme Name:     My Twenty Eleven Child
Theme URI:      http: //www.site.com/
Description:    Child theme for the Twenty Eleven theme
Author:         Your Name
Author URI:     http: //your-site.com/
Template:       twentyeleven
Version:        0.1
*/

@import url("../twentyeleven/style.css");
You can also add some CSS changes under the @import line, for example you can change body background:
body {background: #D51717;}
Then create the functions.php file and add the following lines:
<?php
function favicon_link() {
	echo '<link rel="shortcut icon" type="image/x-icon" href="/favicon.ico" --="" />' . "\n";
}
add_action('wp_head', 'favicon_link');
?>
This simple function file does one thing: it adds a favicon link to the head element of HTML pages.
Now our child theme is complete and we need to track it in Git repository:
cd ~/Dropbox/Development/vhost/www.site.dev/
git add wp-content/theme/my-twentyeleven-child/
Then we need to commit the changes:
git commit -m "Added My Twenty Eleven Child Theme"
In this this way you can continue the development of the child theme adding files, changing code and committing all these changes to repository. When your theme is ready for the production server you simply have to issue the git push command:
git push website master
In this way the child theme will be pushed on the Remote Server, ready to be used.
If you develop a plugin do the same steps: track the plugin directory and commit changes on repository. When your plugin is ready push it on Remote Server.
WordPress Management
In a similar way we can manage WordPress plugin installation or WordPress update. Let's assume that we want to try a new plugin, and we want to be sure that it doesn't break our production site.
We install it on Local Environment first using the WordPress Administration Panel (see here for details), then we have to track it and add it to Git repository (do this on your Desktop or on your Notebook):
cd ~/Dropbox/Development/vhost/www.site.dev/
git add wp-content/plugins/plugin-to-try/
git commit -m "Add the Plugin to try"
If the plugin works, you can deploy it on Remote Server using:
git push website master
and enable it using the WordPress Administration Panel.
If plugin doesn't work you can uninstall it using the WordPress Administration Panel, then you can remove it from tracked files and commit the changes:
git rm wp-content/plugins/plugin-to-try/
git commit -m "Removed the Plugin to try"
A little tip: if you add a plugin directory to
.gitignorefile (before commit) the plugin will remain only on the Local Environment but it will not pushed on Remote Server. This might be useful for plugins like Debug Bar that are used in local development but that don’t have to be transferred to a production site.
Make Quick Changes on the Production Server and Pull Them in the Local Environment
Ok, we know, quick changes on production server are not a good habit, indeed they are a bad habit, but sometimes are unavoidable. Assuming that we changed the DB_PASSWORD on Remote Server wp-config.php file and now we want to acknowledge that change in our Local Enviroment wp-config.php. To do this first connect to remote server via SSH and use the following command:
git commit -m "change DB_PASSWORD on wp-config.php"
Then pull changes from remote repository using the following command on Desktop:
git pull website master
If you read the wp-config.php you'll see the new DB_PASSWORD.
Conclusion
In this tutorial we have seen a scenario made up of a Local Environment and a Remote Server that hosts the development and the production site for www.site.com, but you can easily repeat this setup for www.mynewcustomer.com, for www.myothernewnewcustomer.com and so on.
MAMP, Dropbox and Git form a winning team to deal with WordPress development and deployment, they represent a flexible development environment that allows to easily add a new site, develop it everywhere you are, and to deploy it in a reliable manner to the production server.
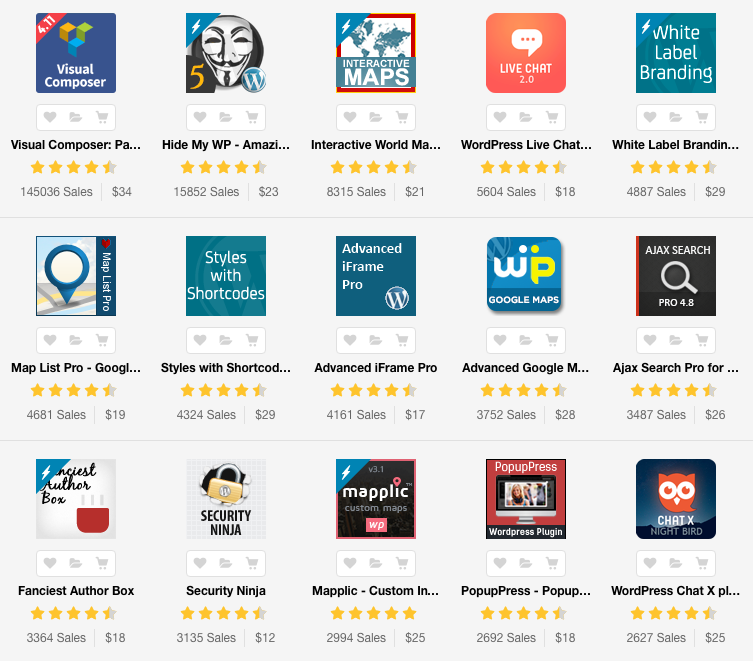
If you work with WordPress regularly, check out the selection of great WordPress utilities on Envato Market. From security plugins to iFrame customizers, there's sure to be something there that can help you.

Comments