In this article, we're going to explore how you can make use of the hardware capabilities of a Windows Phone device, such as geolocation, device sensors, Bluetooth, and NFC.
Geolocation
All Windows Phone devices have built-in geolocation hardware. By using a combination of 3G, Wi-Fi, and GPS signal, the phone is able to identify the user’s location and make it available to every app, thanks to a set of APIs included in the Windows Runtime.
Geolocation is another scenario where APIs are duplicated. The original API set was part of the Silverlight framework, but it has been expanded in the Windows Runtime.
The new main class for working with geolocation services is called Geolocator, and it’s part of the Windows.Devices.Geolocation namespace.
Note: To use geolocation services, you’ll need to enable the ID_CAP_LOCATION capability in the manifest file.
The first step to use geolocation services is to check the LocationStatus property value of the Geolocator class to identify the current status of the services. Specifically, we have to manage the PositionStatus.Disabled status. In this case, the user has disabled the geolocation services in the phone’s settings, so we don’t have to execute any operation related to geolocation, otherwise we will get an exception.
If you want to keep track of the geolocation service’s status, there’s a specific event handler called StatusChanged that is invoked every time the status changes. It helps you to identify, for example, that the GPS is ready or that the user is in a location that is hard to track.
There are two ways to interact with the Geolocator class: asking for a single position (for example, a Twitter client that needs to geolocalize a tweet), or subscribing to an event handler that can be used to continuously track the user’s location (for example, a running tracker app).
To ask for a single position, you simply have to call the asynchronous method GetGeopositionAsync(). It will return a Geoposition object containing a Coordinate property that will help you to identify where the user is.
Note: The Geoposition object has another property called CivicAddress which should contain a reference to the user’s location using civic references (like the city, street address, etc.). This property isn’t supported, so it will always return incorrect information. Later in this article we’ll look at how to get the civic position of the user.
The following code sample demonstrates how to get a single user’s position:
private async void OnGetSinglePositionClicked(object sender, RoutedEventArgs e)
{
    Geolocator geolocator = new Geolocator();
    if (geolocator.LocationStatus != PositionStatus.Disabled)
    {
        Geoposition geoposition = await geolocator.GetGeopositionAsync();
        MessageBox.Show(string.Format("The user's coordinates are {0} - {1}", geoposition.Coordinate.Latitude, geoposition.Coordinate.Latitude))
    }
}
To continuously track the user’s position, instead, you need to subscribe to the PositionChanged event handler, which is invoked every time the user moves from the previous location. You can control how often this event is raised by setting three properties of the Geolocator object:
-
DesiredAccuracy, which is the geolocation accuracy. The higher it is set, the more precise the result will be, and the more battery power will be consumed. -
MovementThreshold, which is the distance, in meters, the user should move from the previous location before thePositionChangedevent is triggered. -
ReportInterval, which is the minimum number of milliseconds that should pass between two detections.
The PositionChanged event returns a parameter that contains a Position property of type Geoposition—it works the same way as we’ve previously seen for the GetGeopositionAsync() method.
private void OnStartTrackingPosition(object sender, RoutedEventArgs e)
{
    Geolocator geolocator = new Geolocator();
    geolocator.MovementThreshold = 100;
    geolocator.ReportInterval = 1000;
    geolocator.DesiredAccuracy = PositionAccuracy.High;

    geolocator.PositionChanged += geolocator_PositionChanged;
}

private void geolocator_PositionChanged(Geolocator sender, PositionChangedEventArgs args)
{
    Dispatcher.BeginInvoke(() =>
    {
        Latitude.Text = args.Position.Coordinate.Latitude.ToString();
        Longitude.Text = args.Position.Coordinate.Longitude.ToString();
    });
}
In the previous sample, we track the user’s location every time he or she moves 100 meters from the previous location, only if at least one second has passed since the previous detection. Every time the PositionChanged event is raised, we display the Latitude and Longitude properties’ values in two different TextBlock controls. Note that we’re using the Dispatcher class we discussed earlier in this series. It’s required because the PositionChanged event is managed in a background thread, so we are not able to directly interact with the UI.
Tip: You can easily test geolocation services by using the tool that comes with the emulator. Simply click a position on the map and the related coordinates will be sent to the emulator.
Background Tracking
Windows Phone 8 has introduced the ability to keep tracking the user’s position when the application is suspended. This means that the PositionChanged event handler will continue to be invoked even if the app is not running in the foreground.
Background tracking can continue unless:
- the application stops tracking the user’s location by deregistering the
PositionChangedandStatusChangedevent handlers - the application has been running in the background for four hours without being reopened
- Battery Saver mode is enabled
- the phone is running out of free memory
- geolocation services have been disabled
- the user opens another application that is able to track his or her location in the background
To activate background tracking, you need to edit the manifest file using the manual editor (right-click the file and choose View code) since the option is not supported by the visual editor. You’ll have to edit the DefaultTask node in the following way:
<Tasks>
  <DefaultTask Name="_default" NavigationPage="MainPage.xaml">
    <BackgroundExecution>
      <ExecutionType Name="LocationTracking"/>
    </BackgroundExecution>
  </DefaultTask>
</Tasks>
Now, if the previous conditions are satisfied, the application will keep tracking the user’s location even when it’s not running in the foreground.
If you want to customize the user experience based on whether the application is running in the background, you can subscribe to a specific event of the PhoneApplicationService object, which is declared in the App.xaml file, and which we learned to use earlier in this series. The event handler is called RunningInBackground and it’s triggered every time the application is suspended. However, since it’s using geolocation services, it will keep running in the background.
In the following sample, you can see how the PhoneApplicationService declaration will look after we’ve subscribed to the event:
<Application.ApplicationLifetimeObjects>
    <!--Required object that handles lifetime events for the application-->
    <shell:PhoneApplicationService
        Launching="Application_Launching" Closing="Application_Closing"
        Activated="Application_Activated" Deactivated="Application_Deactivated"
        RunningInBackground="Application_RunningInBackground"
        />
</Application.ApplicationLifetimeObjects>
In the previous sample, we set a property (called IsRunningInBackground) to know whether the app is running in the background. We set it to true when the RunningInBackground event is triggered, and set it to false when the Activated event is raised, which means that the application has been reopened.
Interacting With the Map Control
Windows Phone includes a built-in Map control that can be used to embed a map inside an application’s page and can be used in combination with the geolocation services. The control has been greatly improved since Windows Phone 7, and it’s now based on Nokia’s cartography. In addition, it supports offline maps—if the user has downloaded maps for the current location, the control will be able to automatically use them. The Map control is part of the Microsoft.Phone.Maps.Controls namespace, so you’ll need to add it to your XAML page before using it:
xmlns:maps="clr-namespace:Microsoft.Phone.Maps.Controls;assembly=Microsoft.Phone.Maps"
The Map control exposes many properties for customization. The most useful ones are:
-
Center, the geolocation coordinates the map is centered at. -
ZoomLevel, which is the zoom level from1(minimum) to19(maximum). -
CartographicMode, which can be used to switch betweenAerial(satellite view),Road(road view),Terrain(landscape view), andHybrid(a combination of the others). -
ColorModecan be used to set aLightorDarktheme, according to the luminosity conditions.
In the following sample, you can see a Map control included in a page:
<maps:Map x:Name="CustomMap"
            ZoomLevel="15"
            CartographicMode="Aerial"
            ColorMode="Light" />
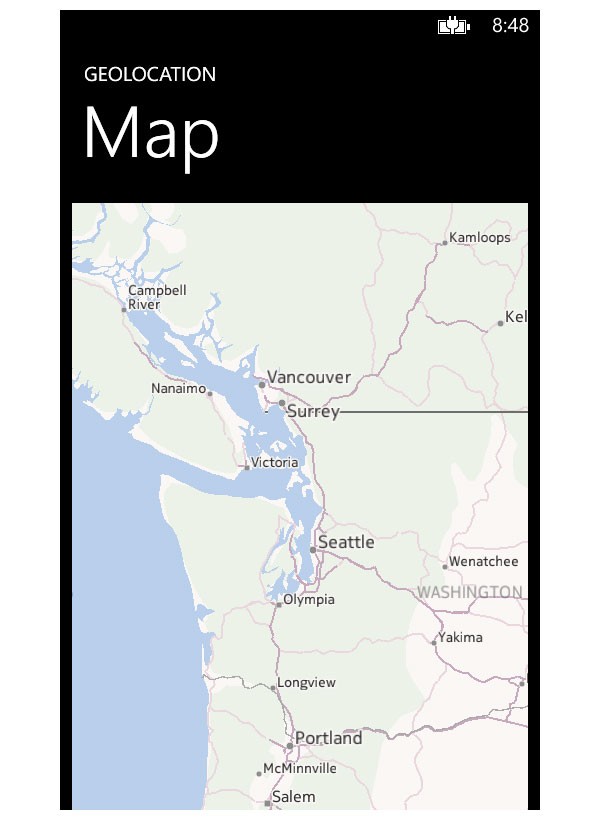
Using the Map control in combination with the geolocation services should be easy: it would be enough to set the Center property of the Map with a Geoposition object returned by the Geolocator class. Unfortunately, there’s a limitation since Windows Phone and the Map control use two different classes to store geolocation coordinates. The first one is called Geocoordinate and it’s part of the Windows.Devices.Geolocation namespace, while the second one is called GeoCoordinate (with a capital C) and it’s part of the System.Device.Location namespace.
Fortunately, there’s a work-around: installing the Windows Phone Toolkit we discussed earlier in this series. In addition to providing a useful set of additional controls, it also offers many helpers and extensions that are useful when working with the Map control.
Specifically, after adding the Windows Phone Toolkit to your project (the easiest way is using NuGet), you will be able to use an extension method called ToGeoCoordinate(), which is able to convert the original Windows Runtime class to the Map control’s specific one. In the following sample, you can see how we use it to display the user’s current location on a map:
private async void OnGetSinglePositionClicked(object sender, RoutedEventArgs e)
{
    Geolocator geolocator = new Geolocator();
    if (geolocator.LocationStatus != PositionStatus.Disabled)
    {
        Geoposition geoposition = await geolocator.GetGeopositionAsync();
        myMap.Center = geoposition.Coordinate.ToGeoCoordinate();
    }
}
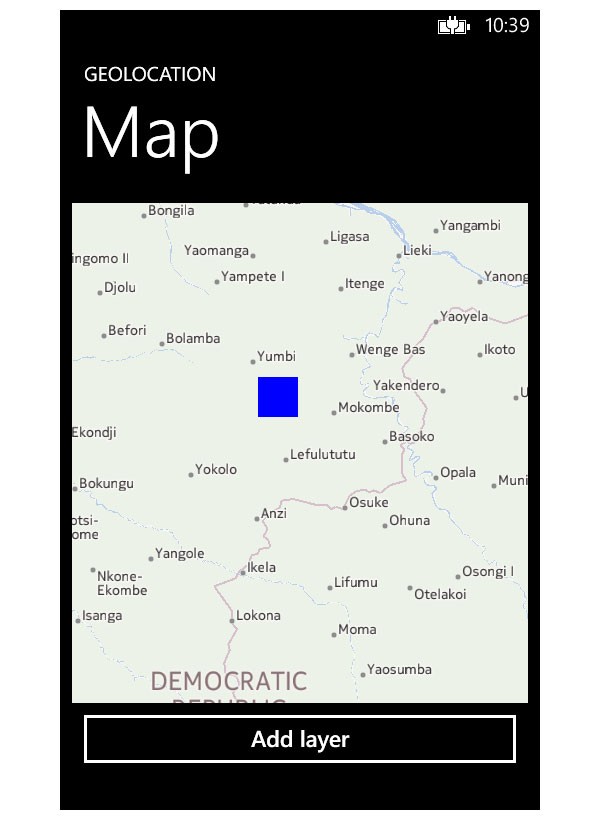
Layers
The Map control supports layers that can be added on top of the map. A layer is a collection of visual objects that are displayed over the map, and it’s represented by the MapLayer class.
Each MapLayer has a collection of overlays (the MapOverlay class); each one is an object that is displayed on the map.
An overlay can be composed of virtually any control. In fact, it’s defined by a position using the GeoCoordinate property, and content using the Content property, which is a generic object. This means that you can add any object you want as content, as with any of the XAML visual controls available in the framework.
In the following sample, we create a Rectangle object and set it as Content of a MapOverlay object that we add to a new layer.
private void OnAddShapeClicked(object sender, RoutedEventArgs e)
{
    MapOverlay overlay = new MapOverlay
    {
        GeoCoordinate = myMap.Center,
        Content = new Rectangle
        {
            Fill = new SolidColorBrush(Colors.Blue),
            Width = 40,
            Height = 40
        }
    };
    MapLayer layer = new MapLayer();
    layer.Add(overlay);

    myMap.Layers.Add(layer);
}
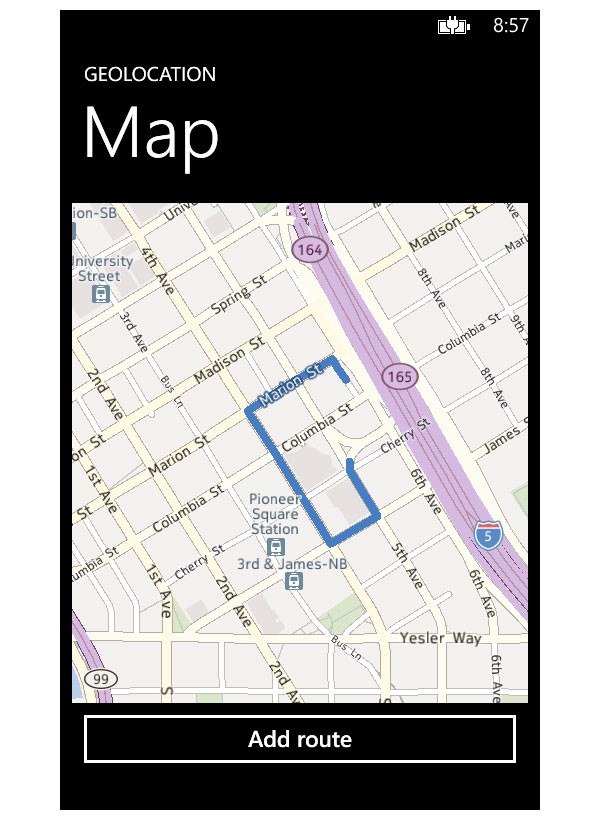
Routing
A common scenario in which you work with the Map control is with routing, where you have the ability to show routes on the map. Even if it sounds complicated, it’s easy to implement using the RouteQuery class, which allows you to:
- set different route options by using the
TravelModeandRouteOptimizationproperties - add a list of waypoints that compose the route
The following code demonstrates a routing sample:
private void OnCalculateRouteClicked(object sender, RoutedEventArgs e)
{
    RouteQuery query = new RouteQuery
    {
        TravelMode = TravelMode.Driving,
        RouteOptimization = RouteOptimization.MinimizeTime,
    };

    List<GeoCoordinate> coordinates = new List<GeoCoordinate>();
    coordinates.Add(new GeoCoordinate(47.6045697927475, -122.329885661602));
    coordinates.Add(new GeoCoordinate(47.605712890625, -122.330268859863));
    query.Waypoints = coordinates;

    query.QueryCompleted += query_QueryCompleted;
    query.QueryAsync();
}
The TravelMode and RouteOptimization options can be used to customize the route in a way similar to what many GPS navigators do. In the previous sample, we want the driving route that requires the least amount of time.
The path is set using the Waypoints property, which requires a collection of GeoCoordinate objects. Each object represents a point in the path that should be touched by the route.
The RouteQuery class works using the callback approach. We call the QueryAsync() method and subscribe to the QueryCompleted event, which is triggered when the route has been calculated, as shown in the following sample:
void query_QueryCompleted(object sender, QueryCompletedEventArgs<Route> e)
{
    MapRoute route = new MapRoute(e.Result);
    myMap.AddRoute(route);
}
Displaying a route on the Map control is easy—you simply have to create a new MapRoute object, passing the query result (stored in the Result property of the returned object) as a parameter, and add it to the Map using the AddRoute() method.
Working With Coordinates
Until now, we’ve always worked with geolocation coordinates based on latitude and longitude, but often it’s easier for users to understand a location based on its civic address. Windows Phone 8 has introduced two classes to perform geocoding conversion: GeoCodeQuery (to convert an address into a set of numeric coordinates) and ReverseGeocodeQuery (to convert latitude and longitude into an address).
They both work in the same way, since they use the same callback approach we’ve seen for routing. After you’ve defined the operation to perform, you can start the search using the QueryAsync() method. Once the search has completed, you can use the QueryCompleted event handler to manage the results.
The GeocodeQuery class requires you to set two parameters: GeoCoordinate and, most important, SearchTerm, which is the search keyword. GeoCoordinate shouldn’t be required (since the purpose of this class is to find the location’s coordinate), but you’ll have to set it anyway with a fake value as shown in the following sample. Otherwise, you won’t get any result.
private void OnResolveCoordinatesClicked(object sender, RoutedEventArgs e)
{
    GeocodeQuery query = new GeocodeQuery
        {
               GeoCoordinate = new GeoCoordinate(0, 0),
               SearchTerm = "Milan,Italy"
        };
    query.QueryCompleted += query_QueryCompleted;
    query.QueryAsync();
}
The ReverseGeoCodeQuery class, instead, only requires the GeoCoordinate property to be set with the location’s coordinates.
private void OnResolveAddressClicked(object sender, RoutedEventArgs e)
{
    ReverseGeocodeQuery reverseQuery = new ReverseGeocodeQuery
        {
             GeoCoordinate = new GeoCoordinate(45.3967, 9.3163)
        };
    reverseQuery.QueryCompleted += reverseQuery_QueryCompleted;
    reverseQuery.QueryAsync();
}
The QueryCompleted event handler is the same for both classes and returns a collection of MapLocation objects. If you used the GeocodeQuery class, you’ll probably be interested in the GeoCoordinate object, which contains the latitude and longitude of the searched location.
void query_QueryCompleted(object sender, QueryCompletedEventArgs<IList<MapLocation>> e)
{
    var item = e.Result.FirstOrDefault();
    myMap.SetView(item.BoundingBox, MapAnimationKind.Parabolic);
}
The previous sample shows a way to center the map on the position returned by the service.
Instead, if you used the ReverseGeocodeQuery class, you’ll find the information you’re looking for in the Information property that contains data like City, Street, Address, etc.
void reverseQuery_QueryCompleted(object sender, QueryCompletedEventArgs<IList<MapLocation>> e)
{
    var item = e.Result.FirstOrDefault();
    MessageBox.Show(string.Format("{0},{1}", item.Information.Address.Street, item.Information.Address.City));
}
In both cases, the event handler returns a collection of MapLocation objects because, especially if you searched a location by a keyword, the service can return multiple results. The previous example shows the information about the first item in the collection.
How to Publish an Application That Uses the Map Control
You can freely use the Map control during the testing phase, but when you submit it to the Store, you’ll need production credentials.
The credentials can be obtained during the submission process. One of the optional steps is called Map service, which will give you two codes called ApplicationId and AuthenticationToken. Once you have the codes, you need to set them in the following way when the application starts:
Microsoft.Phone.Maps.MapsSettings.ApplicationContext.ApplicationId = "ApplicationId";
Microsoft.Phone.Maps.MapsSettings.ApplicationContext.AuthenticationToken = "AuthenticationToken";
Movement Sensors
Windows Phone devices have many movement sensors that can be used by applications, like the accelerometer, gyroscope, and compass. The Windows Runtime has introduced a new set of APIs which are part of the Windows.Devices.Sensors namespace:
- The
Accelerometerclass can be used to interact with the accelerometer. - The
Gyrometerclass can be used to interact with the gyroscope. - The
Compassclass can be used to interact with the compass. -
OrientationSensoris a special class that can combine values obtained from all the available sensors.
Note: To use sensors, you’ll need to enable the ID_CAP_SENSORS option in the manifest file. If you also want to use gyroscope and compass, you need to enable the ID_REQ_MAGNETOMETER and ID_REQ_GYROSCOPE capabilities in the Requirements section of the manifest file. This way, users with devices without one of these sensors won’t be able to download your application.
All the sensors work in the same way. You’ll be able to get a reference to the sensor using the GetDefault() method. If it’s not available on the phone (for example, not all devices have a gyroscope), you’ll get a null reference in return. It’s important to always check if the returned sensor is null before doing any operation.
Like the geolocation services, you have two ways to interact with sensors:
- the
GetCurrentReading()method, which returns a single detection - the
ReadingChangedevent handler, which is triggered every time the phone moves to a new position
In this section, we’ll use as an example the OrientationSensor class, which is a special sensor that is able to combine all the values returned by the available sensors and automatically filter all the out-of-scale data. The class returns an OrientationSensorReading object, which contains all the information about the current position. You’ll be able to get the device position by using the Quaternion and RotationMatrix properties.
In the following samples, you can see two ways to achieve the same result: getting a single reading, and subscribing to notifications that are sent every time the position changes. The device’s coordinates on the x-axis, y-axis, and z-axis are displayed on the screen using three TextBlock controls:
//Single reading.
private void OnGetReadingClicked(object sender, RoutedEventArgs e)
{
    OrientationSensor orientationSensor = OrientationSensor.GetDefault();
    if (orientationSensor != null)
    {
        OrientationSensorReading reading = orientationSensor.GetCurrentReading();
        txtX.Text = reading.Quaternion.X.ToString();
        txtY.Text = reading.Quaternion.Y.ToString();
        txtZ.Text = reading.Quaternion.Z.ToString();
    }
    else
    {
        MessageBox.Show("The sensor is not available");
    }
}
//Continuous reading.
private void OnGetReadingClicked(object sender, RoutedEventArgs e)
{
    OrientationSensor orientationSensor = OrientationSensor.GetDefault();
    if (orientationSensor != null)
    {
        orientationSensor.ReadingChanged += orientationSensor_ReadingChanged;
    }
    else
    {
        MessageBox.Show("The sensor is not available");
    }
}

void orientationSensor_ReadingChanged(OrientationSensor sender, OrientationSensorReadingChangedEventArgs args)
{
    Dispatcher.BeginInvoke(() =>
    {
        txtX.Text = args.Reading.Quaternion.X.ToString();
        txtY.Text = args.Reading.Quaternion.Y.ToString();
        txtZ.Text = args.Reading.Quaternion.Z.ToString();
    });
}
Please note that if you decide to subscribe to the ReadingChanged event, you’ll need a Dispatcher to communicate with the user interface since the event handler is managed by a background thread.
If you need to use a specific sensor, the code to use is very similar. You’ll simply have to use the specific sensor class and manage the specific reading object that you’ll get in return.
Tip: The Windows Phone emulator features a tool to simulate movement sensors. Unfortunately, only the accelerometer is supported; for every other sensor, including the OrientationSensor, you’ll need a real device.
Determining the Current Hardware
Windows Phone offers a class called DeviceStatus that can be used to get information about the current device, like:
- the firmware version, with the
DeviceFirmwareVersionproperty - the hardware version, with the
DeviceHardwareVersionproperty - the manufacturer, with the
DeviceManufacturerproperty - the device name, with the
DeviceNameproperty - the amount of total memory available, with the
DeviceTotalMemoryproperty
Plus, you have access to some useful APIs to get the current status of the battery. They belong to the Windows.Phone.Devices.Power namespace, and you’ll be able to use the Battery class to identify the percentage of remaining battery charge (with the RemainingChargePercent property) and the remaining time before the battery totally discharges (with the RemainingDischargeTime property).
The Battery class behaves like a sensor; you’ll have to use the GetDefault() method to get a reference to it (even if, in this case, you can avoid checking whether the returned object is null since every phone has a battery), as in the following sample:
private void OnGetBatteryClicked(object sender, RoutedEventArgs e)
{
    int remainingCharge = Battery.GetDefault().RemainingChargePercent;
    TimeSpan remainingTime = Battery.GetDefault().RemainingDischargeTime;
}
In addition, the DeviceStatus class offers a property called PowerSource, which tells you the current power source, and an event handler, called PowerSourceChanged, which is triggered every time the current power source changes (from battery to external or vice versa).
private void OnGetBatteryClicked(object sender, RoutedEventArgs e)
{
    DeviceStatus.PowerSourceChanged += DeviceStatus_PowerSourceChanged;
}

void DeviceStatus_PowerSourceChanged(object sender, EventArgs e)
{
    string message = DeviceStatus.PowerSource == PowerSource.Battery ? "Batteria" : "Alimentazione di rete";
    MessageBox.Show(message);
}
It can be useful if, for example, you want to avoid performing power-consuming operations if the phone is not connected to an external power source.
Note: To get access to hardware info, you’ll need to enable the ID_CAP_IDENTITY_DEVICE capability in the manifest file.
Proximity
Under the proximity category we can include all the new APIs that have been introduced in the Windows Runtime to connect two devices together without using an Internet connection. In Windows Phone you can achieve this result by using two technologies: Bluetooth and NFC.
Bluetooth is well known and can be used to connect devices within a range of 10 meters. It’s been available since the first Windows Phone release, but only Windows Phone 8 has introduced APIs that are available to developers.
NFC is a more recent technology that has started to gain some traction in recent years. It can be used to exchange small amounts of data within a close range (the two devices should basically touch each other). NFC is an interesting technology since it works not only with active devices (like two phones), but also with passive devices (like chips embedded in a sticker or in a magazine page). In addition, Windows Phone is able to extend NFC and use it also to create a Bluetooth communication channel without needing to manually pair the two devices. This way, you can overcome NFC’s limitations and use Bluetooth to transfer larger data files, like images.
Note: To use Proximity APIs, you’ll need to enable the ID_CAP_PROXIMITY option in the manifest file.
The easiest way to test applications that use the Proximity APIs is with real devices, but there’s also a third-party tool called Proximity Tapper available on CodePlex that can be used to simulate the connection between different emulators (since Visual Studio is able to run only one specific emulator at a time, you’ll have to use different emulator versions, for example a WVGA and a WXGA one).
Exchanging Messages
A common scenario when working with NFC is the exchange of messages, which represents a small amount of data. There are some standard messages that Windows Phone is able to manage automatically (for example, when you receive a URI or a contact), and some custom messages which can be managed only by third-party apps.
The first step, as with every other sensor we’ve seen so far, is to use the GetDefault() method of the ProximityDevice class to get access to the proximity sensor. In this case, we also need to check if the sensor reference is null before moving on, since some devices don’t support NFC.
Every message is identified by a specific keyword. The Windows Phone APIs natively support three message types—text, URI, and binary. Let’s see how to manage them.
Text Messages
Publishing a text message is easy. We use the PublishMessage() method of the ProximityDevice class, which requires the message type and the content as parameters. In the following sample, you can see how we send a text message, identified by the Windows.SampleMessage keyword.
private void OnSendMessageClicked(object sender, RoutedEventArgs e)
{
    ProximityDevice device = ProximityDevice.GetDefault();

    if (device != null)
    {
        device.PublishMessage("Windows.SampleMessage", "Sample message", MessageSent);
    }
}

private void MessageSent(ProximityDevice sender, long messageId)
{
    MessageBox.Show("The message has been sent");
    sender.StopPublishingMessage(messageId);
}
As you can see, the PublishMessage() method accepts a third, optional parameter, which is an event that is raised when the message has been received by the other device. This event can be useful, as shown in the previous sample, to stop sending the message once it has been received by calling the StopPublishingMessage() method on the ProximityDevice object. You need to set the message ID, which is passed as a parameter of the method.
The phone receiving the message should instead call the SubscribeForMessage() method. Unlike the publishing method, this method is the same regardless of the data we expect. The difference is that, according to the message, we can use some specific properties to parse it and extract the information we need.
In the following sample you can see how it’s easy to extract the message content thanks to the DataAsString property of the ProximityMessage class:
private void OnReadMessageClicked(object sender, RoutedEventArgs e)
{
    ProximityDevice device = ProximityDevice.GetDefault();

    if (device != null)
    {
        device.SubscribeForMessage("Windows.SampleMessage", messageReceived);
    }
}

private void messageReceived(ProximityDevice sender, ProximityMessage message)
{
    Dispatcher.BeginInvoke(() =>
                                {
                                    MessageBox.Show(message.DataAsString);
                                });
    sender.StopSubscribingForMessage(message.SubscriptionId);
}
This code is not very different from the code used to send the message; the SubscribeForMessage() method requires the message type and the event handler that is invoked when the message has been received.
The message is received thanks to the ProximityMessage object that is returned as a parameter. In this case, since it’s a text message, we can extract the content using the DataAsString property. Note that again in this situation we cancel the subscription by using the StopSubscribingForMessage() method so that the application won’t listen anymore for the incoming message.
URI
Sending URIs works in a similar way, except that we need to use the PublishUriMessage() method that accepts the Uri to send as a parameter. In this case, we don’t need to set the message type since it’s implicit.
private void OnPublishUriClicked(object sender, RoutedEventArgs e)
{
    ProximityDevice device = ProximityDevice.GetDefault();
    if (device != null)
    {
        device.PublishUriMessage(new Uri("http://wp.qmatteoq.com"));
    }
}
The difference is that Uri messages are directly supported by Windows Phone, so you’ll be able to exchange them without using a receiver application. The operating system, once it has received the Uri, will simply ask the user if he or she wants to open the browser to see it.
However, if you still want to manage Uris in your application, you can subscribe to receive them. In this case, you’ll have to listen for the incoming WindowsUri message. In addition, you’ll need some more code to extract it since it’s not treated as a string; you’ll need to work directly with a byte array, as in the following sample:
private void OnReceiveUriClicked(object o, RoutedEventArgs e)
{
    ProximityDevice device = ProximityDevice.GetDefault();
    if (device != null)
    {
        device.SubscribeForMessage("WindowsUri", messageReceived);
    }
}

private void messageReceived(ProximityDevice sender, ProximityMessage message)
{
    byte[] array = message.Data.ToArray();
    string uri = Encoding.Unicode.GetString(array, 0, array.Length);
    Dispatcher.BeginInvoke(() =>
    {
        MessageBox.Show(uri);
    });
}
NDEF Messages
NDEF (NFC Data Exchange Format) is a standard protocol used to define NFC messages that can be used to exchange different data types across different platforms. Some common scenarios are exchanging geolocation data, mail sending, and social network sharing.
NDEF isn’t natively supported by Windows Phone APIs. To avoid requiring developers to manually create the binary data needed to compose a message, a developer named Andreas Jakl has created a library called NDEF Library For Proximity API, which is available on CodePlex and can be easily installed using NuGet.
This library features many classes that encapsulate the needed logic for the most common messages, like NdefGeoRecord for sharing geolocation coordinates, NdefLaunchAppRecord to open another Windows Phone application, and NdefTelRecord to start a phone call to a specific number. You can see a complete list of the supported records on the official website.
In the following sample, you’ll see how to send a message that contains an NdefSmsRecord which can be used to create a new SMS message with predefined text:
private void OnSendNdefMessageClicked(object sender, RoutedEventArgs e)
{
    ProximityDevice device = ProximityDevice.GetDefault();
    if (device != null)
    {
        NdefSmsRecord record = new NdefSmsRecord
                                    {
                                        SmsNumber = "0123456789",
                                        SmsBody = "This is the text"
                                    };

        NdefMessage message = new NdefMessage
                                    {
                                        record
                                    };

        device.PublishBinaryMessage("NDEF", message.ToByteArray().AsBuffer());
    }
}
The first step is to create the record and set the needed properties. In this sample, we need to set the SmsNumber (the phone number that will receive the message) and SmsBody (the message’s text) properties.
Next, we need to encapsulate the record into a new message, which is identified by the NdefMessage class. In the end, we can send it; in this scenario we need to use the PublishBinaryMessage() method of the ProximityDevice class, since it’s not a standard message but a binary one. As you can see, we pass as parameter (other than the message’s type, which is NDEF) the message as a bytes array.
If the message’s type is natively supported by Windows Phone, the device will automatically manage the incoming message. With the previous sample, the operating system will prompt to the user to send a SMS message. Instead, if we want to receive it within an application, we’ll need to do some additional work. Since it’s a binary message, we’ll need to extract the needed information. Fortunately, the NDEF Library for Proximity API will help us, as you can see in the following sample:
private void OnReceiveNdefMessage(object sender, RoutedEventArgs e)
{
    ProximityDevice device = ProximityDevice.GetDefault();
    if (device != null)
    {
        device.SubscribeForMessage("NDEF", NdefMessageReceived);
    }
}

private void NdefMessageReceived(ProximityDevice sender, ProximityMessage message)
{
    NdefMessage receivedMessage = NdefMessage.FromByteArray(message.Data.ToArray());
    foreach (NdefRecord record in receivedMessage)
    {
        if (record.CheckSpecializedType(true) == typeof(NdefSmsRecord
        {
            NdefSmsRecord ndefSmsRecord = new NdefSmsRecord(record);
            Dispatcher.BeginInvoke(() =>
            {
                MessageBox.Show(ndefSmsRecord.SmsBody);
            });
        }
    }
}
We need to subscribe for incoming NDEF messages. When we receive the message, we are able to convert the binary data (which is available in the Data property of the ProximityMessage class) into a NdefMessage again, thanks to the FromByteArray() method.
An NdefMessage object can contain more than one record, so we need to iterate it and extract every NdefRecord object that is stored. In the previous sample, since we expect to only get an NdefSmsRecord, we manage only this scenario. The task is accomplished by using the CheckSpecializedType() method on the record, which returns its data type. We manage it only if it’s the type we’re expecting. We are able to get the original record simply by creating a new NdefSmsRecord object and passing, as a parameter, the NdefRecord object stored in the message.
Once we have it, we are able to access all its properties. In the previous sample, we show the user the body of the SMS message.
Writing Messages to a Tag
As mentioned previously, NFC can be used with passive devices, like tags and stickers. Windows Phone devices are able to write data to NFC tags simply by adding the :WriteTag suffix to the message’s type when publishing a message.
In the following code you can see how to adapt the previous sample to write the record into a tag instead of sending it to another device:
private void OnSendNdefMessageClicked(object sender, RoutedEventArgs e)
{
    ProximityDevice device = ProximityDevice.GetDefault();
    if (device != null)
    {
        NdefSmsRecord record = new NdefSmsRecord
                                    {
                                        SmsNumber = "0123456789",
                                        SmsBody = "This is the text"
                                    };

        NdefMessage message = new NdefMessage
                                    {
                                        record
                                    };

        device.PublishBinaryMessage("NDEF:WriteTag", message.ToByteArray().AsBuffer());
    }
}
Creating a Communication Channel Using NFC
As previously mentioned, NFC can be used only to exchange small amounts of data—it can’t be used to maintain a stable communication channel. The best technology to achieve this result is Bluetooth. However, we’re able to use NFC as a shortcut to establish a Bluetooth channel between two devices that have the same installed application.
Note: In this case we also need to enable the ID_CAP_NETWORKING option in the manifest file.
The starting point is the PeerFinder class, which can be used (on both devices) to start the connection and look for another device to pair with. Using it is quite simple: you have to subscribe to the TriggeredConnectionStateChanged event that is triggered when the connection status changes, and start the pairing process by calling the Start() method.
private async void OnConnectToPeerClicked(object sender, RoutedEventArgs e)
{
    PeerFinder.TriggeredConnectionStateChanged += PeerFinder_TriggeredConnectionStateChanged;
    PeerFinder.Start();
}
You’ll need to use the same code on both devices. However, there’s a work-around to automatically execute it in case the app is opened by a pairing request. In fact, when you execute the previous code and connect the two devices together, Windows Phone will automatically intercept the incoming message and will prompt the user to open the required application. When this happens, the application is opened with the following special URI:
MainPage.xaml?ms_nfp_launchargs=Windows.Networking.Proximity.PeerFinder: StreamSocket
By using the OnNavigatedTo event on the main page we are able to intercept this special URI and automatically start the pairing process, as shown in the following sample:
protected override void OnNavigatedTo(NavigationEventArgs e)
{
    if (NavigationContext.QueryString.ContainsKey("ms_nfp_launchargs") &&
        NavigationContext.QueryString["ms_nfp_launchargs"] ==
        "Windows.Networking.Proximity.PeerFinder:StreamSocket")
    {
        PeerFinder.TriggeredConnectionStateChanged += PeerFinder_TriggeredConnectionStateChanged;
        PeerFinder.Start();
    }
}
The TriggeredConnectionStateChanged event can be used to manage the actual connection status. The most important state is Completed, which is triggered when the connection has been successfully established and you can start to exchange data.
In the following sample, you can see that once the connection is established, we store the channel (identified by a StreamSocket object) in another variable to be used later for further communications.
private StreamSocket socket;

void PeerFinder_TriggeredConnectionStateChanged(object sender, TriggeredConnectionStateChangedEventArgs args)
{
    switch (args.State)
    {
        case TriggeredConnectState.Completed:
            socket = args.Socket;
            StartListeningForMessages();
            PeerFinder.Stop();
            break;
    }
}
Other than saving a reference to the channel, we start listening for incoming messages (we’ll see how in a moment) and we call the Stop() method of the PeerFinder class. Since the channel has been created, we can stop the pairing process.
Listening for Incoming Messages
The listening process works in a way similar to polling; until the channel is opened, we keep asking the other device if there’s a new message. In the following sample, we exchange text messages by using the DataReader and DataWriter classes we learned to use earlier in this series in the context of storing data in the local storage.
private bool listening;

private async void StartListeningForMessages()
{
    if (socket != null)
    {
        if (!listening)
        {
            listening = true;
            while (listening)
            {
                var message = await GetMessage();
                if (listening)
                {
                    if (message != null)
                    {
                        Dispatcher.BeginInvoke(() => MessageBox.Show(message));
                    }
                }
            }
        }
    }
}


private async Task<string> GetMessage()
{
    DataReader dataReader = new DataReader(socket.InputStream);
    uint bytesRead = await dataReader.LoadAsync(sizeof(uint));
    if (bytesRead > 0)
    {
        uint strLength = (uint)dataReader.ReadUInt32();
        bytesRead = await dataReader.LoadAsync(strLength);
        if (bytesRead > 0)
        {
            String message = dataReader.ReadString(strLength);
            return message;
        }
    }

    return string.Empty;
}
While the channel is opened and the listening process is active, we keep calling the GetMessage() method. If there’s an incoming message in the channel, we display it to the user. The polling procedure is implemented using a while loop, which is repeated until the isListening variable is set to true.
The GetMessage() method is simply a helper that, by using the DataReader class, is able to get the channel’s data (which is stored as binary in the InputStream property of the StreamSocket class) and convert it into a plain string.
Sending a Message
To send a message, we need to use the DataWriter class to write the data in the OutputStream channel of the StreamSocket object. We have to send two pieces of information: the message size by using the WriteInt32() method, and the message text by using the WriteString() message.
public async Task SendMessage(string message)
{
    if (socket != null)
    {
        DataWriter dataWriter = new DataWriter(socket.OutputStream);

        dataWriter.WriteInt32(message.Length);
        await dataWriter.StoreAsync();

        dataWriter.WriteString(message);
        await dataWriter.StoreAsync();
    }
}
If you want to send a message on the channel, it’s enough to use the SendMessage() method we’ve just defined:
private async void OnSendMessageOnChannelClicked(object sender, RoutedEventArgs e)
{
    await SendMessage(“This is my first message”);
}
Creating a Communication Channel Using Bluetooth
The approach to creating a communication channel using Bluetooth is the same we’ve previously seen. A channel is identified by the StreamSocket class, and we can send and listen for incoming messages exactly in the same way.
What changes is the way we connect to another device. With NFC, the peer-to-peer communication is necessarily made between the two devices that are connected. With Bluetooth, instead, you can virtually connect to any device within your phone’s range.
We’re going to use the PeerFinder class again, but this time, instead of starting the pairing process using the Start() method, we look for all the available peers with the FindAllPeersAsync() method. It returns a collection of PeerInformation objects—each one is a device that can connect with our application.
In the following sample, we simply display the list of available devices to the user, by setting the collection as ItemsSource of a ListBox control:
private async void OnFindNearPeers(object sender, RoutedEventArgs e)
{
    PeerFinder.Start();
    try
    {
        IReadOnlyList<PeerInformation> peers = await PeerFinder.FindAllPeersAsync();
        PeersList.ItemsSource = peers;
    }
    catch (Exception exc)
    {
        if ((uint)exc.HResult == 0x8007048F)
        {
            MessageBox.Show(“Bluetooth is turned off”);
        }
    }
}
Notice that we’ve embedded our code into a try/catch statement; in fact, the user may have Bluetooth turned off. While we start looking for other peers, if we get an exception with the error code 0x8008048F, it means that we are in this situation, so we have to properly manage it (for example, by informing the user that he or she needs to turn it on to use the application).
After the user has chosen which device he or she wants to connect with, we need to call the ConnectAsync() method of the PeerFinder class, passing the PeerInformation object that represents the device as a parameter. Next, exactly like we did for the NFC communication, we start listening for messages and stop looking for other peers using the Stop() method, as shown in the following sample:
private async void PeerList_OnSelectionChanged(object sender, SelectionChangedEventArgs e)
{
    PeerInformation peer = PeerList.SelectedItem as PeerInformation;
    socket = await PeerFinder.ConnectAsync(peer);
    StartListeningForMessages();
    PeerFinder.Stop();
}
The StartListeningForMessage() method is the same method we used to deal with NFC communication.
On the other side (the phone that the user has selected to interact with), if we want to accept the incoming communication request from another phone, we need to again use the Start() method of the PeerFinder class and subscribe to the ConnectionRequested event, which is triggered when another device has requested to establish a connection.
In the event handler we simply have to call the ConnectAsync() method of the PeerFinder class like we did with the phone that started the connection request. We’ll get a reference to the device that sent the request in the method’s parameters.
private void OnListenToConnectionClicked(object sender, RoutedEventArgs e)
{
    PeerFinder.ConnectionRequested += PeerFinder_ConnectionRequested;
    PeerFinder.Start();
}

async void PeerFinder_ConnectionRequested(object sender, ConnectionRequestedEventArgs args)
{
    socket = await PeerFinder.ConnectAsync(args.PeerInformation);
    StartListeningForMessages();
    PeerFinder.Stop();
}
Conclusion
In this article we’ve seen how to interact with the hardware features that every Windows Phone device has. Specifically:
- We’ve seen how to interact with the geolocation services, retrieve the user’s location, and interact with the
Mapcontrol. - We’ve learned how to use the motion sensors to determine the device’s position in space. It’s a feature particularly useful with games, since many of them are easier to control with the accelerometer rather than with virtual controls.
- We’ve briefly covered the hardware APIs that are useful for obtaining information about the device on which the app is running.
- We’ve discussed Proximity APIs, which have been introduced in the Windows Runtime to connect two devices without requiring an Internet connection. Specifically, we’ve talked about two technologies: NFC and Bluetooth.

Comments