In this tutorial, I'll be teaching you about the event model of Windows Phone. More importantly, we'll learn about navigation and how we can add it to an application to allow users to navigate between pages of a Windows Phone application.
1. Events
Events in Windows Phone are simply actions that are triggered after a specific condition has been satisfied. This action is normally initiated by user interaction. A good example of an event is the user tapping a button in a Windows Phone application. The user would normally expect something to happen after tapping a button. Right?
Controls can have many events attached to them. On Windows Phone, we can specify a code block to be executed when a particular event occurs. This process is called event handling. We can also create custom events, but that is beyond the scope of this tutorial. Instead, we'll explore some of the built-in events that some Windows Phone controls respond to.
2. Event Handling
Event handling is fairly easy on Windows Phone. We even have the possibility to define even handlers in XAML, similar to how we define properties. Let's see how this works.
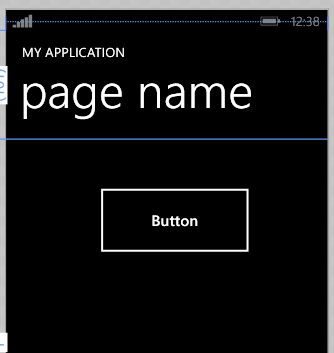
Start by creating a new Windows Phone C# project like we've done in the previous tutorials. In your new project, drag a Button control from the ToolBox onto the blank space in the Visual Studio design view. You should have something that looks like what I have below.
To demonstrate how events work, we are going to have our application display a simple Hello World popup message when the user taps the button we just added. A Button control has a Click event, which we can subscribe to and handle.
To see the events a control possesses, select the control in the design view and go to the Visual Studio properties window at the bottom right. Click the events button in the top right of the window to show the control's events.
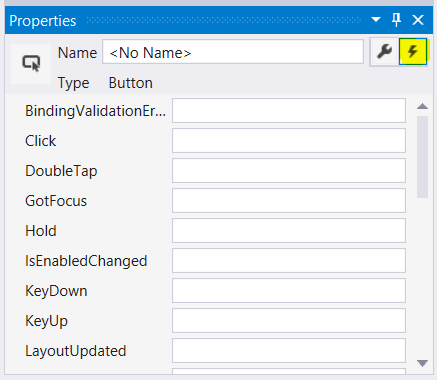
You should see a list of events for the selected control. These events are the built-in events of the currently selected control. In the text field on the right of each event, we can specify the name of a method that is invoked when the event occurs. That method is the event handler.
In other words, the event handler is invoked when the event occurs. The event that interests us at this point is the Click
event. Double-click the text field on the right of the event name This should automatically bring you to the MainPage.cs class that is coupled with our MainPage.xaml page. You should also see an auto-generated method, which represents the event handler, named Button_Click or something similar.
Remember that for every XAML page we create in Windows Phone is coupled with a C# page which contains the code for the controls created in the XAML page. This C# code is normally referred to as code behind.
Now, let's go ahead and implement the code to display a message saying "Hello World". Add the following code snippet to the Button_Click method as shown below.
private void Button_Click(object sender, RoutedEventArgs e) {
    MessageBox.Show("Hello World");
}
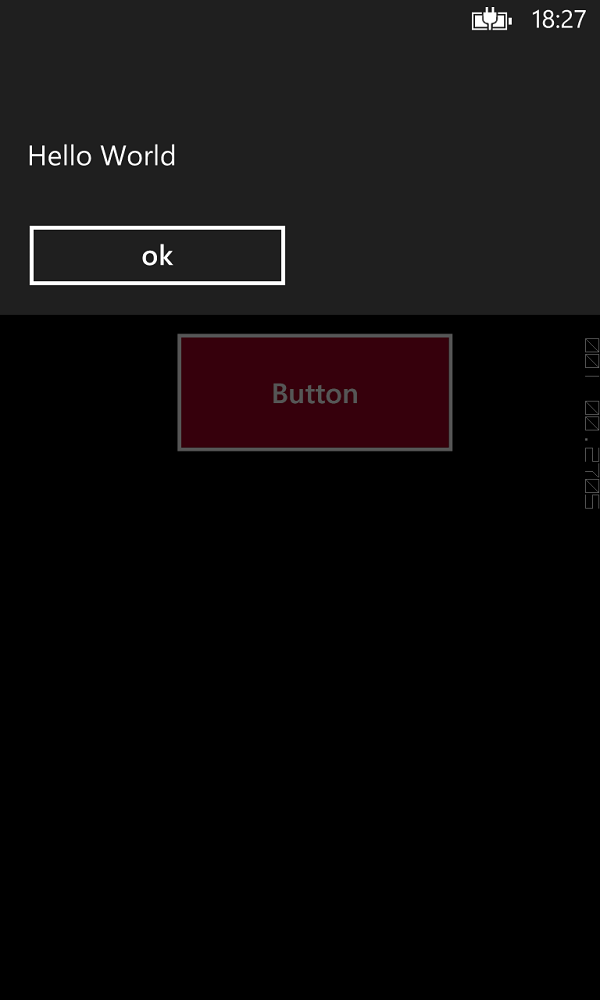
This is all we need to do to implement the click event handler for our button. Before we test our application, let me explain what the above code snippet does. The MessageBox class is part of the .NET library and allows us to show a popup message. By calling the Show method on the MessageBox class and passing in a string, "Hello World", a popup is shown to the user. Run the application and tap the button to see the result of our work.
That was easy, wasn't it? Events are an integral part of a Windows Phone application and you'll find yourself using them frequently when developing Windows Phone applications.
3. Navigation
Now that we know about events and event handling, it's time to learn about another important aspect of Windows Phone, navigation. Most Windows Phone applications have more than one page and we need to implement a way to navigate between these pages.
Windows Phone takes a very simple approach to navigation, allowing us to navigate from one page to another with very little work. The way navigation works on Windows Phone is very similar to how you navigate web pages. We make use of a URI or Universal Resource Identifier, which is very similar to a URL in web development. With URIs, you can even pass parameters, just like you can on the web. We won't cover this aspect of navigation in this tutorial though.
Let's explore navigation by expanding our current application. We first need to create a new page to which we can navigate. Right-click your project's name in the Solution Explorer and select Add > Add Item from the menu. Create a page named Page1.xaml.
.png)
.png)
Add a TextBlock control to the new page and set its text to "This Is a New
Page" by changing the Text property.
The goal is to navigate from the first page, MainPage.xaml, to the new page, Page1.xaml. To accomplish this, we need to edit the event handler of the button on the first page. Instead of displaying a popup message, we navigate to the page we just created. Open MainPage.cs and locate the event handler we created a moment ago. Replace its implementation with the one shown below.
private void Button_Click(object sender, RoutedEventArgs e) {
    NavigationService.Navigate(new Uri("/Page1.xaml", UriKind.Relative));
}
In the even handler, we call the Navigate method on the NavigationService
class, passing in an instance of the Uri class. The NavigationService class is accessible from every Windows Phone page, allowing us to navigate to another page.
The Navigate method takes a Uri instance as a parameter. We create the Uri object by passing two parameters. The first parameter is the relative path to the page we
want to navigate to, /Page1.xaml in our example. It's important to add the leading forward slash when navigating to a relative path. The second parameter we pass is the
type of Uri we are passing, UriKind.Relative in this example. It indicates that first parameter is a relative path.
We don't need to create a back button, because every Windows Phone device has a physical back button that takes the user to the previous page. However, we could override the default behavior of the back button if we really wanted to.
Run your application one more time and tap the button on the first page to navigate to the second page. If you've followed the steps in this tutorial, the application should take you to the next page as shown below.

As you can see, it's very easy to navigate between pages in a Windows Phone application. I encourage you to explore the documentation to learn more about Windows Phone events and navigation.
Conclusion
In this tutorial, you learned the basics of Windows Phone events and how to handle events. You also learned about navigation on Windows Phone.
In the next tutorial, I will be showing you how to add media elements, such as audio and images, to a Windows Phone application.

Comments