As I mentioned in my previous Ruby on Rails tutorial, Unobtrusive JavaScript (UJS) is one of the coolest new features in Rails 3. UJS allows Rails-generated code to be much cleaner, helps separate your JavaScript logic from your HTML layouts, and uncouples Rails from the Prototype JavaScript library. In this tutorial, we're going to look at these features and learn how to use them in a simple Rails 3 application.
Background: What is Unobtrusive JavaScript?
To start off, what exactly is UJS? Simply, UJS is JavaScript that is separated from your HTML markup. The easiest way to describe UJS is with an example. Take an onclick event handler; we could add it obtrusively:
<a href='#' onclick='alert("Inline Javscript")'>Link</a>
Or we could add it unobtrusively by attaching the event to the link (using jQuery in this example):
<a href='#'>Link</a>
<script>
$('a').bind('click', function() {
    alert('Unobtrusive!');
}
</script>
As mentioned in my introduction, this second method has a variety of benefits, including easier debugging and cleaner code.
"Rails 3, on the other hand, is JavaScript framework agnostic. In other words, you can use your JavaScript framework of choice, provided a Rails UJS implementation exists for that framework."
Up until version 3, Ruby on Rails generated obtrusive JavaScript. The resulting code wasn't clean, but even worse, it was tightly coupled to the Prototype JavaScript framework. This meant that unless you created a plugin or hacked Rails, you had to use the Prototype library with Rail's JavaScript helper methods.
Rails 3, on the other hand, is JavaScript framework agnostic. In other words, you can use your JavaScript framework of choice, provided a Rails UJS implementation exists for that framework. The current UJS implementations include the following:
Rails 3 now implements all of its JavaScript Helper functionality (AJAX submits, confirmation prompts, etc) unobtrusively by adding the following HTML 5 custom attributes to HTML elements.
- data-method - the REST method to use in form submissions.
- data-confirm - the confirmation message to use before performing some action.
- data-remote - if true, submit via AJAX.
- data-disable-with - disables form elements during a form submission
For example, this link tag
<td><a href="/posts/2" class="delete_post" data-confirm="Are you sure?" data-method="delete" data-remote="true" rel="nofollow">Destroy</a></td>
would send an AJAX delete request after asking the user "Are you sure?."
You can imagine how much harder to read that would be if all that JavaScript was inline.
Now that we've reviewed UJS and how Rails implements UJS, let's set up a project and look at some specific applications. We'll be using the jQuery library and UJS implementation in this tutorial.
Step 1: Setting up the Project
Since we're creating a new project from scratch, the first thing we need to do is create the project by typing the following:
rails new blog --skip-prototype
Notice that I'm instructing Rails to skip the prototype JavaScript file, since I'm going to be using the jQuery library.
Let's start the server just to make sure everything appears to be working.
And, voila!
Now that we've set up our project, we need to add jQuery and the jQuery UJS to our project. You are free to organize your JavaScript however you want, but the Rails convention for structuring your JavaScript files is as follows (all these files go in public/javascripts):
- framework JavaScript file (jquery.js, prototype.js, or mootools.js)
- rails.js - the code implementing rails UJS (for whatever framework you've chosen)
- application.js - your application JavaScript
If you haven't already, download jquery.js (or refer to a CDN) and rails.js and include them in your public/javascripts directory.
The last thing we need to do to get up and running is to actually tell Rails to include these js files on each of our pages. To do this, open application.rb in your config directory and add the following line
config.action_view.JavaScript_expansions[:defaults] = %w(jquery rails application)
This configuration item tells Rails to include the three JavaScript files mentioned above by default.
Alternatively, you could grab jQuery from a CDN (i.e. http://ajax.googleapis.com/ajax/libs/jquery/1.4.2/jquery.min.js) by manually included a script tag pointing to the correct location. If you do this, be sure to remove 'jquery' from the JavaScript_expansions configuration item.
Step 2: Generating Some Code
To demonstrate the rails UJS functionality, we're first going to have to have some code to work with. For this demo we're just going to have a simple Post object. Let's generate that now
rails generate scaffold Post name:string title:string content:text
And then let's migrate our database to create the posts table.
rake db:migrate
Ok, we're good to go! If we navigate to http://localhost:3000/posts/new, we should see a form to create a new Post.
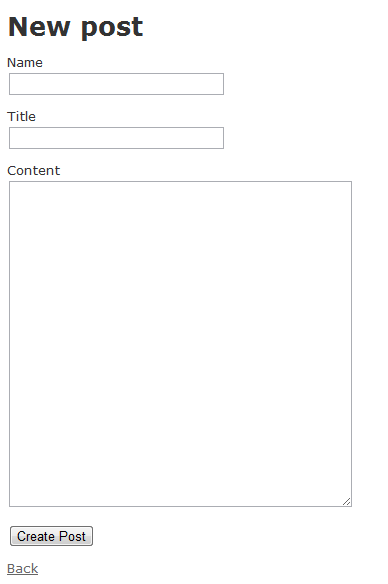
Ok, it's all working! Now let's dig in and see how to use the UJS and AJAX functionality baked into Rails.
Step 3: Adding AJAX
Now that all the required JavaScript files are being included, we can actually start using Rails 3 to implement some AJAX functionality. Although you can write all of the custom JavaScript that you want, Rails provides some nice built-in methods that you can use to easily perform AJAX calls and other JavaScript actions.
Let's look at a couple of commonly used rails helpers and the JavaScript they generate
AJAX Form Submission and Javascript ERB Files
If we look at our Posts form, we can see that whenever we create or edit a Post, the form is manually submitted and then we're redirected to a read-only view of that Post. What if we wanted to submit that form via AJAX instead of using a manual submission?
Rails 3 makes it easy to convert any form to AJAX. First, open your _form.html.erb partial in app/views/posts, and change the first line from:
<%= form_for(@post) do |f| %>
to
<%= form_for(@post, :remote => true) do |f| %>
Prior to Rails 3, adding :remote => true would have generated a bunch of inline JavaScript inside the form tag, but with Rails 3 UJS, the only change is the addition of an HTML 5 custom attribute. Can you spot it?
<form accept-charset="UTF-8" action="/posts" class="new_post" data-remote="true" id="new_post" method="post">
The attribute is data-remote="true", and the Rails UJS JavaScript binds to any forms with that attribute and submits them via AJAX instead of a traditional POST.
That's all that's needed to do the AJAX submit, but how do we perform a callback after the AJAX call returns?
The most common way of handling a return from an AJAX call is through the use of JavaScript ERB files. These work exactly like your normal ERB files, but contain JavaScript code instead of HTML. Let's try it out.
The first thing we need to do is to tell our controller how to respond to AJAX requests. In posts_controller.rb (app/controllers) we can tell our controller to respond to an AJAX request by adding
format.js
in each respond_to block that we are going to call via AJAX. For example, we could update the create action to look like this:
def create
    @post = Post.new(params[:post])

    respond_to do |format|
      if @post.save
        format.html { redirect_to(@post, :notice => 'Post created.') }
        format.js
      else
        format.html { render :action => "new" }
        format.js
      end
    end
end
Because we didn't specify any options in the respond_to block, Rails will respond to JavaScript requests by loading a .js ERB with the same name as the controller action (create.js.erb, in this case).
Now that our controller knows how to handle AJAX calls, we need to create our views. For the current example, add create.js.erb in your app/views/posts directory. This file will be rendered and the JavaScript inside will be executed when the call finishes. For now, we'll simply overwrite the form tag with the title and contents of the blog post:
$('body').html("<h1><%= escape_javaScript(@post.title) %></h1>").append("<%= escape_javaScript(@post.content) %>");
Now if we create a new Post we get the following on the screen. Success!

The advantage of this method is that you can intersperse ruby code that you set up in your controller with your JavaScript, making it really easy to manipulate your view with the results of a request.
AJAX Callbacks Using Custom JavaScript Events
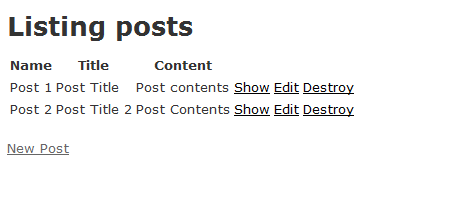
Each Rails UJS implementation also provides another way to add callbacks to our AJAX calls - custom JavaScript events. Let's look at another example. On our Posts index view (http://localhost:3000/posts/), we can see that each post can be deleted via a delete link.
Let's AJAXify our link by adding :remote=>true and additionally giving it a CSS class so we can easily find this POST using a CSS selector.
<td><%= link_to 'Destroy', post, :confirm => 'Are you sure?', :method => :delete, :remote=>true, :class=>'delete_post' %></td>
Which produces the following output:
<td><a href="/posts/2" class="delete_post" data-confirm="Are you sure?" data-method="delete" rel="nofollow">Destroy</a></td>
Each rails UJS AJAX call provides six custom events that can be attached to:
- ajax:before - right before ajax call
- ajax:loading - before ajax call, but after XmlHttpRequest object is created)
- ajax:success - successful ajax call
- ajax:failure - failed ajax call
- ajax:complete - completion of ajax call (after ajax:success and ajax:failure)
- ajax:after - after ajax call is sent (note: not after it returns)
In our case we'll add an event listener to the ajax:success event on our delete links, and make the deleted post fade out rather than reloading the page. We'll add the following JavaScript to our application.js file.
	$('.delete_post').bind('ajax:success', function() {
		$(this).closest('tr').fadeOut();
	});
We'll also need to tell our posts_controller not to try to render a view after it finishes deleting the post.
  def destroy
    @post = Post.find(params[:id])
    @post.destroy

    respond_to do |format|
      format.html { redirect_to(posts_url) }
      format.js   { render :nothing => true }
    end
Now when we delete a Post it will gradually fade out.
Conclusion
Well, there you have it. Now you know how to make AJAX calls using Rails 3 UJS. While the examples explained were simple, you can use these same techniques to add all kinds of interactivity to your project. I hope you'll agree that it's a big improvement over previous versions, and that you'll try it out on your next Rails project.
What techniques do you use when implementing AJAX in Rails?

Comments