Editors Note: This article was updated to remove references to deprecated components specifically polymer-ajax which has since been replaced by core-ajax. Thanks to Rob Dodson, developer advocate at Google, for the feedback.
Building modern web applications requires a lot of tooling. This includes preprocessors, JavaScript frameworks, testing tools and a whole lot more. And as the complexities of these apps increases, so does the breadth of tooling and services needed to manage them. Wouldn't it be great if some things were simplified?
Web Components aim to solve some of these complexities by providing a unified way to create new elements that encompass rich functionality without the need for all the extra libraries. Web components are comprised of four different specifications (Custom Elements, Templates, Shadow DOM and HTML imports) which are being fleshed out in the W3C.
To bridge the gap and give developers access to this rich functionality now, Google has created the Polymer library which serves as a set of polyfills to bring the promise of Web Components to you today. Let's dive a little deeper into.
What Is Polymer
As I mentioned, the Polymer library is a set of polyfills that help you create Web Components on all major modern browsers. It provides the framework for defining, creating and rendering complex custom elements in a simplistic fashion similar to the tags you've grown up with. What I mean by this, is that it helps to simplify the way we use complex components by:
- Encapsulating much of the complex code and structure
- Allowing developers to use a simple-to-use tag style naming convention
- Providing a suite of predefined UI elements to leverage and extend
But the important thing to remember, is that the framework itself is developed based on the direction of the individual specifications being vetted by the W3C, thus providing a foundation that should evolve with the direction of the main standards body.
What this library can do, is allow us to create reusable components that work as true DOM elements while helping to minimize our reliance on JavaScript to do complex DOM manipulation to render rich UI results.
Here's a quick example from the Polymer site. Say I wanted to render a working clock on my page. That would typically entail some heavy duty JavaScript code to do but by using Polymer, I can simply use the following syntax:
<polymer-ui-clock></polymer-ui-clock>
This looks like the HTML tag syntax we've all grown up with and is far easier to implement, read and maintain than some complex JavaScript code. And the end result looks like this:
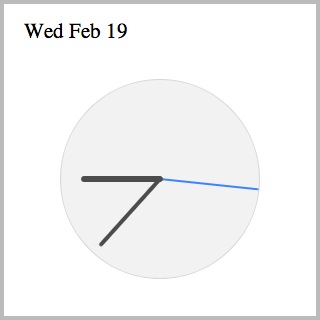
And since it's a normal element in the DOM, you can style it as well using CSS like this:
      polymer-ui-clock {
        width: 320px;
        height: 320px;
        display: inline-block;
        background: url("../assets/glass.png") no-repeat;
        background-size: cover;
        border: 4px solid rgba(32, 32, 32, 0.3);
      }
It's certainly not the prettiest clock, but that's not the point. The fact is that you can customize the component to your liking and then reuse it via an easier and more maintainable syntax.
Installing Polymer
There are three ways to install and use Polymer:
- Use the Bower package manager (preferred)
- Use the libraries hosted on CloudFare's cdnjs
- Install from Git
Of the three, the easiest and recommended way is to use Bower because not only is it incredibly easy to do but Bower also manages any dependencies that Polymer might have. This means that if you choose to install a specific UI element which has a dependency on another one, Bower can handle that for you.
Bower is installed as a Node Packaged Module, so you'll need to have Node.js installed. From the command line, type in the following:
npm install -g bower
This should pull Bower from the npm registry and install it so it's globally available to you. From there, subsequent Bower-based installs take the following form:
bower install
At a bare minimum, you're going to want to install Polymer's platform and core components since they provide the foundation for you to create and run your customer elements.
bower install --save Polymer/platform
bower install --save Polymer/polymer
You can shortcut this by typing in:
bower install --save Polymer/platform Polymer/polymer
Polymer also comes with a rich, predefined set of elements that you can begin taking advantage of immediately. They consist of UI and non-UI based elements that provide functionality such as:
- Animation
- Accordions
- Grid layout
- Ajax capabilities
- Menus
- Tabs
And that's only scraping the surface. There's a lot already in there with full source code available to serve as a learning tool, as well as allow you to customize the capabilities to your needs.
You have a choice in how to install these components. You can install everything or only those you want to use. To install everything, you type in:
bower install Polymer/core-elements
bower install Polymer/polymer-ui-elements
This is the kitchen sink approach and when you're starting out learning Polymer, it's probably easiest just to do that, to help you get a feel for what's available.
Once you're more familiar with the framework, you can cherry-pick the individual components you'd like to use and install them like this:
bower install Polymer/polymer-ui-accordion
This is the beauty of using Bower. Every component comes with a bower.json configuration file that outlines its dependencies. So if you were installing the accordion component, looking at the config, we can see that it has dependencies on the main polymer component as well as the selector and collapsible components.
{
  "name": "polymer-ui-accordion",
  "private": true,
  "dependencies": {
    "polymer": "Polymer/polymer#0.2.0",
    "polymer-selector": "Polymer/polymer-selector#0.2.0",
    "polymer-ui-collapsible": "Polymer/polymer-ui-collapsible#0.2.0"
  },
  "version": "0.2.0"
}
The key thing is that you don't have to worry about that because Bower manages that for you. This is why it's the preferred tool for installing Polymer.
Installing via Bower will create a folder called bower_components in your project folder housing all of the stuff Polymer needs.
Making a New Polymer Element
The Polymer site pretty much nails the description of custom elements:
“Custom Elements are the core building blocks of Polymer-based applications. You create applications by assembling custom elements together, either ones provided by Polymer, ones you create yourself, or third-party elements.”
Polymer gives us the ability to create our own custom elements from scratch and even reuse other elements to extend our custom ones. This is done by first creating a template of the custom element. For all intents, this template is a combination of HTML, CSS and JavaScript and includes the functionality that will be available when you use the element. It's based off the WhatWG HTML Templates specification which is meant to provide native support for client-side templating.
Let's look at this simple example of a Polymer template:
<link rel="import" href="../bower_components/polymer/polymer.html">

<polymer-element name="lorem-element" noscript>
  <template>
    <p>Lorem ipsum dolor sit amet, consectetur adipisicing elit, sed do eiusmod tempor incididunt ut labore et dolore magna aliqua. Ut enim ad minim veniam, quis nostrud exercitation ullamco laboris nisi ut aliquip ex ea commodo consequat. Duis aute irure dolor in reprehenderit in voluptate velit esse cillum dolore eu fugiat nulla pariatur. Excepteur sint occaecat cupidatat non proident, sunt in culpa qui officia deserunt mollit anim id est laborum.</p>
  </template>
</polymer-element>
This Element allows you to easily add Lorem Ipsum text into your code by simply using the following tag:
<lorem-element></lorem-element>
The first thing that needs to be included is Polymer core, which is the main API that allows you to define the Custom Elements:
<link rel="import" href="../bower_components/polymer/polymer.html">
The next step is defining the name of the new element using Polymer's polymer-element directive:
<polymer-element name="lorem-element" noscript>
In this case, I've named my new element lorem-element. The name is a required attribute and it must contain a dash (“-”).
From there we use the template directive to wrap the main body tags and code that will make up our new element. For this simple example, I grab Lorem Ipsum text and wrapped it with paragraph tags.
That's it! My custom element is done and I can now use it.
Using Your New Polymer Element
Keep in mind that this component will be imported into other pages in your web app that may want to leverage it. This is possible because of Polymer's implementation of the HTML Imports specification that allows you to include and reuse HTML documents in other HTML documents.
First, you need to include platform.js which provides the polyfill that mimicks the native APIs:
<script src="bower_components/platform/platform.js"></script>
Next, we need to import our custom element into our web page:
<link rel="import" href="lorem-element.html">
Once you've done this, your new custom element is now available allowing you to do something like this:
<div><lorem-element></lorem-element></div>
You also have the ability to fully style the element as well:
<style>
      div { width: 300px;}
      lorem-element { font: bold 16px cursive;}
</style>
This is a pretty basic example. Let's take it a step further.
Adding More Functionality to Your Element
If you remember, I mentioned how you can leverage existing elements to enhance your custom one. Let's look at an example of this.
Suppose I wanted to have an element that went out to Reddit and grabbed data from one of the subreddits. I could take advantage of Polymer's existing Ajax component by including that in my custom element like this:
<link rel="import" href="../bower_components/polymer/polymer.html">
<link rel="import" href="../bower_components/core-ajax/core-ajax.html">

<polymer-element name="reddit-element">
  <template>
    <core-ajax url="http://www.reddit.com//r/aww/about.json" auto response="{{resp}}"></core-ajax>
    <p>{{resp.data.public_description}}</p>
  </template>
</polymer-element>
Notice that I'm importing the Polymer Ajax component and then dropping it into my template. This now makes it easy to reference my new element which makes the XHR call to pull back the JSON data and fill it into my paragraph tags with the subreddit's public description:
“Things that make you go AWW! Like puppies. And bunnies... and so on... A place for really cute pictures, videos and stories!”
The response is returned and Polymer establishes a two-way data binding that allows me to be able to use the data by wrapping it in double curly braces like this {{resp.data.public_description}}.
This is cool but in most cases, we're not going to hardcode a URL for a specific resource. Let's expand this further by adding attributes to our custom element. Doing this is incredibly simple. First, you need to update the polymer-element directive to reflect the attributes you want for your custom element:
<polymer-element name="reddit-element" attributes="subreddit">
In this case, I want to be able to pass a subreddit to my element and have it pull back data based on that. I can now change the call to polymer-ajax like this:
<core-ajax url="http://www.reddit.com//r/{{subreddit}}/about.json" auto response="{{resp}}"></core-ajax>
Notice how I'm using Polymer's data binding capabilities to dynamically build the URL based on the attribute value of {{subreddit}}. Now, I can update how I reference my custom element to pass in the subreddit that I want:
<reddit-element subreddit="aww"></reddit-element>
The last thing I want to do is ensure there's a default value for my attribute so my code doesn't blow up. I do this by adding the following into my element template:
  <script>
    Polymer('reddit-element', {
      subreddit: "aww"
    });
  </script>
This ensures that I'll always have a default value for my element's public attribute. Here's how the final code looks like:
<link rel="import" href="../bower_components/polymer/polymer.html">
<link rel="import" href="../bower_components/core-ajax/core-ajax.html">

<polymer-element name="reddit-element" attributes="subreddit">
  <template>
    <core-ajax url="http://www.reddit.com//r/{{subreddit}}/about.json" auto response="{{resp}}"></core-ajax>
    <p>{{resp.data.public_description}}</p>
  </template>
  <script>
    Polymer('reddit-element', {
      // These default values are overridden
      // by the user's attribute values.
      subreddit: "aww"
    });
  </script>
</polymer-element>
And there's quite a bit more stuff you can do including adding custom callback handlers, managing events, setting up Mutation Observers to process changes to the DOM and much more.
The Future Is Here
Web Components are going to change the way we build web apps and Polymer is bringing this to us today. You now have the ability to create your own customized and maintainable components that can be catered to the specific needs of your application. These components can be easily shared allowing other teams or the community to easily share and benefit from these encapsulated building blocks.

Comments