I often use the text widget to add custom content to sidebars on the sites I develop. These are useful widgets as they accept both text and HTML, so if you can write HTML, you can use them to add all kinds of content.
However, if my clients will be editing the sidebar and aren't familiar with HTML, it's very easy for them to break things, especially if I've included images or links.
An easy way around this is to replace the widget areas in your theme with a custom post type, using WP_Query to output posts of that custom post type in the sidebar.
You do this in two steps:
- Register a custom post type for your sidebars.
- Create a function to output the content of your sidebars and add that to the
sidebar.phpfile in your theme.
We'll also create some sidebars in the WordPress admin, check how they look, and add some styling for them.
What You'll Need
To work through this tutorial, you'll need:
- a development installation of WordPress
- a code editor
I'm going to create a child theme of Twenty Fifteen to do this, but you can add the code to your own theme, or you might prefer to use a plugin to register the post type and create the function, and then add the function to your theme's sidebar.php file.
Creating a Child Theme
If you're working with your own theme you can skip this part, but if you're starting from scratch the easiest way to try this technique out is by using a child theme. I'm going to create a child of the Twenty Fifteen theme.
In your themes folder in wp-content, create a folder and give it a name relevant to your theme. I'm calling mine tutsplus-sidebar-custom-post-type.
In that folder, create two empty files: style.css and functions.php. Make a copy of the sidebar.php file from Twenty Fifteen in your child theme as well. You'll edit this later and WordPress will use the template file from your child theme to display the sidebar, instead of the one from Twenty Fifteen.
In your new stylesheet, add the following:
/*
Theme Name:     Tuts+ Use a Cusotm Post Type for Sidebar Content
Theme URI:      http://rachelmccollin.co.uk/tutsplus-use-custom-post-type-for-sidebars/
Description:    Theme to support tuts+ tutorial on using a CPT for sidebars. Child theme for the Twenty Fifteen theme.
Author:         Rachel McCollin
Author URI:     http://rachelmccollin.co.uk/
Template:       twentyfifteen
Version:        1.0
*/

@import url("../twentyfifteen/style.css");
You'll need to edit the theme and author details as it's your theme, not mine, but this gives you the idea.
Now activate your new theme for your site, via the Themes screen in the WordPress admin.
Registering the Custom Post Type
The next step is to register the custom post type for sidebars. You do this in your theme's functions file (or if you're creating a plugin for this, create a new file in your plugins folder in wp-content).
Open the functions.php file in your theme and add this code:
function tutsplus_create_sidebar_post_type() {
    $labels = array(
		'name' => __( 'Sidebars' ),
		'singular_name' => __( 'Sidebar' ),
		'add_new' => __( 'New Sidebar' ),
		'add_new_item' => __( 'Add New Sidebar' ),
		'edit_item' => __( 'Edit Sidebar' ),
		'new_item' => __( 'New Sidebar' ),
		'view_item' => __( 'View Sidebar' ),
		'search_items' => __( 'Search Sidebars' ),
		'not_found' =>  __( 'No Sidebars Found' ),
		'not_found_in_trash' => __( 'No Sidebars found in Trash' ),
	);
	$args = array(
		'labels' => $labels,
		'has_archive' => false,
		'public' => true,
		'hierarchical' => false,
		'supports' => array(
			'title',
			'editor',
			'excerpt',
			'custom-fields',
			'thumbnail',
			'page-attributes'
		),
	);
	register_post_type( 'sidebar_post', $args );
}
add_action( 'init', 'tutsplus_create_sidebar_post_type' );
This registers the sidebar_post custom post type. Note that I've deliberately called it sidebar_post and not sidebar. This is because a lot of themes already use the .sidebar class for their sidebar, which could lead to a conflict with the CSS classes output by the post_class() template tag when we come to create a loop later on.
Now if you refresh your admin screens you'll see the custom post type displayed:

Now add some sidebars in the same way as you would add a normal post. Here are mine:

One of my sidebars consists of nothing but a featured image. This is deliberate, as the loop I'll create shortly outputs featured images.
Creating a Function to Display Sidebars
At the moment your sidebars won't show up in your site because you haven't added them to your theme. So the next step is to write a function that uses WP_Query to output the sidebar posts.
Creating the Function
Again in your functions file, add the following:
function tutsplus_sidebars() {

	$args = array(
		'post_type' => 'sidebar_post'
	);

	$query = new WP_query ( $args );
	if ( $query->have_posts() ) { ?>

		<?php while ( $query->have_posts() ) : $query->the_post(); /* start the loop */ ?>

		<aside id="post-<?php the_ID(); ?>" <?php post_class( 'sidebar-post' ); ?>>
			<h3 class="sidebar-title"><a href="<?php the_permalink(); ?>" title="<?php printf( esc_attr__( 'Permalink to %s', 'compass' ), the_title_attribute( 'echo=0' ) ); ?>" rel="bookmark"><?php the_title(); ?></a></h3>

			<?php if ( has_post_thumbnail() ) { ?>
				<a href="<?php the_permalink(); ?>">
					<?php the_post_thumbnail( 'medium', array(
						'class' => 'aligncenter',
						'alt'	=> trim(strip_tags( $wp_postmeta->_wp_attachment_image_alt ))
					) ); ?>
				</a>
			<?php } ?>

			<section class="sidebar-content">
				<?php the_content(); ?>
			</section><!-- .entry-content -->

		</aside>

		<?php endwhile; /* end the loop*/ ?>

		<?php rewind_posts();
	}
}
Let's take a look through this code to identify what it does:
- Firstly, it creates a function called
tutsplus_sidebars(), which we'll later add to thesidebar.phpfile. - Inside that function, it defines the arguments for
WP_Query, namely that the post type issidebar_post. - It checks that the query returns posts and if so, starts a loop.
- It opens an
asideelement usingthe_ID()andpost_class()to generate an ID and classes in CSS. - It adds an
h3element with the post title in it. - It checks if the post has a featured image and if so, outputs it.
- It outputs the content of the post inside a
sectionelement. - It closes the
asideelement, ends the loop and usesrewind_posts()to reset the query.
Now save your functions file.
Adding the Function to the Sidebar Template File
The function you've just written isn't attached to any hooks so WordPress has no way of running it. Instead, you need to call it in your sidebar.php file.
Open the sidebar.php file in your theme. If you're working with a child of the Twenty Fifteen theme, this will be the copy you made earlier.
If you want your sidebar to consist just of these sidebar posts and no widgets, delete any code to output widgets. If you want to keep widgets, leave that in.
In my case, I'm going to delete the widgets from the Twenty Fifteen sidebar file, so I'm deleting these lines:
<?php if ( is_active_sidebar( 'sidebar-1' ) ) : ?>
    <div id="widget-area" class="widget-area" role="complementary">
		<?php dynamic_sidebar( 'sidebar-1' ); ?>
	</div><!-- .widget-area -->
<?php endif; ?>
Now add your function to output the sidebars. In Twenty Fifteen I'm adding it at the very end of the sidebar.php file, after the endif; line. In your theme you can add it wherever you want the sidebars output:
<?php tutsplus_sidebars(); ?>
Now take a look at your site. The sidebars will be displayed:

They still need some styling, which we'll come to shortly. But first let's tidy up the widget areas.
Unregistering the Widget Area
If you're working with a child theme and you don't want to use widgets in your sidebar at all, it will prevent confusion if you remove the widget areas in your child theme. This means they won't show up in the Widgets admin screen. If you leave a widget area registered, users may add widgets to it and be puzzled when they don't show up on the site.
If you're working with your own theme, all you need to do is delete the code that registered those widgets in the first place (or not add any widget areas to start with). But if you're using a child theme you can't edit the parent theme, so you'll need to use the unregister_sidebar() function to remove the widget area(s) in your sidebar.
In your child theme's functions.php file, add this:
function tutsplus_unregister_sidebar_widget_area() {
    unregister_sidebar( 'sidebar-1' );
}
add_action( 'widgets_init', 'tutsplus_unregister_sidebar_widget_area', 15 );
This unregisters the sidebar-1 widget area, which is the ID of the widget area I removed form the sidebar.php file. Note that when attaching the function to the widgets_init action hook, I've added a priority of 15 to ensure that this function is run after the one registering the sidebar in the first place, which has the default priority of 10.
Now my Widgets admin screen shows no widget areas:

Styling the Sidebars
At the moment my sidebars don't align nicely with the other sidebar content as styled by the Twenty Fifteen stylesheet. If you're using your own theme you might not have this problem, or may have different problems that you need to fix with styling.
To fix the problem with Twenty Fifteen, you just need to add one line of CSS. Open your child theme's stylesheet and add this:
.sidebar-post {
    margin: 0 20%;
}
Now save your stylesheet and view your site again:

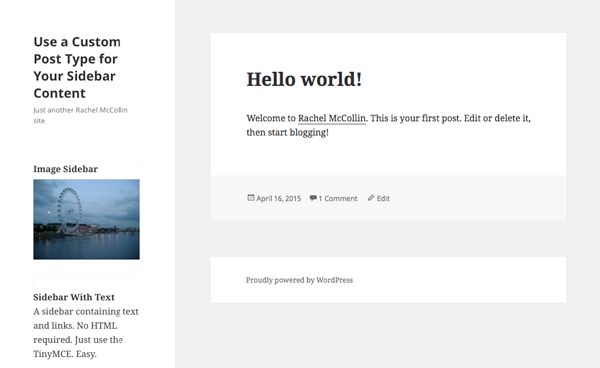
That's better! Now the sidebars are displaying correctly.
Summary
Using a custom post type for your sidebar content can make life much easier if the people editing the site aren't experienced with code. Using posts in this way means they can use the normal WordPress admin screens to create sidebars and then output them on the site.
If you like you can add to this technique by adding extra arguments in WP_Query. Maybe you could create a taxonomy for your sidebar posts and output posts by taxonomy, or output different content (e.g. including or omitting the post title or featured image) depending on the taxonomy (or even better, post metadata). Or you could add an argument for posts to be sorted by menu_order and add that when registering your post type.

Comments