Welcome to the third part in our series on database driven Titanium Mobile development. This tutorial will continue to build on the principles introduced in earlier posts, but we will be altering our app design in one very significant way. Instead of using a TableView object to display a custom interface, we are going to switch to using a WebView object. The reason for this is that the WebView object will allow us to control our interface using CSS and HTML, and TableView will not. For those of you coming from a web development background, you should feel right at home with this approach.
Recap
The first part of this series laid the foundation for a database driven application. The second part extended the functionality by creating the ability to read a remote database and insert values into our tables. This tutorial will utilize the source code from the first two parts in this series.
Step 1: Setup the Application
Open Titanium Developer and create a new project. Choose Mobile and fill in all of the required information. Then click Create Project. Copy the products folder from your previous application and the products.sqlite database into the new resources directory. Download jQuery and place it into the resources directory as well. Also, create a new folder and name it images. Now you should be ready to go.
Step 2: Stripping app.js
We are going to strip the app.js file down for simplicity sake. Remove everything except where we created the tabGroup. Open the tabGroup and create our first, and only, tab. Here it is:
	var tabGroup = Ti.UI.createTabGroup();

	var main = Ti.UI.createWindow({
	    title:'Product Categories',
		url:'products/product_category.js'
	});

	var tab = Ti.UI.createTab({
	    icon:'images/tabs/KS_nav_ui.png',
	    title:'Products',
	    window:main
	});

	tabGroup.addTab(tab);

	tabGroup.open();
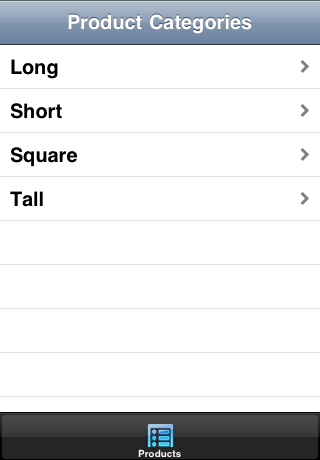
If you launch the application, it should look familiar:
NOTE: If you copied your database from Part 2 of this series, you may wonder why any additionally added values (those added from inside the application) are not there. This is because the active local database is installed on the device. Our local file remains untouched. If you remove the previous application from the simulator and reinstall it, your database will also be back to its original state.
Step 2: Extending The Existing Product Files
The first file that is loaded by our application is "product_category.js". We are going to leave this file completely alone. The next thing we can do to keep things clean is to delete the "product_specs.js" file. We will be using a WebView to replace the function of this file. Open "products.js" and let's get hacking. Aside from the eventListener, there is only one thing we need to change in this file. Remove the path from where we build our array:
	var dataArray = [];

	while (rows.isValidRow())
	{
	    dataArray.push({title:'' + rows.fieldByName('name') + '', hasChild:true});
	    rows.next();
	};

...
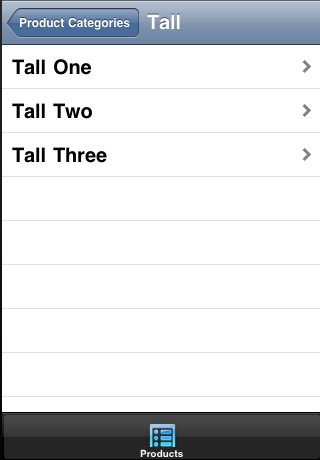
If we run our application at this point, it will likely fail due to us deleting files and changing the above information. However, this is what it would look like:
Our eventListener is now completely in charge of the outcome from the click event. The first thing we need to change is our if statement. Previously, we were checking if there was a path. Since we removed the path, we need to attach something else to check for. We also need to use this to determine which item was selected. Use "title." This is the only value we have that is a unique identifier. Make sure to change this value when we create the window also.
    tableview.addEventListener('click', function(e)
    {
        if (e.rowData.title)
        {
            var win = Ti.UI.createWindow({
            title:e.rowData.title,
            backgroundColor: "#000"
        });

...
Step 3: Adding To the eventListener
Let's think through the next steps. We need to create a WebView and set its path, query the database based on the selected row (we have to do this here because Ti.Database is not accessible from a WebView), create our variables from our database query, and finally pass them to the WebView. One thing to keep in mind is that we cannot pass anything to the WebView until it is created. We will use a setTimeout function to delay our passing of the variables. Here is how the code ends up looking:
    var web = Ti.UI.createWebView({
        url:'productsWebview.html'
    });


    var db2 = Ti.Database.install('../products.sqlite','products');
    var specs = db2.execute('SELECT * FROM Products WHERE name="' + e.rowData.title + '"');
    var name = specs.fieldByName('name');
    var pwidth = specs.fieldByName('pwidth');
    var pheight = specs.fieldByName('pheight');
    var pcolor = specs.fieldByName('pcolor');
    var qty = specs.fieldByName('qty');
    var stripName = removeSpaces(specs.fieldByName('name'));

    function removeSpaces(strip) {
        return strip.split(' ').join('');
    };

    // Add the webView to the window
    win.add(web);

    // Create a timeout - we want time for the window to be ready before we fire the event
    setTimeout(function(){
        Ti.App.fireEvent("webPageReady", {name:name, pwidth:pwidth, pheight:pheight, pcolor:pcolor, qty:qty, stripName:stripName});
    },500);

    Ti.UI.currentTab.open(win,{animated:true});
    ...
We created a second instance of the database (As a local variable inside the function. We are using scope here to make sure we don't mess anything up.) and created our query with the data from the selected row title value. Created our individual variables for the database column data, and created a second variable using the product name, only removing the spaces with a "removeSpaces" function. This is so we can create a path to an image using the product name in our WebView.
We then add our WebView to the current windows. Our variables are passed to the WebView and named "webPageReady" by the TI.App.fireEvent. This fires once the specified amount of time has passed from the setTimeout function. In our case, it is 500 milliseconds, or half of one second.
Step 4: Adding an Activity Indicator
If we were to create our WebView right now, everything would work fine. However, there would be something that just didn't feel right to the user. The WebView would be created and the data set, but there would be a second or so of time where the page was blank, or missing items. It would appear that something is broken. Users have become accustomed to always knowing something is happening. For Windows users, there is that nice little hour glass, OS X users have the spinning color wheel, etc.
Users have become accustomed to always knowing something is happening.
For our activity indicator, we need to create a new window, create the activity indicator, set the length of time for it to display, and then hide the window. We need to also make sure to add the activity indicator to the new window and the new window to the current view.
			var actWin = Ti.UI.createWindow({
				backgroundColor: '#000',
				opacity: 0.8
			});

			var actInd = Ti.UI.createActivityIndicator({
				style:Ti.UI.iPhone.ActivityIndicatorStyle.PLAIN
			});

			actWin.add(actInd);

			if (Ti.Platform.name == 'iPhone OS') {
				actInd.show();
				actInd.color = '#FFF';
				actInd.message = 'Loading...';
				setTimeout(function()
				{
					actInd.hide();
				},1500);
			};
			setTimeout(function()
			{
				actWin.hide();
			},1500);


			// Add the webView to the window
			win.add(web,actWin);

...
When we create the indicator, we are setting the style to look like the standard iPhone indicator. We then also want this to look as native as possible and let the user know what is going on. We use an if statement, setting it to check for the platform type, add a message, and set the length of time before we hide the window.
This timeout is inside the if statement, so we need to create another timeout function to hide the window. In both cases we are setting the time to 1500 milliseconds. Thinking back to the last step, we allowed 500 milliseconds before our data is passed. This will allow another second for the data to be actually loaded into the WebView.
Step 5: Building Our Table In the WebView
Create a new html file with the name and location that we set above when we created our WebView. It is not necessary to add all of the standard HTML header information. I like to declare my doctype and add the <head> tags. We will need this because we need to use some scripts.
First, create the content of the body. Using a table, add the required amount of rows and columns. For this tutorial, we need four rows and two columns. The label will be in the left column and the spec in the right. Use a non-breaking space ( ) in the spec cell. This is what our table looks like:
<!DOCTYPE html>
<html>
    <head>

        <link rel="stylesheet" href="productStyle.css">

    </head>
        <body id="body">
            <div id="container">
                    <div id="content">
					<div id="name"> </div>
					<div id="picture"> </div>
					<div id="mainTable">
						<table border="0" align="center" cellpadding="20" cellspacing="0" id="mainTable">
							<tr>
								<td class="prodTitle">Width</td>
								<td class="prodSpec" id="pwidth"> </td>
							</tr>
							<tr>
								<td class="prodTitle">Height</td>
								<td class="prodSpec" id="pheight"> </td>
							</tr>
							<tr>
								<td class="prodTitle">Color</td>
								<td class="prodSpec" id="pcolor"> </td>
							</tr>
							<tr>
								<td class="prodTitle">Quantity</td>
								<td class="prodSpec" id="qty"> </td>
							</tr>
						</table>
					</div>
				</div>
			</div>
		</body>
	</html>
It is also a great idea to add a stylesheet so we can customize how our page displays. Directly underneath the "content" div we want to create some form of our own header. I think it is a great idea to display the product name and show a picture. The most important thing to do when building our table is to add an "id" to the cell that will contain our specs. For the sake of styling, we should also add a class to the similar cells.
Step 6: Catching Variables From the Database
In the previous tutorials, we created a variable on one page and attached it to the new window. This variable was accessed using Ti.UI.currentWindow.varName and then globally accessible to the page. Because this is a WebView we cannot do this. What we need to do is to add an EventListener and catch the passed variables.
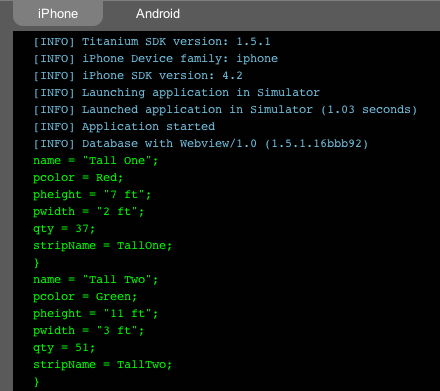
The console in Titanium Developer logs the variables and the values that are being passed. This can be very handy for debugging.
In the EventListener we specify the event we are listening for (webPageReady) and declare our variables using our callback.
<script>
        Ti.App.addEventListener('webPageReady',function(e) {
            var name = e.name;
            var pwidth = e.pwidth;
            var pheight = e.pheight;
            var pcolor = e.pcolor;
            var qty = e.qty;
            var stripName = e.stripName;
        });
</script>
Step 7: Setting the Variables to the Table
Now that we have our variables declared we need to figure out how to use them in our page. We cannot return them from the function and then use the variables in our table, so we have to get creative. Load jQuery on your page and wrap the current EventListener inside of a document.ready function.
Then use the id for each cell defined in the previous step and replace the element using jQuery and the correct variable.
<script src="../jquery-1.4.4.min.js"></script>

<script>
    $(document).ready(function() {
        Ti.App.addEventListener('webPageReady',function(e) {
            var name = e.name;
            var pwidth = e.pwidth;
            var pheight = e.pheight;
            var pcolor = e.pcolor;
            var qty = e.qty;
            var stripName = e.stripName;

            $("#name").html(name);
            $("#pwidth").html(pwidth);
            $("#pheight").html(pheight);
            $("#pcolor").html(pcolor);
            $("#qty").html(qty);
            $("#picture").html('<img src ="../images/productThumbs/' + stripName + '.png">');

        });
    });
</script>
The last element we are replacing in the above code is our product image variable. Use the variable from the product name that we removed the spaces from to build the link to the image. Also, make sure to create the directory and images for each product. For the sake of styling, it is a great idea to make all of the product images the same size. Something like 150px by 150px is a good size for most screens.
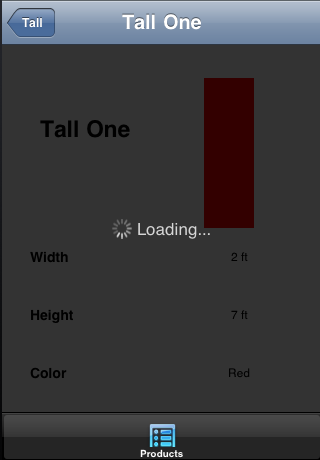
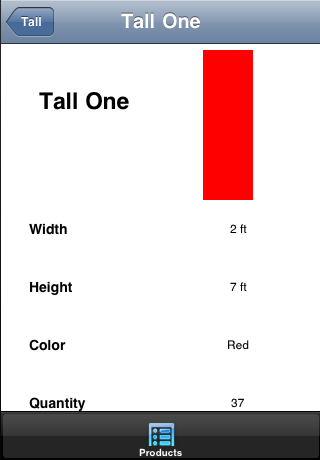
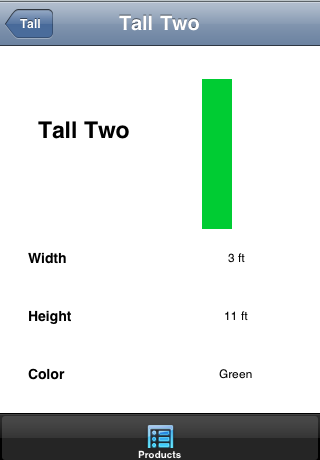
Finally we should have a working application with all the code completed. Here is how the WebView will look:
Wrap Up
Once our images are created for all of the products it is very easy to use some standard CSS in our stylesheet and make our product pages look exactly how we want them to appear. If the information we are displaying and using in our application is updated frequently, a remote database may be the way to go.

Comments