Jinja2 is a template engine written in pure Python. It provides a Django-inspired non-XML syntax but supports inline expressions and an optional sandboxed environment. It is small but fast, apart from being an easy-to-use standalone template engine. Flask is a Python-based micro web framework which allows you to write your web applications quickly and efficiently.
In this three-part series, I will start with the basics of Jinja2 templating from the perspective of Flask. In the subsequent parts of this series, I will cover advanced templating topics while learning how to lay out templates in a Flask-based application in a modular and extensible design.
I assume that you have a basic understanding of Flask and environment setup best practices using virtualenv to be followed while developing a Python application.
Installing Packages
Flask comes packaged with Jinja2, and hence we just need to install Flask. For this series, I recommend using the development version of Flask, which includes much more stable command line support among many other features and improvements to Flask in general.
pip install https://github.com/mitsuhiko/flask/tarball/master
Need for a Templating Engine?
In Flask, we can write a complete web application without the need of any third-party templating engine. Let's have a look at a small Hello World app below:
from flask import Flask

app = Flask(__name__)

@app.route('/')
@app.route('/hello')
@app.route('/hello/<user>')
def hello_world(user=None):
    user = user or 'Shalabh'
    return '''
    <html>
        <head>
            <title>Templating in Flask</title>
        </head>
        <body>
            <h1>Hello %s!</h1>
            <p>Welcome to the world of Flask!</p>
        </body>
    </html>''' % user

if __name__ == '__main__':
    app.run()
It is obvious that the above pattern of writing an application is not feasible in case of a real web application where HTML, CSS and JS code ranges in thousands of lines of code. Here, templating saves us because we can structure our view code by keeping our templates separate. Flask provides support for Jinja2 by default, but any other templating engine can also be used as suited.
Laying Out Templates
By default, Flask expects the templates to be placed in a folder named templates at the application root level. Flask then automatically reads the contents by making this folder available for use with the render_template() method. I will demonstrate the same by restructuring the trivial Hello World application shown above.
The application structure would be as shown below.
flask_app/
    my_app.py
    templates/
        - index.html
The Application Itself
flask_app/my_app.py
from flask import Flask, render_template, request

app = Flask(__name__)

@app.route('/')
@app.route('/hello')
@app.route('/hello/<user>')
def hello_world(user=None):
    user = user or 'Shalabh'
    return render_template('index.html', user=user)
flask_app/templates/index.html
<html>
  <head>
    <title>Templating in Flask</title>
  </head>
  <body>
    <h1>Hello {{ user }}!</h1>
    <p>Welcome to the world of Flask!</p>
  </body>
</html>
To run the application, just execute the following command on the command line:
flask --app=my_app run
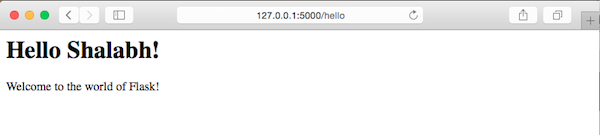
Open up http://127.0.0.1:5000/ in a browser to see the application in action. The result would be same in the case of http://127.0.0.1:5000/hello as well.
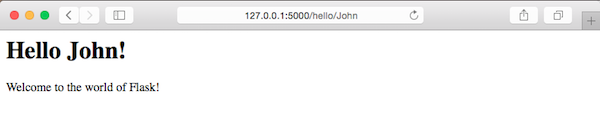
Try opening the URL with your name as the last part of it. So if your name is John, the URL would be http://127.0.0.1:5000/hello/John. Now the page would look like this:
It is pretty straightforward that in the method hello_world the last part of the URL after hello is fetched from the request and passed to the context of the template being rendered using render_template(). This value is then parsed from the template context using the Jinja2 placeholder {{ user }}. This placeholder evaluates all the expressions that are placed inside it, depending on the template context.
Understanding Blocks and Inheritance in Templates
Usually, any web application will have a number of web pages that will be different from each other. Code blocks such as headers and footers will be the same in almost all the pages throughout the site. Likewise, the menu also remains the same. In fact, usually, just the center container block changes, and the rest usually remains the same. For this, Jinja2 provides a great way of inheritance among templates. It's a good practice to have a base template where we can structure the basic layout of the site along with the header and footer.
I will create a small application to showcase a list of products under different categories. For styling, I will use the Bootstrap framework to give a basic design to the templates. The application structure is now as shown below.
flask_app/
    my_app.py
    templates/
        - base.html
        - home.html
        - product.html
    static/
        css/
            - bootstrap.min.css
            - main.css
        js/
            - bootstrap.min.js
Here static/css/bootstrap.min.css and static/js/bootstrap.min.js can be downloaded from the bootstrap website mentioned above. The rest of the application code is demonstrated below.
flask_app/my_app.py
from flask import Flask, render_template, abort

app = Flask(__name__)

PRODUCTS = {
    'iphone': {
        'name': 'iPhone 5S',
        'category': 'Phones',
        'price': 699,
    },
    'galaxy': {
        'name': 'Samsung Galaxy 5',
        'category': 'Phones',
        'price': 649,
    },
    'ipad-air': {
        'name': 'iPad Air',
        'category': 'Tablets',
        'price': 649,
    },
    'ipad-mini': {
        'name': 'iPad Mini',
        'category': 'Tablets',
        'price': 549
    }
}

@app.route('/')
@app.route('/home')
def home():
    return render_template('home.html', products=PRODUCTS)

@app.route('/product/<key>')
def product(key):
    product = PRODUCTS.get(key)
    if not product:
        abort(404)
    return render_template('product.html', product=product)
In this file, I have hardcoded the product list to make the application simpler and focus only on the templating part. I have created two endpoints, home and product, where the former serves the purpose of listing all the products and the latter opens up the individual page.
flask_app/static/css/main.css
body {
  padding-top: 50px;
}
.top-pad {
  padding: 40px 15px;
  text-align: center;
}
This file holds a bit of custom CSS that I added to make the templates more legible. Let's look at the templates now.
flask_app/templates/base.html
<!DOCTYPE html>
<html lang="en">
  <head>
    <meta charset="utf-8">
    <meta http-equiv="X-UA-Compatible" content="IE=edge">
    <meta name="viewport" content="width=device-width, initial-scale=1">
    <title>Jinja2 Tutorial - Tutsplus</title>
    <link href="{{ url_for('static', filename='css/bootstrap.min.css') }}" rel="stylesheet">
    <link href="{{ url_for('static', filename='css/main.css') }}" rel="stylesheet">
  </head>
  <body>
    <div class="navbar navbar-inverse navbar-fixed-top" role="navigation">
      <div class="container">
        <div class="navbar-header">
          <a class="navbar-brand" href="{{ url_for('home')}}">Tutsplus - Jinja2 Tutorial</a>
        </div>
      </div>
    </div>
    <div class="container">
      {% block container %}{% endblock %}
    </div>
    <!-- jQuery (necessary for Bootstrap's JavaScript plugins) -->
    <script src="https://ajax.googleapis.com/ajax/libs/jquery/2.0.0/jquery.min.js"></script>
    <script src="{{ url_for('static', filename='js/bootstrap.min.js') }}"></script>
  </body>
</html>
Note the use of url_for() for creating URLs for static files and other links. It is a very handy tool which is provided by Flask. Read more about this in the documentation. Another important point to note here is the usage of {% block container %}{% endblock %}, which is very crucial component of Jinja2 working towards making the templates modular and inheritable. The next couple of files will make this clearer.
flask_app/templates/home.html
{% extends 'base.html' %}

{% block container %}
  <div class="top-pad">
    {% for id, product in products.iteritems() %}
      <div class="well">
        <h2>
          <a href="{{ url_for('product', key=id) }}">{{product['name'] }}</a>
          <small>$ {{ product['price'] }}</small>
        </h2>
      </div>
    {% endfor %}
  </div>
{% endblock %}
See how this template extends base.html and provides the contents of {% block container %}. {% for %} behaves just like a normal for loop in any language which we are using here to create a list of products.
flask_app/templates/product.html
{% extends 'home.html' %}

{% block container %}
  <div class="top-pad">
    <h1>{{ product['name'] }}
      <small>{{ product['category'] }}</small>
    </h1>
    <h3>$ {{ product['price'] }}</h3>
  </div>
{% endblock %}
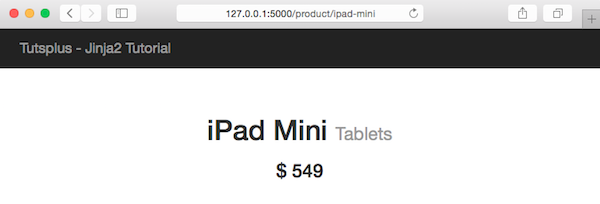
The above template implements the individual product page.
Now run the app by executing the following command.
flask --app=my_app run
The running app would look like the one shown in the screenshot below. Just open http://127.0.0.1:5000/home in the browser.
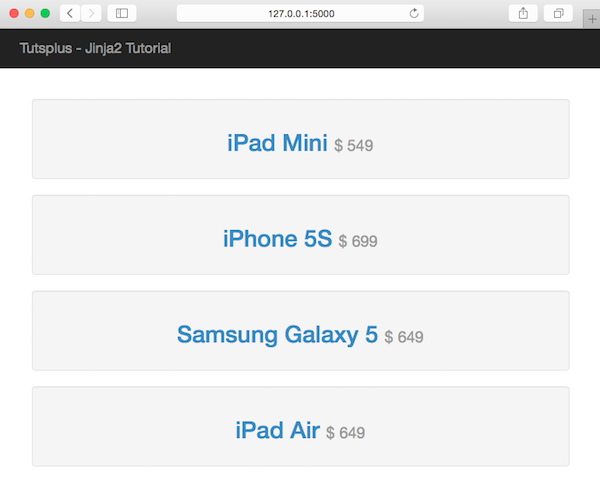
Click on any of the products to see the individual product page.
Conclusion
In this tutorial, we have seen how to lay out the template structure in a Flask-based application using Jinja2. We also saw how blocks can be used to leverage the inheritance in templates.
In the next part of this series, we will see how to write a custom filter, a custom context processor, and a macro.

Comments