Introduction
SpriteKit, available on iOS, tvOS, and OS X, is a framework that allows developers to create high quality 2D games without worrying about the complexities of graphics APIs, such as OpenGL and Metal. In addition to handling all of the graphics for developers, SpriteKit also offers a wide range of extra functionality, including physics simulation, audio/video playback, and saving/loading games.
Throughout this series, you learn all about SpriteKit and gain skills, which you can then apply to any sort of 2D game being built with this excellent framework. In this series, we create a fully functional game in which the player controls a car that must avoid obstacles that cross its path.
Prerequisites
This series requires that you are running Xcode 7.3 or higher, which includes support for Swift 2.2 as well as the SDKs for iOS 9.3, tvOS 9.2, and OS X 10.11.5. You also need to download the starter project from GitHub, which contains the visual assets to be used in the game and a few lines of code to help us get started.
The graphics used for the game in this series can be found on GraphicRiver. GraphicRiver is a great source for finding artwork and graphics for your games.
1. Scenes, Nodes, and Views
Scenes
The first class you need to be aware of when working with SpriteKit is the SKScene class. For any 2D game built with SpriteKit, you split the game's content up into multiple scenes, each with their own SKScene subclass.
While we will look at the functionality and inner workings of the SKScene class later on in this series, what you need to know for now is that a scene is what you add the game's content to and it acts as the root node. This brings us to nodes.
Nodes (Sprites)
The SKNode class, which SKScene is a subclass of, is used to represent any sort of item within your scene. While there are many different types of nodes available in SpriteKit, commonly referred to as sprites, they share the same key properties with the most important being:
-
position(CGPoint) -
xScale(CGFloat): representing the horizontal scale of a node -
yScale(CGFloat): similar toxScalebut it acts in the vertical direction instead -
alpha(CGFloat): representing the node's transparency -
hidden(Bool): value determining whether or not the node should be visible -
zRotation(CGFloat): representing the angle, in radians, that the node should be rotated -
zPosition(CGFloat): used to determine which nodes should be displayed on top of other nodes in the scene
As you can see, the above properties allow you to accurately position, rotate, and edit the basic appearance of every node in a scene.
Just as you can add subviews to any UIView object in UIKit, in SpriteKit you can add any number of child nodes to an existing node. This is done using the addChild(_:) method on any SKNode object.
Also similar to UIView objects, the position and scale properties of any child node are relative to the parent node that it is added to. This is how an SKScene object, being a subclass of SKNode, can act as the root node of your scene. For any nodes that you want in your scene, you need to add them as children of the scene itself using the addChild(_:) method.
The SKNode class on its own is not capable of producing any visual content. In order to do so, you must use one of the many subclasses available in SpriteKit. Some important SKNode subclasses to be aware of are:
-
SKSpriteNode: takes an image and creates a textured sprite in your scene -
SKCameraNode: controls where your scene is viewed from -
SKLabelNode: renders a text string -
SKEmitterNode: used in conjunction with a particle system to render particle effects -
SKLightNode: creates lighting and shadow effects in your scene
Throughout this series, we use these node types as well as some of the other less common ones.
Views
To display your SpriteKit content within a working application, you need to use the SKView class. This is a subclass of UIView (or NSView on OS X), which can be easily added to any part of your application. To present a SpriteKit scene, you need to call either the presentScene(_:) or presentScene(_:transition:) method on an SKView instance. The second method is used when you want a custom animation or transition into your new scene.
In addition to just rendering your SpriteKit content, the SKView class also offers some extra and very useful functionality. This includes a Bool property called paused, which can easily be used to pause or resume a scene.
There are also several properties that are useful when debugging your game and can show information, such as the current FPS (frames per second), node count, and physics fields within your scene. If you want to have a look at all the available properties, check out the SKView class reference.
2. Scene Editor
Now that we have looked over the basic classes used in SpriteKit games, it is time to create our very first scene. While scenes can be created entirely programmatically, Xcode provides an excellent scene editing tool, which allows you to easily drag and drop nodes into your scene while editing their position, appearance, and other properties.
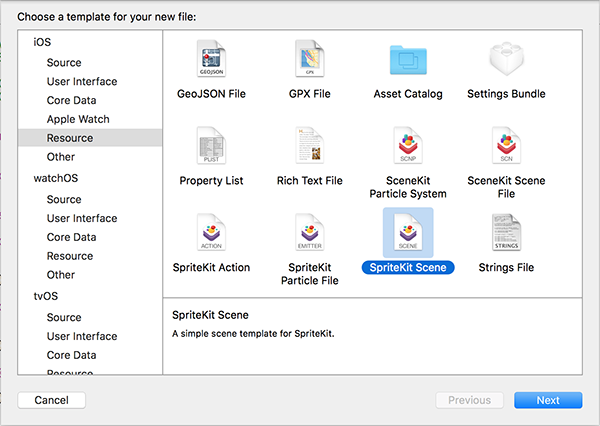
Open the starter project and create a new file by pressing Command+N or selecting New > File... from Xcode's File menu. Choose the iOS > Resource > SpriteKit Scene file type and click Next.
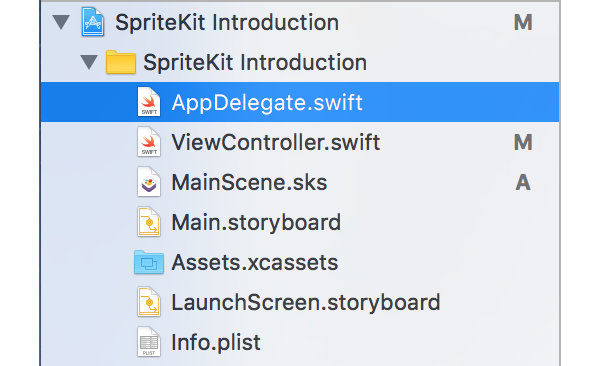
Name the file MainScene and save it. You should now see your new scene file in the Project Navigator.
Select MainScene.sks to open Xcode's scene editor. At the moment, your scene is blank and has a grey background. There are no nodes in it yet. Before adding some sprites to your scene, we first need to change its size.
In the Attributes Inspector on the right, change your scene's size to have a width (W) of 320 points and a height (H) of 480 points.
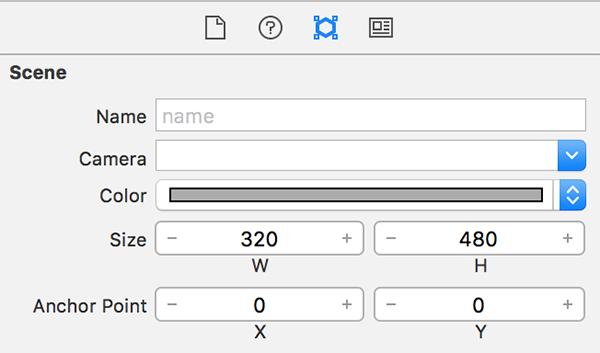
This scene size correlates to the smallest screen size we are targeting (3.5" screen on iPhone 4s) so that we can size our nodes correctly. We will change the scene size to be adaptive to the current device screen size in a later tutorial.
To add nodes to your scene, open the Object Library on the right. You may need to click the icon highlighted in blue if the Object Library is not visible.

From the Object Library, drag a Color Sprite to the middle of your scene.
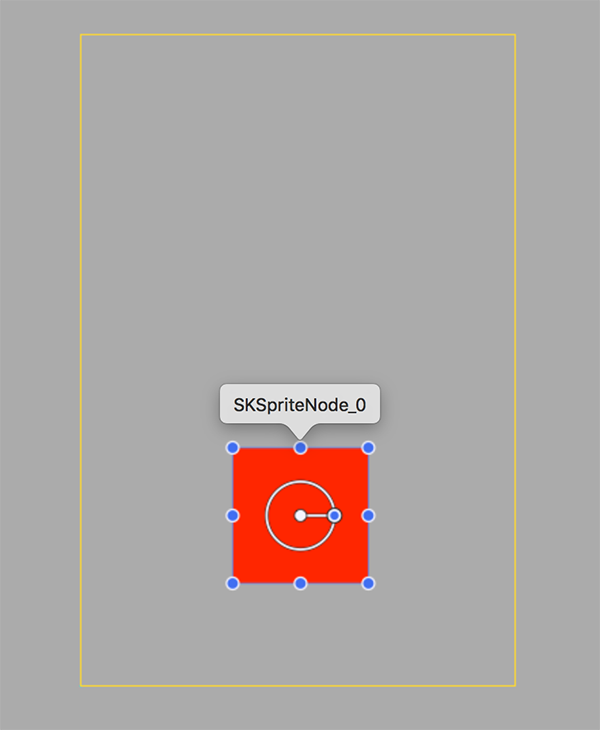
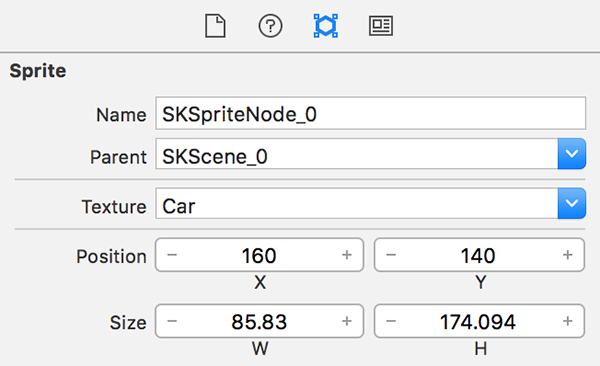
Open the Attributes Inspector on the right and change the Texture, Position, and Size attributes to the following values:
Your scene should now have a car in the middle as shown below.
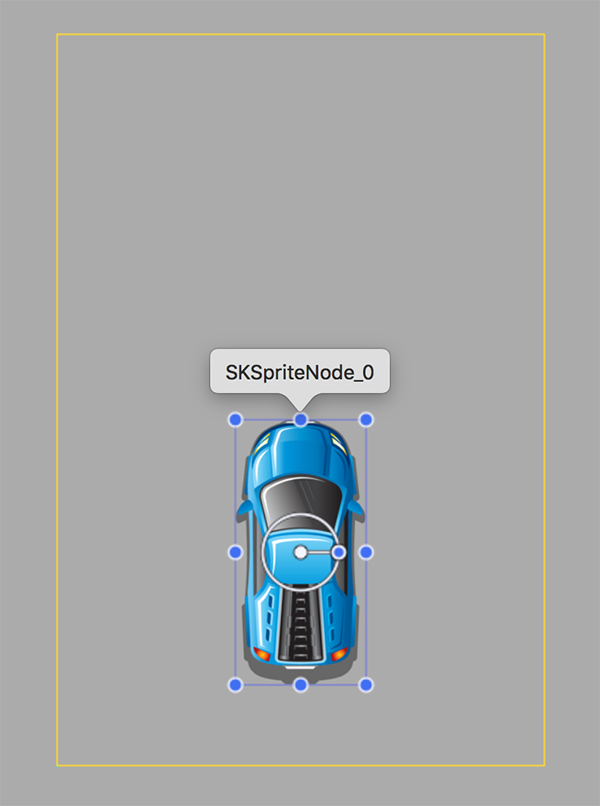
Take note that, unlike the UIKit coordinate system, in SpriteKit, the position of a node always relates to its centre from the scene's bottom-left corner origin point (0, 0). This is why setting the car's position to (160, 120) places the centre of the car 160 points in from the left and 120 points up from the bottom.
3. Displaying a Scene
With your scene completed for now, open ViewController.swift and add an import statement for the SpriteKit framework at the top. This allows us to use the SpriteKit classes and APIs in ViewController.swift.
import UIKit
import SpriteKit
Next, update the implementation of the viewDidLoad() method of the ViewController class as follows:
override func viewDidLoad() {
    super.viewDidLoad()

    let skView = SKView(frame: self.view.frame)
    let scene = SKScene(fileNamed: "MainScene")
    skView.presentScene(scene)
    view.addSubview(skView)
}
With this code, we first create an SKView instance, which is the same size as the view controller's view. Next, we load our scene from the file we created by using the SKScene(fileNamed:) initializer. We make the SKView instance present this scene and then add it as a subview to the main view.
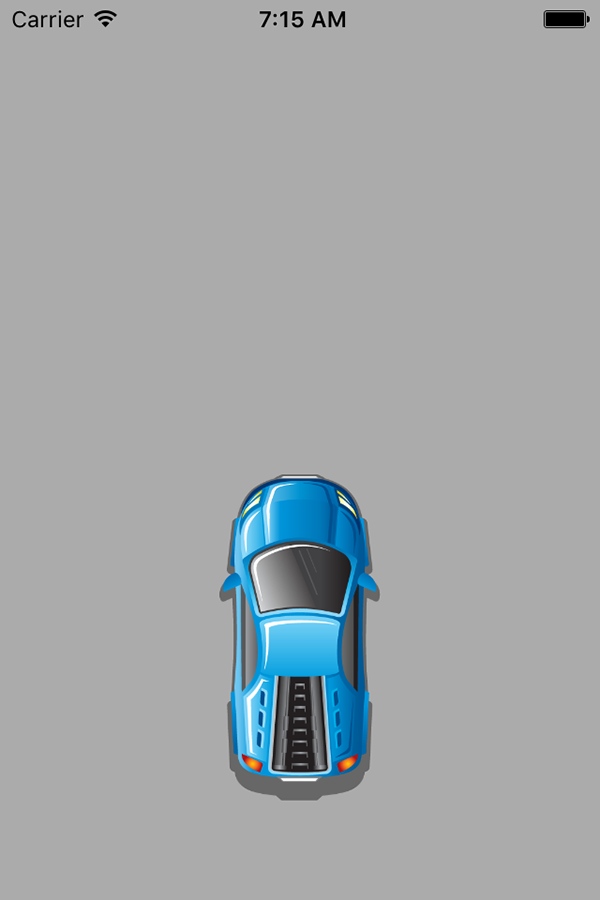
Select the iPhone 4s simulator (so that our scene is correctly sized for the screen) and build and run your application. You should see a screen similar to the following:
Conclusion
In this first tutorial of SpriteKit From Scratch, you learned the basics of views, scenes, and nodes in SpriteKit. You created a basic scene with one sprite using the scene editor built into Xcode, which makes creating scenes much easier when compared to doing it all programmatically.
In the next tutorial, we will add more functionality to our game by using SpriteKit actions to move the car around in the scene. You will also be introduced to the physics simulation in SpriteKit by detecting when the car collides with another node.
As always, leave your comments and feedback in the comments section below.

Comments