My client sells a few products and wanted a way for site visitors to be able to submit a review or testimonial about a particular product, and to display those reviews on their respective product pages in his WordPress site.
I worked on this task all afternoon yesterday to my great frustration, and just now got it working. I figured out I was making it much harder than it really is. Gravity Forms to the rescue!
There are a few steps in this process:
- Create a custom post type.
- Create a form in Gravity Forms to let users submit draft posts using your custom post type.
- Add the form to a page.
- Display the posts on your site.
Let's get started.
1. Create a Custom Post Type
This is a perfect situation for a custom post type—like a blog post, only special. Custom post types are separate from regular blog posts; they can help you turn your site into a movie database or a recipe site, with their own custom taxonomies (instead of blog categories, think Movie Directors, Actors and Genres).
While you can manually create a custom post type (CPT) using coding, let's do this the easy way. Install Custom Post Type UI and activate it. This is a very useful and stable plugin that's been around for many years.
In Custom Post Type UI you'll set up a new post type. Here's a screenshot of mine. Name it whatever you like; in this case mine is Reviews.
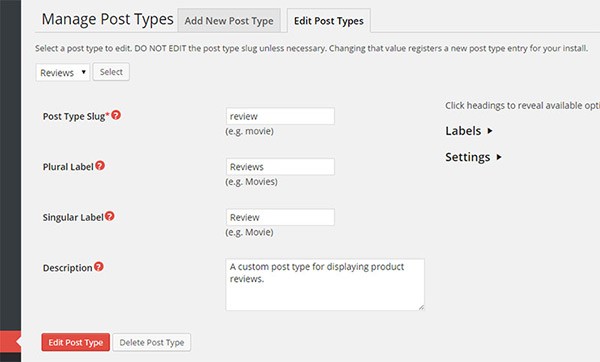
You can leave the Labels section alone. But in Settings, you will want to make a few changes.
I've left most of the defaults under Settings alone, but have ticked the box for Exclude from Search as I don't want review posts in search results. And in the section Supports, I've only ticked the checkboxes for the elements I need to show in my review post editing page: Title, Editor, and Custom Fields.
If you mouse over the red question marks in the Settings panel, you'll see what each item does; you can always come back and make changes.
2. Create a Form in Gravity Forms
Gravity Forms is a great plugin, but it won't handle custom posts on its own. For that you'll need to install and activate another plugin, Gravity Forms + Custom Post Types. Go ahead and do that, and we'll get started on the form.
In Gravity Forms, create a new form; let's call it Submit a Review. Save it, and then open up the Post Fields in the right column. Using these fields instead of the usual form fields will create a new post when the user submits the form.
First, click on Post Title to add that field. In this case, I want the title of my post to be the name of the person submitting the review—see the screenshot below.

Name your field (here it's Your Name, so this is the label the user will see). For Post Status, you probably want Draft; this means the new post will be in Draft format and won't be published on your site until you approve it.
Default Post Author is set to you and that's fine—it won't matter here—and neither will Post Category since we're using a custom post type. Make this field Required by ticking the bottom checkbox.
Then go to the Advanced tab. Tick the box for Save as Post Type and choose the custom post type you created at the beginning of this tutorial.
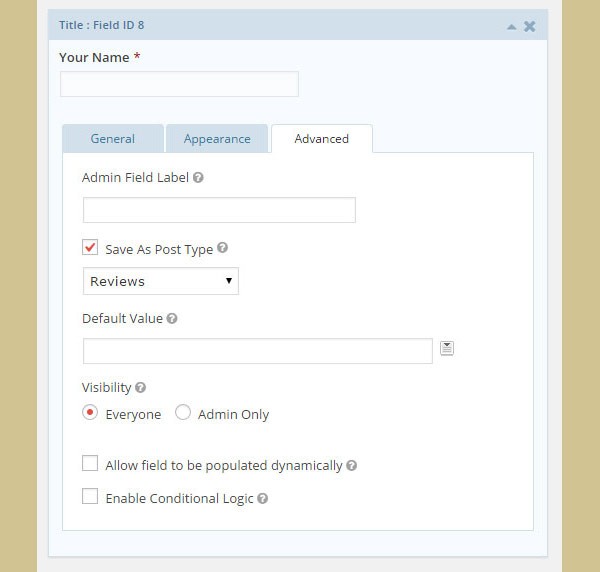
Then click Update to save your changes.
Then we'll add an email field (from the Advanced Fields section) like with any form, making it Required.
Next we'll add another Post Field, Body. This works just like the Paragraph Text field in a normal form. You shouldn't need to change any settings for this field other than the Field Label and ticking the Required checkbox.
Almost done! Now because my client has several products, we want to ask the user which product they bought. To do this we're going to add a Custom Field from the Post Fields area (drag it up so it appears before the Body field so that the flow makes sense).
For our purposes we want this custom field to be radio buttons, so choose that from Field Type. Then we need to give our custom field a name. Choose the New button since we're making it here, and then type a name into the text box. In this case it's product_name.
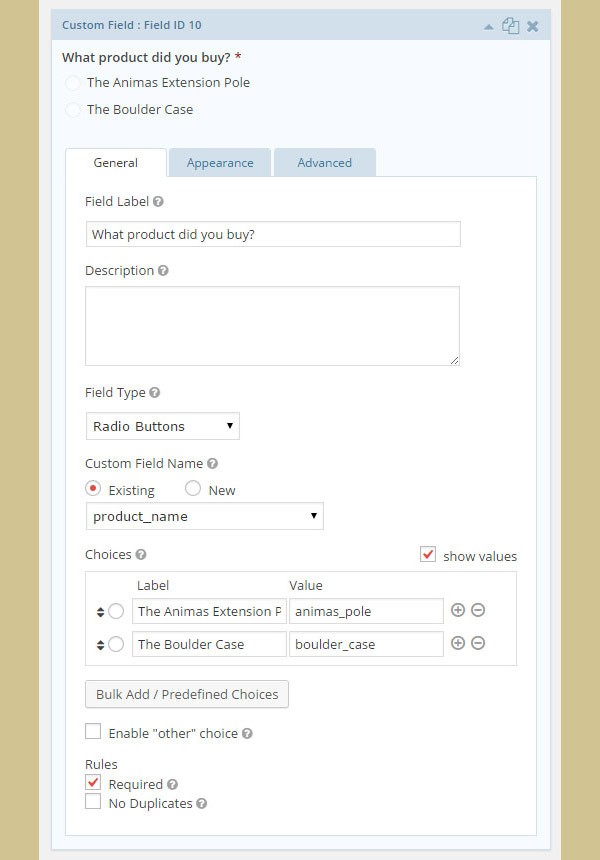
Then fill in the radio button choices as usual, making sure you enter both a label (what the user sees) and a value (which you can use to separate the reviews by product name).
Make this field Required (and don't forget to add your own Field Label at the top, for the user) and update the form. We're all done with part 2.
3. Adding the Form to a Page
I hope you already know how to do this, but if not, it’s very simple. Go to the page where you want to put your form and edit the page.
Put the cursor where you want to add the form. Click Add Form at the top, choose your new form, untick the Title and Description checkboxes, and click Insert Form. It will add a shortcode to the page.
That’s it. And this is how the form looks on the page.
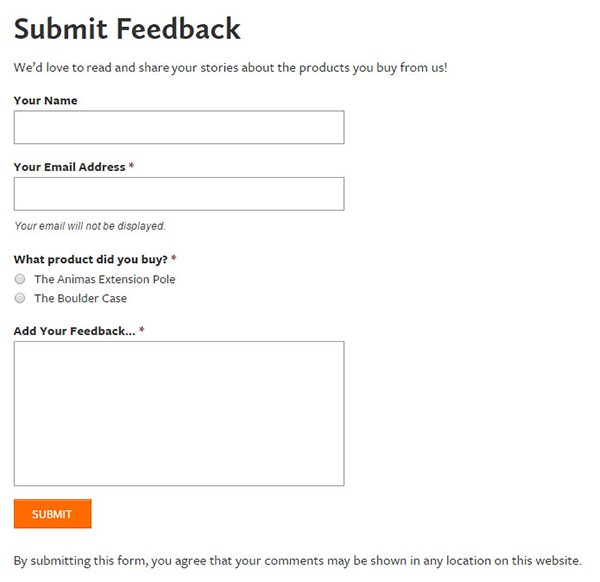
Go ahead and try the form, adding a couple of reviews in. I’d suggest adding reviews for at least two or three products, so that we’ll have something to work with in the next part of this tutorial. You can always delete your test reviews later.
4. Display the Posts on Your Site
Now we get to the part that has a lot of possibilities. If you look in the Admin menu on the left side, you’ll now have a new menu item—in my case it’s called Reviews. If you look at that, you’ll see the test reviews you submitted (if there aren’t any, you skipped the last part of Step 3—go to your form and submit test reviews, at least for a few products, as we need some material to work with for this step).
These are blog posts but they have their own menu item because of your custom post type. This helps you keep things separated on your site; you can have a regular blog, and then any number of custom post types to handle more specialized information. Pretty cool, yes?
Open up one of these posts and you’ll see only the items you ticked under Supports back in Step 1 when you set up your custom post type. In this case, it’s the title, the editor, and custom fields. We like to keep it as simple as possible. Look at the custom field and you’ll see it has both a name (the Label you entered) and a value (which you also entered). That value can be used to control which reviews are displayed in a custom template.
Showing posts on your site can be done with coding in your theme files or with plugins; there are many, many ways to do this. For this tutorial, we’re going to add the reviews to a sidebar widget. I’ll show you two ways to do this with a plugin: an easy one, and a better one.
Displaying Custom Posts in a Widget: The Easy Way
For this example we’ll use the Special Recent Posts plugin. Install and activate it and then go to Settings > Widgets. Drag the widget into a sidebar.
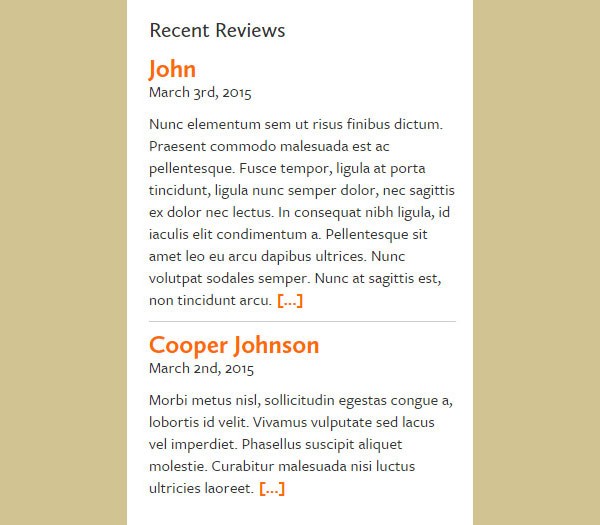
When you open it you’ll see lots of options. For this example these are the settings I used to get the posts list shown here, but you can use whatever works with your site.
- I changed the Widget Title to Recent Reviews and the Post Limit to 2.
- No thumbnails, since there aren’t any associated with reviews.
- Under Post Options I chose to use full length for the Post Content Length. Tick the box by Enable WordPress Filters, because we’ll use that later.
- No changes under Advanced Post Options 1 or 2.
- Under Filtering Options, type in your custom post name in the last box (if it doesn’t work, try the singular version—review or reviews).
- Save the widget.
Here's how it looks in my sidebar:
It works pretty well right out of the box, but you can customize the display if you know some CSS. However, you don’t have much control over what gets displayed; you can’t choose to display reviews for one product and hide them for another. But I’ll show you how to do that in the next part.
Displaying Custom Posts in a Widget: With Total Control
Custom Content Shortcode is an amazingly useful plugin that will let you display any type of content anywhere on your site, including widgets. It does have a bit of a learning curve, but it also has great documentation that is included in a Reference section right in your Admin dashboard. It provides a lot of control over what’s displayed, and will not disappoint if you take a little time to learn how to use it. It’s a tool you can use again and again in your website or blog.
You will need to be a little bit comfortable with HTML and CSS to style the display of this widget—just letting you know. It doesn’t look like much right out of the box. You can add the styles to your theme’s style.css file.
Let’s use Custom Content Shortcode to create another widget, but this time we’ll limit what gets displayed so we can show only reviews for a certain product.
In Settings > Widgets, drag a text widget into a sidebar and add your title.
I’ll show you how to set up the shortcode for this example, but I highly recommend you take a look through the Reference section for the plugin, which you get to in the Plugins page (you’ll see a link for it under the plugin name). It’s a very powerful tool!
Here is the shortcode I’m using. I’ll go through it line by line.
[loop type="review" field="product_name" value="boulder_case"]
[content]
[field title]
[field date]
[/loop]
For loop type, enter the name of your custom field, probably singular (if that doesn’t work, try plural).
Field is the custom field name you used in Gravity Forms. Value is the value associated with the radio button in Gravity Forms.
These elements control the loop, which means that it will go through each ‘review’ post one by one displaying the ones with the value ‘boulder_case’ until it’s looked at them all.
So inside your loop, it’s going to display three things: the content of the post (from the Body field in Gravity Forms), the title (the user’s name), and the date published.
Does that make sense? Type or copy this into your text widget, replacing the items in the section with your own names, save it, and take a look at what it generates.
It probably looks like a mess—but the content is all there, and you'll notice that only the posts with the particular value you typed in are shown. This is powerful; it means you can create a review widget for each product instead of having all the reviews jumbled together.
So now you'll need to do some formatting to make things look better—a little bit of HTML is needed.
<div class="review-loop"> [loop type="review" field="product_name" count="3"] <div class="review"> <div class="text">[content]</div> <h4 class="author">– [field title]</h4> <p class="date">[field date]</p> </div> [/loop] </div>
This makes things a lot easier to read, but now some CSS is needed to style it. I'll add some classes to this code for styling.
/* Reviews */
#sidebar-primary .widget .review-loop .review {
  margin-bottom: 1.5em;
}
#sidebar-primary .widget .review-loop div.text p {
  margin: 0;
}
#sidebar-primary .widget .review-loop div.text p:before {
  content: '\201C';
}
#sidebar-primary .widget .review-loop div.text p:after {
  content: '\201D';
}
#sidebar-primary .widget .review-loop .author {
  font-size: 1.5rem;
  line-height: 2.1rem;
  font-style: italic;
  margin: 0.5em 0 0.2em;
  text-align: right;
}
#sidebar-primary .widget .review-loop .date {
  margin: 0;
  font-size: 1.4rem;
  line-height: 1.96rem;
  font-style: italic;
  text-align: right;
}
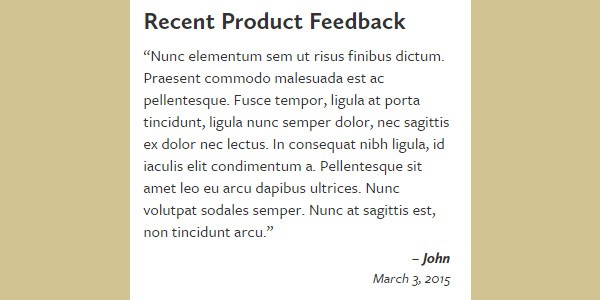
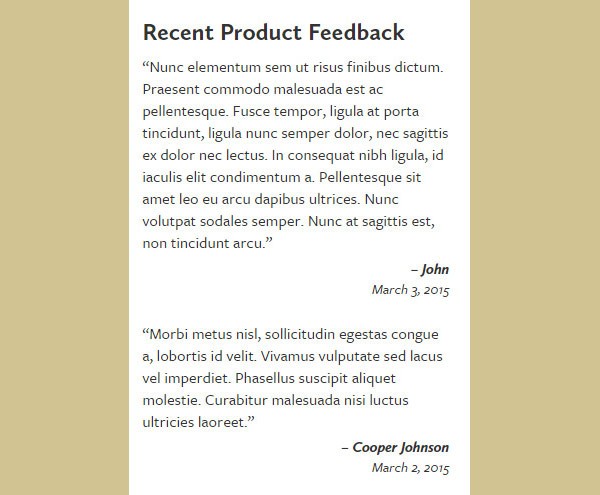
And here is the finished product all styled and ready for more content.
Wrapping Up
So now you know:
- how and when to create a custom post type
- how to create a form to collect user content for your custom post type
- how to display that form on a page or post
- how to display your custom posts in a widget using a simple plugin
- how to display your custom posts with more control
In a followup to this post, I'll show you how to display your new custom content in a page using a custom template and loop. It's a bit more difficult, but will give you the power to really control your user-submitted content. And then you can think about other ways to use user content—submitting photos to a gallery, for example. Getting visitors involved is a great way to promote your business site.

Comments