Firebase's goal is to help developers build better apps and grow them into successful businesses. By taking care of your app back-end or infrastructure, Firebase lets you focus on solving problems for your users. One of the new exciting features announced at the Google Cloud Next '17 Conference this March for Firebase was Cloud Functions. In this tutorial, you'll learn about this new feature by building a simple Android app with it.
What Are Cloud Functions for Firebase?
Firebase Cloud Functions run in a hosted, private, and scalable Node.js environment where you can run JavaScript code. You simply create reactive functions that trigger whenever an event occurs. Cloud functions are available for both Google Cloud Platform and Firebase (they were built on top of Google Cloud Functions).
For now, Cloud Functions support the following triggers that you can listen to and respond to:
- Realtime Database Triggers: fire a function when a write event occurs on a path in a database.
-
Authentication Triggers: fire a function when a new user is created or when a user is deleted.
- Analytics Triggers: fire a function when a new conversion event is logged.
- Cloud Storage Triggers: a function can be fired when there is any change in a bucket such as a file or folder upload, update, or delete.
- Cloud Pub/Sub Triggers: fire a function when a new message is received in a Google Cloud Pub/Sub topic.
- HTTPS Triggers: fire when a request is made to an endpoint.
So Why Use Cloud Functions?
So now you have seen the range of capabilities that Cloud Functions can offer. But why use them?
Running and setting up a back end and servers can be a real pain—you have to handle issues such as scalability and writing code in server-side languages—but with Cloud Functions, this complexity is reduced. Also, computationally intensive tasks can be performed in the cloud instead of on the client device (such as image resizing for upload or writing to multiple paths of your database). Your code will also be more secure in the cloud than on the client device, so you can securely store data such as secret keys on your server.
In this tutorial, you'll learn how to use the Realtime Database Triggers that will fire when a database write event occurs. Then, we'll see how to use the Firebase Cloud Messaging service to send a notification to devices that subscribed to a topic. We'll create a simple app called Tutsplus Alerts, which will send a notification to subscribers of the "android" topic whenever a new article is available.
Prerequisites
To follow along with this tutorial, you should be familiar with:
And you should have Node.js installed on your computer.
Check out the following tutorials here on Envato Tuts+ if you need some help getting started with Firebase:
 Android SDKGet Started With Firebase for Android
 FirebaseFirebase for Android: Notifications and App Invites
- Android SDKGet Started With Firebase for Android
1. Create a Firebase Cloud Function
Install the Firebase CLI
Now that the prerequisites are set up, let's download Cloud Functions.
To begin to use Cloud Functions, we need the Firebase CLI (command-line interface) installed from npm. If you already have Node set up on your machine, you can install Cloud Functions with:
npm install -g firebase-tools
This command will install the Firebase CLI globally along with any necessary Node.js dependencies.
Initialize the Project
To initialize your project:
- Run
firebase loginto log in to Firebase via the browser and authenticate the CLI tool. - Create a new project directory with the name tutsplus-alerts.
- Finally, run
firebase init functionsfrom that new directory. This tool gives you an option to install dependencies with NPM. It is safe to decline if you want to manage dependencies in another way.
After these commands complete successfully, your project structure looks like this:
-
.firebaserc: a hidden file that helps you quickly switch between projects with
firebase use. - firebase.json: describes properties for your project.
- functions/: this folder contains all the code for your functions.
- functions/package.json: an NPM package file describing your Cloud Functions.
- functions/index.js: the main source for your Cloud Functions code.
- functions/node_modules/: the folder where all your NPM dependencies are installed.
Import the Needed Modules and Initialize the App
To develop our simple Tutsplus Alerts app, we just need two node modules: Cloud Functions and Admin SDK modules (these modules are already installed for us). So go to the index.js and require these modules, and then initialize an admin app instance.
var functions = require('firebase-functions');
var admin = require('firebase-admin');

admin.initializeApp(functions.config().firebase);
Code the Cloud Function
Now that the required modules for our project have been imported and initialized, let's code our cloud function in the index.js file. As stated earlier, we are going to write a function that will be fired when an onWrite() event occurs in our Firebase realtime database and then, in response, will send a notification (a downstream message) to device subscribers.
// ...
exports.sendNotification = functions.database.ref('/articles/{articleId}')
        .onWrite(event => {

        // Grab the current value of what was written to the Realtime Database.
        var eventSnapshot = event.data;
        var str1 = "Author is ";
        var str = str1.concat(eventSnapshot.child("author").val());
        console.log(str);

        var topic = "android";
        var payload = {
            data: {
                title: eventSnapshot.child("title").val(),
                author: eventSnapshot.child("author").val()
            }
        };

        // Send a message to devices subscribed to the provided topic.
        return admin.messaging().sendToTopic(topic, payload)
            .then(function (response) {
                // See the MessagingTopicResponse reference documentation for the
                // contents of response.
                console.log("Successfully sent message:", response);
            })
            .catch(function (error) {
                console.log("Error sending message:", error);
            });
        });
In the code above, we are listening to the database path /articles/{articleId}, where {articleId} represents the id of the article that was successfully written. Now, what we are really concerned about is the data that was written. To get that, we use event.data, which is a DeltaSnapshot static interface.
Afterwards, add data from this snapshot to a message payload and send it to the "android" topic. The asynchronous code is simplified with JavaScript promises.
Note that in the code above, we wrote to the console by using console.log(), which will help us in debugging and monitoring. We can view this log either in our Firebase dashboard or via the command line with:
firebase functions:log
Be aware that since this runs on Node.js, you can install other modules available from NPM. You can also code in JavaScript ES6 or TypeScript instead of vanilla JavaScript.
Deploy the Cloud Function
Let's deploy our Cloud Function. Run this command for deployment:
$ firebase deploy --only functions
Now we can code the Android app that will subscribe to the topic, write to the realtime database, and receive a notification when data is written to our realtime database—that is when our cloud function would be executed!
2. Create the TutsplusAlerts App
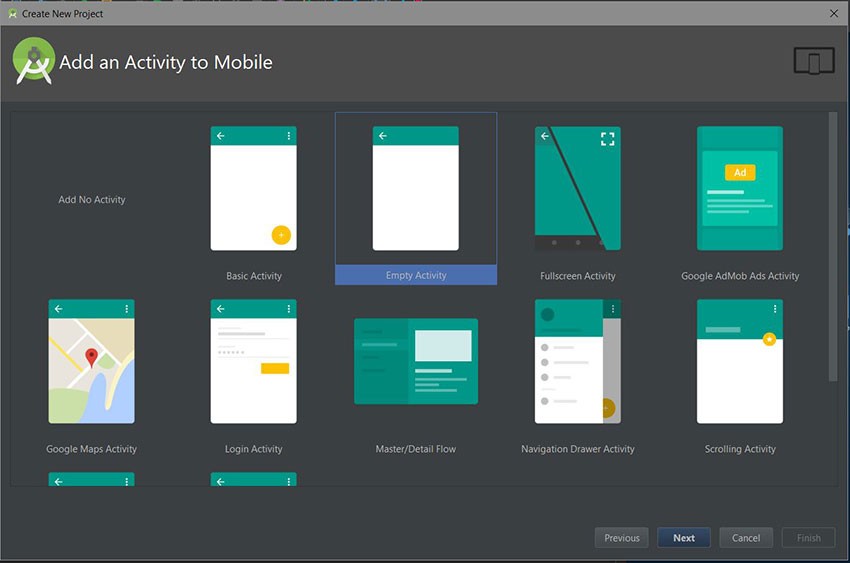
Create an Android Studio Project
First, fire up Android Studio and create a new project ''TutsplusAlerts" with an empty activity called MainActivity.
To follow along, make sure you have integrated Firebase into your app.
Add the Realtime Database Dependency
Add the following dependency to your build.gradle file:
compile 'com.google.firebase:firebase-database:10.2.1'
Make sure you sync your project after adding it.
Create the Model
Let's model an article entity to be persisted to our realtime database.
public class Article {

    public String title;
    public String author;

    public Article() {
        // Default constructor required for calls to DataSnapshot.getValue(Article.class)
    }

    public Article(String title, String author) {
        this.title = title;
        this.author = author;
    }
}
Create the XML Layout
Our XML layout for the main Activity will have just two EditTexts and just a button that will submit the new article.
<?xml version="1.0" encoding="utf-8"?>
<LinearLayout
        xmlns:android="http://schemas.android.com/apk/res/android"
        xmlns:tools="http://schemas.android.com/tools"
        xmlns:app="http://schemas.android.com/apk/res-auto"
        android:layout_width="match_parent"
        android:layout_height="match_parent"
        tools:context="com.chikeandroid.tutsplusalerts.MainActivity"
        android:orientation="vertical">

    <EditText
            android:id="@+id/et_title"
            android:layout_width="match_parent"
            android:layout_height="wrap_content"
            android:hint="Title"/>

    <EditText
            android:id="@+id/et_author"
            android:layout_width="match_parent"
            android:layout_height="wrap_content"
            android:hint="Author"/>

    <Button
            android:id="@+id/btn_submit"
            android:layout_width="match_parent"
            android:layout_height="wrap_content"
            android:hint="Submit"/>
</LinearLayout>
Write to the Realtime Database
Now we are going to write to the Realtime Database path /articles/.
// ...
@Override
protected void onCreate(Bundle savedInstanceState) {
    super.onCreate(savedInstanceState);
    setContentView(R.layout.activity_main);

    final FirebaseDatabase database = FirebaseDatabase.getInstance();

    final EditText titleEditText = (EditText)findViewById(R.id.et_title);
    final EditText authorEditText = (EditText)findViewById(R.id.et_author);
    Button submitButton = (Button)findViewById(R.id.btn_submit);
    submitButton.setOnClickListener(new View.OnClickListener() {
        @Override
        public void onClick(View view) {
            DatabaseReference myRef = database.getReference("articles").push();
            Article article = new Article(titleEditText.getText().toString(),
                    authorEditText.getText().toString());
            myRef.setValue(article);
        }
    });
}
//...
Your app will need write access to the database. For demo purposes only, you can set your Security Rules to permit all reads and writes. In a real application, you would never want to use such insecure security settings.
{
  "rules": {
    ".read": "true",
    ".write": "true"
  }
}
You can learn more about Firebase Security Rules in my post here on Envato Tuts+.
Run the App
At this stage, we can test the app and see if our Cloud Function was executed successfully. Enter a title and author, and then click the submit button. After that, visit the Functions dashboard and view the logs. Our custom log should appear.
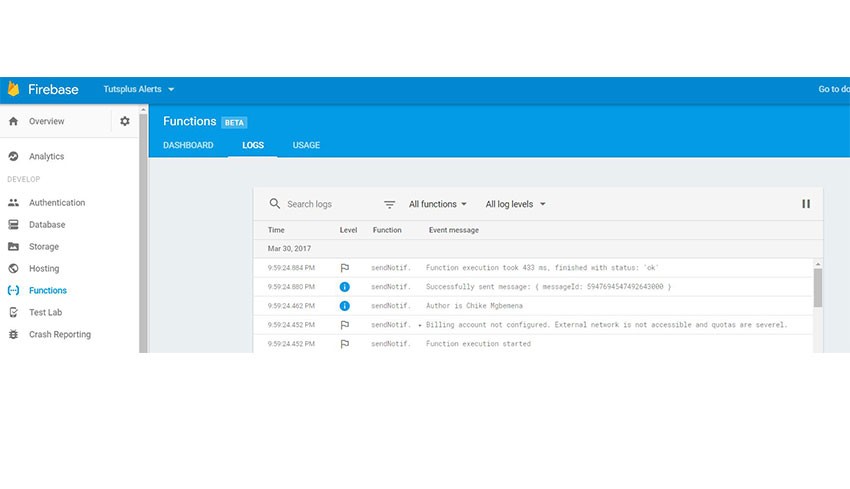
From the logs above, we see that we have successfully executed our Cloud Function and sent a message with a payload to devices subscribed to the 'android' topic, but no device has subscribed to the topic yet. In the next section, we'll use Firebase Cloud Messaging so that devices can subscribe to a topic and then process the incoming message from the server to show a notification.
3. Add Firebase Cloud Messaging Support
Include the Dependency
Include the Firebase Messaging dependency to your build.gradle file and sync your project afterwards:
compile 'com.google.firebase:firebase-messaging:10.2.1'
Handling Messages
We need to create a service that extends FirebaseMessagingService and overrides the onMessageReceived callbacks.
package com.chikeandroid.tutsplusalerts;

import com.google.firebase.messaging.FirebaseMessagingService;
import com.google.firebase.messaging.RemoteMessage;

import android.app.NotificationManager;
import android.app.PendingIntent;
import android.content.Context;
import android.content.Intent;
import android.media.RingtoneManager;
import android.net.Uri;
import android.support.v4.app.NotificationCompat;

public class MyFirebaseMessagingService extends FirebaseMessagingService {

    @Override
    public void onMessageReceived(RemoteMessage remoteMessage) {

        // Check if message contains a data payload.
        if (remoteMessage.getData().size() > 0) {
            showNotification(remoteMessage.getData().get("title"), remoteMessage.getData().get("author"));
        }

        // Check if message contains a notification payload.
        if (remoteMessage.getNotification() != null) {

        }
    }

    private void showNotification(String title, String author) {
        Intent intent = new Intent(this, MainActivity.class);
        intent.addFlags(Intent.FLAG_ACTIVITY_CLEAR_TOP);
        PendingIntent pendingIntent = PendingIntent.getActivity(this, 0 /* Request code */, intent,
                PendingIntent.FLAG_ONE_SHOT);

        Uri defaultSoundUri= RingtoneManager.getDefaultUri(RingtoneManager.TYPE_NOTIFICATION);
        NotificationCompat.Builder notificationBuilder = new NotificationCompat.Builder(this)
                .setContentTitle("New Article: " + title)
                .setSmallIcon(R.mipmap.ic_launcher)
                .setContentText("By " + author)
                .setAutoCancel(true)
                .setSound(defaultSoundUri)
                .setContentIntent(pendingIntent);

        NotificationManager notificationManager =
                (NotificationManager) getSystemService(Context.NOTIFICATION_SERVICE);

        notificationManager.notify(0 /* ID of notification */, notificationBuilder.build());
    }
}
In the above code, we are also getting the data payload and showing it in a notification regardless of whether the application is in a foreground or background state.
Update the Manifest File
Update the manifest file, including the service created earlier inside the <application> tag.
//..
<service
    android:name=".MyFirebaseMessagingService">
    <intent-filter>
        <action android:name="com.google.firebase.MESSAGING_EVENT"/>
    </intent-filter>
</service>
//...
Subscribe to a Topic
Finally, we need to subscribe to the topic 'android' so that the device can receive and process messages sent to that topic.
/...
@Override
protected void onCreate(Bundle savedInstanceState) {
    // ...
    FirebaseMessaging.getInstance().subscribeToTopic("android");
    // ...
}
//...
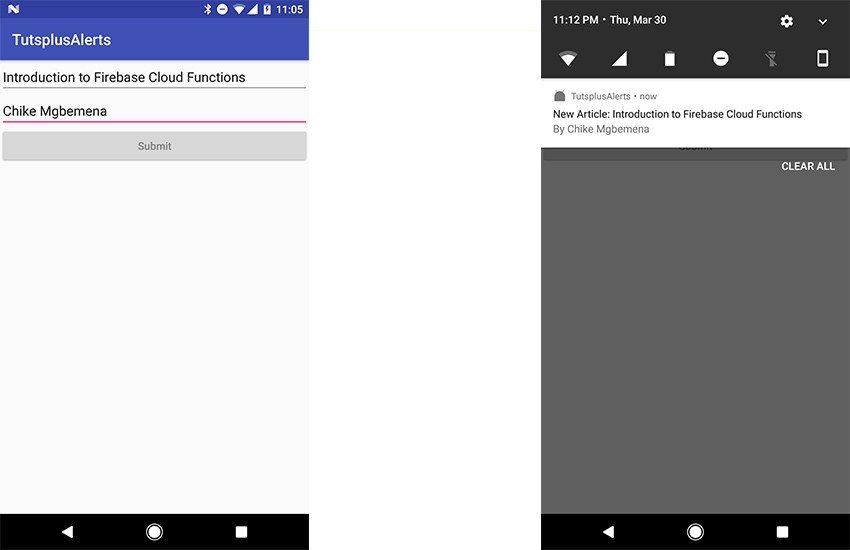
Run the App
Run the app for the second time and enter a title and an author, and then click the submit button. This time, a notification will show up whenever a new article is posted to the database by any app user.
To do this before Cloud Functions, you would have needed an HTTP or XMPP server, which would mean more code to write, as well as a server to set up and support.
Conclusion
In this tutorial, you learned about Cloud Functions for Firebase: what they are, why you might need them, and how to get started using Cloud Functions for your app. Be aware that Cloud Functions for Firebase is still in public beta as of this writing.
To learn more about Cloud Functions for Firebase, do refer to the official documentation. And in the meantime, check out some of our other courses and tutorials on Android app development!


Comments