Facebook Login provides a convenient and secure way for people to log in to an app without having to go through a sign-up process first. Using the latest version of Facebook's SDK for Android, it takes only a few minutes to add this feature to your app.
In this quick tip, you will learn how to add a Facebook login button to an Android app and handle the events to log a user in using Facebook Login.
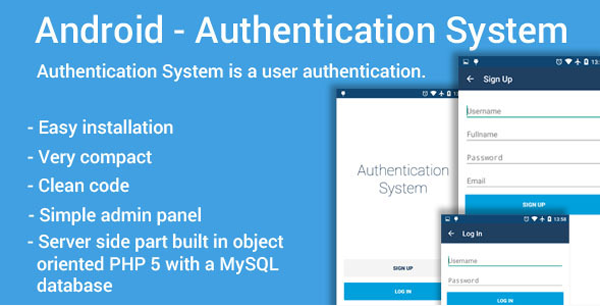
Premium Option
If you want a quick solution for setting up user authentication in your Android apps, try Android Authentication System on Envato Market. It's a source code project that lets developers create signups and logins and authorize users for their app.
You can also find Android developers on Envato Studio to help you with your projects.

Prerequisites
Before you begin, make sure you have access to the following:
- the latest version of Android Studio
- a Facebook account
1. Register Your App
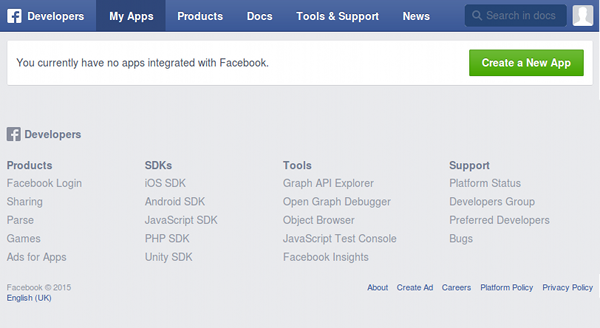
All apps that use the Facebook SDK must be registered with Facebook. Log in to the Facebook Developers website and click Create a New App in the top right.
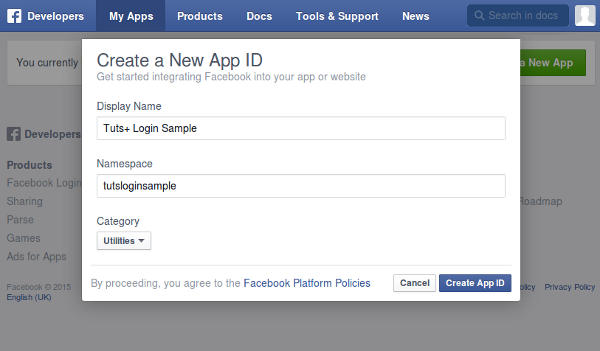
You are presented with a form that asks for the app's Display Name, Namespace, and Category. Enter the required fields and click Create App ID.
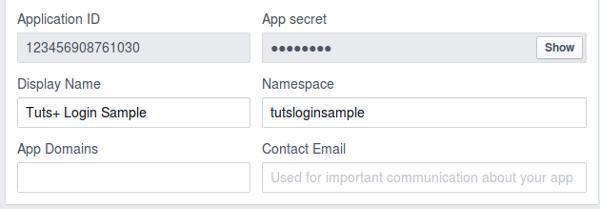
In the next screen, you are able to see your Application ID. Make a note of it, because you will be needing it later in this tutorial.
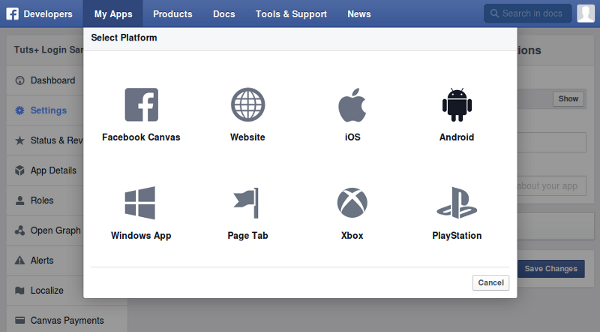
Open Settings from the left and click the Add Platform button. From the pop-up, select Android.
In the next form, enter the package name of your app and the name of your Activity. If you haven't created your app or Activity yet, make sure you remember the values you entered.
To fill in the Key Hashes field, open a terminal window and run the keytool command to generate a key hash using the debug keystore located at ~/.android/debug.keystore. This is what the command should look like.
keytool -exportcert -alias androiddebugkey -keystore ~/.android/debug.keystore | openssl sha1 -binary | openssl base64
The default password for the debug keystore is android. Enter that password when prompted. The output of the command should be a string of 28 characters. Copy it, go back to your browser, and paste the string into the Key Hashes field as shown below.
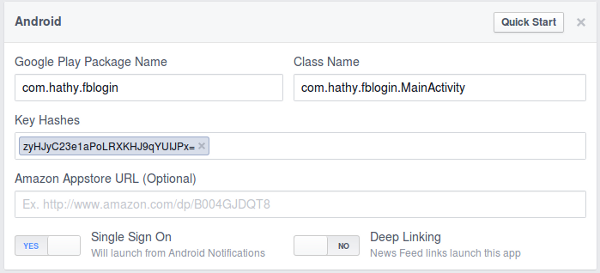
Make sure Single Sign On is set to Yes and click the Save Changes button. Your app is now registered.
2. Add Facebook SDK to Your Project
The Facebook SDK is available on Maven Central. To use this repository, edit the build.gradle file in your project's app directory and add the following code to it before the list of dependencies:
repositories {
    mavenCentral()
}
You can now add the Facebook SDK to your project as a compile dependency. Add the following code to the list of dependencies:
compile 'com.facebook.android:facebook-android-sdk:4.0.0'
3. Create an Activity
Step 1: Define the Layout
Create a new layout named main_activity.xml in res/layout. This is going to be a very simple layout with only two widgets:
- a
LoginButtonto allow the user to log in to Facebook - a
TextViewto display the result of the latest login attempt
You can place them inside a RelativeLayout. After including attributes for padding and positioning the widgets, the layout's XML will look something like this:
<?xml version="1.0" encoding="utf-8"?>
<RelativeLayout xmlns:android="http://schemas.android.com/apk/res/android"
    android:layout_width="match_parent" android:layout_height="match_parent"
    android:padding="16dp"
    >

    <TextView
        android:layout_width="wrap_content"
        android:layout_height="wrap_content"
        android:id="@+id/info"
        android:layout_alignParentLeft="true"
        android:layout_alignParentTop="true"
        android:textSize="18sp"
        />

    <com.facebook.login.widget.LoginButton
        android:id="@+id/login_button"
        android:layout_width="wrap_content"
        android:layout_height="wrap_content"
        android:layout_centerInParent="true"
        />

</RelativeLayout>
Step 2: Create the Class
Create a new Java class that extends Activity and name it MainActivity.java. Remember that the name of this class and the package that it belongs to should match the values you entered while registering your app with Facebook.
Declare the widgets you defined in the activity's layout as fields of this class.
private TextView info;
private LoginButton loginButton;
Declare a CallbackManager as another field. The CallbackManager, as its name suggests, is used to manage the callbacks used in the app.
private CallbackManager callbackManager;
The SDK needs to be initialized before using any of its methods. You can do so by calling sdkInitialize and passing the application's context to it. Add the following code to the onCreate method of your Activity:
FacebookSdk.sdkInitialize(getApplicationContext());
Next, initialize your instance of CallbackManager using the CallbackManager.Factory.create method.
callbackManager = CallbackManager.Factory.create();
Call setContentView to set the layout defined in the previous step as the layout of this Activity and then use findViewById to initialize the widgets.
setContentView(R.layout.main_activity);
info = (TextView)findViewById(R.id.info);
loginButton = (LoginButton)findViewById(R.id.login_button);
It's time to create a callback to handle the results of the login attempts and register it with the CallbackManager. Custom callbacks should implement FacebookCallback. The interface has methods to handle each possible outcome of a login attempt:
- If the login attempt is successful,
onSuccessis called. - If the user cancels the login attempt,
onCancelis called. - If an error occurs,
onErroris called.
To register the custom callback, use the registerCallback method. The code to create and register the callback should look like this:
loginButton.registerCallback(callbackManager, new FacebookCallback<LoginResult>() {
    @Override
    public void onSuccess(LoginResult loginResult) {

    }

    @Override
    public void onCancel() {

    }

    @Override
    public void onError(FacebookException e) {

    }
});
You can now add code to these methods to display appropriate messages using the setText method of the TextView.
When the onSuccess method is called, a LoginResult is passed as a parameter. Retrieve the access token it contains using getAccessToken and use its getUserId method to get the user's ID. To get the token in the form of a String, use getToken. Display these values in the TextView by adding the following code to the onSuccess method:
info.setText(
    "User ID: "
    + loginResult.getAccessToken().getUserId()
	+ "\n" +
    "Auth Token: "
	+ loginResult.getAccessToken().getToken()
);
If the user cancel's the login attempt, we display a message saying "Login attempt canceled". Add the following code to the onCancel method:
info.setText("Login attempt canceled.");
Similarly, add the following code to the onError method:
info.setText("Login attempt failed.");
Tapping the login button starts off a new Activity, which returns a result. To receive and handle the result, override the onActivityResult method of your Activity and pass its parameters to the onActivityResult method of CallbackManager.
@Override
protected void onActivityResult(int requestCode, int resultCode, Intent data) {
    callbackManager.onActivityResult(requestCode, resultCode, data);
}
4. Add the Facebook Application ID
The application ID you received when you registered your app should be added as a string in your project's res/values/strings.xml. For this tutorial, call the string facebook_app_id.
<string name="facebook_app_id">123456908761030</string>
5. Edit the Manifest
Define your Activity in the AndroidManifest.xml. If it is the first Activity of your app, you should also add an intent-filter that responds to the action android.intent.action.MAIN.
<activity android:name="com.hathy.fblogin.MainActivity">
    <intent-filter>
        <action android:name="android.intent.action.MAIN"/>
        <category android:name="android.intent.category.LAUNCHER"/>
    </intent-filter>
</activity>
Add the application ID as meta-data.
<meta-data android:name="com.facebook.sdk.ApplicationId"
   android:value="@string/facebook_app_id"/>
Define FacebookActivity as another Activity that belongs to your app. It handles most of the configuration changes itself. You need to mention that using the configChanges attribute.
<activity android:name="com.facebook.FacebookActivity"
  android:configChanges=
         "keyboard|keyboardHidden|screenLayout|screenSize|orientation"
  android:theme="@android:style/Theme.Translucent.NoTitleBar"
  android:label="@string/app_name" />
Finally, you have to request android.permission.INTERNET to be able to connect to Facebook's servers.
<uses-permission android:name="android.permission.INTERNET"/>
6. Build and Run
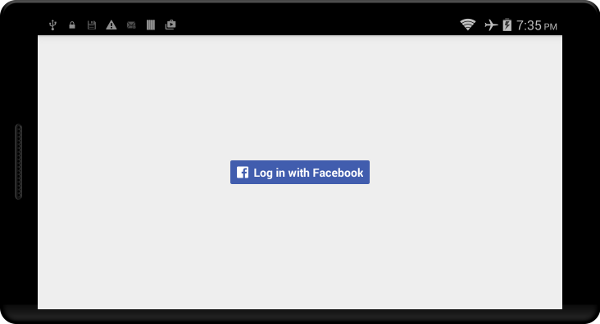
Your app is now complete. When you build it and deploy it on your Android device, you will see the Facebook login button.
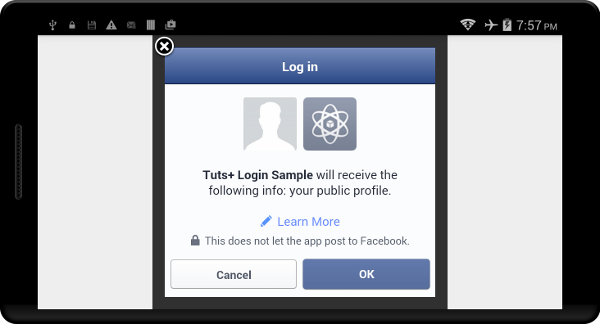
Tapping the login button takes you to a Facebook page that asks you to log in and authorize the app.
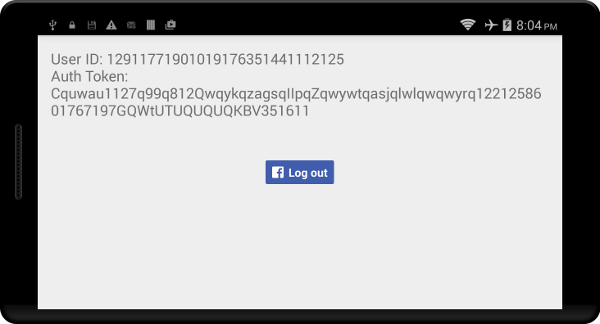
After successfully logging in, the TextView will display the user ID and auth token.
Conclusion
In this quick tip, you learned how to use the Facebook SDK to add Facebook Login to your Android app. You also learned how to handle the possible outcomes of a login attempt. To learn more about Facebook Login, you can go through the reference for the Facebook SDK for Android.

Comments