In the last two tutorials we looked at ways to use PreCSS on completed stylesheets to enhance their cross browser compatibility and optimization, essentially as a post-processor. In this tutorial you’ll learn to use PostCSS as a pre-processor, in the same way you would use Stylus, Sass or LESS.
There are two main ways you can go about using PostCSS for preprocessing. One is to select all your own plugins to add the preprocessor functionality you want, and the other is to install a pack of preselected plugins so you’re ready to go right away.
We’ll start with the quickest and easiest approach, installing the excellent PreCSS pack of plugins, created by Jonathan Neal. In the tutorial after this we’ll move onto how you can put together your own preprocessor, using only the functionality you want.
This tutorial will assume you have some degree of familiarity with the features commonly found in preprocessors like Stylus, Sass or LESS. That’s purely because we’ll be focusing on how you can use these same types of features via PostCSS, rather than what the features actually do. That said though, even if you’ve never used a preprocessor before, this might be the perfect place to start.
Try Out PreCSS Live
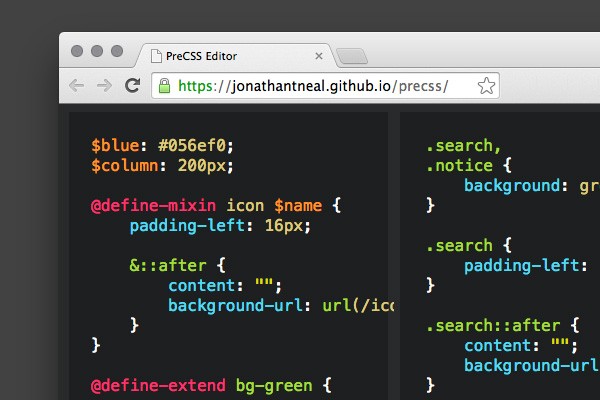
We’ll go through how to setup a Gulp or Grunt project using PreCSS in the next section, however, if you would like to take a shortcut, (just for now), you can alternatively use the live demo playground to try out the code we’ll run through in this tutorial. Code can be typed into the left window, and it will automatically compile for you and display in the right window.
Setup Your Project
The first thing you’ll need to do is setup your project to use either Gulp or Grunt, depending on your preference. If you don’t already have a preference for one or the other I recommend using Gulp as you’ll need less code to achieve the same ends.
You can read about how to setup Gulp or Grunt projects for PostCSS in the previous tutorials
respectively.
If you don't want to manually setup your project from scratch though, you can download the source files attached to this tutorial, and extract either the provided Gulp or Grunt starter project into an empty project folder.
Then, with a terminal or command prompt pointed at the folder, run the commandnpm install.
Install PreCSS
Whether you’re using Gulp or Grunt, install PreCSS into your project with the command:
npm install precss --save-dev
Load as a Gulp Plugin
If you’re using Gulp, add this variable under the variables already in the file:
var precss = require('precss');
Now add the new variable name into your processors array:
    var processors = [
		precss
	];
Do a quick test that everything is working by running the command gulp css then checking that a new “style.css” file has appeared in your project’s “dest” folder.
Load as a Grunt Plugin
If you’re using Grunt, update the processors object, which is nested under the options object, to the following:
        processors: [
          require('precss')()
        ]
Do a quick test that everything is working by running the command grunt postcss then checking that a new “style.css” file has appeared in your project’s “dest” folder.
You now have everything you need to use PreCSS installed and ready to go. This means we’re ready to start stepping through the some of the preprocessing capabilities of PreCSS and how they can be used.
Preprocessing via “PreCSS”
Generally speaking, PreCSS syntax is most similar to that of Sass. However it does use some of its own unique approaches, which we’ll cover as we go along.
Note: because of the Sass-like syntax of PreCSS, you’ll find that a Sass syntax highlighter will work best for you in your favorite text editor.
Nesting
Nesting is something common to all three of the major preprocessors, i.e. Stylus, Sass and LESS, and it’s also present in PreCSS. Nesting in PreCSS is done in the same way as in Sass and LESS, by placing selectors inside the curly brackets of other selectors.
The ability to use the & symbol to have the parent selector duplicated into the child selector also works in the same way in PreCSS as in other preprocessors.
Try adding the following nested code to your “src/style.css” file:
.menu {
    width: 100%;
	a {
		text-decoration: none;
	}
	&::before {
		content: '';
	}
}
Compile your CSS with gulp css or grunt postcss and your “dest/style.css” file should have evaluated the nested code into the following:
.menu {
    width: 100%;
}

.menu a {
	text-decoration: none;
}

.menu::before {
	content: '';
}
Variables
Variables are another type of functionality common to all preprocessors, and they are included in PreCSS. The only thing typically differing between each preprocessor is the syntax to denote variables.
- LESS variables begin with an
@symbol and place a:before the value. - Stylus variables can optionally use a
$symbol and place an=sign before the value. - Sass variables use a
$symbol and place a:before the value.
In keeping with the PreCSS tendency to uses Sass like syntax, it too places a $ before the variable name and a : before the value.
Try out using PreCSS variables by adding this to your “src/style.css” file:
$text_color: #232323;

body {
    color: $text_color;
}
After recompiling you should see this resulting code:
body {
    color: #232323;
}
Conditionals
Conditionals, i.e. if and else logic, are a feature that is very strong in both Sass and Stylus. LESS offers guarded mixins, but they don’t offer quite the same degree of power. Conditionals are present in PreCSS and follow the same syntax as Sass, using @if and @else.
Add this example code to your “src/style.css” file:
$column_layout: 2;

.column {
    @if $column_layout == 2 {
		width: 50%;
		float: left;
	}	@else {
		width: 100%;
	}
}
In the above example we’re having a .column class output differently depending on if we want a one column layout, or a two column layout. We have the $column_layout variable set to 2, meaning we should see width: 50%; float: left; output into our class.
Compile your file, and you should see the following in your “dest/style.css” file.
.column {
    width: 50%;
    float: left
}
Note: the postcss-advanced-variables plugin that provides this conditionals functionality is still quite new, and I have encountered some unexpected output when using it for more complex conditionals, however, I’m sure it will be updated in the near future.
There is an alternative plugin that can be used for conditionals named postcss-conditionals. We’ll cover how you can use that plugin (if you choose) in the next tutorial, “Rolling Your Own Preprocessor”.
Loops - @for and @each
There are two types of loops available in PreCSS, the @for and @each loops. Both of these use an approach that is just like Sass. “For” loops let you cycle through a numerical counter, while “each” loops let you cycle through a list of items.
@for Loops
In a @for loop there is a “counter” variable that keeps track of where you are in cycling through your numeric counter, typically set as $i. For example, when iterating from 1 to 3 there will be three loops; in the first $i will equal 1, the second it will equal 2 and the third it will equal 3.
This $i counter variable can be interpolated into both selectors and rules, which can be very handy for things like generating nth-of-type() rules and calculating widths.
Add this code to your “src/style.css” file to try out a @for loop:
@for $i from 1 to 3 {
    p:nth-of-type($i) {
		margin-left: calc( 100% / $i );
	}
}
After compilation you should see this code expanded out to:
p:nth-of-type(1) {
    margin-left: calc( 100% / 1 );
}

p:nth-of-type(2) {
    margin-left: calc( 100% / 2 );
}

p:nth-of-type(3) {
	margin-left: calc( 100% / 3 );
}
Note: numbers 1, 2 and 3 have been inserted into each of the above styles.
@each Loops
An @each loop cycles through a list of items instead of numbers. As with @for loops, the variable representing the loop’s current item can be interpolated into selectors and rules. Note that to interpolate into a string, you need to insert a set of brackets into the variable name in the format $(var).
Give using PreCSS @each loops a go by adding the following example code:
$social: twitter, facebook, youtube;

@each $icon in ($social){
    .icon-$(icon) {
		background: url('img/$(icon).png');
	}
}
After compilation you should see the following CSS has been generated:
.icon-twitter {
    background: url('img/twitter.png');
}

.icon-facebook {
    background: url('img/facebook.png');
}

.icon-youtube {
	background: url('img/youtube.png');
}
Mixins
The syntax for mixin creation is one aspect of PreCSS that’s a little different to Sass.
In Sass, to define a mixin you use the syntax @mixin mixin_name($arg1, $arg2) {...} and then use it with @include mixin_name(pass_arg1, pass_arg2);.
In PreCSS, on the other hand, you define a mixin with the syntax @define-mixin mixin_name $arg1, $arg2 {...} and use it with @mixin mixin_name pass_arg1, pass_arg2;.
Add this example to your “src/style.css” file:
@define-mixin icon $network, $color {
    .button.$(network) {
		background-image: url('img/$(network).png');
		background-color: $color;
	}
}

@mixin icon twitter, blue;

@mixin icon youtube, red;
On compilation you should see:
.button.twitter {
    background-image: url('img/twitter.png');
    background-color: blue;
}

.button.youtube {
	background-image: url('img/youtube.png');
	background-color: red;
}
Note: arguments passed through the mixin can be interpolated into selectors and strings with the same approach as mentioned in @each loops above; with the format $(var).
Using @mixin-content
As well as using mixins in the way shown above, they can also be set to consume blocks of content passed when calling the mixin. This is essentially the same process as with Sass’ @content.
For instance, modify the mixin from the above example, placing @mixin-content where you want a passed block of content to appear, like so:
@define-mixin icon $network, $color {
    .button.$(network) {
		background-image: url('img/$(network).png');
		background-color: $color;
		@mixin-content;
	}
}
When a mixin incorporating @mixin-content is used, it must be placed with curly brackets, rather than on a single line ending with a ;, or it will fail to compile.
Update your code so your mixin calls look like this:
@mixin icon twitter, blue {
    width: 3rem;
}

@mixin icon youtube, red {
	width: 4rem;
}
After compilation, this should yield the following code - notice the inclusion of the width content passed through each use of the mixin:
.button.twitter {
    background-image: url('img/twitter.png');
	background-color: blue;
	width: 3rem;
}

.button.youtube {
	background-image: url('img/youtube.png');
	background-color: red;
	width: 4rem;
}
Extends
Extends are similar to mixins in a sense, in that they’re designed to allow you to reuse blocks of code. However, the idea behind “extends” is to create a base set of code you know you’re going to use in the exact same way multiple times for a certain type of element. You can then subsequently extend on that base with additional, non-default code.
In PreCSS, the syntax to define an extend is @define-extend extend_name {...}.
In your “src/style.css” file, define an extend containing the base styles for a rounded button like so:
@define-extend rounded_button {
    border-radius: 0.5rem;
	padding: 1em;
	border-width: 0.0625rem;
	border-style: solid;
}
This default set of styles is now ready be extended on with extra code, for example, setting things like background-color and border-color. This is done by using the syntax @extend extend_name; to import the base styles defined in the extend.
Add this example code, underneath the code you just added:
.blue_button {
    @extend rounded_button;
	border-color: #2F74D1;
	background-color: #3B8EFF;
}

.red_button {
	@extend rounded_button;
	border-color: #C41A1E;
	background-color: #FF2025;
}
Where the @extend rounded_button; line is used, the entire contents of the extend will be inserted.
Compile your styles and you should get:
.blue_button,
.red_button {
    border-radius: 0.5rem;
	padding: 1em;
	border-width: 0.0625rem;
	border-style: solid;
}

.blue_button {
	border-color: #2F74D1;
	background-color: #3B8EFF;
}

.red_button {
	border-color: #C41A1E;
	background-color: #FF2025;
}
Note also that the styles common to the .blue_button and .red_button class have been combined for efficiency.
Imports
The plugin used for inlining stylesheets via @import is the same one we covered in the previous tutorial of this series: For Minification and Optimization. For a rundown on how it works head over and have a read of the sectioned headed “Inline / Combine Files with @import”.
In the context of using PostCSS as a preprocessor, imports become even more useful as they give you the option of setting up partials, something you might be used to from other preprocessing solutions. For example, you might setup a “partials” folder, separate your project into logically discrete partial files then import them like so:
@import "partials/_variables.css";
@import "partials/_utilities.css";
@import "partials/_mixins.css";
@import "partials/_extends.css";
Let’s Recap
I hope you now have some insights into how powerful PostCSS can be as a preprocessor by way of the PreCSS pack. To summarize what we covered above:
- You can try out PreCSS live at https://jonathantneal.github.io/precss.
- Nesting in PreCSS works the same way as Sass and LESS.
- Variables in PreCSS use the same syntax as Sass.
- Conditionals are present in PreCSS, using the syntax @if and @else.
- @for and @each loops are available.
- PreCSS mixins are defined with the syntax:
@define-mixin mixin_name $arg1, $arg2 {...} - PreCSS mixins are used with the syntax:
@mixin mixin_name pass_arg1, pass_arg2; -
@mixin-contentcan be used in the same way as Sass'@content - Extends in PreCSS are defined with the syntax:
@define-extend extend_name {...}
- Extends are used with the syntax:
@extend extend_name;
-
@importinlines external CSS files, particularly helpful for using partials
In the Next Tutorial
PreCSS is a fantastic project, bringing together some excellent language extension plugins and making PostCSS-based preprocessing pretty much plug and play. It provides almost all of the functionality most preprocessor users have come to expect, and is a quick, “no fuss” way to get the PostCSS preprocessor ball rolling.
Using PreCSS is one of the two methods of PostCSS preprocessing we mentioned at the start of this tutorial. The other method is to setup your own preprocessor, hand picking the language extension plugins that suit your own projects or coding style. The trade off is it’s a little more setup, but in return you get the freedom to put together a preprocessor that works however you want it to.
You’ll learn how to do this in the next tutorial, “Roll Your Own Preprocessor”.

Comments