
In the first part of this series I am going to show you how you can generate buttons to collect payments through PayPal using their Button Creation Tool. You won't have to write a single line of code—just copy and paste an HTML snippet.
This is the easiest integration to take payments from PayPal. It works on mobile devices, tablets and PC. To create a payment button, you have to log in on the PayPal website, and then copy and paste a short HTML snippet on your website to add a payment button for a single item or for a shopping cart. You can securely accept credit card, debit card, or PayPal payments.
There are seven types of payment buttons that you can generate from your PayPal Business account after you log in and navigate to the PayPal Button Creation Tool.
Buy Now Buttons: Single-Item Payments

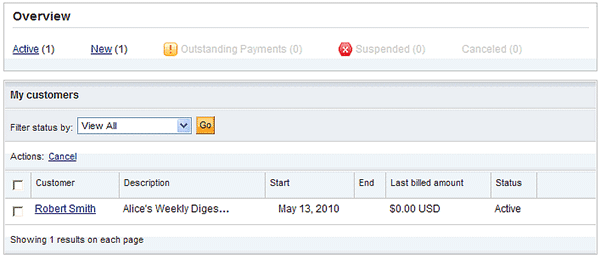
This type of button is widely used and very simple to set up. Start by logging in to your PayPal Account and navigating to PayPal Buttons. In this section you can see all your saved buttons. Bear in mind that you can customise the text on every button, and you can even use your custom images if you like. You can also assign an optional item id to each button to link to each product id that you have. So you could have multiple "Buy Now" buttons on your website if you have multiple products.
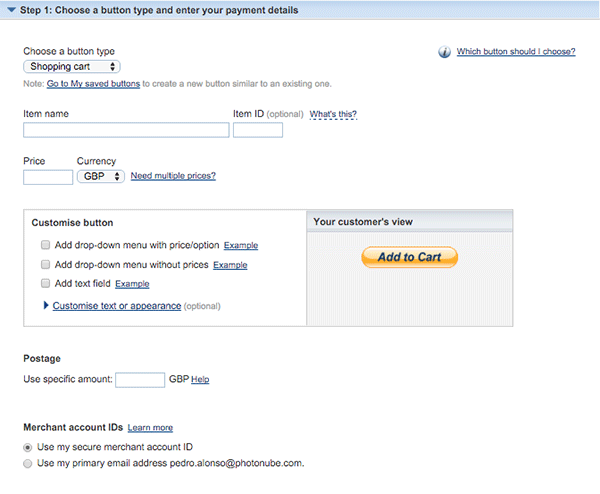
To create a new button, in the Related Items box on the right, click the Create new button link, and the following form will open:
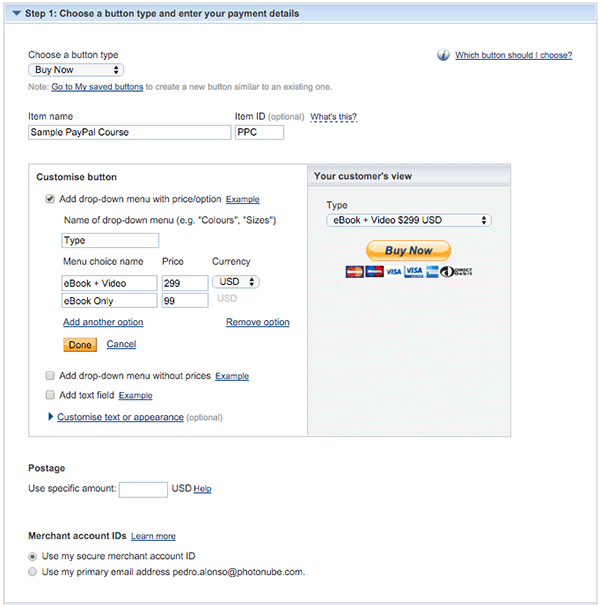
Enter the payment details for your item here, as well as the item name and price. In this example the item name is "Sample PayPal Course". This button comes with a dropdown and two different prices. If you only have one price, the dropdown will not be shown. Now click on Create Button, and Add your button code to your webpage opens:

Copy the generated HTML code and paste it in your web editor where you want the button to appear.
Checkout Experience With Buy Now Buttons
The following diagram shows what the navigation journey is for the user after clicking on your Buy Now PayPal Button.
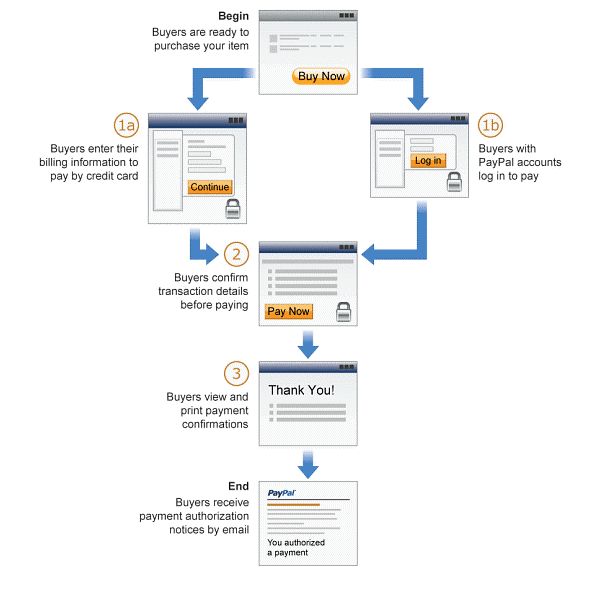
As you can see in the diagram, after clicking on Buy Now, your customer is redirected to PayPal. Your customer can log in to his or her PayPal account and pay with the PayPal balance (1a) or securely enter credit card details (1b). After this step, an order summary is displayed (2), and clicking on Pay Now will capture the payment, display the Thank You page (3), and notify your customer by email.
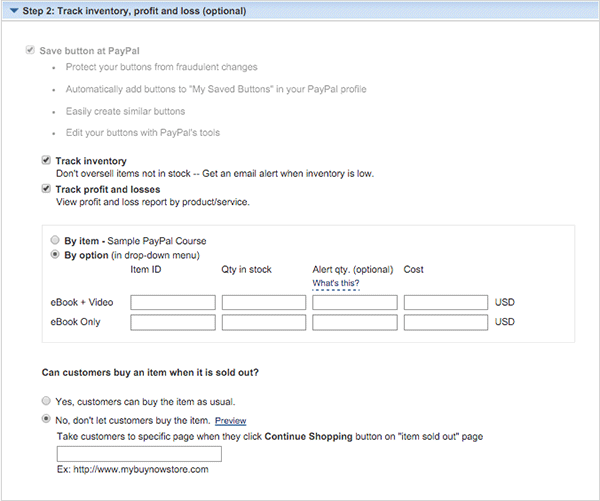
Tracking Inventory and Tracking Profit and Loss
If you are selling digital products, possibly you will not be interested in this feature, but this is an interesting feature when you are selling physical products. PayPal lets you manage your stock quantities so you don't oversell, as well as letting you introduce your cost per product, so you can have a quick overview of revenue and profit. This can be enabled from the Create Button form, step 2.
Advanced Features
The basic checkout experience leaves buyers on the PayPal website after they make the payment. You can modify that behavior so your customers return to your website after checkout. This can be set up from the Create Button form, step 3.
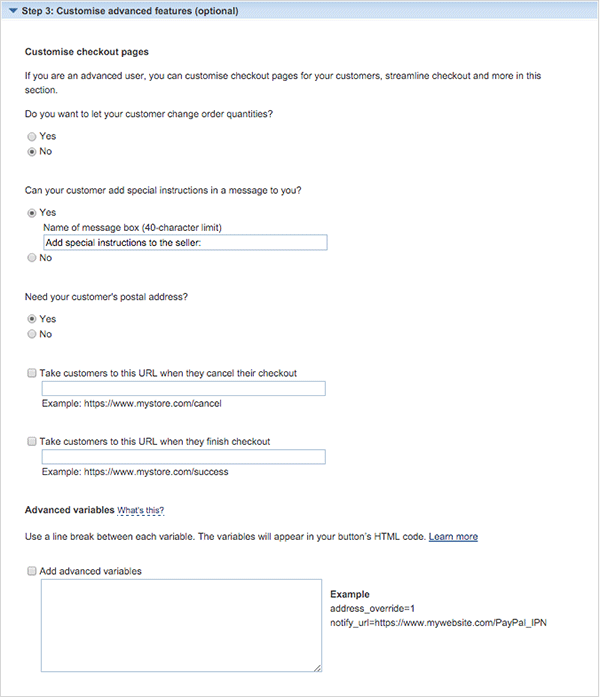
- Change order quantity: This is disabled by default, and the quantity is one. If you enable this, PayPal prompts buyers for quantities after they click on your Buy Now button.
- Special instructions: You can enable this field to allow your buyers to leave you a short message with the order.
- Shipping address: If you are selling a physical product, you need the buyer address to post the item. If you are selling a digital download, probably you do not need the address.
- Custom cancel webpage: You can create a custom page where your customers will be redirected if they cancel their checkout. Enter the URL of that page in this field.
- Custom success webpage: You can create a custom page where you customers will be redirected after a successful payment. Enter the URL of that page in this field.
If your needs for taking PayPal payments are not very complex, possibly this is the only integration that you might need, and you can see that you don't need to do any actual coding.
Donate Buttons: Contribution Payments

Donate buttons are very similar to Buy Now buttons, and they're commonly used on websites to collect contribution payments from donors. They can be configured to collect either pre-determined contribution amounts or amounts selected by donors.
To create a Donate button, you have to open the Create new button form again:
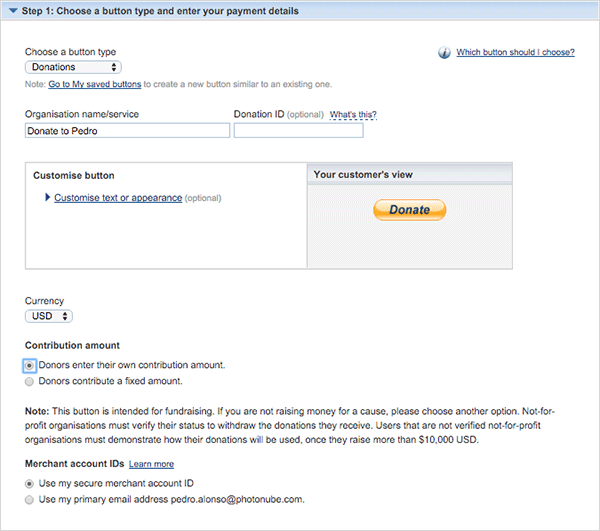
Select Donations on the Choose a button type drop-down. All the other options are the same as for the Buy Now button, except that in this case there's no inventory tracking or profit and loss tracking.
Subscribe Buttons: Recurring Payments

If you want to obtain subscription payments automatically from buyers for access to online content and services, this is the type of button that you should use. To create it, you have to open again the Create New Button form:
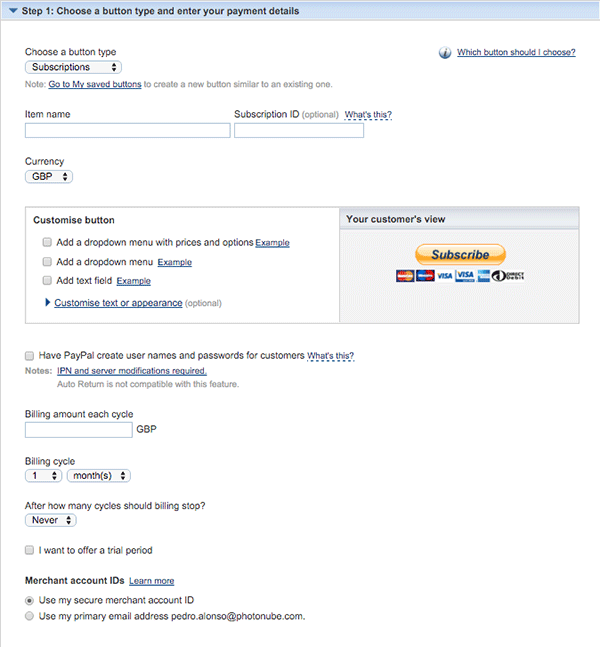
After you select Subscriptions from the Choose a button type drop-down, the form is pretty similar to the previous button types, but there are some small differences:
- Have PayPal create user names and passwords for customers: This is an advanced feature, where PayPal generates a username and password for each subscription. You need to implement some code in your website, because PayPal notifies your website, so you can save the username and password in your database so your users can access your private content. For this scenario I recommend using the PayPal REST API; I am going to explain how it works in the next article of this series.
- Billing amount each cycle: Enter the amount that your customers will pay you each billing cycle.
- Billing cycle: Select a number and unit of duration from the dropdown menus for the regular subscription billing cycle.
- After how many cycles should billing stop?: Optionally you can select a limit to the number of payments.
- Offer trial period: You can offer an optional trial period for free or at a discount compared to the regular price. Select this checkbox if you want to offer a trial and fill in the fields, the amount to bill for the trial, and the trial period. You can optionally offer a second trial period.
How Billing Cycles and Recurring Payments Work
PayPal attempts to collect recurring payments from subscribers on the day after the previous billing cycle or trial period ends. Billing cycles can be daily, weekly, monthly or yearly, depending on the terms of the original subscription. If the payment is weekly, the charge will be made each week on the same day. If the payment is monthly, the charge will be on the same day of the month, each month. For yearly payments, the payment is collected on the same day of the month, each year.
Canceling Subscriptions
As a subscription service provider, you can cancel the subscriptions of individual subscribers from the Subscription Details pages of your PayPal account. In addition, your subscribers can cancel their subscriptions from their PayPal account.
Creating an Unsubscribe Button
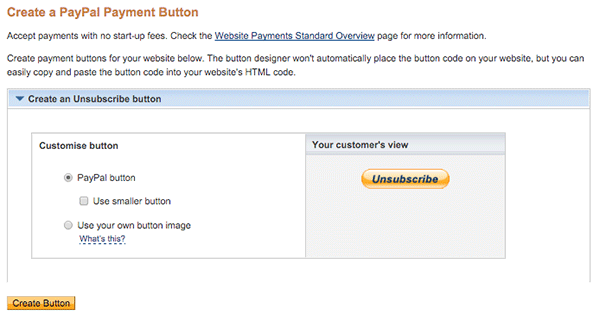
You have the option to add this button in your private area, so each customer can cancel their subscription whenever they want. Considering that after a subscription has been canceled, you can not reactivate it again, I probably would not add this button; instead, I would add a form to contact the website manager to request a cancelation of the service. At least there would be a last chance to keep the customer happy. If you still want to add this button, after you create the Subscription button, on the confirmation page, you can see this:

Click on Create an Unsubscribe button, and this page will open:
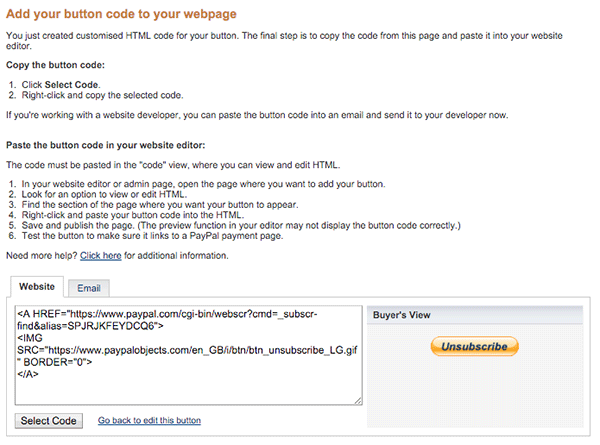
After you click on Create Button, you get the HTML code to copy and paste in your customer private area:
As you can see, if you want to sell a subscription to your customers, it can be easily achieved by generating buttons from your PayPal business account.
Automatic Billing Buttons: Recurring Payments

Automatic Billing is similar to a Subscription, but the charge for each billing cycle is not fixed. Your customer will authorise a payment up to a limit amount. Then you need to go every billing cycle, monthly for example, and set the amount that your customer has consumed.
For instance, let's say that you are selling a cleaning service subscription. Your customers could authorise you to charge up to $200 per month, and some months they may use fewer hours, and the charge might be less than $200.
To create an Automatic Billing button, you have to navigate to the PayPal Button Creation Tool, and select Automatic Billing from the Choose a button type dropdown.
Managing Automatic Billing Agreements
To view the Automatic Billing agreements, you have to navigate to the recurring payments dashboard. In this dashboard you can see the subscription payments, automatically billed payments, and installment payments. After you log in to your PayPal business account, click on Tools > All Tools at the top of the page, and select Recurring Payments from the Tools page.
From this page you can cancel any automatic billing plan, or select Bill Now to collect a payment from the customer for the current month. The Bill Now link is only available when the status for the plan is To be billed. After a payment has been collected for the current month, the status changes to Billed.
Installment Payment Button: Up to Four Installments

If you want to offer interest-free installment payments to your customers, you can use this type of button. You can collect the first installment on checkout, with up to three additional installments. Or you can set up installment payments that defer the first installment, with up to four future payments. All payments must be collected within one year of checkout.
This payment type also allows the customer to make the full payment, so you don't need a Buy button next to this one. A good idea would be to create a custom image button, where you say "Buy Now (pay up to 4 installments interest-free if you like)". Or use some other text that makes this clear.
To create an Installment Payment button, you have to navigate to the PayPal Button Creation Tool and select Installment Plan from the Choose a button type dropdown. In this form you can set up the installments and advanced features as in the previous buttons.
To manage installment plans, you have to navigate to the recurring payments dashboard. In this list you can cancel, initiate installment plans, view plan details, and modify basic installment plan information.
Add to Cart and View Cart Buttons: PayPal Shopping Cart

This functionality allows you to use a Shopping Cart hosted by PayPal. You have to generate two types of button: an Add to Cart button for each type of product that you want to sell, and a View Cart button that displays a list of items in your customer's cart.
To create an Add to Cart button, you have to navigate to the PayPal Button Creation Tool, and select Shopping Cart from the Choose a button type dropdown.
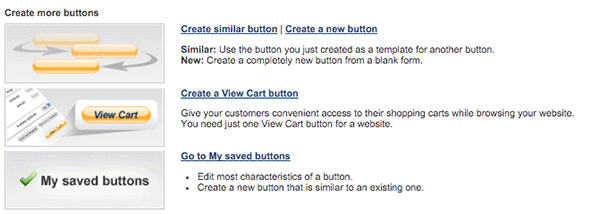
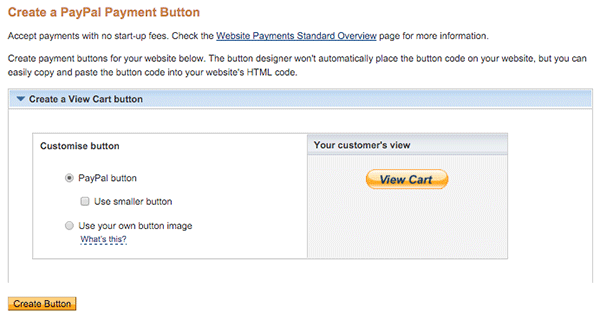
After you create this button, you need to create only one View Cart button, regardless of the number of Add to Cart buttons that you create and add to your website. View Cart buttons on your website allow buyers to view their shopping carts and the items in them. From there they can proceed to checkout. To create the button, click on the Create a View Cart button.
The form is pretty simple, and you can customise the look and feel. When you're ready, click on Create Button to get the HTML snippet.
This is a very useful feature if you have several products for sale on your website. If you have a CMS or many products, this approach would become very difficult to maintain, and it would be better to integrate with PayPal using their API, as we will explore in the next tutorial of this series.
Buy Gift Certificate Button

This type of button allows you to sell Gift Certificates that your customers can use to pay on your website. This type of button seem not to be getting much attention these days, and only the old documentation in PDF is available. I would recommend that you don't use it, and I would not be surprised to see this button being removed in the near future.
Conclusion
As we have seen in this tutorial, you can take different types of payment using PayPal buttons simply by copying and pasting HTML code snippets on your websites, simplifying the process of taking online payments. In the next part of this series, I am going to show you how to take payments using the PayPal REST API.

Comments