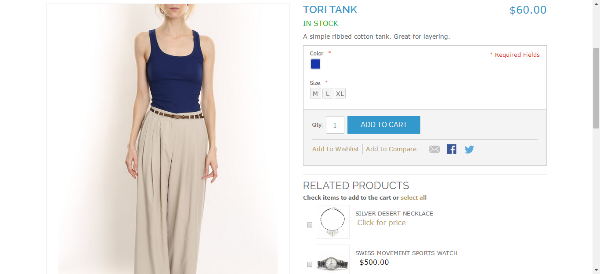
Now that we have completed the home page and the category page, in this tutorial we'll start editing the third most important page of the eCommerce website: the product page. Let's first open up the product page, and see how it looks now and how we want it to look.
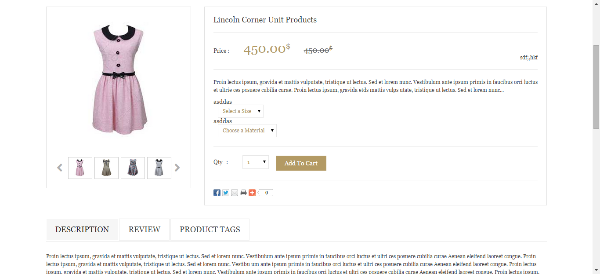
The product page in our HTML design looks like this:
Our current product page looks like this:
To start editing it, we'll do the same step as we have done dozens of times so far, i.e. enabling the template hints to figure out which template files are responsible for rendering this page.

As we can see, the page is a compilation of over a dozen files, but luckily we don't have to edit all of these. We'll just have to edit three or four of these files, and for the rest we'll just modify the styles to make them look like our design, without messing with the phtml files.
If you look closely, the overall structure of the product section is coming from the \template\catalog\product\view.phtml file. I've pointed that out through an arrow in the above image. This file is providing the outer structure of all components and then the inner parts are coming from other templates, but we'll edit this outer one first.
We'll copy this view.phtml file into our new theme, and start editing it. The current code of this file looks like this:
<?php $_helper = $this->helper('catalog/output'); ?>
<?php $_product = $this->getProduct(); ?>
<script type="text/javascript">
    var optionsPrice = new Product.OptionsPrice(<?php echo $this->getJsonConfig() ?>);
</script>
<div id="messages_product_view"><?php echo $this->getMessagesBlock()->toHtml() ?></div>
<div class="product-view">
    <div class="product-essential">
        <form action="<?php echo $this->getSubmitUrl($_product) ?>" method="post" id="product_addtocart_form"<?php if($_product->getOptions()): ?> enctype="multipart/form-data"<?php endif; ?>>
            <?php echo $this->getBlockHtml('formkey') ?>
            <div class="no-display">
                <input type="hidden" name="product" value="<?php echo $_product->getId() ?>" />
                <input type="hidden" name="related_product" id="related-products-field" value="" />
            </div>
            <div class="product-img-box">
                <div class="product-name">
                    <h1><?php echo $_helper->productAttribute($_product, $_product->getName(), 'name') ?></h1>
                </div>
                <?php echo $this->getChildHtml('media') ?>
            </div>
            <div class="product-shop">
                <div class="product-name">
                    <span class="h1"><?php echo $_helper->productAttribute($_product, $_product->getName(), 'name') ?></span>
                </div>
                <div class="price-info">
                    <?php echo $this->getPriceHtml($_product); ?>
                    <?php echo $this->getChildHtml('bundle_prices') ?>
                    <?php echo $this->getTierPriceHtml() ?>
                </div>
                <div class="extra-info">
                    <?php echo $this->getReviewsSummaryHtml($_product, 'default', false)?>
                    <?php echo $this->getChildHtml('product_type_availability'); ?>
                </div>
                <?php echo $this->getChildHtml('alert_urls') ?>
                <?php if ($_product->getShortDescription()):?>
                    <div class="short-description">
                        <div class="std"><?php echo $_helper->productAttribute($_product, nl2br($_product->getShortDescription()), 'short_description') ?></div>
                    </div>
                <?php endif;?>
                <?php echo $this->getChildHtml('other');?>
                <?php if ($_product->isSaleable() && $this->hasOptions()):?>
                    <?php echo $this->getChildChildHtml('container1', '', true, true) ?>
                <?php endif;?>
            </div>
            <div class="add-to-cart-wrapper">
                <?php echo $this->getChildHtml('product_type_data') ?>
                <?php echo $this->getChildHtml('extrahint') ?>
                <?php if (!$this->hasOptions()):?>
                    <div class="add-to-box">
                        <?php if($_product->isSaleable()): ?>
                            <?php echo $this->getChildHtml('addtocart') ?>
                            <?php if( $this->helper('wishlist')->isAllow() || $_compareUrl=$this->helper('catalog/product_compare')->getAddUrl($_product)): ?>
                                <span class="or"><?php echo $this->__('OR') ?></span>
                            <?php endif; ?>
                        <?php endif; ?>
                        <?php echo $this->getChildHtml('addto') ?>
                        <?php echo $this->getChildHtml('sharing') ?>
                    </div>
                    <?php echo $this->getChildHtml('extra_buttons') ?>
                <?php elseif (!$_product->isSaleable()): ?>
                    <div class="add-to-box">
                        <?php echo $this->getChildHtml('addto') ?>
                        <?php echo $this->getChildHtml('sharing') ?>
                    </div>
                <?php endif; ?>
            </div>
            <?php echo $this->getChildHtml('related_products') ?>
            <div class="clearer"></div>
            <?php if ($_product->isSaleable() && $this->hasOptions()):?>
                <?php echo $this->getChildChildHtml('container2', '', true, true) ?>
            <?php endif;?>
        </form>
        <script type="text/javascript">
        //<![CDATA[
            var productAddToCartForm = new VarienForm('product_addtocart_form');
            productAddToCartForm.submit = function(button, url) {
                if (this.validator.validate()) {
                    var form = this.form;
                    var oldUrl = form.action;

                    if (url) {
                       form.action = url;
                    }
                    var e = null;
                    try {
                        this.form.submit();
                    } catch (e) {
                    }
                    this.form.action = oldUrl;
                    if (e) {
                        throw e;
                    }

                    if (button && button != 'undefined') {
                        button.disabled = true;
                    }
                }
            }.bind(productAddToCartForm);
            productAddToCartForm.submitLight = function(button, url){
                if(this.validator) {
                    var nv = Validation.methods;
                    delete Validation.methods['required-entry'];
                    delete Validation.methods['validate-one-required'];
                    delete Validation.methods['validate-one-required-by-name'];
                    // Remove custom datetime validators
                    for (var methodName in Validation.methods) {
                        if (methodName.match(/^validate-datetime-.*/i)) {
                            delete Validation.methods[methodName];
                        }
                    }

                    if (this.validator.validate()) {
                        if (url) {
                            this.form.action = url;
                        }
                        this.form.submit();
                    }
                    Object.extend(Validation.methods, nv);
                }
            }.bind(productAddToCartForm);
        //]]>
        </script>
    </div>
    <div class="product-collateral toggle-content tabs">
        <?php if ($detailedInfoGroup = $this->getChildGroup('detailed_info', 'getChildHtml')):?>
            <dl id="collateral-tabs" class="collateral-tabs">
                <?php foreach ($detailedInfoGroup as $alias => $html):?>
                    <dt class="tab"><span><?php echo $this->escapeHtml($this->getChildData($alias, 'title')) ?></span></dt>
                    <dd class="tab-container">
                        <div class="tab-content"><?php echo $html ?></div>
                    </dd>
                <?php endforeach;?>
            </dl>
        <?php endif; ?>
    </div>
    <?php echo $this->getChildHtml('upsell_products') ?>
    <?php echo $this->getChildHtml('product_additional_data') ?>
</div>
Now we have to check out our HTML code, and we'll put all of our HTML code into this view.phtml file and then start editing it. The current code of the details.html file in our HTML design file is like this (I'm only copying the code for the product part excluding header, footer section, etc.):
<div class="row">
<div class="col-md-12">
<div class="products-details">
<div class="preview_image">
<div class="preview-small"><img id="zoom_03" src="images/products/medium/products-01.jpg" data-zoom-image="images/products/Large/products-01.jpg" alt=""></div>
<div class="thum-image">
<ul id="gallery_01" class="prev-thum">
<li><a href="#" data-image="images/products/medium/products-01.jpg" data-zoom-image="images/products/Large/products-01.jpg"><img src="images/products/thum/products-01.png" alt=""></a></li>
<li><a href="#" data-image="images/products/medium/products-02.jpg" data-zoom-image="images/products/Large/products-02.jpg"><img src="images/products/thum/products-02.png" alt=""></a></li>
<li><a href="#" data-image="images/products/medium/products-03.jpg" data-zoom-image="images/products/Large/products-03.jpg"><img src="images/products/thum/products-03.png" alt=""></a></li>
<li><a href="#" data-image="images/products/medium/products-04.jpg" data-zoom-image="images/products/Large/products-04.jpg"><img src="images/products/thum/products-04.png" alt=""></a></li>
<li><a href="#" data-image="images/products/medium/products-05.jpg" data-zoom-image="images/products/Large/products-05.jpg"><img src="images/products/thum/products-05.png" alt=""></a></li>
</ul>
<a class="control-left" id="thum-prev" href="javascript:void(0);"><i class="fa fa-chevron-left"></i></a><a class="control-right" id="thum-next" href="javascript:void(0);"><i class="fa fa-chevron-right"></i></a></div>
</div>
<div class="products-description">
<h5 class="name">Lincoln Corner Unit Products</h5>
<hr class="border">
<div class="price pull-left">Price : <span class="new_price">450.00<sup>$</sup></span><span class="old_price">450.00<sup>$</sup></span></div>
<div class="pull-right">sdf;,hkf</div>
<div class="clearfix"></div>
<hr class="border">
<p>Proin lectus ipsum, gravida et mattis vulputate, tristique ut lectus. Sed et lorem nunc. Vestibulum ante ipsum primis in faucibus orci luctus et ultrie ces posuere cubilia curae. Proin lectus ipsum, gravida etds mattis vulps utate, tristique ut lectus. Sed et lorem nunc...</p>
<div class="row sizeInput">
<div class="col-xs-12 drodpwn">
<h6>asddas</h6>
<div class="inline-middle styled-dd">
<select>
<option>Select a Size</option>
<option value="Black">Black</option>
<option value="Aubergine">Aubergine</option>
</select>
</div>
</div>
<div class="space30 visible-xs"></div>
<div class="col-xs-12 drodpwn">
<h6>asddas</h6>
<div class="inline-middle styled-dd">
<select>
<option>Choose a Material</option>
<option value="xs">X-Small</option>
<option value="s">Small</option>
</select>
</div>
</div>
</div>
<hr class="border">
<div class="wided">
<div class="qty">Qty :
<select>
<option>1</option>
</select>
</div>
<div class="button_group">
<button class="button" >Add To Cart</button>
</div>
</div>
<div class="clearfix"></div>
<hr class="border">
<img src="images/share.png" alt="" class="pull-left"></div>
</div>
<div class="clearfix"></div>
<div class="tab-box">
<div id="tabnav">
<ul>
<li><a href="#Descraption">DESCRIPTION</a></li>
<li><a href="#Reviews">REVIEW</a></li>
<li><a href="#tags">PRODUCT TAGS</a></li>
</ul>
</div>
<div class="tab-content-wrap">
<div class="tab-content" id="Descraption">
<p>Proin lectus ipsum, gravida et mattis vulputate, tristique ut lectus. Sed et lorem nunc. Vestibulum ante ipsum primis in faucibus orci luctus et ultri ces posuere cubilia curae Aenean eleifend laoreet congue. Proin lectus ipsum, gravida et mattis vulputate, tristique ut lectus. Sed et lorem nunc. Vestibu um ante ipsum primis in faucibus orci luctus et ultri ces posuere cubilia curae Aenean eleifend laoreet congue. Proin lectus ipsum, gravida et mattis vulputate, tristique ut lectus. Sed et lorem nunc. Vestibulum ante ipsum primis in faucibus orci luctus et ultri ces posuere cubilia curae Aenean eleifend laoreet congue. Proin lectus ipsum, gravida et mattis vulputate, tristique ut lectus. Sed et lorem nunc. Vestibulum ante ipsum primis in faucibus orci luctus et ultri ces posuere cubilia curae...</p>
<p>Proin lectus ipsum, gravida et mattis vulputate, tristique ut lectus. Sed et lorem nunc. Vestibulum ante ipsum primis in faucibus orci luctus et ultri ces posuere cubilia curae Aenean eleifend laoreet congue. Proin lectus ipsum, gravida et mattis vulputate, tristique ut lectus. Sed et lorem nunc. Vestibu um ante ipsum primis in faucibus orci luctus et ultri ces posuere cubilia curae Aenean eleifend laoreet congue. Proin lectus ipsum, gravida et mattis vulputate, tristique ut lectus. Sed et lorem nunc...</p>
</div>
<div class="tab-content" id="Reviews">
<form>
<table>
<thead>
<tr>
<th> </th>
<th>1 star</th>
<th>2 stars</th>
<th>3 stars</th>
<th>4 stars</th>
<th>5 stars</th>
</tr>
</thead>
<tbody>
<tr>
<td>Quality</td>
<td><input type="radio" name="quality" value="Blue"/></td>
<td><input type="radio" name="quality" value=""></td>
<td><input type="radio" name="quality" value=""></td>
<td><input type="radio" name="quality" value=""></td>
<td><input type="radio" name="quality" value=""></td>
</tr>
<tr>
<td>Price</td>
<td><input type="radio" name="price" value=""></td>
<td><input type="radio" name="price" value=""></td>
<td><input type="radio" name="price" value=""></td>
<td><input type="radio" name="price" value=""></td>
<td><input type="radio" name="price" value=""></td>
</tr>
<tr>
<td>Value</td>
<td><input type="radio" name="value" value=""></td>
<td><input type="radio" name="value" value=""></td>
<td><input type="radio" name="value" value=""></td>
<td><input type="radio" name="value" value=""></td>
<td><input type="radio" name="value" value=""></td>
</tr>
</tbody>
</table>
<div class="row">
<div class="col-md-6 col-sm-6">
<div class="form-row">
<label class="lebel-abs">Your Name <strong class="red">*</strong></label>
<input type="text" name="" class="input namefild">
</div>
<div class="form-row">
<label class="lebel-abs">Your Email <strong class="red">*</strong></label>
<input type="email" name="" class="input emailfild">
</div>
<div class="form-row">
<label class="lebel-abs">Summary of You Review <strong class="red">*</strong></label>
<input type="text" name="" class="input summeryfild">
</div>
</div>
<div class="col-md-6 col-sm-6">
<div class="form-row">
<label class="lebel-abs">Your Name <strong class="red">*</strong></label>
<textarea class="input textareafild" name="" rows="7" ></textarea>
</div>
<div class="form-row">
<input type="submit" value="Submit" class="button">
</div>
</div>
</div>
</form>
</div>
<div class="tab-content" >
<div class="review">
<p class="rating"><i class="fa fa-star light-red"></i><i class="fa fa-star light-red"></i><i class="fa fa-star light-red"></i><i class="fa fa-star-half-o gray"></i><i class="fa fa-star-o gray"></i></p>
<h5 class="reviewer">Reviewer name</h5>
<p class="review-date">Date: 01-01-2014</p>
<p>Lorem ipsum dolor sit amet, consectetur adipiscing elit. Integer a eros neque. In sapien est, malesuada non interdum id, cursus vel neque.</p>
</div>
</div>
<div class="tab-content" id="tags">
<div class="tag"> Add Tags :
<input type="text" name="">
<input type="submit" value="Tag">
</div>
</div>
</div>
</div>
<div class="clearfix"></div>
<div id="productsDetails" class="hot-products">
<h3 class="title"><strong>Hot</strong> Products</h3>
<div class="control"><a id="prev_hot" class="prev" href="#"><</a><a id="next_hot" class="next" href="#">></a></div>
<ul id="hot">
<li>
<div class="row">
<div class="col-md-3 col-sm-4">
<div class="products">
<div class="main">
<div class="view view-eighth">
<img src="images/products/small/products-02.jpg" />
<div class="mask">
<a href="#" class="info">Read More</a>
</div>
<div class="productname">Iphone 5s Gold 32 Gb 2013</div>
<h4 class="price">$451.00</h4>
</div>
</div>
</div>
</div>
</div>
</li>
<li>
<div class="row">
<div class="col-md-4 col-sm-4">
<div class="products">
<div class="offer">- %20</div>
<div class="thumbnail"><img src="images/products/small/products-01.png" alt="Product Name"></div>
<div class="productname">Iphone 5s Gold 32 Gb 2013</div>
<h4 class="price">$451.00</h4>
<div class="button_group">
<button class="button add-cart" type="button">Add To Cart</button>
</div>
</div>
</div>
<div class="col-md-4 col-sm-4">
<div class="products">
<div class="thumbnail"><img src="images/products/small/products-02.png" alt="Product Name"></div>
<div class="productname">Iphone 5s Gold 32 Gb 2013</div>
<h4 class="price">$451.00</h4>
<div class="button_group">
<button class="button add-cart" type="button">Add To Cart</button>
</div>
</div>
</div>
<div class="col-md-4 col-sm-4">
<div class="products">
<div class="offer">New</div>
<div class="thumbnail"><img src="images/products/small/products-03.png" alt="Product Name"></div>
<div class="productname">Iphone 5s Gold 32 Gb 2013</div>
<h4 class="price">$451.00</h4>
<div class="button_group">
<button class="button add-cart" type="button">Add To Cart</button>
</div>
</div>
</div>
</div>
</li>
</ul>
</div>
<div class="clearfix"></div>
</div>
</div>
I know that's a lot of code, and might scare you away. But don't worry, because as you'll see when we start placing the dynamic tags in it, the code will start melting fast, and we don't have to worry about most of it.
Now we’ll start
editing this HTML code by inserting dynamic tags from our actual view.phtml file.
First of all, we’ll add these lines at the top, to do some initialization:
<?php $_helper = $this->helper('catalog/output'); ?>
<?php $_product = $this->getProduct(); ?>
<script type="text/javascript">
    var optionsPrice = new Product.OptionsPrice(<?php echo $this->getJsonConfig() ?>);
</script>
<div id="messages_product_view"><?php echo $this->getMessagesBlock()->toHtml() ?></div>
<div class="product-view">
And then close the product-view div at the end of the file
(line 314):
Next we’ll wrap the product details div inside a form
element, as it is in the actual view.phtml file. So we’ll add these lines inside the product-details div at line 10:
<form action="<?php echo $this->getSubmitUrl($_product) ?>" method="post" id="product_addtocart_form"<?php if($_product->getOptions()): ?> enctype="multipart/form-data"<?php endif; ?>>
    <?php echo $this->getBlockHtml('formkey') ?>
    <div class="no-display">
        <input type="hidden" name="product" value="<?php echo $_product->getId() ?>" />
        <input type="hidden" name="related_product" id="related-products-field" value="" />
    </div>
Likewise, we'll now close this form, and also copy this JavaScript from view.phtml at line 77:
<div class="clearer"></div>
            <?php if ($_product->isSaleable() && $this->hasOptions()):?>
                <?php echo $this->getChildChildHtml('container2', '', true, true) ?>
            <?php endif;?>
</form>
        <script type="text/javascript">
        //<![CDATA[
            var productAddToCartForm = new VarienForm('product_addtocart_form');
            productAddToCartForm.submit = function(button, url) {
                if (this.validator.validate()) {
                    var form = this.form;
                    var oldUrl = form.action;

                    if (url) {
                       form.action = url;
                    }
                    var e = null;
                    try {
                        this.form.submit();
                    } catch (e) {
                    }
                    this.form.action = oldUrl;
                    if (e) {
                        throw e;
                    }

                    if (button && button != 'undefined') {
                        button.disabled = true;
                    }
                }
            }.bind(productAddToCartForm);

            productAddToCartForm.submitLight = function(button, url){
                if(this.validator) {
                    var nv = Validation.methods;
                    delete Validation.methods['required-entry'];
                    delete Validation.methods['validate-one-required'];
                    delete Validation.methods['validate-one-required-by-name'];
                    // Remove custom datetime validators
                    for (var methodName in Validation.methods) {
                        if (methodName.match(/^validate-datetime-.*/i)) {
                            delete Validation.methods[methodName];
                        }
                    }

                    if (this.validator.validate()) {
                        if (url) {
                            this.form.action = url;
                        }
                        this.form.submit();
                    }
                    Object.extend(Validation.methods, nv);
                }
            }.bind(productAddToCartForm);
        //]]>
        </script>
In the next step, inside tab-box div (starting at line 129), remove all of the
existing code, and copy the following tab code from view.phtml (around 100 lines of code replaced with these few lines). To make sure that the tab JavaScript keeps working fine, we’ll add the current classes tab tab-box
div, so the new code will look like this:
<div class="tab-box product-collateral toggle-content tabs">
    <?php if ($detailedInfoGroup = $this->getChildGroup('detailed_info', 'getChildHtml')):?>
    <dl id="collateral-tabs" class="collateral-tabs">
        <?php foreach ($detailedInfoGroup as $alias => $html):?>
            <dt class="tab"><span><?php echo $this->escapeHtml($this->getChildData($alias, 'title')) ?></span></dt>
            <dd class="tab-container">
                <div class="tab-content"><?php echo $html ?></div>
            </dd>
        <?php endforeach;?>
    </dl>
    <?php endif; ?>
</div>
With all that done, now we’ll insert the <?php echo
$this->getChildHtml('related_products') ?> tag inside the hot-products
div, after removing existing code, so that it looks like this at line 166:
<div id="productsDetails" class="hot-products">
<?php echo
$this->getChildHtml('related_products') ?>
</div>
See how around 150 lines of code is replaced with just these three lines? Let's save everything and see how the page is coming along so far. If you did everything right, it should look something like this:
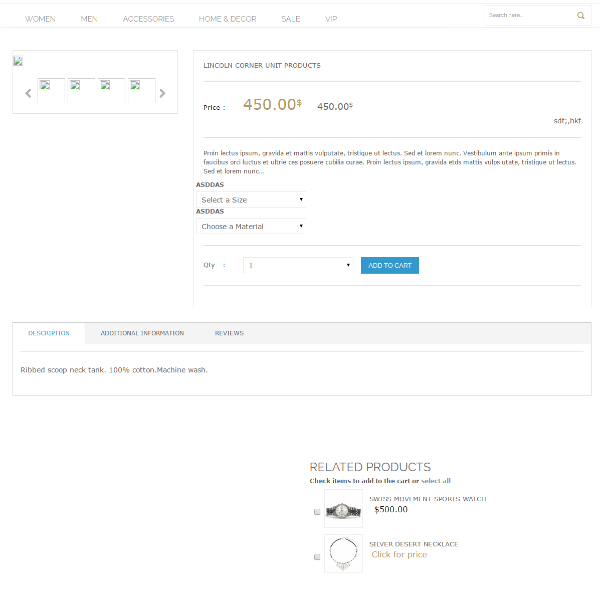
It might look all messed up, but trust me, we are getting closer to what we want the page to look like. In the next article, we'll edit the files responsible for rendering the images section, related products, etc., and we'll lastly do some styling fixes, and our product page will be ready.
In the end, let me reiterate that the large chunks of code shown above might intimidate you at first, but once you start replacing the code with appropriate dynamic tags, you'll soon realize that editing these isn't much work.
In the next article, we'll complete the rest of this page by editing other phtml files.

Comments