As we set the stage in the previous bootstrapping article, now is the time to actually dive deep into the code, and start making changes. As an obvious choice, we'll start the editing process from the home page.
In this first article we'll be partially editing the header section. We'll edit the default wrapper files and the header.phtml file, and then we'll start editing the different components of header like currency, language selector, etc. So, without further ado, we'll start the editing process.
First of all, we’ll enable the Template hints from the admin panel, by going to System > Developer > Debug, and while doing so we'll make sure that Current Configuration Scope is set to Main Website. By enabling template hints, we’ll know which template is responsible for the header styles. This is how the home page will look when the template hints are on.

Here, as you can see, the outermost wrapper in which all
other files are included is coming from frontend/rwd/default/template/page/1column.phtml, which
is from the RWD theme, as we have inherited our theme from this default theme.
Instead of editing this file directly in the RWD theme, we’ll create a similar
folder in our vstyle theme at this location: frontend/tutsplus/vstyle/template/page. Then we'll copy these files into this folder, and edit them there. So, we’ll go to the frontend/rwd/default/template/page
directory and copy 1column.phtml, 2column-left.phtml, 2column-right.phtml, and
3column.phtml into this newly created folder.
If we look at the code of 1-column.phtml, it is like
this:
<!DOCTYPE html>

<!--[if lt IE 7 ]> <html lang="<?php echo $this->getLang(); ?>" id="top" class="no-js ie6"> <![endif]-->
<!--[if IE 7 ]>    <html lang="<?php echo $this->getLang(); ?>" id="top" class="no-js ie7"> <![endif]-->
<!--[if IE 8 ]>    <html lang="<?php echo $this->getLang(); ?>" id="top" class="no-js ie8"> <![endif]-->
<!--[if IE 9 ]>    <html lang="<?php echo $this->getLang(); ?>" id="top" class="no-js ie9"> <![endif]-->
<!--[if (gt IE 9)|!(IE)]><!--> <html lang="<?php echo $this->getLang(); ?>" id="top" class="no-js"> <!--<![endif]-->

<head>
<?php echo $this->getChildHtml('head') ?>
</head>
<body<?php echo $this->getBodyClass()?' class="'.$this->getBodyClass().'"':'' ?>>
<?php echo $this->getChildHtml('after_body_start') ?>
<div class="wrapper">
    <?php echo $this->getChildHtml('global_notices') ?>
    <div class="page">
        <?php echo $this->getChildHtml('header') ?>
        <div class="main-container col1-layout">
            <div class="main">
                <?php echo $this->getChildHtml('breadcrumbs') ?>
                <div class="col-main">
                    <?php echo $this->getChildHtml('global_messages') ?>
                    <?php echo $this->getChildHtml('content') ?>
                </div>
            </div>
        </div>
        <?php echo $this->getChildHtml('footer_before') ?>
        <?php echo $this->getChildHtml('footer') ?>
        <?php echo $this->getChildHtml('global_cookie_notice') ?>
        <?php echo $this->getChildHtml('before_body_end') ?>
    </div>
</div>
<?php echo $this->getAbsoluteFooter() ?>
</body>
</html>
Now we have to modify it to match our index.html file, so we’ll use our body and container classes, and add some extra divs, and the edited code will
look like this:
<!DOCTYPE html>
<html>

<head>
    <?php echo $this->getChildHtml('head') ?>
</head>
<body id="home" <?php echo $this->getBodyClass()?' class="'.$this->getBodyClass().'"':'' ?>>
<?php echo $this->getChildHtml('after_body_start') ?>

<div class="wrapper">
    <?php echo $this->getChildHtml('global_notices') ?>

    <?php echo $this->getChildHtml('header') ?>

    <div class="container_fullwidth">
        <div class="container">
            <?php echo $this->getChildHtml('global_messages') ?>
            <?php echo $this->getChildHtml('content') ?>
        </div>
    </div>
    <div class="clearfix"></div>
    <div class="footer">
        <?php echo $this->getChildHtml('footer_before') ?>
        <?php echo $this->getChildHtml('footer') ?>
        <?php echo $this->getChildHtml('global_cookie_notice') ?>
        <?php echo $this->getChildHtml('before_body_end') ?>
    </div>
</div>

<?php echo $this->getAbsoluteFooter() ?>
</body>
</html>
Similarly we are also going to edit the 2column-left.phtml,
2column-right.phtml, and 3column.phtml files. This is how the modified code will look for 2-column-left.phtml:
<!DOCTYPE html>
<html>

<head>
    <?php echo $this->getChildHtml('head') ?>
</head>
<body id="home" <?php echo $this->getBodyClass()?' class="'.$this->getBodyClass().'"':'' ?>>
<?php echo $this->getChildHtml('after_body_start') ?>

<div class="wrapper">
    <?php echo $this->getChildHtml('global_notices') ?>

    <?php echo $this->getChildHtml('header') ?>

    <div class="container_fullwidth">
        <div class="container">
            <div class="row">
                <div class="col-md-3">
                    <?php echo $this->getChildHtml('left') ?>
                </div>
                <div class="col-md-9">
                    <?php echo $this->getChildHtml('global_messages') ?>
                    <?php echo $this->getChildHtml('content') ?>
                </div>
            </div>
        </div>
    </div>
    <div class="clearfix"></div>
    <div class="footer">
        <?php echo $this->getChildHtml('footer_before') ?>
        <?php echo $this->getChildHtml('footer') ?>
        <?php echo $this->getChildHtml('global_cookie_notice') ?>
        <?php echo $this->getChildHtml('before_body_end') ?>
    </div>
</div>

<?php echo $this->getAbsoluteFooter() ?>
</body>
</html>
Next, 2columns-right.phtml will look like this after the editing:
<!DOCTYPE html>
<html>

<head>
    <?php echo $this->getChildHtml('head') ?>
</head>
<body id="home" <?php echo $this->getBodyClass()?' class="'.$this->getBodyClass().'"':'' ?>>
<?php echo $this->getChildHtml('after_body_start') ?>

<div class="wrapper">
    <?php echo $this->getChildHtml('global_notices') ?>

    <?php echo $this->getChildHtml('header') ?>

    <div class="container_fullwidth">
        <div class="container">
            <div class="row">
                <div class="col-md-9">
                    <?php echo $this->getChildHtml('global_messages') ?>
                    <?php echo $this->getChildHtml('content') ?>
                </div>
                <div class="col-md-3">
                    <?php echo $this->getChildHtml('right') ?>
                </div>
            </div>
        </div>
    </div>
    <div class="clearfix"></div>
    <div class="footer">
        <?php echo $this->getChildHtml('footer_before') ?>
        <?php echo $this->getChildHtml('footer') ?>
        <?php echo $this->getChildHtml('global_cookie_notice') ?>
        <?php echo $this->getChildHtml('before_body_end') ?>
    </div>
</div>

<?php echo $this->getAbsoluteFooter() ?>
</body>
</html>
Lastly, we are going to edit 3columns.phtml like this:
<!DOCTYPE html>
<html>

<head>
    <?php echo $this->getChildHtml('head') ?>
</head>
<body id="home" <?php echo $this->getBodyClass()?' class="'.$this->getBodyClass().'"':'' ?>>
<?php echo $this->getChildHtml('after_body_start') ?>

<div class="wrapper">
    <?php echo $this->getChildHtml('global_notices') ?>

    <?php echo $this->getChildHtml('header') ?>

    <div class="container_fullwidth">
        <div class="container">
            <div class="row">
                <div class="col-md-3">
                    <?php echo $this->getChildHtml('left') ?>
                </div>
                <div class="col-md-6">
                    <?php echo $this->getChildHtml('global_messages') ?>
                    <?php echo $this->getChildHtml('content') ?>
                </div>
                <div class="col-md-3">
                    <?php echo $this->getChildHtml('right') ?>
                </div>
            </div>
        </div>
    </div>
    <div class="clearfix"></div>
    <div class="footer">
        <?php echo $this->getChildHtml('footer_before') ?>
        <?php echo $this->getChildHtml('footer') ?>
        <?php echo $this->getChildHtml('global_cookie_notice') ?>
        <?php echo $this->getChildHtml('before_body_end') ?>
    </div>
</div>

<?php echo $this->getAbsoluteFooter() ?>
</body>
</html>
Look carefully at the changes we have made in these template
files. When you compare it to the index.html file of our HTML website, it’ll
make sense to you.
This is how the website should look after editing these files. You won’t see much difference, but we are heading in the right direction.

Next we are going to edit the header.phtml file, as we can
see that this is the file which has the wrapper content of the header section.
So, we’ll copy the frontend/rwd/default/template/page/html/header.phtml file, move it to the frontend/tutsplus/vstyle/template/page/html folder, and start
editing it. Currently its code will look like this:
<div class="header-language-background">
    <div class="header-language-container">
        <div class="store-language-container">
            <?php echo $this->getChildHtml('store_language') ?>
        </div>

        <?php echo $this->getChildHtml('currency_switcher') ?>

        <p class="welcome-msg"><?php echo $this->getChildHtml('welcome') ?> <?php echo $this->getAdditionalHtml() ?></p>
    </div>
</div>

<header id="header" class="page-header">
    <div class="page-header-container">
        <a class="logo" href="<?php echo $this->getUrl('') ?>">
            <img src="<?php echo $this->getLogoSrc() ?>" alt="<?php echo $this->getLogoAlt() ?>" class="large" />
            <img src="<?php echo $this->getLogoSrcSmall() ?>" alt="<?php echo $this->getLogoAlt() ?>" class="small" />
        </a>

        <?php // In order for the language switcher to display next to logo on smaller viewports, it will be moved here.
              // See app.js for details ?>
        <div class="store-language-container"></div>

        <!-- Skip Links -->

        <div class="skip-links">
            <a href="#header-nav" class="skip-link skip-nav">
                <span class="icon"></span>
                <span class="label"><?php echo $this->__('Menu'); ?></span>
            </a>

            <a href="#header-search" class="skip-link skip-search">
                <span class="icon"></span>
                <span class="label"><?php echo $this->__('Search'); ?></span>
            </a>

            <div class="account-cart-wrapper">
                <a href="<?php echo $this->helper('customer')->getAccountUrl(); ?>" data-target-element="#header-account" class="skip-link skip-account">
                    <span class="icon"></span>
                    <span class="label"><?php echo $this->__('Account'); ?></span>
                </a>

                <!-- Cart -->

                <div class="header-minicart">
                    <?php echo $this->getChildHtml('minicart_head'); ?>
                </div>
            </div>


        </div>

        <!-- Navigation -->

        <div id="header-nav" class="skip-content">
            <?php echo $this->getChildHtml('topMenu') ?>
        </div>

        <!-- Search -->

        <div id="header-search" class="skip-content">
            <?php echo $this->getChildHtml('topSearch') ?>
        </div>

        <!-- Account -->

        <div id="header-account" class="skip-content">
            <?php echo $this->getChildHtml('topLinks') ?>
        </div>
    </div>
</header>


<?php echo $this->getChildHtml('topContainer'); ?>
We’ll compare it to the header section of our HTML, and start making these changes in it:
<div class="header">
    <div class="container">
      <div class="row">
          <div class="col-md-12 col-sm-10">
          <div class="phoneNum pull-left">
          	<p>Call us now! 0800-123-456-78</p>
          </div>
          <div class="header_top">
            <div class="row">
              <ul class="option_nav">
                  <li class="dropdown"><a href="checkout.html" class="log"><img src="images/language.jpg" alt=""></a>
                    <ul class="subnav">
                      <li><a href="#">Eng</a></li>
                      <li><a href="#">Vns</a></li>
                      <li><a href="#">Fer</a></li>
                      <li><a href="#">Gem</a></li>
                    </ul>
                  </li>
                  <li class="dropdown"><a href="checkout.html" class="log"><img src="images/doller.jpg" alt=""></a>
                    <ul class="subnav">
                      <li><a href="#">USD</a></li>
                      <li><a href="#">UKD</a></li>
                      <li><a href="#">FER</a></li>
                    </ul>
                  </li>
                </ul>
              <ul class="usermenu">
                  <li><a href="checkout.html" class="log"><img src="images/user.jpg" alt=""></a></li>
              </ul>
              <ul class="option">
                  <li class="option-cart"><a href="#" class="cart-icon">cart <!--<span class="cart_no">02</span>--></a>
                <ul class="option-cart-item">
                  <li>
                    <div class="cart-item">
                      <div class="image"><img src="images/products/thum/products-01.png" alt=""></div>
                      <div class="item-description">
                        <p class="name">Lincoln chair</p>
                        <p>Size: <span class="light-red">One size</span><br>
                          Quantity: <span class="light-red">01</span></p>
                      </div>
                      <div class="right">
                        <p class="price">$30.00</p>
                        <a href="#" class="remove"><img src="images/remove.png" alt="remove"></a></div>
                    </div>
                  </li>
                  <li>
                    <div class="cart-item">
                      <div class="image"><img src="images/products/thum/products-02.png" alt=""></div>
                      <div class="item-description">
                        <p class="name">Lincoln chair</p>
                        <p>Size: <span class="light-red">One size</span><br>
                          Quantity: <span class="light-red">01</span></p>
                      </div>
                      <div class="right">
                        <p class="price">$30.00</p>
                        <a href="#" class="remove"><img src="images/remove.png" alt="remove"></a></div>
                    </div>
                  </li>
                  <li><span class="total">Total <strong>$60.00</strong></span>
                    <button class="checkout" onClick="location.href='checkout.html'">CheckOut</button>
                  </li>
                </ul>
              </li>
            </ul>
            </div>
          </div>

        </div>
      </div>
    </div>
  </div>
We’ll insert this HTML into the header.phtml file, and
replace difference sections with the relevant dynamic template tags like
currency switcher, store language, logo, menu, search bar, etc. This is how the
code will look after these edits:
<div class="header">
    <div class="container">
        <div class="row">
            <div class="col-md-12 col-sm-10">
                <div class="phoneNum pull-left">
                    <p><?php echo $this->getChildHtml('welcome') ?> <?php echo $this->getAdditionalHtml() ?></p>
                </div>
                <div class="header_top">
                    <div class="row">
                        <ul class="option_nav">
                                <?php echo $this->getChildHtml('currency_switcher') ?>
                                <?php echo $this->getChildHtml('store_language') ?>
                        </ul>
                        <ul class="usermenu">
                            <li><a href="<?php echo Mage::getUrl('customer/account'); ?>" class="log"><img src="<?php echo $this->getSkinUrl('images/user.jpg'); ?>" alt=""></a></li>
                        </ul>
                        <ul class="option">
                            <li class="option-cart">
                                <?php echo $this->getChildHtml('minicart_head'); ?>
                            </li>
                        </ul>
                    </div>
                </div>

            </div>
        </div>
    </div>
</div>

<div class="logoContainer">
    <div class="container">
        <div class="row">
            <div class="col-md-12 col-sm-2">
                <div class="logoBox">
                    <a class="logo" href="<?php echo $this->getUrl('') ?>">
                        <img src="<?php echo $this->getLogoSrc() ?>" alt="<?php echo $this->getLogoAlt() ?>" class="large" />
                        <img src="<?php echo $this->getLogoSrcSmall() ?>" alt="<?php echo $this->getLogoAlt() ?>" class="small" />
                    </a>
                </div>
            </div>
        </div>
    </div>
</div>

<div class="menu">
    <div class="container">
        <div class="row">
            <div class="col-md-9 col-sm-10">
                <div id="header-nav" class="skip-content">
                    <?php echo $this->getChildHtml('topMenu') ?>
                </div>
            </div>
            <div class="col-md-3 col-sm-2">
                <div class="search">
                    <div id="header-search" class="skip-content">
                        <?php echo $this->getChildHtml('topSearch') ?>
                    </div>
                </div>
            </div>
        </div>
    </div>
</div>

<?php echo $this->getChildHtml('topContainer'); ?>
This is how the header section will look after editing
the header.phtml file:
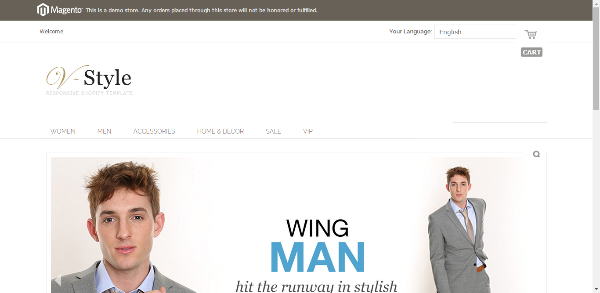
Now as you can see, we need to modify the code of
different sections we are using, like language and currency selector, slider,
menu, search bar, etc. To start with, we’ll edit the currency and language
selectors. If we again enable the template hints, we can see that language
selector section is coming from base/default/template/page/switch/languages.phtml, so we’ll copy this file into our theme at the same location, and start editing it
to match our HTML code. The original languages.phtml file looks like this:
<?php if(count($this->getStores())>1): ?>
<div class="form-language">
    <label for="select-language"><?php echo $this->__('Your Language:') ?></label>
    <select id="select-language" title="<?php echo $this->__('Your Language') ?>" onchange="window.location.href=this.value">
    <?php foreach ($this->getStores() as $_lang): ?>
        <?php $_selected = ($_lang->getId() == $this->getCurrentStoreId()) ? ' selected="selected"' : '' ?>
        <option value="<?php echo $_lang->getCurrentUrl() ?>"<?php echo $_selected ?>><?php echo $this->escapeHtml($_lang->getName()) ?></option>
    <?php endforeach; ?>
    </select>
</div>
<?php endif; ?>
The original HTML code for language and currency selector
looks like this:
<ul class="option_nav">
                  <li class="dropdown"><a href="checkout.html" class="log"><img src="images/language.jpg" alt=""></a>
                    <ul class="subnav">
                      <li><a href="#">Eng</a></li>
                      <li><a href="#">Vns</a></li>
                      <li><a href="#">Fer</a></li>
                      <li><a href="#">Gem</a></li>
                    </ul>
                  </li>
                  <li class="dropdown"><a href="checkout.html" class="log"><img src="images/doller.jpg" alt=""></a>
                    <ul class="subnav">
                      <li><a href="#">USD</a></li>
                      <li><a href="#">UKD</a></li>
                      <li><a href="#">FER</a></li>
                    </ul>
                  </li>
                </ul>
After we modify languages.phtml to match the HTML, it’ll
look like this:
<?php if(count($this->getStores())>1): ?>
<li class="dropdown">
    <a href="#" class="log"><img src="<?php echo $this->getSkinUrl('images/doller.jpg'); ?>" alt=""></a>
    <ul class="subnav">
        <?php foreach ($this->getStores() as $_lang): ?>
            <li>
                <a href="<?php echo $_lang->getCurrentUrl() ?>">
                    <?php
                        $langName = $this->escapeHtml($_lang->getName());
                        $langName = substr("$langName", 0, 3);
                        $langName = strtoupper($langName);
                        echo $langName;
                    ?>
                </a>
            </li>
        <?php endforeach; ?>
    </ul>
</li>
<?php endif; ?>
As you can see, the currency selector is not showing up
on our website for now. We have to enable the currency selector from the admin
panel first. From System > Configuration > General > Currency Setup, you
have to first enable some languages, and then from System > Manage
Currency > Rates set currency rates. Then you’ll see that the currency selector
is enabled on your website. By enabling the template hints on again, we can see
that its template is rwd/default/template/directory/currency.phtml, and its
current code will look like this:
<?php if($this->getCurrencyCount()>1): ?>
<div class="currency-switcher">
    <label for="select-currency"><?php echo $this->__('Your Currency:') ?></label>
    <select id="select-currency" name="currency" title="<?php echo $this->__('Your Currency') ?>" onchange="setLocation(this.value)">
        <?php foreach ($this->getCurrencies() as $_code => $_name): ?>
        <option value="<?php echo $this->getSwitchCurrencyUrl($_code) ?>"<?php if($_code==$this->getCurrentCurrencyCode()): ?> selected="selected"<?php endif; ?>>
            <?php echo $_name ?> - <?php echo $_code ?>
        </option>
    <?php endforeach; ?>
    </select>
</div>
<?php endif; ?>
We’ll edit it to match our HTML, so the modified code will look
like this:
<?php if($this->getCurrencyCount()>1): ?>
    <li class="dropdown">
        <a href="#" class="log"><img src="<?php echo $this->getSkinUrl('images/language.jpg'); ?>" alt=""></a>
        <ul class="subnav">
            <?php foreach ($this->getCurrencies() as $_code => $_name): ?>
                <li>
                    <a href="<?php echo $this->getSwitchCurrencyUrl($_code) ?>">
                        <?php echo $_code ?>
                    </a>
                </li>
            <?php endforeach; ?>
        </ul>
    </li>
<?php endif; ?>
Next, we’ll edit our welcome message to match our HTML design. For that we’ll have to go to System > Configuration/General/Design/Header/Welcome Text. After editing this, the header will look like this:

If you have followed all the steps correctly, I hope you can see much progress in your home page's looks. Now as we have partially edited the header section, we'll continue editing the header section in the next article, and we'll also edit the main slider in that article.
Please do explain your experiences in the comments section!

Comments