In the previous article on category pages, we edited the toolbar, grid and list layout. In this second article on customizing the category page, we'll customize the sidebar and do some CSS fixes.
First of all, we'll add some components in the sidebar, so that we can style them. Here, for the purpose of demonstration, we'll just add one or two components and modify them. That'll give you ample understanding of how you can modify the other sidebar components as well.
For now we'll just add 'compare products' and a sidebar banner to the sidebar. We'll do that from the local.xml code. If you remember from the first articles of the series, you can find the local.xml file in the layout folder of your theme file.
We'll add a reference to the left section, and then add a banner and compare product module in the sidebar, using the code below:
<reference name="left">
    <block type="catalog/navigation" name="left_categories_nav" before="-" template="catalog/navigation/left.phtml"/>
    <block type="core/template" name="left.permanent.callout" template="callouts/left_col.phtml">
        <action method="setImgSrc"><src>images/banner-small-01.png</src></action>
        <action method="setImgAlt" translate="alt" module="catalog"><alt>Our customer service is available 24/7. Call us at (555) 555-0123.</alt></action>
        <action method="setLinkUrl"><url>checkout/cart</url></action>
    </block>
    <block type="catalog/product_compare_sidebar" before="cart_sidebar" name="catalog.compare.sidebar" template="catalog/product/compare/sidebar.phtml"/>
</reference>
Use it just as a reference code—you can add more modules or banners using the same procedure.
If we look at our HTML design, we'll notice that all components are nicely designed, especially the heading part, which has multiple colors in it.
Whereas our current design is little off, though we can modify the design through CSS, but we need to modify the HTML to add classes for different colors in the heading.
To modify the HTML, we'll first enable template hints, and find out that the file responsible for it is \template\catalog/product/compare/sidebar.phtml.
Now we'll open up this sidebar.phtml file, and compare it with the HTML code.
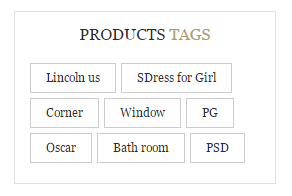
Our design HTML code for the sidebar looks like this:
<div class="product-tag leftbar">
    <h3 class="title">Products <strong>Tags</strong></h3>
    <ul>
      <li><a href="#">Lincoln us</a></li>
      <li><a href="#">SDress for Girl</a></li>
      <li><a href="#">Corner</a></li>
      <li><a href="#">Window</a></li>
      <li><a href="#">PG</a></li>
      <li><a href="#">Oscar</a></li>
      <li><a href="#">Bath room</a></li>
      <li><a href="#">PSD</a></li>
    </ul>
</div>
We can see that the heading has the h3 tag with a class of title, and it has the strong tag around the heading parts, which have a different color.
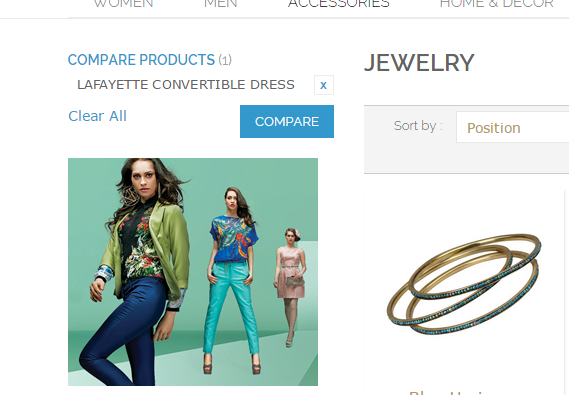
For this, we'll replace the block-title div with this:
<h3 class="title"><?php echo $this->__('Compare ') ?><strong><?php echo $this->__('Products') ?>
    <?php if($_helper->getItemCount() > 0): ?>
        <small><?php echo $this->__('(%d)', $_helper->getItemCount()) ?></small>
    <?php endif; ?>
</strong></h3>
Refresh the page, and it should look quite close to our HTML design now. You can add and style other sidebar components in a similar way.
Now that we are done editing the phtml files, let's start fixing the CSS styles.
We'll start fixing styles from the top. The first component which needs our attention is the page heading. As we can see, it is quite off, and is not close to our HTML requirements.
We'll add these lines in our new CSS file to style the heading.
.page-title h1{

    font-family: "Raleway", "Helvetica Neue", Verdana, Arial, sans-serif;
    float: left;
    position: relative;
    width: 100%;
    margin-bottom: 15px;
    font-size: 24px;
    color: #2f2f2f;
    font-weight: 300;
    padding-bottom: 5px;
    text-align: center;
    background: url(../images/hadingBg.jpg) no-repeat center;
    line-height: 3;

}

.col-md-9 .toolbar{
    float: none;
	border:none;
	background-color: transparent;
	padding-left: 0;
}
Here we have just given it a good text font, line height, text align, background image, etc. Also, we have made the background transparent with no border. It should look like this now:

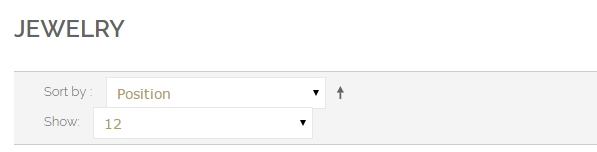
Next we need to modify the toolbar section. For that we'll add these styles in our CSS file:
.toolbar .sorter > .view-mode{float: left;}

.toolbar .sorter > .view-mode .grid {
    background-image: url(../images/grid-icon.png);
    width: 25px;
    height: 25px;
    background-position: 0px 0px;
}
.toolbar .sorter > .view-mode .list {
    background-image: url(../images/list-icon.png);
    width: 25px;
    height: 25px;
    background-position: 0px 0px;
}
.toolbar .sorter select{font-size:12px;}
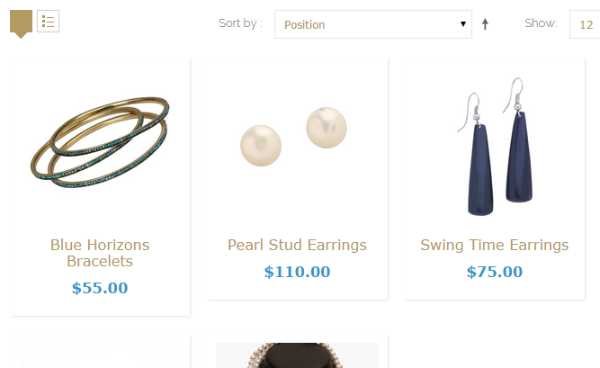
Here we have just specified some background images, width, height, etc., and it'll pretty much do the trick. The page should look like this:

Now, let's start editing the products section in grid view. The page looks like this now:
We'll just have to make some width and hover style adjustments. Also the price color needs changing. We'll do all that by adding these CSS lines:
.category-products .products-grid--max-4-col > li {width:30%;}
.category-products .products-grid--max-4-col > li .view-eighth:hover .mask {top:170px;}
.item .price-box .price, .price{color:black;}
Now the grid section should look like this:

In the last part we need to fix the products section in the list mode. It currently looks quite messed up, but don't worry—a few lines of CSS will set everything right.
To make it look good, we'll use these CSS styles:
.item .product-list-description .price-box .price{float: left;
    font-size: 28px;
    color: #b39a64;
    margin-right: 10px;}
.products-list .products .thumbnail{border: medium none;
    float: left;
    margin: 0;
    padding: 10px;
    position: relative;
    width: 18%;
    height: auto;}
.products-list .products{min-height: 100px;}

.products-list .products:hover {
    background: #fff;
    border-color: #b39a64;
    -webkit-box-shadow: 0 0 5px 1px #d3d3d3;
    box-shadow: 0 0 5px 1px #d3d3d3;
}
.products-list .products {
    border: 1px solid #e1e1e1;
    position: relative;
    overflow: hidden;
    background: #fff;
    padding: 15px;
    margin-top: 15px;
    min-height: 150px;
}
.products .button {
    background: #b39a64;
    color: #fff;
}
.button:hover, button:hover {
    border: 1px solid #b39a64;
}
Here we have set the product image width, floated the price to the right, given the whole section a nice background, border and hover effect, and modified the button slightly. The page should look something like this:
With all this done, your catalog page should look nice and close to our HTML design requirements. You may need some other CSS fine-tuning, but other than that you are all set.
In the next article of this series, we'll start editing the product detail page.
Please do leave your suggestions and feedback in the comments section. We'll be looking forward to it.

Comments