RubyMotion is a fantastic framework for building performant iOS applications using the Ruby language. In the first part this tutorial, you learned how to set up and implement a RubyMotion application. You worked with Interface Builder to create the application's user interface, implemented a view controller, and learned how to write tests for your application.
In this tutorial, you'll learn about the Model-View-Controller or MVC design pattern and how you can use it to structure your application. You'll also implement a painting view and add a gesture recognizer that allows the user to draw on the screen. When you're done, you'll have a complete, fully-working application.
1. Model-View-Controller
Apple encourages iOS developers to apply the Model-View-Controller design pattern to their applications. This pattern breaks classes into one of three categories, models, views, and controllers.
- Models contain your application's business logic, the code that determines the rules for managing and interacting with data. Your model is where the core logic for you application lives.
- Views display information to the user and allow them to interact with the application.
- Controllers are responsible for tying the models and views together. The iOS SDK uses view controllers, specialized controllers with a little more knowledge of the views than other MVC frameworks.
How does MVC apply to your application? You've already started implementing the PaintingController class, which will connect your models and views together. For the model layer, you'll add two classes:
-
StrokeThis class represents a single stroke in the painting. -
PaintingThis class represents the entire painting and contains one or more strokes.
For the view layer, you'll create a PaintingView class that is responsible for displaying a Painting object to the user. You'll also add a StrokeGestureRecongizer that captures touch input from the user.
2. Strokes
Let's start with the Stroke model. A stroke will consist of a color and several points representing the stroke. To start, create a file for the Stroke class, app/models/stroke.rb, and another one for its spec, spec/models/stroke.rb.
Next, implement the stroke class skeleton and a constructor.
class Stroke
  attr_reader :points, :color
end
The Stroke class has two attributes, points, a collection of points, and color, the color of the Stroke object. Next, implement a constructor.
class Stroke
  attr_reader :points, :color

  def initialize(start_point, color)
    @points = [ start_point ]
    @color = color
  end
end
That looks great so far. The constructor accepts two arguments, start_point and color. It sets points to an array of points containing start_point and color to the provided color.
When a user swipes their finger across the screen, you need a way to add points to the Stroke object. Add the add_point method to Stroke.
def add_point(point)
  points << point
end
That was easy. For convenience, add one more method to the Stroke class that returns the start point.
def start_point
  points.first
end
Of course, no model is complete without a set of specs to go along with it.
describe Stroke do

  before do
    @start_point = CGPoint.new(0.0, 50.0)
    @middle_point = CGPoint.new(50.0, 100.0)
    @end_point = CGPoint.new(100.0, 0.0)
    @color = UIColor.blueColor

    @stroke = Stroke.new(@start_point, @color)
    @stroke.add_point(@middle_point)
    @stroke.add_point(@end_point)
  end

  describe "#initialize" do
    before do
      @stroke = Stroke.new(@start_point, @color)
    end

    it "sets the color" do
      @stroke.color.should == @color
    end
  end

  describe "#start_point" do
    it "returns the stroke's start point" do
      @stroke.start_point.should == @start_point
    end
  end

  describe "#add_point" do
    it "adds the points to the stroke" do
      @stroke.points.should == [ @start_point, @middle_point, @end_point ]
    end
  end

  describe "#start_point" do
    it "returns the start point" do
      @stroke.start_point.should == @start_point
    end
  end
end
This should start to feel familiar. You've added four describe blocks that test the initialize, start_point, add_point, and start_point methods. There's also a before block that sets a few instance variables for the specs. Notice the describe block for #initialize has a before block that resets the @stroke object. That's fine. With specs, you don't have to be as concerned with performance as you do with a regular application.
3. Drawing
It's the moment of truth, it's time to make your application draw something. Start by create a file for the PaintingView class at app/views/painting_view.rb. Because we're doing some specialized drawing, the PaintingView class is tricky to test. For the sake of brevity, I'm going to skip the specs for now.
Next, implement the PaintingView class.
class PaintingView < UIView
  attr_accessor :stroke

  def drawRect(rectangle)
    super

    # ensure the stroke is provided
    return if stroke.nil?

    # set up the drawing context
    context = UIGraphicsGetCurrentContext()
    CGContextSetStrokeColorWithColor(context, stroke.color.CGColor)
    CGContextSetLineWidth(context, 20.0)
    CGContextSetLineCap(context, KCGLineCapRound)
    CGContextSetLineJoin(context, KCGLineJoinRound)

    # move the line to the start point
    CGContextMoveToPoint(context, stroke.start_point.x, stroke.start_point.y)

    # add each line in the path
    stroke.points.drop(1).each do |point|
      CGContextAddLineToPoint(context, point.x, point.y)
    end

    # stroke the path
    CGContextStrokePath(context);
  end
end
Phew, that's a lot code. Let's break it down piece by piece. The PaintingView class extends the UIView class. This allows PaintingView to be added as a subview of PaintingController's view. The PaintingView class has one attribute, stroke, which is an instance of the Stroke model class.
With regards to the MVC pattern, when working with the iOS SDK, it's acceptable for a view to know about a model, but it's not okay for a model to know about a view.
In the PaintingView class, we've overridden UIView's drawRect: method. This method allows you to implement custom drawing code. The first line of this method, super, calls the method on the super class, UIView in this example, with the provided arguments.
In drawRect:, we also check that the stroke attribute isn't nil. This prevents errors if stroke hasn't been set yet. We then fetch the current drawing context by invoking UIGraphicsGetCurrentContext, configure the stroke that we're about to draw, move the drawing context to the start_point of the stroke, and adds lines for each point in the stroke object. Finally, we invoke CGContextStrokePath to stroke the path, drawing it in the view.
Add an outlet to PaintingController for the painting view.
outlet :painting_view
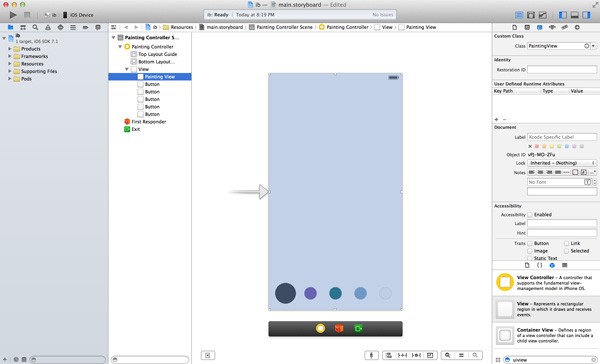
Fire up Interface Builder by running bundle exec rake ib:open and add a UIView object to the PaintingController's view from the Ojbect Library on the right. Set the view's class to PaintingView in the Identity Inspector. Make sure that the painting view is positioned underneath the buttons you added earlier. You can adjust the ordering of the subviews by changing the positions of the view's in the view hierarchy on the left.
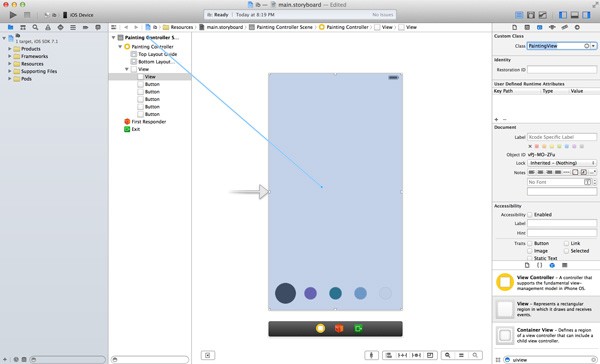
Control and drag from the view controller to the PaintingView and select the painting_view outlet from the menu that appears.
Select the painting view and set its background color to 250 red, 250 green, and 250 blue.

Don't forget to add a spec to spec/controllers/painting_controller_spec.rb for the painting_view outlet.
describe "#painting_view" do
  it "is connected in the storyboard" do
    controller.painting_view.should.not.be.nil
  end
end
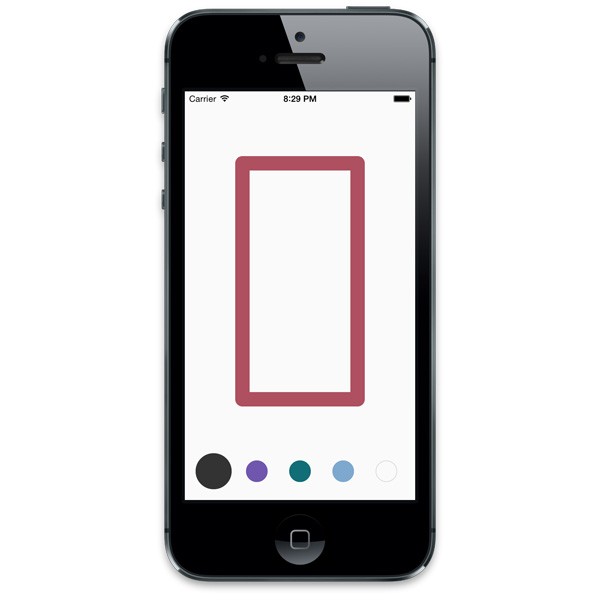
To make sure your drawing code works correctly, add the following code snippet to the PaintingController class and run your application. You can delete this code snippet when you've verified everything is working as expected.
def viewDidLoad
  stroke = Stroke.new(CGPoint.new(80, 100), '#ac5160'.uicolor)
  stroke.add_point(CGPoint.new(240, 100))
  stroke.add_point(CGPoint.new(240, 428))
  stroke.add_point(CGPoint.new(80, 428))
  stroke.add_point(CGPoint.new(80, 100))
  painting_view.stroke = stroke
  painting_view.setNeedsDisplay
end
4. Painting
Now that you can draw a stroke, it's time to level up to the entire painting. Let's start with the Painting model. Create a file for the class at app/models/painting.rb and implement the Painting class.
class Painting
  attr_accessor :strokes

  def initialize
    @strokes = []
  end

  def start_stroke(point, color)
    strokes << Stroke.new(point, color)
  end

  def continue_stroke(point)
    current_stroke.add_point(point)
  end

  def current_stroke
    strokes.last
  end
end
The Painting model is similar to the Stroke class. The constructor initializes strokes to an empty array. When a person touches the screen, the application will start a new stroke by calling start_stroke. Then, as the user drags their finger, it will add points with continue_stroke. Don't forget the specs for the Painting class.
describe Painting do

  before do
    @point1 = CGPoint.new(10, 60)
    @point2 = CGPoint.new(20, 50)
    @point3 = CGPoint.new(30, 40)
    @point4 = CGPoint.new(40, 30)
    @point5 = CGPoint.new(50, 20)
    @point6 = CGPoint.new(60, 10)

    @painting = Painting.new
  end

  describe "#initialize" do

    before do
      @painting = Painting.new
    end

    it "sets the stroke to an empty array" do
      @painting.strokes.should == []
    end
  end

  describe "#start_stroke" do

    before do
      @painting.start_stroke(@point1, UIColor.redColor)
      @painting.start_stroke(@point2, UIColor.blueColor)
    end

    it "starts new strokes" do
      @painting.strokes.length.should == 2
      @painting.strokes[0].points.should == [ @point1 ]
      @painting.strokes[0].color.should == UIColor.redColor
      @painting.strokes[1].points.should == [ @point2 ]
      @painting.strokes[1].color.should == UIColor.blueColor
    end
  end

  describe "#continue_stroke" do

    before do
      @painting.start_stroke(@point1, UIColor.redColor)
      @painting.continue_stroke(@point2)
      @painting.start_stroke(@point3, UIColor.blueColor)
      @painting.continue_stroke(@point4)
    end

    it "adds points to the current strokes" do
      @painting.strokes[0].points.should == [ @point1, @point2 ]
      @painting.strokes[1].points.should == [ @point3, @point4 ]
    end
  end
end
Next, modify the PaintingView class to draw a Painting object instead of a Stroke object.
class PaintingView < UIView
  attr_accessor :painting

  def drawRect(rectangle)
    super

    # ensure the painting is provided
    return if painting.nil?

    painting.strokes.each do |stroke|
      draw_stroke(stroke)
    end
  end

  def draw_stroke(stroke)

    # set up the drawing context
    context = UIGraphicsGetCurrentContext()
    CGContextSetStrokeColorWithColor(context, stroke.color.CGColor)
    CGContextSetLineWidth(context, 20.0)
    CGContextSetLineCap(context, KCGLineCapRound)
    CGContextSetLineJoin(context, KCGLineJoinRound)

    # move the line to the start point
    CGContextMoveToPoint(context, stroke.start_point.x, stroke.start_point.y)

    # add each line in the path
    stroke.points.drop(1).each do |point|
      CGContextAddLineToPoint(context, point.x, point.y)
    end

    # stroke the path
    CGContextStrokePath(context);
  end
end
You've changed the stroke attribute to painting. The drawRect: method now iterates over all of the strokes in the painting and draws each one using draw_stroke, which contains the drawing code you wrote previously.
You also need to update the view controller to contain a Painting model. At the top of the PaintingController class, add attr_reader :painting. As the name implies, the viewDidLoad method of the UIViewController class—the superclass of the PaintingController class—is called when the view controller has finished loading its view. The viewDidLoad method is therefore a good place to create a Painting instance and set the painting attribute of the PaintingView object.
def viewDidLoad
  @painting = Painting.new
  painting_view.painting = painting
end
As always, don't forget to add tests for viewDidLoad to spec/controllers/painting_controller_spec.rb.
describe "#viewDidLoad" do

  it "sets the painting" do
    controller.painting.should.be.instance_of Painting
  end

  it "sets the painting attribute of the painting view" do
    controller.painting_view.painting.should == controller.painting
  end
end
5. Gesture Recognizers
Your application will be pretty boring unless you allow people to draw on the screen with their fingers. Let's add that piece of functionality now. Create a file for the StrokeGestureRecognizer class along with its spec by running the following commands from the command line.
touch app/views/stroke_gesture_recognizer.rb
touch spec/views/stroke_gesture_recognizer_spec.rb
Next, create the skeleton for the class.
class StrokeGestureRecognizer < UIGestureRecognizer
  attr_reader :position
end
The StrokeGestureRecognizer class extends the UIGestureRecognizer class, which handles touch input. It has a position attribute that the PaintingController class will use to determine the position of the user's finger.
There are four methods you need to implement in the StrokeGestureRecognizer class, touchesBegan:withEvent:, touchesMoved:withEvent:, touchesEnded:withEvent:, and touchesCancelled:withEvent:. The touchesBegan:withEvent: method is called when the user starts touching the screen with their finger. The touchesMoved:withEvent: method is called repeatedly when the user moves their finger and the touchesEnded:withEvent: method is invoked when the user lifts their finger from the screen. Finally, the touchesCancelled:withEvent: method is invoked if the gesture is cancelled by the user.
Your gesture recognizer needs to do two things for each event, update the position attribute and change the state property.
class StrokeGestureRecognizer < UIGestureRecognizer
  attr_accessor :position

  def touchesBegan(touches, withEvent: event)
    super
    @position = touches.anyObject.locationInView(self.view)
    self.state = UIGestureRecognizerStateBegan
  end

  def touchesMoved(touches, withEvent: event)
    super
    @position = touches.anyObject.locationInView(self.view)
    self.state = UIGestureRecognizerStateChanged
  end

  def touchesEnded(touches, withEvent: event)
    super
    @position = touches.anyObject.locationInView(self.view)
    self.state = UIGestureRecognizerStateEnded
  end

  def touchesCancelled(touches, withEvent: event)
    super
    @position = touches.anyObject.locationInView(self.view)
    self.state = UIGestureRecognizerStateEnded
  end
end
Both the touchesEnded:withEvent: and touchesCancelled:withEvent: methods set the state to UIGestureRecognizerStateEnded. This is because it doesn't matter if the user is interrupted, the drawing should remain untouched.
In order to test the StrokeGestureRecognizer class, you need to be able to create an instance of UITouch. Unfortunately, there's no publicly available API to accomplish this. To make it work, we'll make use of the Facon mocking library.
Add gem 'motion-facon' to your Gemfile and run bundle install. Then, add require "motion-facon" below require "sugarcube-color" in the project's Rakefile.
Next, implement the StrokeGestureRecognizer spec.
describe StrokeGestureRecognizer do
  extend Facon::SpecHelpers

  before do
    @stroke_gesture_recognizer = StrokeGestureRecognizer.new
    @touch1 = mock(UITouch, :"locationInView:" => CGPoint.new(100, 200))
    @touch2 = mock(UITouch, :"locationInView:" => CGPoint.new(300, 400))
    @touches1 = NSSet.setWithArray [ @touch1 ]
    @touches2 = NSSet.setWithArray [ @touch2 ]
  end

  describe "#touchesBegan:withEvent:" do

    before do
      @stroke_gesture_recognizer.touchesBegan(@touches1, withEvent: nil)
    end

    it "sets the position to the gesture's position" do
      @stroke_gesture_recognizer.position.should == CGPoint.new(100, 200)
    end

    it "sets the state of the gesture recognizer" do
      @stroke_gesture_recognizer.state.should == UIGestureRecognizerStateBegan
    end
  end

  describe "#touchesMoved:withEvent:" do

    before do
      @stroke_gesture_recognizer.touchesBegan(@touches1, withEvent: nil)
      @stroke_gesture_recognizer.touchesMoved(@touches2, withEvent: nil)
    end

    it "sets the position to the gesture's position" do
      @stroke_gesture_recognizer.position.should == CGPoint.new(300, 400)
    end

    it "sets the state of the gesture recognizer" do
      @stroke_gesture_recognizer.state.should == UIGestureRecognizerStateChanged
    end
  end

  describe "#touchesEnded:withEvent:" do

    before do
      @stroke_gesture_recognizer.touchesBegan(@touches1, withEvent: nil)
      @stroke_gesture_recognizer.touchesEnded(@touches2, withEvent: nil)
    end

    it "sets the position to the gesture's position" do
      @stroke_gesture_recognizer.position.should == CGPoint.new(300, 400)
    end

    it "sets the state of the gesture recognizer" do
      @stroke_gesture_recognizer.state.should == UIGestureRecognizerStateEnded
    end
  end

  describe "#touchesCancelled:withEvent:" do

    before do
      @stroke_gesture_recognizer.touchesBegan(@touches1, withEvent: nil)
      @stroke_gesture_recognizer.touchesCancelled(@touches2, withEvent: nil)
    end

    it "sets the position to the gesture's position" do
      @stroke_gesture_recognizer.position.should == CGPoint.new(300, 400)
    end

    it "sets the state of the gesture recognizer" do
      @stroke_gesture_recognizer.state.should == UIGestureRecognizerStateEnded
    end
  end
end
extend Facon::SpecHelpers makes several methods available in your specs, including mock. mock is a simple way to create test objects that work exactly the way you want them to. In the before block at the beginning of the specs, you're mocking instances of UITouch with the locationInView: method that returns a predefined point.
Next, add a stroke_gesture_changed method to the PaintingController class. This method will receive an instance of the StrokeGestureRecognizer class whenever the gesture is updated.
def stroke_gesture_changed(stroke_gesture_recognizer)

  if stroke_gesture_recognizer.state == UIGestureRecognizerStateBegan
    painting.start_stroke(stroke_gesture_recognizer.position, selected_color)
  else
    painting.continue_stroke(stroke_gesture_recognizer.position)
  end

  painting_view.setNeedsDisplay
end
When the gesture recognizer's state is UIGestureRecognizerStateBegan, this method starts a new stroke in the Painting object using the StrokeGestureRecognizer's position and selected_color. Otherwise, it continues the current stroke.
Add the specs for this method.
describe "#stroke_gesture_changed" do

  before do
    drag(controller.painting_view, :points => [ CGPoint.new(100, 100), CGPoint.new(150, 150), CGPoint.new(200, 200) ])
  end

  it "adds the points to the stroke" do
    controller.painting.strokes.first.points[0].should == CGPoint.new(100, 100)
    controller.painting.strokes.first.points[1].should == CGPoint.new(150, 150)
    controller.painting.strokes.first.points[2].should == CGPoint.new(200, 200)
  end

  it "sets the stroke's color to the selected color" do
    controller.painting.strokes.first.color.should == controller.selected_color
  end
end
RubyMotion provides several helper methods to simulate user interaction, including drag. Using drag, you can simulate a user's interaction with the screen. The points option allows you to provide an array of points for the drag.
If you were to run the specs now, they would fail. That's because you need to add the gesture recognizer to the storyboard. Launch Interface Builder by running bundle exec rake ib:open. From the Object Library, drag an Object into your scene, and change its class to StrokeGestureRecognizer in the Identity Inspector on the right.
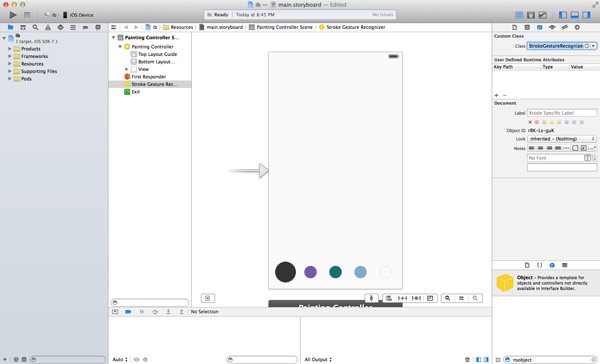
Control and drag from the StrokeGestureRecognizer object to the PaintingController and choose the select_color method from the menu that appears. This will ensure the select_color method is called whenever the gesture recognizer is triggered. Then, control and drag from the PaintingView object to the StrokeGestureRecognizer object and select gestureRecognizer from the menu that appears.
Add a spec for the gesture recognizer to the PaintingController specs in the #painting_view describe block.
describe "#painting_view" do

  it "is connected in the storyboard" do
    controller.painting_view.should.not.be.nil
  end

  it "has a stroke gesture recognizer" do
    controller.painting_view.gestureRecognizers.length.should == 1
    controller.painting_view.gestureRecognizers[0].should.be.instance_of StrokeGestureRecognizer
  end
end
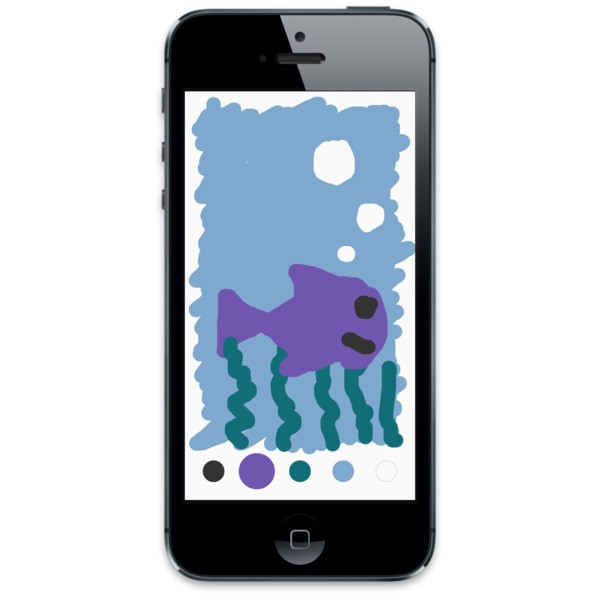
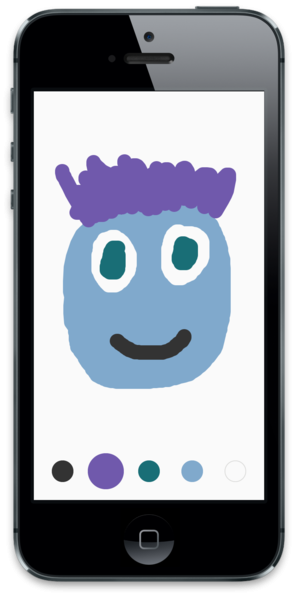
That's it. With these changes your application should now allow a person to draw on the screen. Run your application and have fun.
6. Final Touches
There are a few final touches left to add before your application is finished. Because your application is immersive, the status bar is a bit distracting. You can remove it by setting the UIStatusBarHidden and UIViewControllerBasedStatusBarAppearance values in the application's Info.plist. This is easy to do in the RubyMotion setup block inside the project's Rakefile.
Motion::Project::App.setup do |app|
  app.name = 'Paint'
  app.info_plist['UIStatusBarHidden'] = true
  app.info_plist['UIViewControllerBasedStatusBarAppearance'] = false
end
The application's icons and launch images are included in the source files of this tutorial. Download the images and copy them to the resources directory of the project. Then, set the application icon in the Rakefile configuration. You may have to clean the build by running bundle exec rake clean:all in order to see the new launch image.
Motion::Project::App.setup do |app|
  app.name = 'Paint'
  app.info_plist['UIStatusBarHidden'] = true
  app.info_plist['UIViewControllerBasedStatusBarAppearance'] = false
  app.icons = [ "icon.png" ]
end
Conclusion
That's it. You now have a complete app that's ready for a million downloads in the App Store. You can view and download the source for this application from GitHub.
Even though your app is finished, there's so much more you could add to it. You can add curves between the lines, more colors, different line widths, saving, undo, and redo, and anything else you can imagine. What will you do to make your app better? Let me know in the comments below.

Comments