By now you have read about the basic concepts of using Twig through Timber, while building a modular WordPress theme. We've also studied block nesting and multiple inheritance with Twig, based on the DRY principle. Today, we are going to explore how to display attachment images, WordPress menus, and users in a theme with Twig through the Timber plugin.
Images in Timber
Images are one of the vital elements for any WordPress theme. In regular WordPress coding practices, images are integrated with PHP inside the normal HTML image tags. However, Timber offers quite a comprehensive way of handling the img (image) tag which is modular and clean.
There are images attached to the post's thumbnail field. These can be easily retrieved via the Twig files by {{ post.thumbnail }}. It is just that easy!
Usage
Let's get started with a practical example. Our single.php file looks like this:
<?php
/**
 * Single Template
 *
 * The Template for displaying all single posts.
 *
 * @since 1.0.0
 */

// Context array
$context         = Timber::get_context();
$post            = new TimberPost();
$context['post'] = $post;

// Timber ender().
Timber::render( 'single.twig', $context );
Here, I've used the TimberPost() function for quite obvious reasons. This is used throughout Timber to represent posts retrieved from WordPress, making them available to Twig templates.
As the featured image is attached to the post data, we now need to retrieve it on the front end. So the Twig file for it, single.twig, will look like this:
{# Sinlge Template: `single.twig` #}

{% extends "base.twig" %}

{% block content %}

    <div class="single_content">

        <img src="{{ post.thumbnail.src }}" />

    </div>

{% endblock %}
On line #9 the code {{ post.thumbnail.src }} retrieves the post's featured (thumbnail) image and displays it like this:

You can use this code syntax to retrieve as many thumbnail images you want.
There is still a lot more which you can experiment on with these images when using Timber. For example, you can also resize them via:
<img src="{{ post.thumbnail.src | resize ( 900, 500 ) }}" />
By using the resize(), function, you can add new dimensions to the image where the first parameter is width and the second is height. If you want to scale the image proportionally then omit the height attribute. Now the syntax becomes:
<img src="{{ post.thumbnail.src | resize ( 900 ) }}" />
The front-end displays the same image like this:

If you want to explore more, then try the image cookbook.
Using TimberImage()
Consider a scenario in which a developer wants to fetch images via the image ID, or wants to display an external image via URL, etc. For such an extended approach, Timber offers a class, TimberImage(), to represent the images which are retrieved from WordPress.
Usage
Let's take an example for our single.php file, which looks like this now:
<?php
/**
 * Single Template
 *
 * The Template for displaying all single posts.
 *
 * @since 1.0.0
 */

// Context array
$context         = Timber::get_context();
$post            = new TimberPost();
$context['post'] = $post;

// Using the TimberImage() function
// to retrieve the image via its ID i.e 8
$context['custom_img'] = new TimberImage( 8 );

// Timber ender().
Timber::render( 'single.twig', $context );
This time, I'm using the TimberImage() class which takes the image ID 8 as its parameter. The rest of the coding routine is just the same. Let's retrieve this image via the Twig file single.twig.
<img src="{{ custom_img }}" />
The value stored inside $context custom_img element, i.e. {{ custom_img }}, will retrieve the image via its ID to display on the front end like this:
To retrieve the image via an external URL replace you can follow this syntax.
<?php $context[ 'img' ] = new TimberImage( 'http://domain.com/link/image.jpg' ); ?>
This time, instead of the image ID there is an external image URL which is being displayed on the front end like this:
To explore some more features of this function, you can check the documentation.
Menus in Timber
Now, how would you go about rendering a WordPress menu with Twig templates? That's a tricky thing to do. But, hold on! Timber provides you with its TimberMenu() class, which can help you render the WordPress menus inside Twig files as a complete loop. Let's take a look at it.
Usage
The entire concept of retrieving the menu items revolves around the menu object. There are two ways of defining its context. The first one is to make the menu object available on every page by adding it to the global get_context() function, as I did in the functions.php file. Secondly, you can add a particular menu by its ID for a particular PHP template.
Irrespective of the two methods, once the menu becomes available to the Timber $context array, you can retrieve all the menu items from it. But I prefer to define it globally. So go to the functions.php file and paste the following code:
<?php
/**
 * Custom Context
 *
 * Context data for Timber::get_context() function.
 *
 * @since 1.0.0
 */
function add_to_context( $data ) {
    $data['foo'] = 'bar';
	$data['stuff'] = 'I am a value set in your functions.php file';
	$data['notes'] = 'These values are available everytime you call Timber::get_context();';
	$data['menu'] = new TimberMenu();
	return $data;
}
add_filter( 'timber_context', 'add_to_context' );
So, here I've defined a custom function call add_to_context. Inside this function is some data that I want to be available at every PHP template via the get_context() function. On line #13 you can find an instance of TimberMenu() being passed against the element menu in the $data array.
This will make a standard WordPress menu available to the Twig template as an object that we can loop through. The TimberMenu() function can take parameters like the menu slug or ID.
Let's create a Twig template called the menu.twig file.
{# Menu Template: `menu.twig` #}

<nav>
    <ul class="main-nav">
        {% for item in menu.get_items %}
                <li class="nav-main-item {{ item.classes | join(' ') }}">
                    <a class="nav-main-link" href="{{ item.get_link }}">{{ item.title }}</a>
                </li>
        {% endfor %}
    </ul>
</nav>
The above code runs a loop inside this Twig template. Line# 5 runs a for loop for every menu item and displays the title of every menu item in an unordered list. The loop runs till all the key-values pairs of the menu object are iterated and listed on the front-end.
I went ahead and included the menu.twig template in the base.twig template on line #11.
{# Base Template: `base.twig` #}

{% block html_head_container %}

    {% include 'header.twig' %}

{% endblock %}

	<body class="{{body_class}}">

		{% include "menu.twig" %}

		<div class="wrapper">

			{% block content %}

			    <!-- Add your main content here. -->
			    <p>SORRY! No content found!</p>

			{% endblock %}

		</div>
		<!-- /.wrapper -->

	{% include "footer.twig" %}

	</body>

</html>
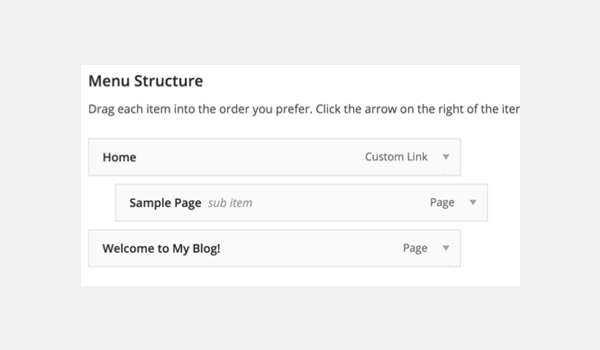
Let's preview the back-end (Appearance > Menus) of my demo website where its menu contains two parent items and one child item.
So, let's take a look at a post page—since our single.twig extends base.twig, our menu will automagically appear on that page.
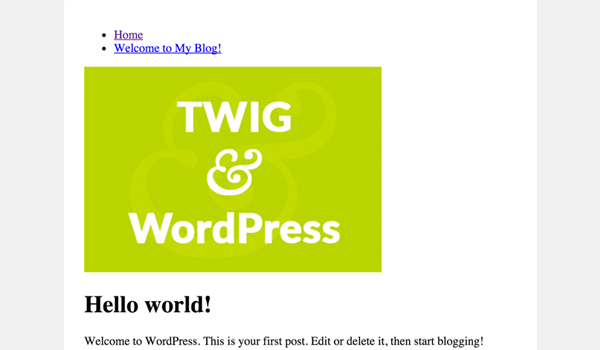
You can see that at the top of our single post there is a menu with both the parent items inside it.
What about the child menu items? Let's update our menu.twig file to include the child items as well.
{# Menu Template: `menu.twig` #}

<nav>
    <ul class="main-nav">
        {% for item in menu.get_items %}
                <li class="nav-main-item {{ item.classes | join(' ') }}">
                    <a class="nav-main-link" href="{{ item.get_link }}">{{ item.title }}</a>

						{% if item.get_children %}

							<ul class="nav-drop">

								{% for child in item.get_children %}

								<li class="nav-drop-item">
									<a href="{{ child.get_link }}">{{ child.title }}</a>
								</li>

								{% endfor %}

							</ul>

						{% endif %}

                </li>
        {% endfor %}
    </ul>
</nav>
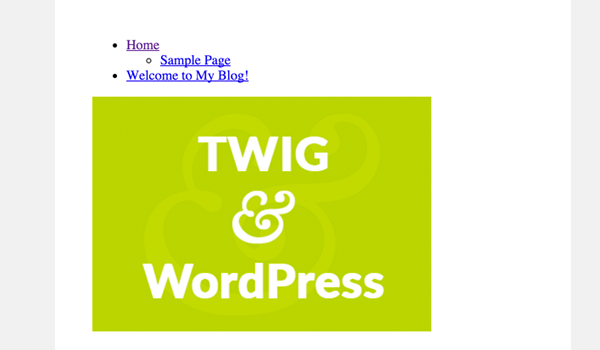
Lines 9 to 23 print the child menu items, if any. This time, the front end displays the child item of our first parent.
For more details about TimberMenu(), check the documentation.
Users in Timber
Users can be retrieved from the WordPress database with the TimberUser() class. The class takes user ID or slug as arguments to retrieve the user.
As users or blog authors are associated with the WP posts, I'm going to use the code of single.php, which now looks like this:
<?php
/**
 * Single Template
 *
 * The Template for displaying all single posts.
 *
 * @since 1.0.0
 */

// Context array
$context         = Timber::get_context();
$post            = new TimberPost();
$context['post'] = $post;

// Using the TimberImage() function
// to retrieve the image via its ID i.e 8
$context['custom_img'] = new TimberImage( 8 );

// Get the user object.
$context['user'] = new TimberUser();

// Timber ender().
Timber::render( 'single.twig', $context );
Line #20 initializes the TimberUser() class and gets assigned to a context object element, i.e. user. Let's display the author name via the Twig template.
My single.twig template has a new line of code at the end, on line #21.
{# Sinlge Template: `single.twig` #}

{% extends "base.twig" %}

{% block content %}

    <div class="single_content">

        <img src="{{ post.thumbnail.src }}" />

    	{# <img src="{{ post.thumbnail.src | resize ( 900, 500 ) }}" /> #}

    	{# <img src="{{ post.thumbnail.src | resize ( 900 ) }}" /> #}

    	{# <img src="{{ custom_img }}" /> #}

        <h1>{{ post.title }}</h1>

        <p>{{ post.get_content }}</p>

        <p>Author: {{ user }} </p>
    </div>

{% endblock %}
The code fetches the author name of the current post and displays it on the front-end. You can use {{ user | print_r }} to see what else is available in the TimberUser object.
To read more about this class, refer to the documentation. You can find the code of this tutorial in the GitHub repo over on the ImagesMenusUsers branch.
Conclusion
This article wraps up the entire series. Throughout these four articles, I explored how to use Timber to integrate the Twig templating language in a WordPress theme.
The final repository for this series can be found on GitHub with tutorial-specific branches:
- Tutorial #2: Getting Started
- Tutorial #3: WordPress Cheatsheet
- Tutorial #4: TimberImages, TimberMenu & TimberUser
You can consult the online documentation of Timber for more.
Go through this entire series and implement all the explained examples, and I bet you'll enjoy Twig. Post your queries in the comment box below. You can also reach me out through Twitter.

Comments