Just imagine being able to write scripts that automatically interact with your iOS application and be able to verify the results. With UI Automation you can. UI Automation is a tool provided by Apple to perform a higher level of testing on your iOS application beyond anything achievable with XCTest.
1. White Box versus Black Box Testing
You might have heard the comparison of white box testing versus black box testing with regard to how one might test a piece of software. If you're not familiar with these concepts, let me explain how they work.
White Box Testing
Imagine there's a piece of software running inside a box. With white box testing, you can see inside the box and look at all the gritty pieces of how the software works, and then make educated decisions on how to test the software. You can also have deeper level hooks into the software from the tests that you write.
Unit testing is white box testing. When writing unit tests, the tester has fine-grained access to the code under test. The tester can actually write tests that leverage the software under test at the method, or unit, level.
In iOS software development we use the XCTest framework to perform this type of testing. Have a look at another tutorial I wrote on getting started with XCTest.
Black Box Testing
In black box testing, the box is opaque. The tester cannot see inside the box. The tester cannot access and doesn't know about the implementation of the code base to write tests. Instead, the tester is forced to use the application as an end user would by interacting with the application and waiting for its response, verifying the results.
There are at least two ways to execute this type of testing.
- A tester who repeatedly and manually performs a number of predefined steps and visually verifies the results.
- Use specialized tools to test the application with APIs that behave similar to how a human interacts.
In iOS application development, Apple provides a tool called UI Automation to perform black box testing.
2. What is UI Automation?
UI Automation is a tool that Apple provides and maintains for higher level, automated, testing of iOS applications. Tests are written in JavaScript, adhering to an API defined by Apple.
Writing tests can be made easier by relying on accessibility labels for user interface elements in your application. Don’t worry though, if you don’t have these defined, there are alternatives available.
The UI Automation API lacks the typical xUnit based format for writing tests. One difference with unit testing is that the tester needs to manually log success and failures. UI Automation tests are run from the Automation instrument within the Instruments tool that comes with Apple's developer tools. The tests can be run in the iOS Simulator or on a physical device.
3. Writing UI Automation Tests
Step 1: Open the Sample Project
I’ve updated the sample project used in the previous tutorial on iOS testing with some additional user interface elements that provide some useful hooks for adding UI Automation tests. Download the project from GitHub. Open the project and run the application to make sure that everything is working as expected. You should see a user interface similar to the one shown below.
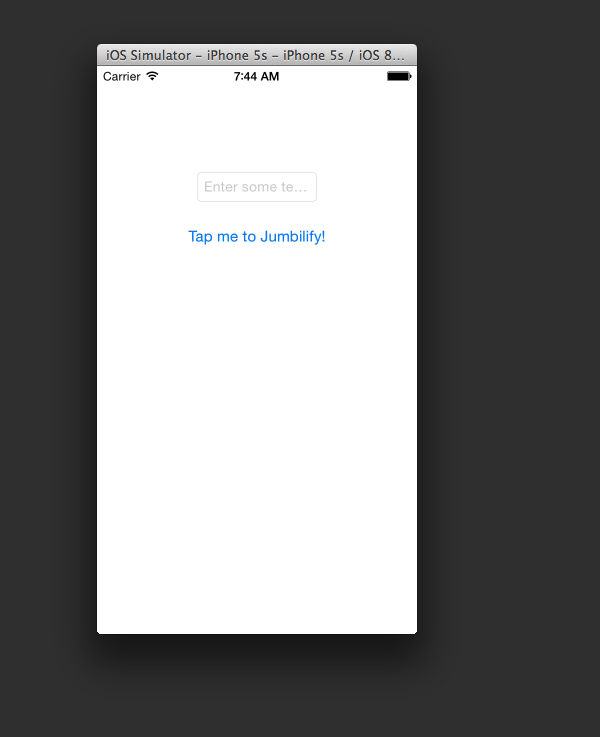
Before we write any tests, feel free to try out the sample application to become familiar with its functionality. As a user, you can enter text in the text field and tap the button to see a label on the screen that displays the reversed, inputted string.
Step 2: Create a UI Automation Test
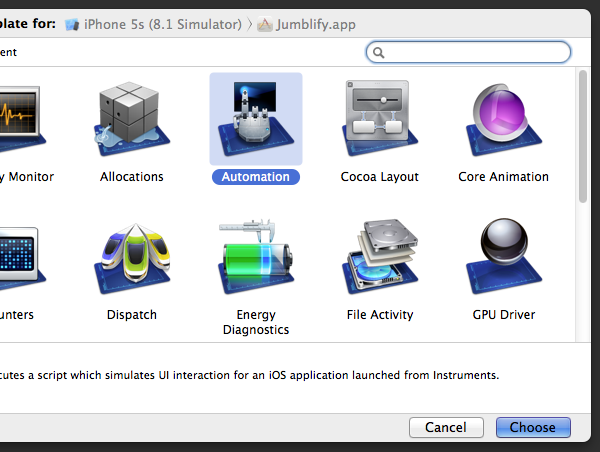
Now that you’re familiar with the sample application, it's time to add a UI Automation test. UI Automation is a tool that can be found in Instruments. To run the sample application in Instruments, select Product > Profile from Xcode's menu. Select Automation from the list of tools.
The main Instruments window will open with a single instrument ready to run, the Automation instrument (the Automation instrument executes UI Automation test cases). You'll also see an area in the bottom half of the window that looks like a text editor. This is the script editor. This is where you will write your UI Automation tests. For this first test, follow the below instructions, adding each line to the script in the script editor.
Start by storing a reference to the text field in a variable.
var inputField = target.frontMostApp().mainWindow().textFields()["Input Field”];
Set the text field's value.
inputField.setValue("hi”);
Verify that the value was set successfully and, if it was, pass the test. Fail the test if it wasn't.
if (inputField.value() != "hi") UIALogger.logFail("The Input Field was NOT able to be set with the string!");
else UIALogger.logPass("The Input Field was able to be set with the string!");
While this test is fairly trivial, it does have value. We've just written a test that tests the presence of a text field when the application is launched and that tests if a random string can be set as the text field's value. If you don't believe me, then remove the text field from the storyboard and run the test. You'll see that it fails.
This test demonstrates three important pieces of writing UI Automation tests. First, it shows you how to access a simple user interface element, the text field. Specifically, we access a dictionary of all text fields on the base view of the application via target.frontMostApp().mainWindow().textFields() and we then find the text field we are interested in by looking for the one with key Input Field. This key is actually the accessibility label of the text field. In this case, it's defined in the storyboard. We can also set the accessibility label in code using the accessibilityLabel property on NSObject.
Accessing the application's main window, the front most application, and the target are common when working with UI Automation. I'll show you how to make this easier and less verbose later in this tutorial.
Second, this shows you that you can interact with user interface elements on the screen. In this case, we set the text field's value, mimicking the user interacting with the application by entering text into the text field.
And third, the example also shows a technique for verifying what happens in the application. If the value is successfully set, the test passes. If the value isn't set, the test fails.
Step 3: Saving Tests
While writing tests in the script editor is convenient, it quickly becomes cumbersome and difficult to maintain. If you quit Instruments, any unsaved changes are discarded. We need to save the tests we write. Simply copy and paste your test into a new document in your favorite text editor and save it. You can find the tests created in this tutorial in the sample project under Jumblify/JumblifyTests/AutomationTests.js.
To run the test, select the middle tab in the pane on the right, next to the script editor, and select Add > Import.

You'll be prompted to select the script to import. Navigate to the saved script and import it. You can still change the script in the script editor. Any changes will be automatically saved in the external file you created.
Step 4: Tapping a Button
Let's update our test to test interaction with the button. Our test already adds text to the text field so we only need to add code to tap the button. Let's first consider how to find the button in the view so that it can be tapped. There are at least three ways to accomplish this and each approach has its tradeoffs.
Approach 1
We can programmatically tap an (X, Y) coordinate on the screen. We do this with the following line of code:
target.tap({x: 8.00, y: 50.00});
Of course, I have no idea if those are even the coordinates of the button on the screen and I'm not going to worry about that, because this approach is not the right tool for this job. I'm only mentioning it so you know it exists. Using the tap method on target to tap a button is error-prone, because that button may not always be at that specific coordinate.
Approach 2
It's also possible to find the button by searching the array of buttons of the main window, similar to how we accessed the text field in the first test. Instead of accessing the button directly using a key, we can retrieve an array of buttons on the main window and hard code an array index to get a reference to the button.
target.frontMostApp().mainWindow().buttons()[0].tap();
This approach is a little better. We're not hard-coding a coordinate, but we are hard-coding an array index to find the button. If we happen to add another button on the page, it may accidentally break this test.
Approach 3
This brings me to the third way to find the button on the page, using accessibility labels. By using an accessibility label, we can directly access the button just liked we'd find an object in a dictionary using a key.
target.frontMostApp().mainWindow().buttons()["Jumblify Button"].tap();
However, if you add the above line to the script and run it, you'll get an error.

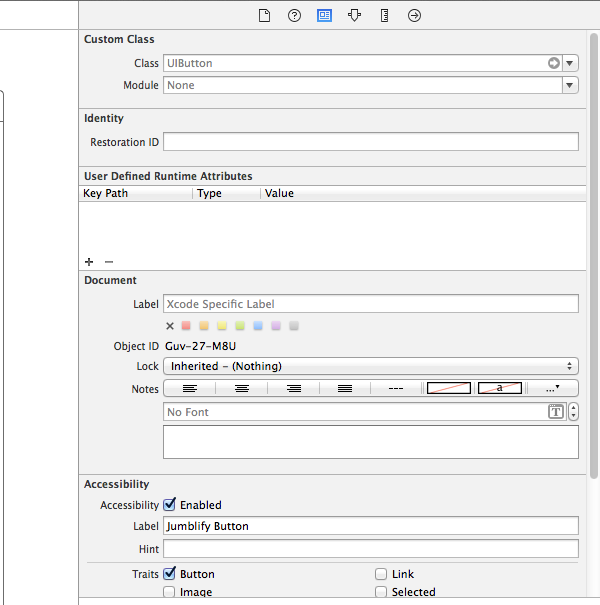
This is because we haven't defined the accessibility label for the button yet. To do that, flip over to Xcode and open the project's storyboard. Find the button in the view and open the Identity Inspector on the right (View > Utilities > Identity Inspector). Ensure that Accessibility is enabled and set the Label for the button to Jumblify Button.
To run the test again, you'll need to run the application from Xcode by selecting Product > Run and then profile the application again by selecting Product > Profile. This runs the tests and each test should pass now.
Step 5: Verify the Jumbled String
As I mentioned earlier, our application takes a string of text as input, and, when the user taps the button, displays the reversed string. We need to add one more test to verify that the input string is properly reversed. To verify that the UILabel is populated with the correct string, we need to figure out how to reference the UILabel and verify the string it displays. This is a common problem when writing automation tests, that is, figuring out how to reference an element in the application to make an assertion on it.
There is a method on nearly every object in the UI Automation API, logElementTree. This method logs the nested elements of a given element. This is very useful to understand the hierarchy of elements in the application and helps to to figure out how to target a specific element.
Let's see how this works by logging the element tree of the main window. Take a look at the following line of code.
target.frontMostApp().mainWindow().logElementTree();
Adding this line to the test script results in the following output:
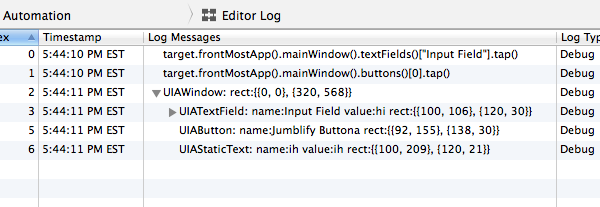
As you can see, there's a UIAStaticText subelement of the UIAWindow and you can also see that it has a name of ih, which also happens to be the reversed string we need to verify. Now, to complete our test, we just need to add code to access this element and verify that it's present.
Why do we only need to verify if the UIAStaticText element is present? Because the element's name is the reversed string of the input string, verifying it's presence confirms that the string was correctly reversed. If the element doesn't exist when referenced by name–the reversed string—then it means the string wasn't correctly reversed.
var stringResult = target.frontMostApp().mainWindow().staticTexts()["ih"];
if (! stringResult.isValid()) UIALogger.logFail("The output text was NOT set with the correctly reversed string!");
else UIALogger.logPass("The output text was set with the correctly reversed string!");
4. Scratching the Surface
There are so many other ways that an end user can interact with an iOS device while using your app. This means that there are many other ways that you can use UI Automation to simulate these interactions. Rather than attempt to capture a comprehensive list of these interactions, I'll direct you to the UI Automation reference documentation.
For each type of object that you can interact with, you can view the list of methods available on that object. Some methods are for retrieving attributes about the object while others are for simulating touch interaction, such as flickInsideWithOptions on UIAWindow.
Recording a Session
As you attempt to test more and more complicated apps with UI Automation, you'll find that sometimes it's pretty tedious to repeatedly use logElementTree to find the element you're looking for. This also becomes tedious and complex for applications with a complex view hierarchy or navigation. In these cases, you can use another feature of Instruments to record a set of user interactions. What's even cooler is that Instruments generates the UI Automation JavaScript code that's needed to reproduce the recorded interactions. Here's how you can try it out for yourself.
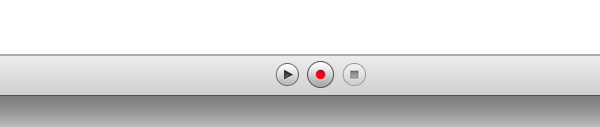
In Instruments and with the Automation instrument selected, look for the record button at the bottom of the window.
If you click the record button, Instruments will start a recording session as shown in the screenshot below.
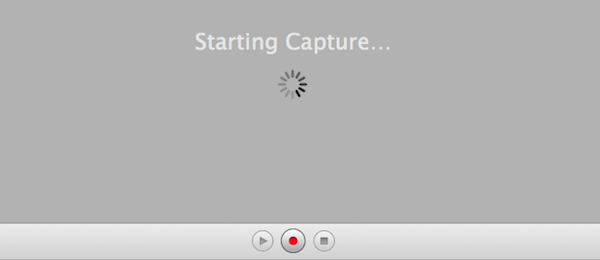
Instruments will launch your application in the iOS Simulator and you'll be able to interact with it. Instruments will generate a script based on your interactions in real time. Give it a try. Rotate the iOS Simulator, tap at random locations, perform a swipe gesture, etc. It's a really useful way to help explore the possibilities of UI Automation.
Avoiding a Monolithic Code Base
As you can probably foresee, if we continue to add more test to the test file we've created in the same method, it will quickly become hard to maintain. What can we do to prevent that from happening. In my tests, I do two things to solve this problem:
-
One test for one function: This implies that the tests we write need to be focused on a specific piece of functionality. I'll even give it an appropriate name, such as
testEmptyInputField. - Group related tests in one file: I also group related tests in the same file. This keeps the code in one file manageable. This also makes it easier to test separate pieces of functionality by executing the tests in a specific file. In addition, you can create a master script in which you call the functions or tests you've grouped in other test files.
In the following code snippet, we import a JavaScript file and this makes the functions in that JavaScript file available to us.
#import “OtherTests.js”
Conclusion
In this tutorial, you've learnt the value of higher level testing and how UI Automation can help to fill that gap. It's another tool in your toolbox to help ensure you ship reliable and robust applications.

Comments